"The Test Mule" --11/22/11 Fab bench

...ask your questions in the appropriate forums BUT document your build here...preferably in a single thread...dates for updates, are appreciated....

Postby vtx1029 » Mon Feb 14, 2011 1:04 am

RockyMountainTeardrops wrote:
Anybody have any pictures of their workbench carts?
I'm looking for ideas on how to add shelves or bins or...something underneath.

Lee


Sorry no pictures but for cheap roller shelves maybe mount some garage door tracks with rollers to make a big shelf then you could lay out your ply's under neath and other stuff.
User avatar
vtx1029
Teardrop Master
 
Posts: 251
Images: 70
Joined: Fri Apr 23, 2010 11:42 pm
Location: MN

Postby Weirdnerd » Wed Feb 23, 2011 8:10 pm

Impressive, your learning curve is improving!..one trick you could use is an electric blanket, just throw it over the vacuum bag and leave it on for the night, other option is to use a couple of halogen lights and leave them on close to the laminate while it cures.....

Image

PS, there are some release agents that are water based and will not soften with the resin...and are water clean up. ( and don't release toxic fumes, I know how bad it can be, I have an NBC type of mask with micron filters just for that)


http://www.aircraftspruce.com/catalog/cmpages/moldplastiease.php
This is my build thread...
Weirdnerd's teardrop
User avatar
Weirdnerd
The 300 Club
 
Posts: 318
Joined: Thu Sep 23, 2010 3:03 pm
Location: Denver, Co ( USofA)

Postby RockyMountainTeardrops » Wed Feb 23, 2011 10:27 pm

vtx wrote:cheap roller shelves

Going to use that idea.
Get some drawer slides....sheet of plywood and you got a large roll out shelf!
Nice idea vtx.

Weirdnerd wrote:Impressive, your learning curve is improving!..one trick you could use is an electric blanket, just throw it over the vacuum bag and leave it on for the night, other option is to use a couple of halogen lights and leave them on close to the laminate while it cures.....

Image

LOL
Funny you post that.
I bought one of these today with just that thought.
Image

Weirdnerd wrote:PS, there are some release agents that are water based and will not soften with the resin...and are water clean up. ( and don't release toxic fumes, I know how bad it can be, I have an NBC type of mask with micron filters just for that)

http://www.aircraftspruce.com/catalog/cmpages/moldplastiease.php


I'm totally going to use the electric blanket!! That's AWESOME!
I'm worried about leaving the lights on, so that will work much better.

I've used Partall PVA in the past with good results.
Looks like that is about the same stuff.


Since you "rattled my cage"..
Here's what's been going on lately.

Talked to two contractors about adding a workshop onto the side of the garage. Both think it can be done for under our budget, so looks like I'll get another 800 sf of workshop this summer.
I figure that will be a better investment than the stock market right now..... :roll:

Also giving some serious thoughts about the fumes (the garage/workshop is attached to the house), and one of the contractors mentioned that might be a problem.
I talked to my local county building department months ago, and they don't care....but I called again, and this time they said I should call the State and ask.
I have a sinking suspicion that the State will take a dim view of me molding with polyester and styrene (the health hazard)....and that's not even thinking about the fire department for the flammability!

So even though the cost is more.....we're going to go with epoxy resin instead of polyester.
Without a paint booth....gel-coating the camper will be too hard anyway, so renting a paint booth at an automotive shop for final painting will keep the fire and health danger down to a minimum.

Working on the hatch plug right now.
MDF ribs
Image

Covered with 1/8" oak plywood (upside down) that I've been dragging around for 15 years.
Image

Bondo coat, ready for sanding
Image

My current tasks:
sand, bondo, sand, bondo, sand, bondo, sand, bondo
repeat as required....
Should be ready for primer end of this week.

Going to uncover the door plug and see what those screw holes are doing too.

More later,
Lee
User avatar
RockyMountainTeardrops
Super Teardrop Manufacturer
 
Posts: 99
Images: 233
Joined: Fri Oct 22, 2010 1:28 pm
Location: 4,000 above Denver, CO
Top

Postby Weirdnerd » Wed Feb 23, 2011 11:30 pm

If you have an air compressor, this puppy will make your sanding a breeze...
regulating the air pressure, you can sand even plexiglass without gouging it

http://www.harborfreight.com/6-inch-orbital-composite-sander-65173.html

and yes, Epoxy is the way to go...more consistent results than polyester.

I am still trying to find a cheap retailer in Denver, instead of having to wait several days for air freight to come home... found one, but the resin they sell is not very suitable for what I want to build....( Oxford and Santa Fe)
This is my build thread...
Weirdnerd's teardrop
User avatar
Weirdnerd
The 300 Club
 
Posts: 318
Joined: Thu Sep 23, 2010 3:03 pm
Location: Denver, Co ( USofA)
Top

Postby RockyMountainTeardrops » Thu Feb 24, 2011 10:01 am

Weirdnerd wrote:If you have an air compressor, this puppy will make your sanding a breeze...
regulating the air pressure, you can sand even plexiglass without gouging it

http://www.harborfreight.com/6-inch-orbital-composite-sander-65173.html

and yes, Epoxy is the way to go...more consistent results than polyester.

I am still trying to find a cheap retailer in Denver, instead of having to wait several days for air freight to come home... found one, but the resin they sell is not very suitable for what I want to build....( Oxford and Santa Fe)


LOL
Again, we're on the same page.
I was there yesterday buying some 1.5oz chopped.
(still going to use polyester resin for the molds)

They are nice guys, but just set up for hobbyists, not industrial.
(although I think they will order large-ish quantities of stuff)
When I get it figured out, I'll see what they will do for me.

If you find somebody closer.....let me know.

Lee
Last edited by RockyMountainTeardrops on Thu Feb 24, 2011 11:52 am, edited 1 time in total.
User avatar
RockyMountainTeardrops
Super Teardrop Manufacturer
 
Posts: 99
Images: 233
Joined: Fri Oct 22, 2010 1:28 pm
Location: 4,000 above Denver, CO
Top

Postby asianflava » Thu Feb 24, 2011 11:39 am

I dunno how cheap you guys consider cheap, but the best brick and motor place I've found is a boat store. I bought some West Systems products at West Marine, they had all the goodies; glass beads, fibers, rollers, etc. (at least the one I went to in Austin did). Their website shows that there is a store at Highlands Ranch.

Boater's World had Raka products. It looks like they have gone strictly online.
User avatar
asianflava
8000 Club
8000 Club
 
Posts: 8412
Images: 45
Joined: Mon Aug 02, 2004 5:11 am
Location: CO, Longmont
Top

Postby RockyMountainTeardrops » Thu Feb 24, 2011 11:49 am

asianflava wrote:I dunno how cheap you guys consider cheap, but the best brick and motor place I've found is a boat store. I bought some West Systems products at West Marine, they had all the goodies; glass beads, fibers, rollers, etc. (at least the one I went to in Austin did). Their website shows that there is a store at Highlands Ranch.

Boater's World had Raka products. It looks like they have gone strictly online.


I'm guessing that Weirdnerd has some specific strength and curing requirements for his projects.

I'm more flexible in my requirements.....I just need consistency.
West or System Three are going to do what I need.
Altho West doesn't offer an infusion resin....

*sigh*
The curse of living in the middle of the country.....hard to get boat building supplies in quantity!!

Lee
User avatar
RockyMountainTeardrops
Super Teardrop Manufacturer
 
Posts: 99
Images: 233
Joined: Fri Oct 22, 2010 1:28 pm
Location: 4,000 above Denver, CO
Top

Postby Weirdnerd » Thu Feb 24, 2011 3:24 pm

Cheap would be 10 to 20 bucks per yard on carbon fiber plain weave 3k, with 100 buck a Gallon for Vantico 52 A/B, not $50 for the yard of carbon and 250 for the gallon of resin... :lol:
This is my build thread...
Weirdnerd's teardrop
User avatar
Weirdnerd
The 300 Club
 
Posts: 318
Joined: Thu Sep 23, 2010 3:03 pm
Location: Denver, Co ( USofA)
Top

Postby vtx1029 » Fri Feb 25, 2011 4:27 am

I figured you may like this thread especially how he was pre-heating the molds before lay-ups

http://www.homebuiltairplanes.com/forums/member-project-logs/7553-molds-making-thread.html
User avatar
vtx1029
Teardrop Master
 
Posts: 251
Images: 70
Joined: Fri Apr 23, 2010 11:42 pm
Location: MN
Top

Postby RockyMountainTeardrops » Fri Feb 25, 2011 8:53 pm

vtx1029 wrote:I figured you may like this thread especially how he was pre-heating the molds before lay-ups

http://www.homebuiltairplanes.com/forums/member-project-logs/7553-molds-making-thread.html


That's a cool thread. I like the heated mold idea.
I wondered how the sharp corner at the trim flange was dealt with....I'm using a radius fillet on these plugs.

Still puttying and sanding. Have some funny bumps on one side that I'm chasing around and around.
Working good to get those lamps about a foot away from the Bondo to get a cure...otherwise I'm clogging sandpaper pretty quick.

I think I'll get the two plugs shot with primer this weekend.
Maybe wait a day or so with the lights shining to get the paint to cure.
:thinking:
I'm also trying to decide if I should go ahead and put a larger trim flange on the plugs to allow a vacuum bag.

Dunno......I'll see what works I guess.

Lee
User avatar
RockyMountainTeardrops
Super Teardrop Manufacturer
 
Posts: 99
Images: 233
Joined: Fri Oct 22, 2010 1:28 pm
Location: 4,000 above Denver, CO
Top

Postby RockyMountainTeardrops » Thu Mar 17, 2011 6:53 pm

Not much work done lately.
Shop addition is moving along slowly....trying to get a decision made tomorrow.
Still talking to contractors, two ranges of bids. 1/2 of them are 20% lower than the others.:shock:
I'm pretty sure one of the higher bids will do a good job....but I can put up with a lot of headaches for 20% savings...

Still working on putty and paint. Chasing low and high spots around and around and around and around and around......

Primer:
Image

Added a trim flange on the "top" side of the plug:
Image

Sand:
Image

Another coat of primer then more sanding:
Not actually two high spots...rather a low spot between the lighter paint areas.
Bought a new long board yesterday, works much better than what I have been using.
Image

Close up of a low spot:
Image

And not that I don't already have enough on my plate.....the fish tank in the office is leaking....so I'm also trying to get the living room tank set up so I can move everything over.
Image

Cloudy from the new sand added.
Image

*sigh*

More later,
Lee
User avatar
RockyMountainTeardrops
Super Teardrop Manufacturer
 
Posts: 99
Images: 233
Joined: Fri Oct 22, 2010 1:28 pm
Location: 4,000 above Denver, CO
Top

Postby H-Balm » Fri Mar 18, 2011 4:11 am

Beautiful fish scene!

That curve is looking good.
Image
User avatar
H-Balm
Teardrop Master
 
Posts: 243
Joined: Sat May 27, 2006 5:52 am
Location: Where NY/NJ/PA Meet
Top

Postby RockyMountainTeardrops » Sat Mar 26, 2011 5:26 pm

Another set back this week. :cry:
ERRR....I mean "a learning experience"!! :BE

Been using Dupli-color high build primer, but it's not quite as hard as I would like...can't get a high gloss buff out of it.
Image

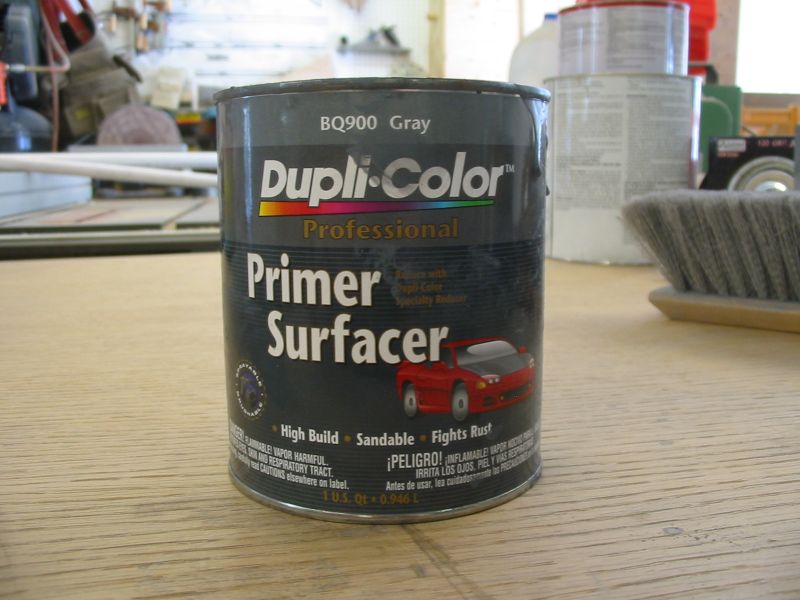
Switched to a two part polyester to try to get better results.
Image

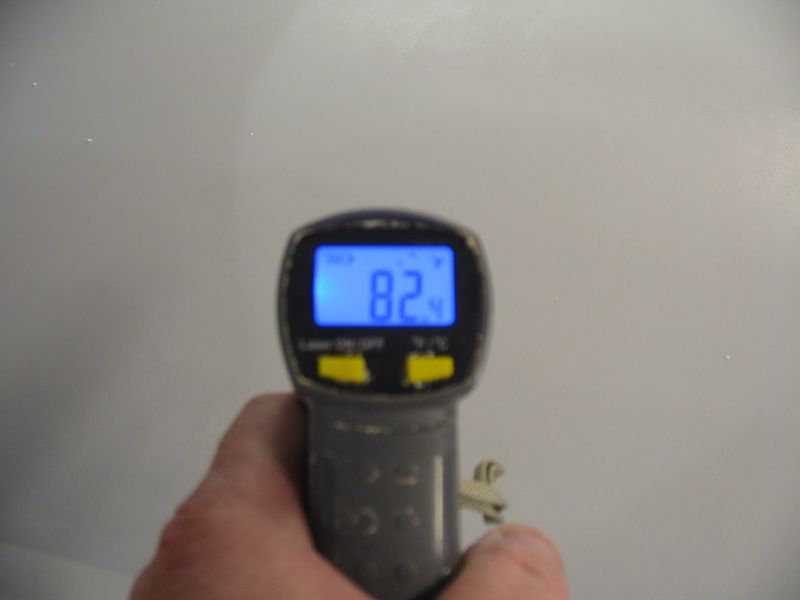
Of course, being a two-part polyester ...I need to keep it warm so I don't have a repeat of the mold fiasco.
Image

Oil filled heater that Tom (aggie79) mentioned.....nice and warm inside.
Image

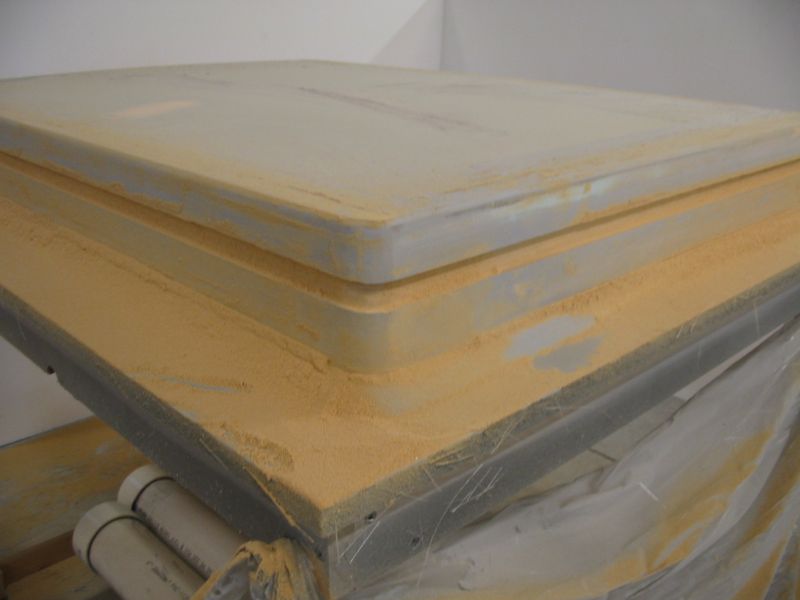
Next problem......this primer is HARD!!! Very tough to sand.
Took lots of elbow grease, but I got it sanded and a nice polish buffed into it.
Then I found a couple of spots that I didn't quite get the orange peel out of. :x
Looks like I need to spend another day sanding and polishing....

In the mean time I decided to pull the door plug out and try to get a mold off of it.
Not a perfect polish, (the soft primer), but I don't want or need a mirror finish on the final camper.
Image

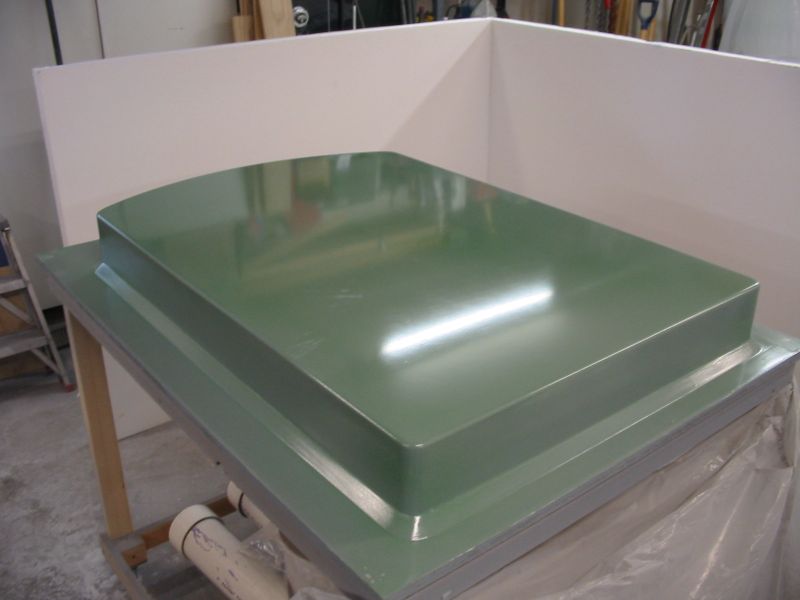
Tooling gel coat and 1.5oz mat
Image

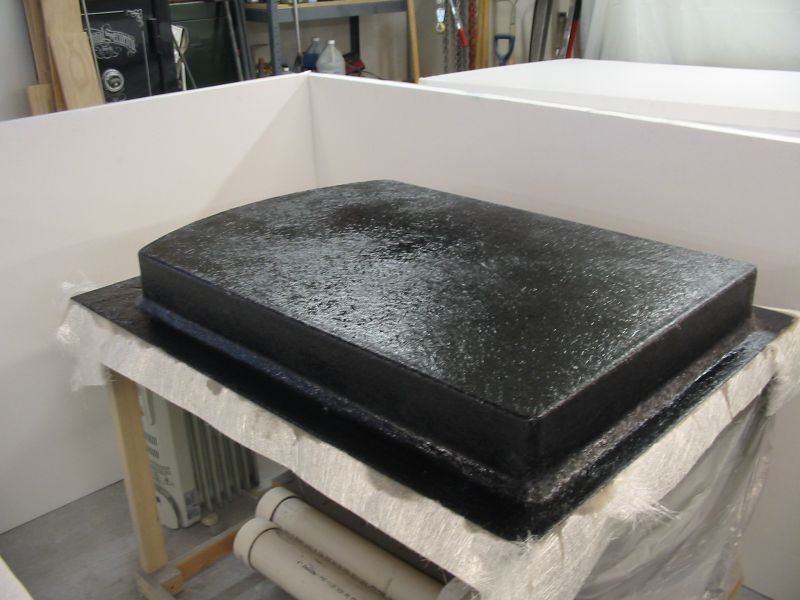
Next morning....another failure.
Not enough resin to keep the mat in contact with the gel coat. I rolled it down into place when I was putting it on, but it came back up after I put it into the heater box.
I learned that you shouldn't try to roll the mat into place. Get enough resin in it to keep it down on it's own. Only roll the bubbles out of it.
Image

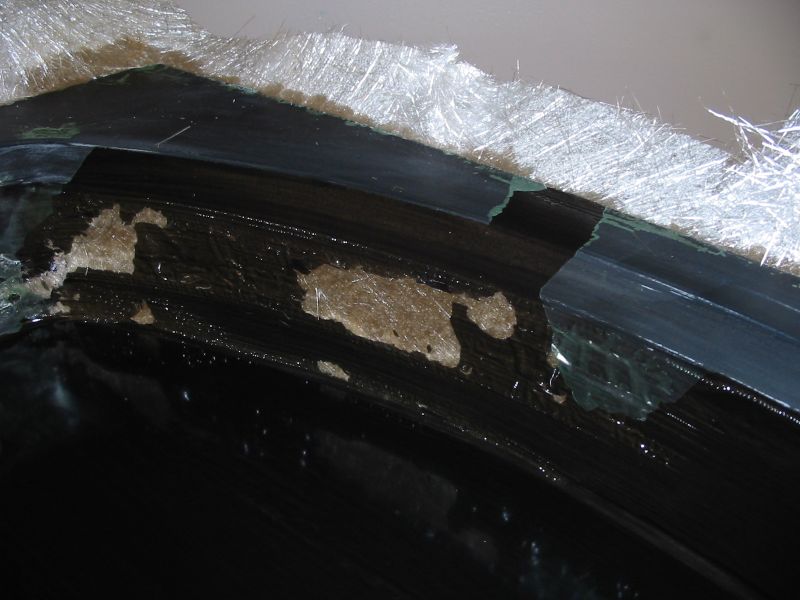
Plug was slightly damaged getting the bad mold off of it, so I decided to go ahead and add a trim flange so I can vacuum bag the next mold attempt. (too little resin will not cause a repeat of this last failure).
Since I'm not exactly sure on the final thickness of the door, I made the original plug 4" tall, figuring that I'll just trim the part to size.
Getting the bad mold off showed me that I should get a little closer to finish thickness.
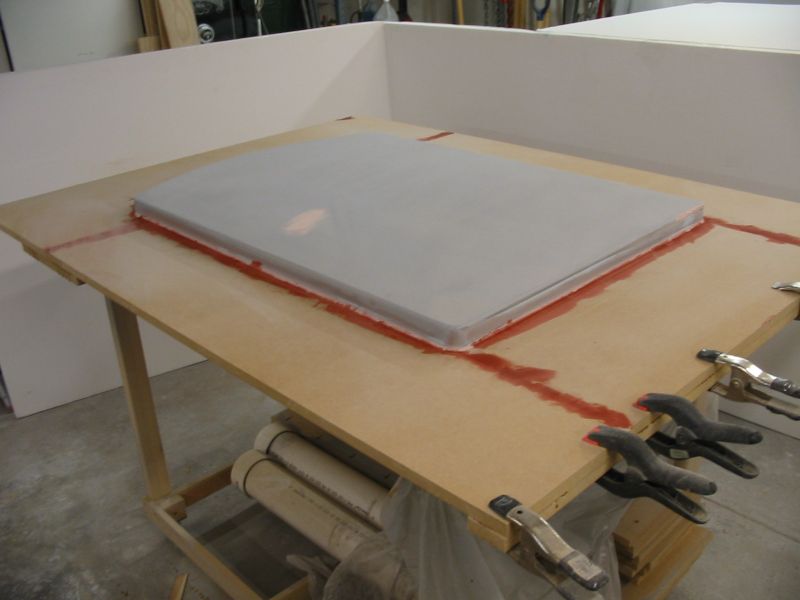
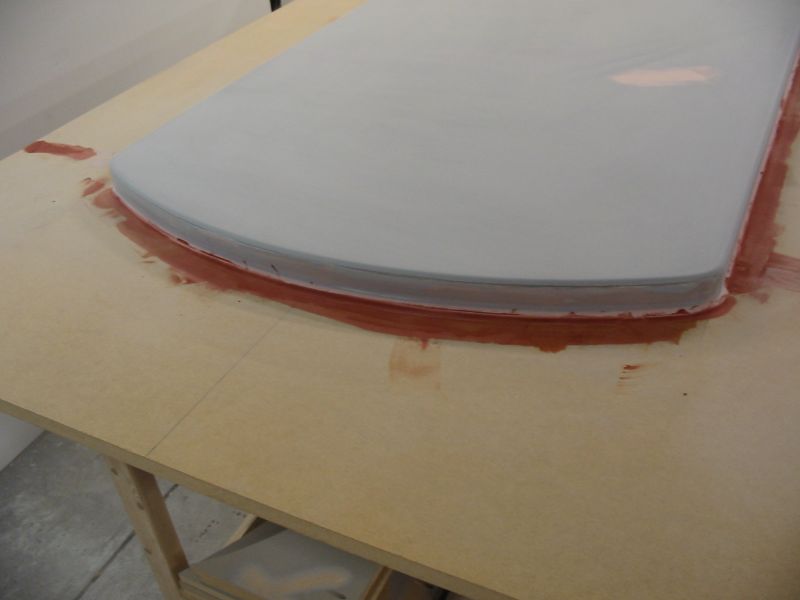
New groove for the trim flange.
Image

Trim flange...10" wide....plenty of room for a vacuum bag.
Image

Little bit of sanding, then ready for primer.
Image

I can't face the hours of sanding that the Feather Fill took....so I broke down and spent the big $$$$ and ordered a gallon of Duratech primer. That's what everybody is using.....and I'm tired of trying to cut corners.

Shop addition ran into a little snag this week.
Got the surveyor out to find property line....we're a lot closer to the road right of way than we thought.
Our set back (how close we are allowed to build to property line) is 20'. But the new addition will be about 6' off of property line.
Talked to the county planning department, and they said we need to talk to Road and Bridge to get a variance (because we're encroaching on the setback to a road).
Building and Planning said "good luck", cause R&B will not be inclined to allow us to get that close to the road right of way (we would be about 25' from where the road actually is, but the right of way is what matters).
Our property is to the LEFT of the pink stakes......we had no idea how that our driveway is so far "over the line".
Image

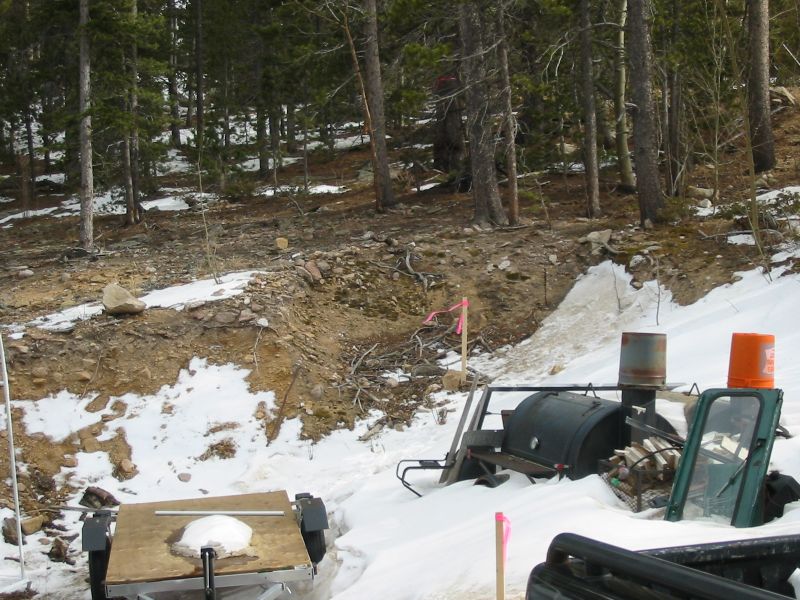
After talking to the wife and our contractor.....we've decided that building a separate building in the back yard will be better than our current plan.
Thankfully, we have the room...but since the property slopes so much, we're going to be big bucks into excavation, foundation, and possibly blasting (due to rocks).

Getting a new price for the building early next week......hopefully it'll still be about the same price as the original bid.
Going to go with a 20' x 40' building, smaller than we wanted, but $$$ are going to be a factor.

More later,
Lee
User avatar
RockyMountainTeardrops
Super Teardrop Manufacturer
 
Posts: 99
Images: 233
Joined: Fri Oct 22, 2010 1:28 pm
Location: 4,000 above Denver, CO
Top

Postby RockyMountainTeardrops » Mon May 02, 2011 9:04 pm

SUCCESS, FINALLY!!

Struggling with getting a mold made of the door plug.
Did a little more research, (stopped listening to the "experts" at the fiberglass store), bought the right tools and finally got it figured out.

Gel coat (applied to the correct thickness with a gel coat spray gun & measured with a thickness gauge).
Image

1.5oz mat applied.
The 1.5oz caused minor problems later (a couple of pinholes in the gel coat due to tiny air bubbles we couldn't get out)
Image

"Alligatoring" of the gel coat along the edge due to not enough gel coat thickness. (this caused the failure in the last attempt, but I didn't know what was causing it)
Since this is along the edge, it doesn't affect the mold.
Image

Couple of layers of 1.5oz, then some 1/2" boat foam I bought for a different test....added to increase the stiffness of the flange.
Image

Plywood frame for additional strength.
Image

Shiny!
Image

I felt like a total tool, going into the fiberglass store every week to get some more materials, and telling the guys about the latest failure. They never had any advice for me, just shake their heads and sell me more resin and fabric.
Now that I got a mold off of the plug, the guys say:"Congratulations! Making a mold is really hard, most people give up after a couple of tries. You should start a business building molds for people!" :?


Learning from my mistakes.
Hatch plug gelcoated and 3/4oz mat applied (3/4 mat to keep the air bubbles down to a minimum)
Image

Many layers of mat (and some leftover woven cloth), 4mm Coremat, and plywood bracing.
Image

Haven't pulled the hatch mold off yet (tomorrow, after I make a new cart for it).
I believe it will be as good as the door...(knock on wood), I haven't seen anything that makes me think otherwise.

More later,
Lee
User avatar
RockyMountainTeardrops
Super Teardrop Manufacturer
 
Posts: 99
Images: 233
Joined: Fri Oct 22, 2010 1:28 pm
Location: 4,000 above Denver, CO
Top

Postby RockyMountainTeardrops » Sun May 15, 2011 9:16 pm

I'm beginning to think I might know what I'm doing here.
:dancing

Hatch mold came off the plug without a hitch, no repairs needed.
(ignore the discoloration on the left side, that's just some PVA that I haven't cleaned off all of the way)
Image

Laying the laminate stack for a door skin.
Switched to type 7725 (9oz 2X2 twill style) instead of the 10oz plain weave I've been using.
Much better drape in the corners.
Image

PVA release agent, two layers of cloth, one layer of 2mm Coremat, two more layers of cloth, peel-ply, release film, breather cloth, and finally bagging film.
Vacuum bagged with Raka thin, (infusion resin is on back-order).
Image

One door skin, ready for trimming.
:woohoo:
Image

Now with four carts / workbenches.....I'm starting to run out of room in the garage.
Image

New shop building in scheduled to start construction June 1st.
Contractor was going to charge me $2,500 for tree removal.
I can do that myself, and this way I'll have some firewood to boot.
:M Well..I'm a lumberjack and I'm okay :M
Image

More later,
Lee
User avatar
RockyMountainTeardrops
Super Teardrop Manufacturer
 
Posts: 99
Images: 233
Joined: Fri Oct 22, 2010 1:28 pm
Location: 4,000 above Denver, CO
Top

PreviousNext

Return to Build Journals

Who is online

Users browsing this forum: No registered users and 16 guests