San Diego 5 x 8+ build

...ask your questions in the appropriate forums BUT document your build here...preferably in a single thread...dates for updates, are appreciated....

Trailer lights...ugghh...

Postby adventurelad » Fri Jul 27, 2012 10:36 am

No updates this week as I have been engaged in an epic battle against my trailer lights. :(

To make a very long story short, I was simultaneouly dealing with a bad 5-to-4 wire controller in the tow vehicle, a bad bulb in the right turn / brake light, and a wire with a split cover that was grounding to the trailer (went through ~9 fuses tracking this one down :x )

As of last night, everything is working and I can move on with my life and teardrop building! :D

A few pics of the details of the wiring...

96036
Grounding terminal

96037
Chafe guard on the wires at the clips

96038
Ground connections at the tongue

Some of the ordered parts are starting to arrive, which makes this much more 'real'...unfortunately the sink / stove combo unit (SMEV MO0911 from Panther RV products) got a bit dented in shipping. Hopefully FedEx will come good on this :NC

96039

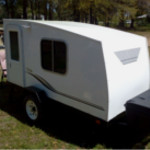
So the trailer is just about ready to go to the DMV, and also to be used for getting the aluminum sheets...
96040

First wall building this weekend!! :)
adventurelad
Teardrop Builder
 
Posts: 35
Images: 148
Joined: Wed Jul 11, 2012 9:42 am

Re: San Diego 5 x 8+ build

Postby pappaw » Fri Jul 27, 2012 11:05 am

Looking good! :thumbsup:

Enjoy your build.

Cheers :beer:
Image Cheers from Granny, Pappaw, and Cocoa (the Dachshund) Image
pappaw
Teardrop Master
 
Posts: 240
Images: 14
Joined: Mon Nov 22, 2010 12:15 pm
Location: S.W.Ohio

Weekend #2 progress

Postby adventurelad » Mon Jul 30, 2012 10:26 am

Lots of progress this weekend, thanks to my helper (wife) I got more done than I expected. The goal for the weekend was to cut and frame-up one wall, and now both walls are nearly done, plus one door :D The story via :pictures:

96169

Jim (pohukai) gave some good advice on cutting the 1/8 lauan, find the non-orbital setting on your jigsaw. You can see the difference this makes (top was from two weeks ago on orbital :thumbdown: , bottom is on non-orbital setting :thumbsup: )

96170

Setting up to join two sheets for the walls (our TD is a little longer than 8 ft, thus the need to join)

96171

First join bonding

96172

Tracing the profile from full size prints (one advantage to working in an office with a 36 inch plotter :) )

96173

Profile traced out, ready to cut

96174

First wall!! :D Also the first time you get a real feeling of what this thing is going to look like.

96175

Working on framing for the first wall

96176

First wall framing nearly done

96179

Drawing the door cutout...my method for drawing radius corners (never underestimate what you can do with duct-tape!! :D )

96180

Door cutout in first wall

96181

Window cutout and dry fit...it fits!! :D

96182

Final framing pieces around the door corners installed

96183

And final door edge trim complete...ready for insulation

96184

Insulation dry fit

96185

Wall #2 framing in progress

96186

Wall # 2 door cutout

96187

Door insulation dry-fit

96188

And wall #1 insulation being bonded in place.

What a weekend...I need to go back to work and rest :D Oh yeah, and order the rest of my parts!

Adventurelad
adventurelad
Teardrop Builder
 
Posts: 35
Images: 148
Joined: Wed Jul 11, 2012 9:42 am
Top

Re: San Diego 5 x 8+ build

Postby Forrest747 » Mon Jul 30, 2012 10:41 am

looks great I would add some more meat to your hinge area.
"All the success on the trail can not compensate for having square headlights"

"I've got a fever and the only prescription is more cowbell!"
http://www.tnttt.com/viewtopic.php?f=50&t=37701 Build Journal
User avatar
Forrest747
Cowbell Donating Member
 
Posts: 1327
Images: 447
Joined: Mon Apr 06, 2009 3:40 am
Location: West Valley Utah, Utah
Top

Weekend #3

Postby adventurelad » Wed Aug 08, 2012 9:46 am

A bit of a shorter weekend of work...this sport called golf keeps getting in the way :D Took the always good advice from Forrest and added some reinforcing to the door where the lower hinge will attach (didn't have the hinges prior). So the main focus of the weekend was getting the cargo-hauler version of the trailer ready for its initial duties (and the DMV), finish framing the door that I didn't get to last weekend, and routing out the door latch pockets.

96605
My wife got the camera...but I hid just in time :)

96606
The basic state of progress, everything framed in an one side insulated

96607
Routing out the latch pocket...I didn't go for the disassembly, rather I went for the 'keep taking little bits out until it just fits' method

96608
Sucessfully installed! :D

96609
And it is still 'clean' from the other side :thumbsup:

96610
Wood filler applied to all of the little blemishes on the plywood, plus the panel join...ready for sanding

96611
And the cargo-hauler, boxed in...

96612
...and ready for the DMV (which happened yesterday).

No work this coming weekend, but the pile of parts to be installed keeps growing :)

Adventurelad
adventurelad
Teardrop Builder
 
Posts: 35
Images: 148
Joined: Wed Jul 11, 2012 9:42 am
Top

Weekend #4

Postby adventurelad » Thu Aug 23, 2012 1:59 pm

Trailer building has slowed dramatically over the last few weeks, hopefully will pick up again soon!

Last weekend I 'painted' the walls and doors with West System epoxy. I used the ultra-slow hardener in the hope that it would allow some amount of penetration into the wood. Took about 36 hours to fully cure in San Diego heat (80 - 90 degrees). I didn't need to thin it at all, it brushed on with no problems, just a bit thicker than paint.

97181

97182
Pretty remarkable difference in wood tone between the sheets of plywood.

97183

97184
I also have now disassembled the 'cargo hauler' trailer and installed the tongue jack.

Had a friend come by and help me get the camper base onto the trailer, so now the assembly of parts can begin :D

Adventurelad
adventurelad
Teardrop Builder
 
Posts: 35
Images: 148
Joined: Wed Jul 11, 2012 9:42 am
Top

Re: San Diego 5 x 8+ build

Postby Forrest747 » Thu Aug 23, 2012 2:02 pm

Looking great keep it up its almost a trailer.
"All the success on the trail can not compensate for having square headlights"

"I've got a fever and the only prescription is more cowbell!"
http://www.tnttt.com/viewtopic.php?f=50&t=37701 Build Journal
User avatar
Forrest747
Cowbell Donating Member
 
Posts: 1327
Images: 447
Joined: Mon Apr 06, 2009 3:40 am
Location: West Valley Utah, Utah
Top

Weekend #5+

Postby adventurelad » Mon Sep 10, 2012 10:29 am

OK, been awhile since I posted...been stealing an hour here and there, but got a full two days of work this weekend, and it is finally starting to really look like a ttt!!! :D

97699

Peel-and-stick vinyl flooring on base, plus wall mounting rails installed. One week later and the flooring isn't sticking too well, may need to get some more glue under the more stubborn tiles.

97702

Gluing the interior 1/8 birch plywood to the outer wall & insulation. My friend has termed this a 'gravity clamp' :D

97705
97704

I drilled holes through the birch from the outside to mark where I was going to cut so that I could...

97706

...tape the other side. Cuts came out cleaner this way, but the jig-saw blade is only barely long enough for this method.

97703

Door skin cutout, ready for gluing (this week sometime...I hope!)

97700
97701

Test fitting first wall. Used a bungy cord from the garage ceiling to hold it up :) Just needed a little sanding along the bottom edge to make sure the weight of the wall was on the 1 x 2s and not the plywood. This left a tiny gap for sealant on the final install.

97707

Both walls dry-fitted and squared up!

97708
97709
97710

It finally takes shape!! :D :D :D
So my method was to dry-fit and stand up both walls, then put the galley bulkhead in place, and screw it to the floor. This gave me a vertical reference for making sure the walls went back on straight. Then took off one wall at a time, applied sealant and wood glue along the bottom, then replace the wall and screwed it in place. Then repeat with the other wall. Then finally pocket-screw the walls and bulkhead together.

97711

I used the off-cut from the door window openings as a template for the galley cupboard openings...recycling at its finest! :D

97712

Inside cupboards starting to go in...a bit of a jig-saw puzzle.

97713

Galley cupboard openings cut...time to call it quits for the weekend!! :beer:

Adventurelad
adventurelad
Teardrop Builder
 
Posts: 35
Images: 148
Joined: Wed Jul 11, 2012 9:42 am
Top

Weekend 6

Postby adventurelad » Mon Sep 17, 2012 10:45 am

Big focus this weekend was completing the interior cabinets and starting the ceiling / roof. The update, in :pictures: :

97986

A shot of the mostly-completed cabinets. A bit of a brain-bender to try to hide all of the finish nails and screws. The best I came up with was a few visible along the center...but that meant that I could split the cabinet face in the center as well (using smaller pieces of plywood), and then I'll make a decorative 'feature' to cover the centerline split and screws.

97988

Close-up. And yes, I used the same door-window piece as a template to cut these as well...consistent shaped openings everywhere! :)

I built the entire cabinet except the visible front face, then started on the ceiling. In retrospect, might have been easier to do the back-end ceiling first, but it made getting in and out of the camper easier (I am 6' 2"!). But it meant that I could install the bottom part of the cabinet first, then drop the shelves and dividers in from the top, and they would be supported while screwing / nailing, etc.

97984

This is an end-of-weekend pic, but I only put the framing in for the back-end ceiling, then installed the 1/8 birch. Lots more room to maneuver the big flexible sheet. I was almost ready for the front end by the end of Sunday, thus the installed front-end framing.

97987
97989

Once you have that nice piece of birch paneling installed, you immediately cut a hole in it! :shock:

97991

Just a detail of the wiring routing up to the ceiling fan and lights. I drilled through the floor and into the wiring conduit, then pulled a string through using the vacuum technique, and then pulled the wires through. Nice and tidy!

97990

A view of the cabinets from the galley side. We decided to offset the shelf from center as you will inevitably have 'tall' items and 'short' items. My engineering brain was going to just center them, but my far-more-logical wife convinced me otherwise :D

Adventurelad
adventurelad
Teardrop Builder
 
Posts: 35
Images: 148
Joined: Wed Jul 11, 2012 9:42 am
Top

Re: San Diego 5 x 8+ build

Postby Forrest747 » Mon Sep 17, 2012 11:01 am

Looking great. I did the same thing with my seams is i put a piece of poplar to hide it.
Its almost done for sure.
9681396810
"All the success on the trail can not compensate for having square headlights"

"I've got a fever and the only prescription is more cowbell!"
http://www.tnttt.com/viewtopic.php?f=50&t=37701 Build Journal
User avatar
Forrest747
Cowbell Donating Member
 
Posts: 1327
Images: 447
Joined: Mon Apr 06, 2009 3:40 am
Location: West Valley Utah, Utah
Top

Half a weekend

Postby adventurelad » Mon Sep 24, 2012 10:02 am

Had plans for Saturday (63 mile bike ride) so only got half a weekend of work this week. Deadline is rapidly approaching, so going to have to resort to after-work hours again :frightened:

First up was to install the forward half of the ceiling. My helper / wife had to work this weekend, so a little ingenuity was required to hold the roof beams in place while I drove the screws from the inside. Yet another use for ratchet straps! :)

98175

98176

Seems like this will be handy when doing the roof and roof insulation.

98177

Finished product, from the inside. I bought some tiny quarter-round molding to cover the ceiling-to-wall gaps, but it is so small I am now wondering how to attach it? Any suggestions??

Next big task was sorting out the galley. I built a sliding shelf for the cooler(s) (we have designed for a plug-in 12V and regular one so that we have options), then placed the center divider, which gave me enough parts to finally visualize how it is all going to look:

98178

Decided, after that, that the water tank would be better standing up vertically instead of horizontally...

Next was the front panel on the left side...and suddenly you realize how tight everything is going to be :shock:

98179

All of that, and the water pump still needs to go in there! Sink is going to drain into a grey water tank constructed from PVC piping under the floor of the camper body between the steel cross-beams of the trailer.

Next up, drilled a hole for the water tap, then marked out the sink / stove combo cutout...twice :oops: First layout was too far to the right, so had to crowd it over to the left as close to the water tap as possible. Measure twice, cut once!

98180

And to finish the day, a scary task...cut a big hole in the side of the camper for the water gravity feed and vent panel :NC :frightened:

98181

98182

19 days 'till the first outing :NC
adventurelad
Teardrop Builder
 
Posts: 35
Images: 148
Joined: Wed Jul 11, 2012 9:42 am
Top

Re: Half a weekend

Postby KCStudly » Mon Sep 24, 2012 7:21 pm

adventurelad wrote:I bought some tiny quarter-round molding to cover the ceiling-to-wall gaps, but it is so small I am now wondering how to attach it? Any suggestions??


Glue? PL or hot glue gun? Wood glue temporarily tape in place with blue tape or propped with spring boards? Pre-drill in strategic locations for tiny brads, glue and tack?
KC
My Build: The Poet Creek Express Hybrid Foamie

Poet Creek Or Bust
Engineering the TLAR way - "That Looks About Right"
TnTTT ORIGINAL 200A LANTERN CLUB = "The 200A Gang"
Green Lantern Corpsmen
User avatar
KCStudly
Donating Member
 
Posts: 9640
Images: 8169
Joined: Mon Feb 06, 2012 10:18 pm
Location: Southeastern CT, USA
Top

Re: San Diego 5 x 8+ build

Postby adventurelad » Tue Sep 25, 2012 10:47 am

Thanks for the suggestions KC...hot melt glue gun might be the best bet, then a few micro-brads. Was looking for something that would set up faster than regular wood glue. Thanks! :thumbsup:

Pulled my wiring through to the rear of the camper last night...4 pairs (8 wires) of 12 ga is all you can realistically fit in a 3/4 in. O.D. flex conduit. The last two were a bear!! :shock:

Adventurelad
adventurelad
Teardrop Builder
 
Posts: 35
Images: 148
Joined: Wed Jul 11, 2012 9:42 am
Top

Re: San Diego 5 x 8+ build

Postby Forrest747 » Tue Sep 25, 2012 11:04 am

my doors and hatch were duct taped on the first trip and the same on the second one you will get there and looking good for sure.
928519285292381
"All the success on the trail can not compensate for having square headlights"

"I've got a fever and the only prescription is more cowbell!"
http://www.tnttt.com/viewtopic.php?f=50&t=37701 Build Journal
User avatar
Forrest747
Cowbell Donating Member
 
Posts: 1327
Images: 447
Joined: Mon Apr 06, 2009 3:40 am
Location: West Valley Utah, Utah
Top

Re: San Diego 5 x 8+ build

Postby jbyrd » Wed Sep 26, 2012 7:18 am

Your trailer is coming along nicely!! If you don't mind can I ask where you got that sink stove combo from? I love it and want it for my next build!!!
Til later, See ya
Jeremy

My build journal #1 "SOLD" : viewtopic.php?t=45945
my build journal #2 "SOLD": viewtopic.php?f=50&t=59216
User avatar
jbyrd
Teardrop Master
 
Posts: 146
Images: 172
Joined: Sun Aug 28, 2011 8:24 pm
Location: marianna, Florida
Top

PreviousNext

Return to Build Journals

Who is online

Users browsing this forum: No registered users and 12 guests