My first try

...ask your questions in the appropriate forums BUT document your build here...preferably in a single thread...dates for updates, are appreciated....

Re: My first try

Postby Richard Miller » Fri Oct 26, 2012 12:59 pm

DMcCam wrote:Hi Richard, Great start on your Teardrop Sir!!! It's very gratifying to see so many members using my profile for their builds, I'll be a following yours for sure! :thumbsup: I hope you can get some 5' wide .040 aluminum for the roof. The .063 I had to use was way overkill and hard to work with. About the hatch hinge, I used Lil' Bear Tag-a-Long's Better that Hurricane hinge. To me, using a time tested hinge is well worth the money and piece of mind. Of course innovation has its merits too. :D

All the best,

Dave

Hi Dave.

YES ! I think the profile of the "Atla Travelear" is going to become one of the all time favorites in the future, love it!

I had posted in the general discussion area asking about differences of mill finish and anodized finish. I know that the anodizing process hardens the surface and allows for better scratch resistance as well as stain and corrosion resistance but is almost twice as expensive as the mill finish.
My trailer is 4'x9' body so I'll be using the 4'x10' sheet of aluminum.
I have found the .040 mill finish in stock locally for abt. $65 a sheet, and they would deliver across town no charge, so I am pretty sure I'll go that route.
Hopefully with a good buffing and wax job and being kept under a car port the mill finish will age naturally and maybe i'll get the old time patina without all the wood rot problems of having an original.

I know the "hinge" I'm thinking about is not what is normally used but i think it will work, im sure going to give it a try :lol: besides I like a challenge.

I'm sure you recognize the galley seal illustration too, when i see a good idea I go for it! Thanks Dave.

Richard
I used to be pretty indecisive, but now I'm not too sure
User avatar
Richard Miller
Teardrop Advisor
 
Posts: 54
Images: 0
Joined: Thu Nov 24, 2011 12:35 pm
Location: Lubbock, TX

Re: My first try

Postby Richard Miller » Tue May 06, 2014 12:45 am

long time since I've posted anything but I'm back to work on the teardrop
Image
I've still got to mount the fenders, do more cabinet work inside and some more wiring
I used to be pretty indecisive, but now I'm not too sure
User avatar
Richard Miller
Teardrop Advisor
 
Posts: 54
Images: 0
Joined: Thu Nov 24, 2011 12:35 pm
Location: Lubbock, TX

Re: My first try

Postby Gunguy05 » Tue May 06, 2014 9:47 am

More pics! More pics!

Looks good from here.
Brian


Checkout my buildThe Regal Eagle Bow front for 4
Image
Also my teardrop updates from blog on Dad Rambles
User avatar
Gunguy05
The 300 Club
 
Posts: 385
Images: 6
Joined: Mon Dec 02, 2013 4:45 pm
Location: South GA
Top

Re: My first try

Postby Richard Miller » Fri May 23, 2014 9:51 pm

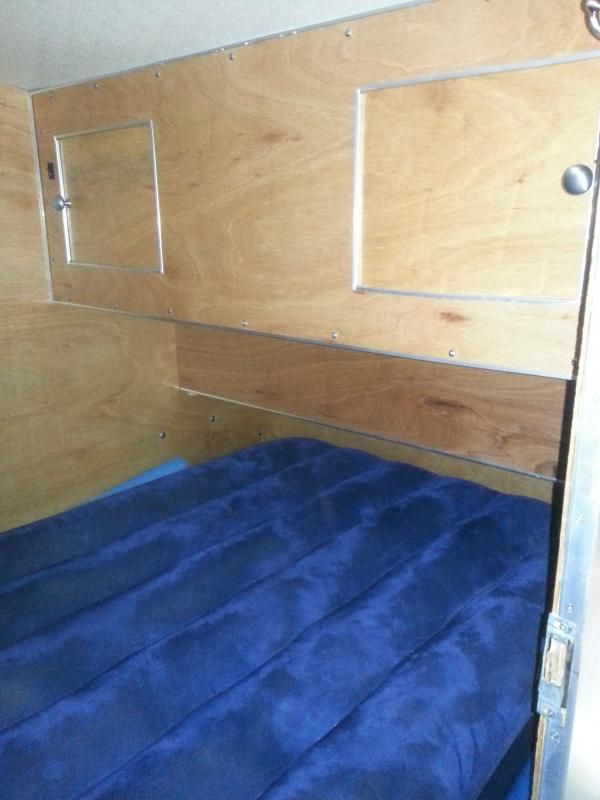
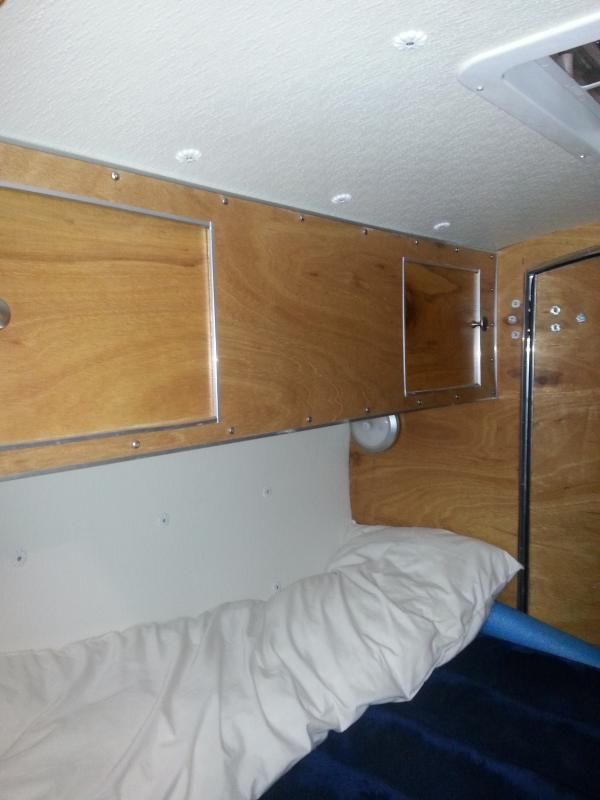
Added an overhead cabinet yesterday
Image
I used to be pretty indecisive, but now I'm not too sure
User avatar
Richard Miller
Teardrop Advisor
 
Posts: 54
Images: 0
Joined: Thu Nov 24, 2011 12:35 pm
Location: Lubbock, TX
Top

Re: My first try

Postby Richard Miller » Mon Jun 02, 2014 12:20 am

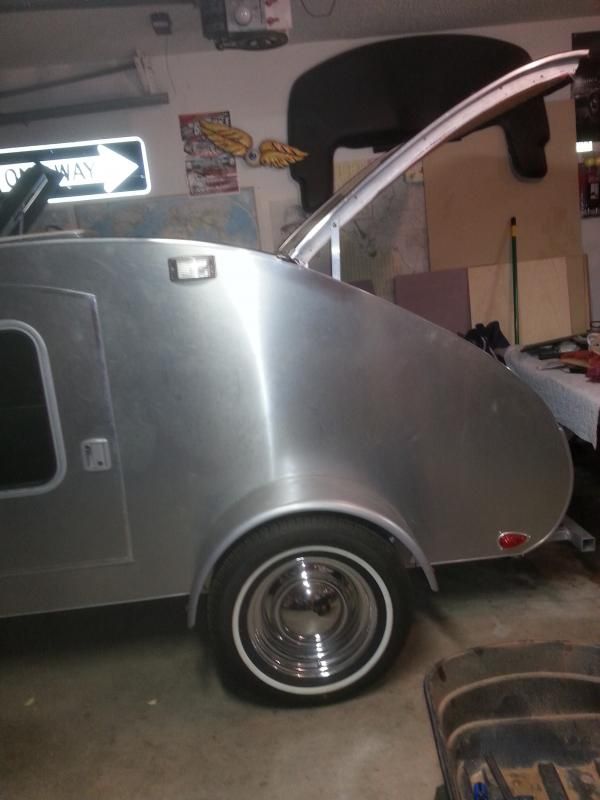
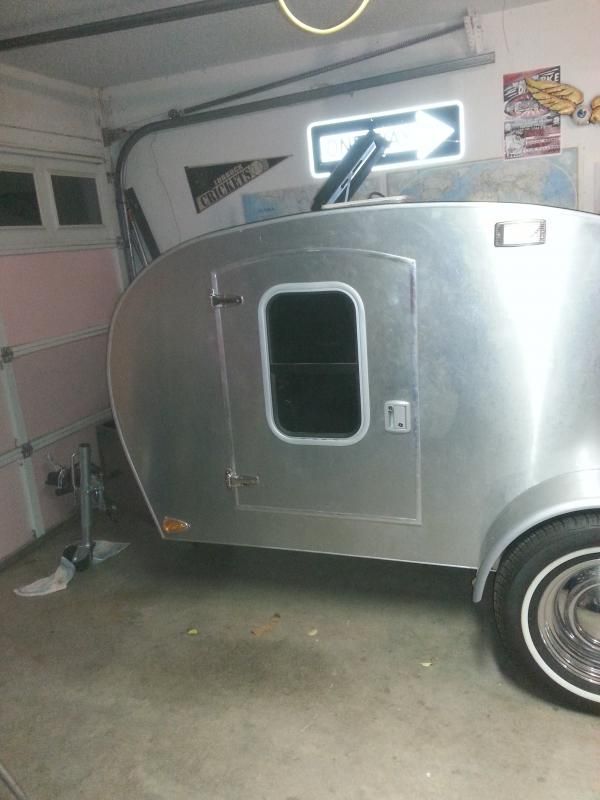
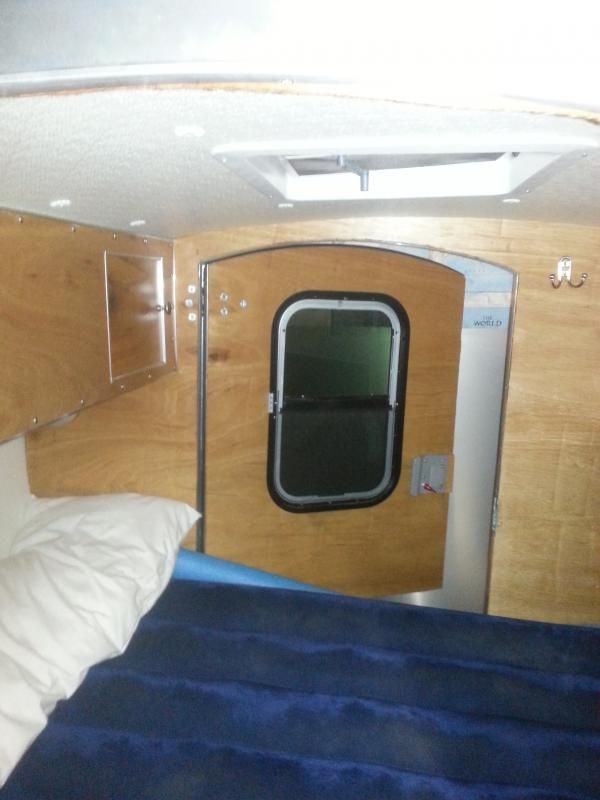
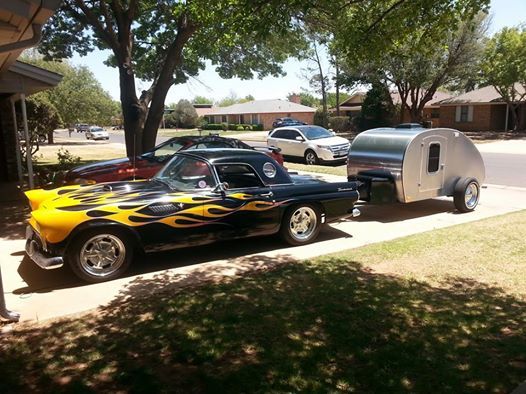
Well I've got the fenders mounted now, and exterior trim done. Still working on the galley cabinets and some interior trim work.
I pulled it out to the lake today along with other car club members and it was a big hit, pulls great too.
Image
I used to be pretty indecisive, but now I'm not too sure
User avatar
Richard Miller
Teardrop Advisor
 
Posts: 54
Images: 0
Joined: Thu Nov 24, 2011 12:35 pm
Location: Lubbock, TX
Top

Re: My first try

Postby StockCube » Tue Jun 03, 2014 2:41 pm

That looks really smart - nice work.
Not tempted to match the tear wheel to the tv though?
StockCube
Teardrop Builder
 
Posts: 36
Images: 0
Joined: Mon Apr 14, 2014 5:37 pm
Location: Scotland
Top

Re: My first try

Postby Richard Miller » Tue Jun 03, 2014 11:06 pm

Stock Cube, I talked to a person at a vinyl wrap place and they said they can match the flames on the car, it might happen but I'm undecided still. I think the smoothie wheels will do just fine :D
I used to be pretty indecisive, but now I'm not too sure
User avatar
Richard Miller
Teardrop Advisor
 
Posts: 54
Images: 0
Joined: Thu Nov 24, 2011 12:35 pm
Location: Lubbock, TX
Top

Re: My first try

Postby Richard Miller » Tue Jun 24, 2014 12:01 pm

A few more pictures now, I'm almost done
Image
Image
Image
Image
Image
Image
I used to be pretty indecisive, but now I'm not too sure
User avatar
Richard Miller
Teardrop Advisor
 
Posts: 54
Images: 0
Joined: Thu Nov 24, 2011 12:35 pm
Location: Lubbock, TX
Top

Re: My first try

Postby Lucky53s » Tue Jun 24, 2014 12:22 pm

Do you have any pictures of how you made the doors? I like your design but am finding that almost nobody shows construction of the doors, they just magically appear. :)

I'm specifically interested to see a shot of the side showing trim/molding/seals/etc.

Tear looks great. You made it look so easy.
Lucky53s
Teardrop Builder
 
Posts: 29
Images: 2
Joined: Mon Jun 16, 2014 6:36 pm
Location: West Palm Beach, FL
Top

Re: My first try

Postby Richard Miller » Thu Jun 26, 2014 9:17 pm

Lucky53s wrote:Do you have any pictures of how you made the doors? I like your design but am finding that almost nobody shows construction of the doors, they just magically appear. :)

I'm specifically interested to see a shot of the side showing trim/molding/seals/etc.

Tear looks great. You made it look so easy.


Lucky, I'm sure not an expert and I didn't take any pictures during the door build, but I just took some pictures of the door edge and I'll try to explain how I formed the arched top of the door.

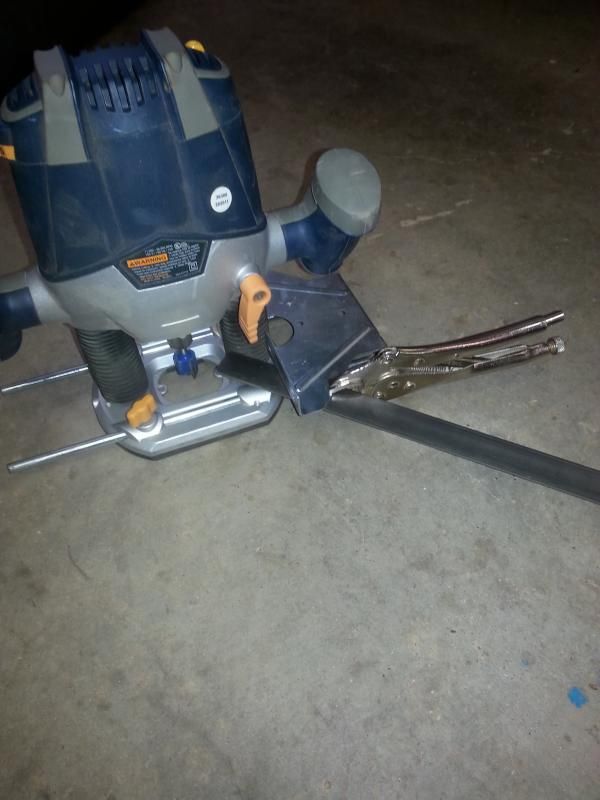
First I measured where I wanted the door, and I marked the two vertical edges of the door, they are 27½" apart and 35½" tall then I put the edge guide on the router in upside down, I took a piece of steel strap and clamped it with a couple vice grips to edge guide on the router like this,
Image
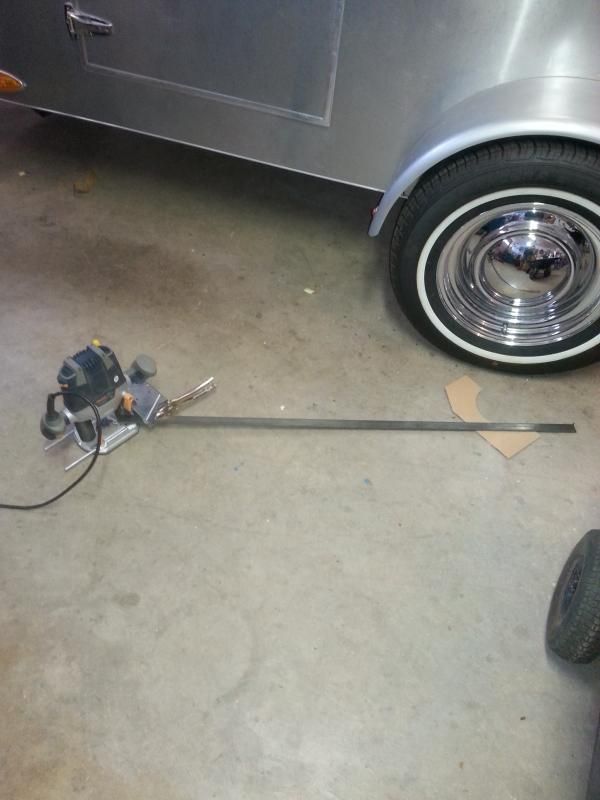
then I placed a hole in the other end of the steel strap where it would reach the bottom of the tear wall and an equal distance between the two vertical lines and made a pivot point there.
Image
The first door was cut with a ¼" router bit but I cut the second door with a 1/8" router bit and I liked it better.

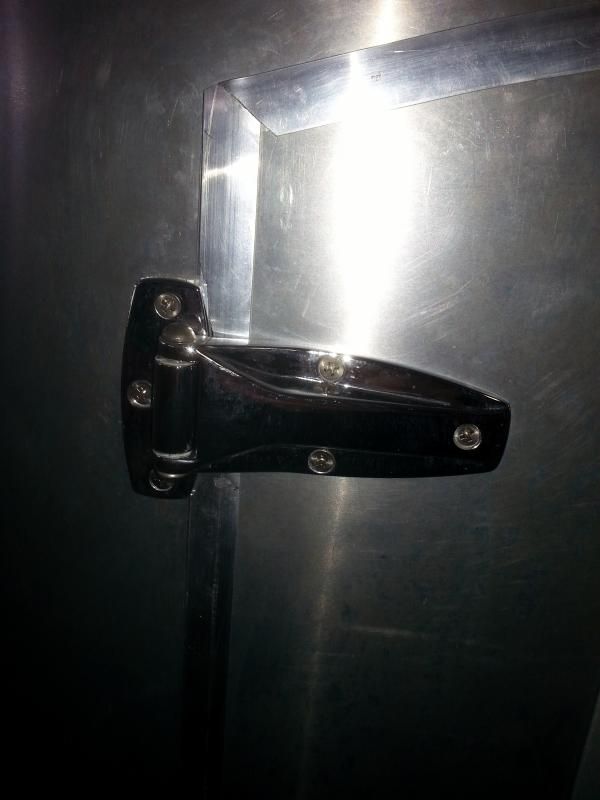
I used refrigerator door hinges that I found on ebay
Image

I bought the edge molding and T molding from Frank Bear at Vintage Technologies, very good service but shipping cost almost as high as the price of the material. (ouch)
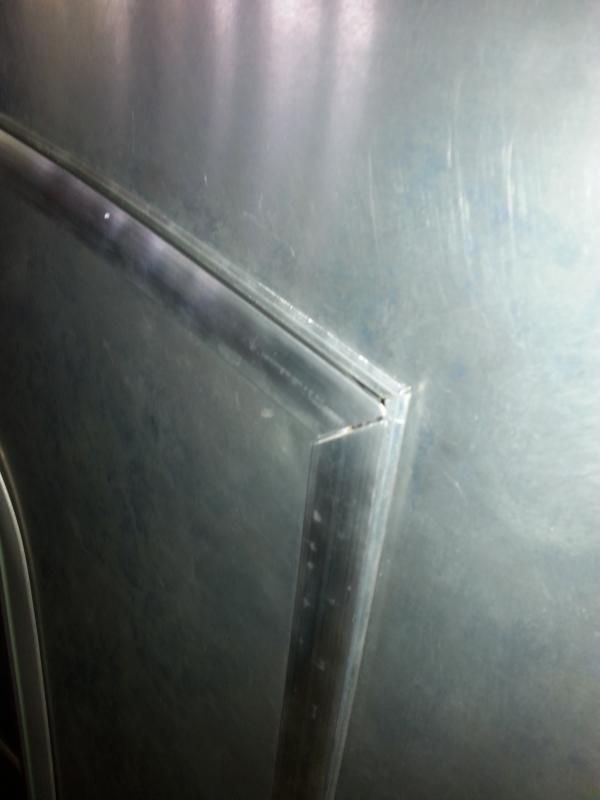
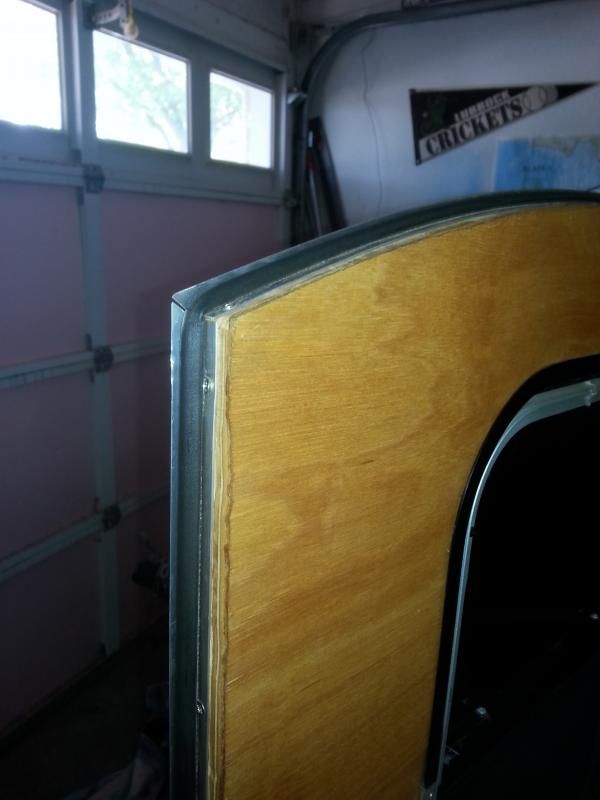
I thought I had all the molding cut to a good tight fit, but when it came time to mount it there were some gaps and surprises
Image
Image
I'm using small D shaped gasket that I found at Home Depot and it works pretty good on the door that I cut with the 1/8" router bit, but I'm going to have to work on the other door to get it to seal better, leaked alittle at the car wash.

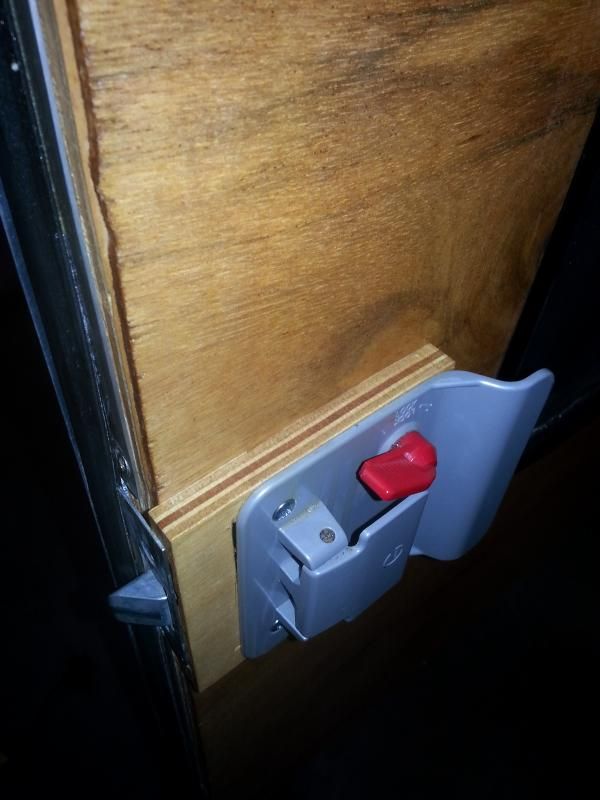
I used RV door latches that I found on Ebay they are a good latch with handle lock and a deadbolt lock, but are made for a thicker door, I had to use ¼" plywood shims to get them to fit right
Image

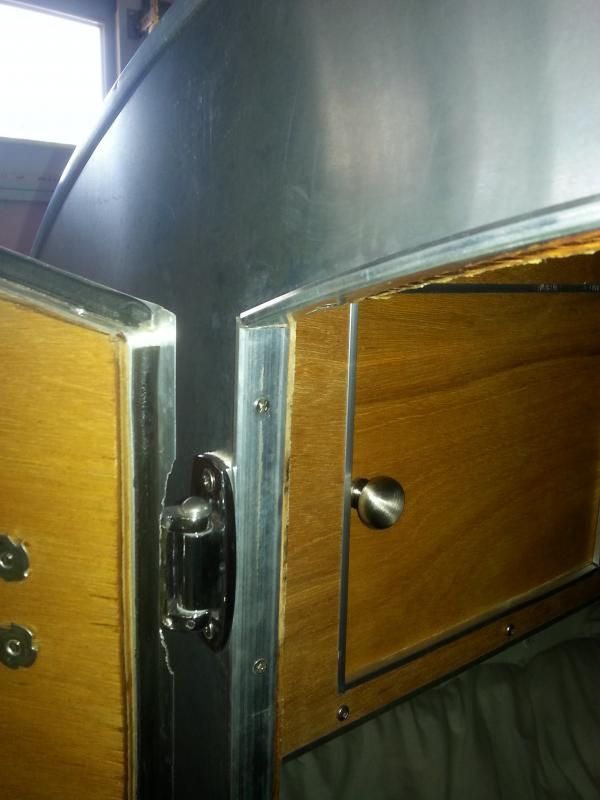
I also had to trim the T molding so it would clear the hinge when the door was shut
Image

I'm still trying to decide if I want to put edge molding on the inside of the door and door opening, I know it would look nicer but I think it is something I can live without for now.
hope this helps you out a little .
I used to be pretty indecisive, but now I'm not too sure
User avatar
Richard Miller
Teardrop Advisor
 
Posts: 54
Images: 0
Joined: Thu Nov 24, 2011 12:35 pm
Location: Lubbock, TX
Top

Re: My first try

Postby Lucky53s » Fri Jun 27, 2014 5:51 am

Richard,

Thanks for the detailed reply. It helps a lot. It's great to be able to see the detail and hear how you did it.
Lucky53s
Teardrop Builder
 
Posts: 29
Images: 2
Joined: Mon Jun 16, 2014 6:36 pm
Location: West Palm Beach, FL
Top

Previous

Return to Build Journals

Who is online

Users browsing this forum: No registered users and 3 guests