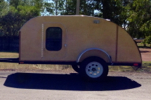
5x10 renovation and build

...ask your questions in the appropriate forums BUT document your build here...preferably in a single thread...dates for updates, are appreciated....

5x10 renovation and build

Postby inthewoods » Fri Jun 20, 2014 11:29 pm

This afternoon with the cooperation of my 4yr old I was able to get a bunch of work started on the electrical install in what will become the battery compartment. I'll hopefully pick up an AGM battery in the next week or so. I ran the 8awg wire from where the battery is located into the cabin area where the 12v fuse panel will be. Then I shifted back to the 120v wiring. Took me most of the afternoon figuring out exactly where I was going to mount the components but in the end I like what I've come up with. Here's a quick photo of the current state.

Basically from the 120v inlet under the trailer, power runs through a short 12/3 extension cord wire to a small 20a push button circuit breaker, then through a blank face 20a GFCI, then into a 20a surge suppression receptacle. Then I'll feed from the surge protector through the other receptacles in the cabin (again using 12awg household wire). So the whole 120v circuit is protected from overload, ground fault and surges. Most of my loads will be 12v and the 120v won't be used for much but it's good to have in place if the need ever arises.

The green box in the photo shows where the AGM battery will live. I haven't completely made up my mind yet but I think I'm planning to get a Northstar (or the Canadian Tire Nautilus equivalent) group 27 or group 31 size battery. Hopefully this weekend I'll get the under counter mount for my Noco Genius G7200 battery charger made and then that will be another thing checked off the list!
Attachments
ImageUploadedByTapatalk1403322955.471506.jpg
ImageUploadedByTapatalk1403322955.471506.jpg (196.64 KiB) Viewed 1871 times
User avatar
inthewoods
Teardrop Master
 
Posts: 112
Images: 25
Joined: Mon Aug 26, 2013 3:19 pm
Location: Saskatchewan, Canada

Re: 5x10 renovation and build

Postby inthewoods » Sun Jun 22, 2014 12:12 am

Ended up going shopping for wood today and ended up coming home with the wood and also the battery and some other small parts! The battery I was looking for happened to pop up on sale and at 50$ off.
Attachments
ImageUploadedByTapatalk1403413877.661477.jpg
ImageUploadedByTapatalk1403413877.661477.jpg (201.17 KiB) Viewed 1836 times
User avatar
inthewoods
Teardrop Master
 
Posts: 112
Images: 25
Joined: Mon Aug 26, 2013 3:19 pm
Location: Saskatchewan, Canada

Re: 5x10 renovation and build

Postby inthewoods » Sun Jun 22, 2014 4:59 pm

Woohoo.... We have Light!!!
Attachments
ImageUploadedByTapatalk1403474360.686512.jpg
ImageUploadedByTapatalk1403474360.686512.jpg (192.64 KiB) Viewed 1809 times
User avatar
inthewoods
Teardrop Master
 
Posts: 112
Images: 25
Joined: Mon Aug 26, 2013 3:19 pm
Location: Saskatchewan, Canada
Top

Re: 5x10 renovation and build

Postby inthewoods » Sun Jun 22, 2014 5:03 pm

This afternoon I had time to get the battery main fuse, main switch and the fuse panel wired in. Here's a quick shot of the battery and switch panel.

Might be hard to see but there is an inline 30a fuse on the battery positive terminal which feeds the main disconnect switch which is a basic 12v 50a toggle switch.

The 20a push button breaker is for the 120v side of the electrical.
Attachments
ImageUploadedByTapatalk1403474591.553043.jpg
ImageUploadedByTapatalk1403474591.553043.jpg (211.58 KiB) Viewed 1808 times
ImageUploadedByTapatalk1403474576.286399.jpg
ImageUploadedByTapatalk1403474576.286399.jpg (201.21 KiB) Viewed 1808 times
User avatar
inthewoods
Teardrop Master
 
Posts: 112
Images: 25
Joined: Mon Aug 26, 2013 3:19 pm
Location: Saskatchewan, Canada
Top

Re: 5x10 renovation and build

Postby inthewoods » Sun Jun 22, 2014 5:06 pm

Inside the cabin I've built a false panel into one of the cabinets and the 12v fuse block will be in there. So now you see a fuse panel....
Attachments
ImageUploadedByTapatalk1403474783.169993.jpg
ImageUploadedByTapatalk1403474783.169993.jpg (231.56 KiB) Viewed 1807 times
User avatar
inthewoods
Teardrop Master
 
Posts: 112
Images: 25
Joined: Mon Aug 26, 2013 3:19 pm
Location: Saskatchewan, Canada
Top

Re: 5x10 renovation and build

Postby inthewoods » Sun Jun 22, 2014 5:08 pm

And then to hide the panel you lift that door up and the fuses disappear. Here's a photo:
Attachments
ImageUploadedByTapatalk1403474891.786469.jpg
ImageUploadedByTapatalk1403474891.786469.jpg (178.99 KiB) Viewed 1852 times
User avatar
inthewoods
Teardrop Master
 
Posts: 112
Images: 25
Joined: Mon Aug 26, 2013 3:19 pm
Location: Saskatchewan, Canada
Top

Re: 5x10 renovation and build

Postby inthewoods » Sun Jun 22, 2014 5:20 pm

Here's a question for anyone reading... My new battery metered at 12.67v when I hooked it up this afternoon. I've got it on my charger now and the charger is charging. What voltage should I expect to see when it is full? I'm wondering how long it will need to be on the charger. It's a 7 amp smart charger and a 100ah battery. I'm thinking it might need to charge for a while. :)
User avatar
inthewoods
Teardrop Master
 
Posts: 112
Images: 25
Joined: Mon Aug 26, 2013 3:19 pm
Location: Saskatchewan, Canada
Top

Re: 5x10 renovation and build

Postby working on it » Sun Jun 22, 2014 7:19 pm

inthewoods wrote:Here's a question for anyone reading... My new battery metered at 12.67v when I hooked it up this afternoon. I've got it on my charger now and the charger is charging. What voltage should I expect to see when it is full? I'm wondering how long it will need to be on the charger. It's a 7 amp smart charger and a 100ah battery. I'm thinking it might need to charge for a while. :)
From the thread No converter just battery charger? http://www.tnttt.com/viewtopic.php?f=30&t=55957x
working on it wrote:Hope this is my final post on this thread... First thing, I checked the battery voltage (12.8vdc, on my very accurate multi-meter), then did as I stated above, and let the charger do its "automatic" float/desulfate thing after 100% charge. Two hours later, after hovering around 15.6vdc (mostly around 15.54, as observed), the charger switched to the voltage display (= 13.4vdc), and to "std" (not AGM) and to "maintenance charge" (@ 2amps). I turned it off, repeated the steps, and one hour later, it did the same. Repeated this two more times. My conclusion is that the AGM battery, having reached 100% charge (12.8vdc being the normal full charge for AGMs) eventually reached a higher voltage than normal for AGMs (i.e.=13.4vdc). Then the charger would go to std/float at 2amps to maintain (2 amps is not the "recommended" default AGM charge). Verdict: battery saved, charger is adequate for my needs, but I will have to manually select charging state (10 amps or 15 amps, not 2 amps) as the charger fails to recognize that the AGM actually can lose capacity at 2 amp charging rate. Thanks to Dale M and bdosorn for their help and advice!
2013 HHRv "squareback/squaredrop", rugged, 4x8 TTT, 2225 lbs
  • *3500 lb Dexter EZ-Lube braked axle, 3000 lb.springs, active-progressive bumpstop suspension
  • *27 x 8.5-14LT AT tires (x 3) *Weight Distribution system for single-beam tongue
  • *100% LED's & GFCI outlets, 3x fans, AM/FM/CD/Aux. *A/C & heat, Optima AGM, inverter & charger(s)
  • *extended-run, on-board, 2500w generator *Coleman dual-fuel stove & lantern, Ikea grill, vintage skillet
  • *zinc/stainless front & side racks *98"L x 6" diameter rod & reel carrier tube on roof
173193172890148599
User avatar
working on it
2000 Club
2000 Club
 
Posts: 2189
Images: 457
Joined: Tue Oct 04, 2011 9:05 pm
Location: DFW Texas
Top

Re: 5x10 renovation and build

Postby inthewoods » Sun Jun 22, 2014 8:40 pm

Thanks for the information and reading through the whole thread helps.
User avatar
inthewoods
Teardrop Master
 
Posts: 112
Images: 25
Joined: Mon Aug 26, 2013 3:19 pm
Location: Saskatchewan, Canada
Top

Re: 5x10 renovation and build

Postby Shar » Sun Jun 22, 2014 11:57 pm

Good luck with the ongoing build and hope the rain finally stopped for you as well! :D
Sheryl
If all these people did it, so can I.
My build thread: Hybrid Foamie in Southern Alberta
User avatar
Shar
Teardrop Master
 
Posts: 276
Images: 8
Joined: Thu Oct 24, 2013 5:20 pm
Location: Alberta, Canada
Top

Re: 5x10 renovation and build

Postby inthewoods » Mon Jun 23, 2014 6:52 pm

Thanks yes the rain has slowed and there was a break long enough on the weekend for me to get the next bit of wood I needed for the project home. Thankfully I am working in the garage so in that respect I have a dry place to work.
User avatar
inthewoods
Teardrop Master
 
Posts: 112
Images: 25
Joined: Mon Aug 26, 2013 3:19 pm
Location: Saskatchewan, Canada
Top

5x10 renovation and build

Postby inthewoods » Tue Jul 01, 2014 11:29 pm

My family has been down sick for a few days this past week so only a little progress on the trailer. I might try to take the trailer out for a couple nights in a few weeks but realized that in order to do that I needed to get the running lights mounted on the back end so the galley has been on hold while I rebuilt the back "bumper." The original builder of this trailer had screwed a maple board to the back of the frame to make a spot wide enough to mount the lights however on his first trip in the mountains he got it hung up on a rock on a back road and broke it. So when I bought the trailer it looked like this:
ImageUploadedByTapatalk1404275013.832042.jpg
ImageUploadedByTapatalk1404275013.832042.jpg (172.24 KiB) Viewed 1725 times


It's not a great photo but shows where the lights are attached.

I'm going for a more finished and street friendly look so I've shaped some hardwood and have painted the wood black to match the trailer frame. I finished the black painting today and will put some clear sealant on over next couple days. The shape of the new bumper will allow me to mount the license plate in the centre of the bumper and the tail lights in about the same location as before. Here's a quick photo after the last coat of black paint went on. The bumper is hanging in the make shift paint booth - aka hanging from the open garage door. :)

ImageUploadedByTapatalk1404275359.747397.jpg
ImageUploadedByTapatalk1404275359.747397.jpg (191.3 KiB) Viewed 1725 times
User avatar
inthewoods
Teardrop Master
 
Posts: 112
Images: 25
Joined: Mon Aug 26, 2013 3:19 pm
Location: Saskatchewan, Canada
Top

Re: 5x10 renovation and build

Postby inthewoods » Sun Jul 06, 2014 8:31 pm

Successful weekend! I was able to get a whole bunch of things done. Got the rear bumper done, clear coated the the inside wall of the galley, redid all the running lights and wiring for the trailer chassis, and removed and lowered the fenders. I'm really happy with the results and progress. I could now take trailer on the road!
User avatar
inthewoods
Teardrop Master
 
Posts: 112
Images: 25
Joined: Mon Aug 26, 2013 3:19 pm
Location: Saskatchewan, Canada
Top

Re: 5x10 renovation and build

Postby inthewoods » Sun Jul 06, 2014 8:38 pm

Galley wall photo. The wall separating the galley from the cabin was a piece of 3/4" spruce plywood and there wasn't any way to make it smooth enough to paint or varnish so I opted to clear coat a piece of 1/4 birch that I had on hand and then I installed it over the wall. Now the entire galley is clear coated birch. I like it!
ImageUploadedByTapatalk1404697112.667289.jpg
ImageUploadedByTapatalk1404697112.667289.jpg (193.59 KiB) Viewed 1667 times
User avatar
inthewoods
Teardrop Master
 
Posts: 112
Images: 25
Joined: Mon Aug 26, 2013 3:19 pm
Location: Saskatchewan, Canada
Top

5x10 renovation and build

Postby inthewoods » Sun Jul 06, 2014 8:48 pm

Here are the photos of the bumper build...

Once the black paint dried well last weekend I started adding clear gloss over it. 5 coats of gloss later and I started mounting the lights and license plate. I also found a nice LED license plate light at Canadian Tire and mounted it over the plate. I'm happy with how it looks.
ImageUploadedByTapatalk1404697495.766697.jpg
ImageUploadedByTapatalk1404697495.766697.jpg (192.65 KiB) Viewed 1665 times


After mounting the lights I built the wiring harness on the back and covered it all in a piece of split loom plastic covering. Please excuse the messy workbench...

ImageUploadedByTapatalk1404697596.066441.jpg
ImageUploadedByTapatalk1404697596.066441.jpg (214.99 KiB) Viewed 1665 times


Finally I mounted the new bumper to the floor and trailer frame. Here is the final results...

ImageUploadedByTapatalk1404697713.866563.jpg
ImageUploadedByTapatalk1404697713.866563.jpg (193.59 KiB) Viewed 1665 times
User avatar
inthewoods
Teardrop Master
 
Posts: 112
Images: 25
Joined: Mon Aug 26, 2013 3:19 pm
Location: Saskatchewan, Canada
Top

PreviousNext

Return to Build Journals

Who is online

Users browsing this forum: jdeleon and 5 guests