Oregon Teardrop

...ask your questions in the appropriate forums BUT document your build here...preferably in a single thread...dates for updates, are appreciated....

Re: Oregon Teardrop

Postby KCStudly » Wed Jul 22, 2015 7:24 pm

You won't have time to build a trailer, so once you get a rough idea of the profile you will want to get the trailer in hand before you decide on much of the details or start cutting wood. Even tho they may be advertised as a certain nominal size, I would want to get my hands on it first to measure actuals. You never know what tolerances they may have been working to that day.
KC
My Build: The Poet Creek Express Hybrid Foamie

Poet Creek Or Bust
Engineering the TLAR way - "That Looks About Right"
TnTTT ORIGINAL 200A LANTERN CLUB = "The 200A Gang"
Green Lantern Corpsmen
User avatar
KCStudly
Donating Member
 
Posts: 9640
Images: 8169
Joined: Mon Feb 06, 2012 10:18 pm
Location: Southeastern CT, USA

Re: Oregon Teardrop

Postby sincere01 » Wed Jul 22, 2015 8:03 pm

KCStudly wrote:You won't have time to build a trailer, so once you get a rough idea of the profile you will want to get the trailer in hand before you decide on much of the details or start cutting wood. Even tho they may be advertised as a certain nominal size, I would want to get my hands on it first to measure actuals. You never know what tolerances they may have been working to that day.


Totally. I already ordered the trailer and its on the truck and on its way to my house currently
Cheers,
Scott

My build thread: http://tnttt.com/viewtopic.php?f=50&t=63853
User avatar
sincere01
Teardrop Advisor
 
Posts: 64
Joined: Mon Jul 20, 2015 5:03 pm

Re: Oregon Teardrop

Postby sincere01 » Sat Jul 25, 2015 11:17 pm

Here is a preliminary drawing of one possibility for a profile. Its a little more simple and square looking than I had originally imagined and prefer. But it would give me more space to add a bunk for the kids inside and generally provide more space. I am getting the northern tool trailer which is supposed to be 5'x8'. I set the the flat on the bottom to be the length of the platform and the curves to stick past it. This adds a little more length and room to the trailer. Also, I realize those 8 inch radii are going to be really tight to bend the plywood around, but I'm pretty sure if I build a simple steam box and steam it before curving it I can do it without it cracking. Probably something I need to experiment with before cutting the template.

The line near the bottom of the template provides a 3/8" lip that can sit on the edge of the floor and still be screwed in from the side. Plus it make two surfaces to glue from. Hoping this is a good idea. If anyone had a reason why not to do that please let me know.

The overall length requires two sheets of plywood which I intend to connect with a half lap and then maybe even glue some dowels going through the half lap (not sure if thats necessary but might make me feel better). I'll make sure the seams of the inner and outer skin are staggered.

Not sure if I will stick with this profile.. But as I already said I think it would function well.
Attachments
Teardrop 1.jpg
Teardrop 1.jpg (98.63 KiB) Viewed 3311 times
Teardrop.jpg
Teardrop.jpg (137.74 KiB) Viewed 3311 times
Cheers,
Scott

My build thread: http://tnttt.com/viewtopic.php?f=50&t=63853
User avatar
sincere01
Teardrop Advisor
 
Posts: 64
Joined: Mon Jul 20, 2015 5:03 pm
Top

Re: Oregon Teardrop

Postby tony.latham » Sat Jul 25, 2015 11:51 pm

Scott:

I think the floor overlap is a good idea. I do the same with my sandwiched walls. I prefer to go with a 3/4" plywood skeletanized core, and then 1/4" skin on the interior and exterior sides. So with my walls, it's the 1/4" skin that overlaps the floor. It also makes it easier when your setting the walls.

Your lapped joints will be fine without the dowels as long as you create good glue surfaces to join –and your lap is 4-6".

You might consider putting your lap joint forward of your hatch spar. That way the joint will be supported by both the floor and the ceiling. It's going to take you three sheets of plywood anyway for the two walls.

Now: after re-reading your post, it sounds like you are going with sandwiched all construction. In this photo of my last set of walls, you'll see where I stuck the skeleton joint and then butted the 8' skins over it to form the 10' wall:

Image

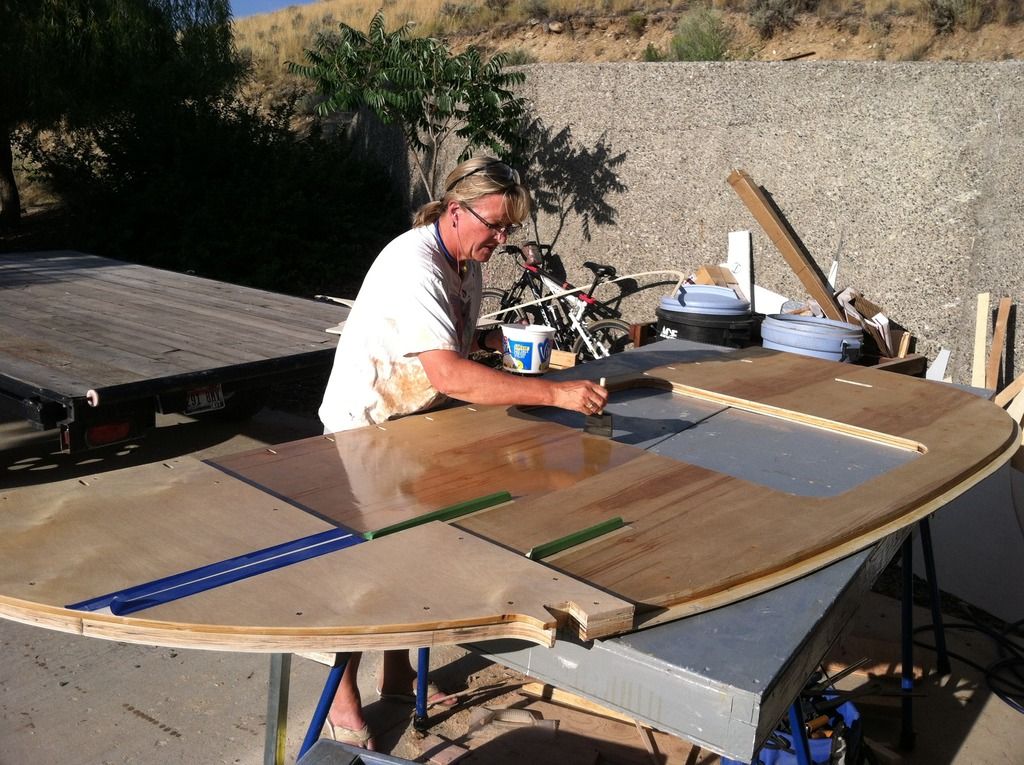
Since I use Steve Fredrick's hatch method, there's a piece of 1/2" pywood that goes over the skin in the galley that really strengthens it up. Here's my better-half putting on a coat of poly. She's good at it.

Image

Tony :frightened:
User avatar
tony.latham
Gold Donating Member
 
Posts: 7073
Images: 17
Joined: Mon Jul 08, 2013 4:03 pm
Location: Middle of Idaho on the edge of nowhere
Top

Re: Oregon Teardrop

Postby sincere01 » Sun Jul 26, 2015 12:51 am

tony.latham wrote:Scott:

I think the floor overlap is a good idea. I do the same with my sandwiched walls. I prefer to go with a 3/4" plywood skeletanized core, and then 1/4" skin on the interior and exterior sides. So with my walls, it's the 1/4" skin that overlaps the floor. It also makes it easier when your setting the walls.

Your lapped joints will be fine without the dowels as long as you create good glue surfaces to join –and your lap is 4-6".

You might consider putting your lap joint forward of your hatch spar. That way the joint will be supported by both the floor and the ceiling. It's going to take you three sheets of plywood anyway for the two walls.

Now: after re-reading your post, it sounds like you are going with sandwiched all construction. In this photo of my last set of walls, you'll see where I stuck the skeleton joint and then butted the 8' skins over it to form the 10' wall:

Image

Since I use Steve Fredrick's hatch method, there's a piece of 1/2" pywood that goes over the skin in the galley that really strengthens it up. Here's my better-half putting on a coat of poly. She's good at it.

Image

Tony :frightened:


Wow, thanks for that. I am planning on making a skeleton out of it. I just haven't drawn the cut outs yet. I'll do some googling as well as searching on tnttt, but if you have any good links to that hatch method I'd like to check it out.
Cheers,
Scott

My build thread: http://tnttt.com/viewtopic.php?f=50&t=63853
User avatar
sincere01
Teardrop Advisor
 
Posts: 64
Joined: Mon Jul 20, 2015 5:03 pm

Top

Re: Oregon Teardrop

Postby noseoil » Sun Jul 26, 2015 7:47 am

Use dowel pins for butt joints & spline joints or lap joints for joining sheet edges, but no need to mix & match. I used the pins for my skeleton frame, but only where there was a web.

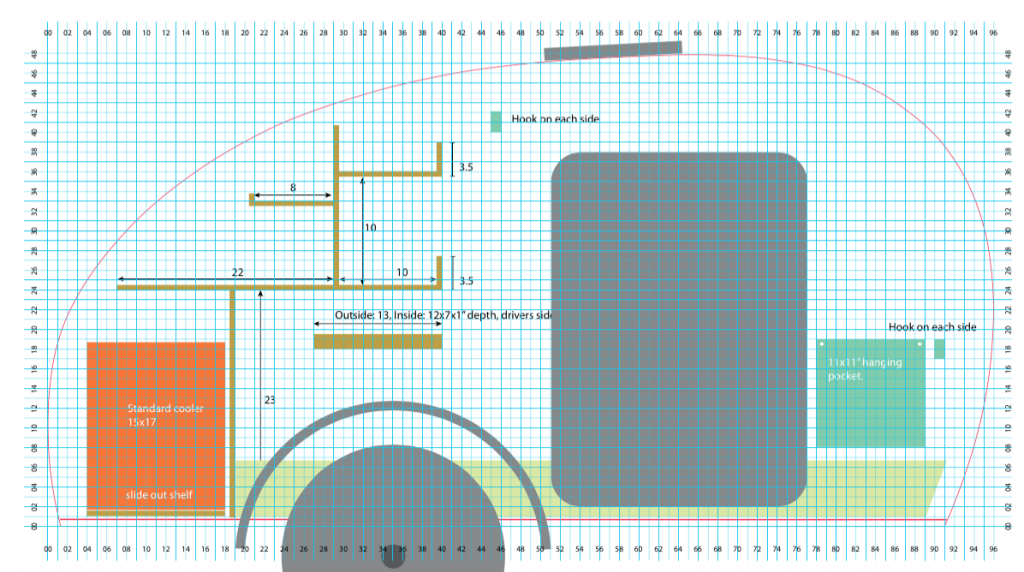
Here's a sketch of my hatch detail at the outer walls, just a cartoon. It might give you another idea about the edge where the hatch seals & meets the walls. Just make sure to leave some clearance (slop) at the side wall, so it isn't a tight fit between the hatch & wall. A 1/4" gap at the wall, where the hatch can open & close, will make life much easier. You can use 1/4" shims against the walls, to build the hatch to fit, so everything fits well. If there's a small amount of difference between the sides, it doesn't matter, since the shims will still let you have a good fit once it's skinned and in place.

I cut the ribs for the hatch last year, so they would match the rear profile & curve, but still haven't done the assembly of the hatch yet. Once I get the skins in place, I'll start building the hatch. I'm still working slowly.....

Image
Build log: viewtopic.php?f=50&t=60248
The time you spend planning is more important than the time you spend building.........

137905
User avatar
noseoil
1000 Club
1000 Club
 
Posts: 1822
Images: 670
Joined: Sun Apr 27, 2014 8:46 am
Location: Raton, New Mexico, living the good life!
Top

Re: Oregon Teardrop

Postby tony.latham » Sun Jul 26, 2015 10:18 am

but if you have any good links to that hatch method I'd like to check it out.


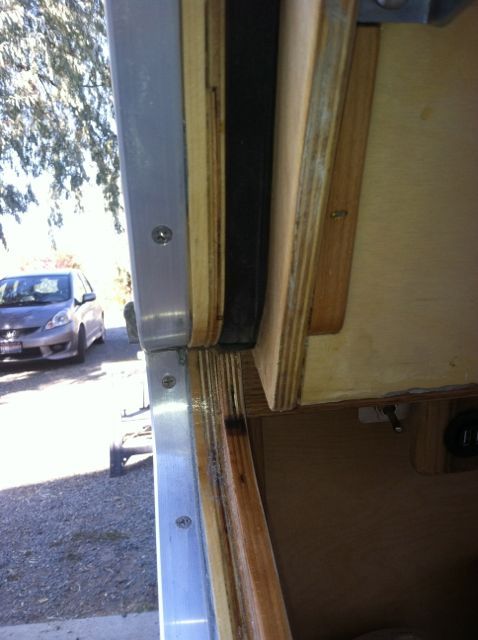
Fredrick's hatch method creates a lip that sticks up from the wall into the hatch that meets the seal in the hatch and does a great job of keeping out dust and water. There's also no springback (or hatch warpage) as other builders deal with once in a while.

Image

There's a tapered gusset that goes on the hatch that gives it stiffness:

Image

Image

Image

Image

Now, anbody that can figure out how to build this system by looking at my photos is smarter than me. I'd highly recommend purchasing Steve Fredrick's Teardrop Builder's Shop Manual. It's about 250 pages laiden with many photographs and in-depth explanations that are well written. I consider myself fortunate that I stumbled upon it prior to my first build. There's a lot more info in it than just hatch building –such as building from the inside out. If you search my posts, you'll see a re-occurring them: get a copy of Fredrick's manual. Full disclosure: Other than an exchange of emails with him on my first build, I don't know the guy.

I don't think he's associated with Fredrick's of Hollywood but who knows? :roll: :frightened:

Do a Google Search on this forum for "Fredrick's." You'll come up with well over a hundred hits on it. I think there may be a sticky on it. :shock:

Tony
User avatar
tony.latham
Gold Donating Member
 
Posts: 7073
Images: 17
Joined: Mon Jul 08, 2013 4:03 pm
Location: Middle of Idaho on the edge of nowhere
Top

Re: Oregon Teardrop

Postby sincere01 » Tue Jul 28, 2015 12:30 am

Trailer is supposed to arrive on Wednesday. Hoping maybe I'll put it together this weekend and start getting some work done. If not will have to wait till end of August after my 2.5 weeks of vacation. Got a little more drawing done on sketchup. Decided I want to router around the entire profile in the ACX plywood. I think I will end up doing the frederick hatch method. But haven't had a chance to draw that style of hatch yet. Also need to draw all the cabinets and decide how I want to lay out everything.

Here is the the frame ply with the routing shown. Still haven't bothered to draw the skeletonization (probably not a word) yet.
Teardrop Profile.jpg
Teardrop Profile.jpg (75.19 KiB) Viewed 3246 times


Here is a sideview with some of the sparring and a basic hatch but not fredericks method. How far apart does everyone place their spars?
Teardrop Side view.jpg
Teardrop Side view.jpg (89.41 KiB) Viewed 3246 times


Here is a quick view of the outside but haven't decided on doors nor drawn in skylight or fan/vent.
Teardrop front sideview.jpg
Teardrop front sideview.jpg (72.92 KiB) Viewed 3246 times
Cheers,
Scott

My build thread: http://tnttt.com/viewtopic.php?f=50&t=63853
User avatar
sincere01
Teardrop Advisor
 
Posts: 64
Joined: Mon Jul 20, 2015 5:03 pm
Top

Re: Oregon Teardrop

Postby noseoil » Tue Jul 28, 2015 9:51 am

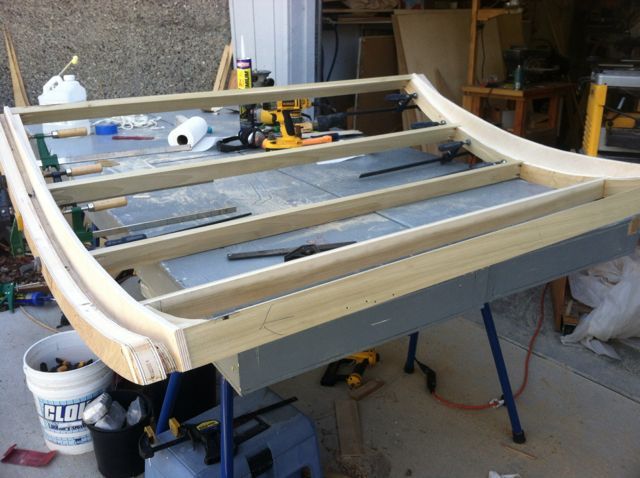
How many spars? It depends.... I didn't use too many spars in the front, as you can see from the pictures. The 1/8" plywood is stronger once it bends into a curve, but it still needs some support. Since the headboard's partition panels were lofted to the inner curve of the wall, it helps support the curve of the plywood where it bends down to the front and keeps it from buckling. This acts as a stiffener for the plywood & the plywood acts as a backing for the cabinet. Because of the cabinet, the headliner doesn't need too much support from inside & there are just enough spars to act as a support for the outer skin, once it's in place. The insulation also helps support things until the glue dries and it becomes one structure. Again, the strength comes from the sandwich panel construction. Each element isn't too strong by itself (1/8" plywood & 1X2 spars are pretty wimpy), but with the glue & layers combined, it sets up into a strong, light structure. Sorry to take up this amount of bandwidth on the thread, but thought it might help to show the inages.

Image

Image

Image

Image

Image
Build log: viewtopic.php?f=50&t=60248
The time you spend planning is more important than the time you spend building.........

137905
User avatar
noseoil
1000 Club
1000 Club
 
Posts: 1822
Images: 670
Joined: Sun Apr 27, 2014 8:46 am
Location: Raton, New Mexico, living the good life!
Top

Re: Oregon Teardrop

Postby tony.latham » Tue Jul 28, 2015 3:04 pm

Here's the profile of a little 8-footer I built. Note that it has two rear bulkheads and that the countertop extends into the cabin to act as the lower shelf (one piece). Both bulkheads are installed with a mortise into the sandwiched walls. The top bulkhead joins the countertop/shelf piece.

Image

I stole this from my first teardrop, made by Hunter, that I beleive was bought out by Lil' Guy for their Silver Shadow line. It's the way I've built all three of my 'drop projects. It's functional and strong.

If you are serious about a Fredrick's hatch, I wouldn't advise it without getting a copie of his manual. (And again, I'm not connected to him.) The side pieces of the hatch consist of a 2" piece of the wall, a 3/4" spacer resessed for the tongue, and the 1/2" gusset. The bottom, or the wall part consists of the sandwich, an 1/8" spacer then the 1/2" lip. Way over my paygrade to figure out.

:frightened:

Tony
User avatar
tony.latham
Gold Donating Member
 
Posts: 7073
Images: 17
Joined: Mon Jul 08, 2013 4:03 pm
Location: Middle of Idaho on the edge of nowhere
Top

Re: Oregon Teardrop

Postby sincere01 » Sat Aug 01, 2015 9:45 pm

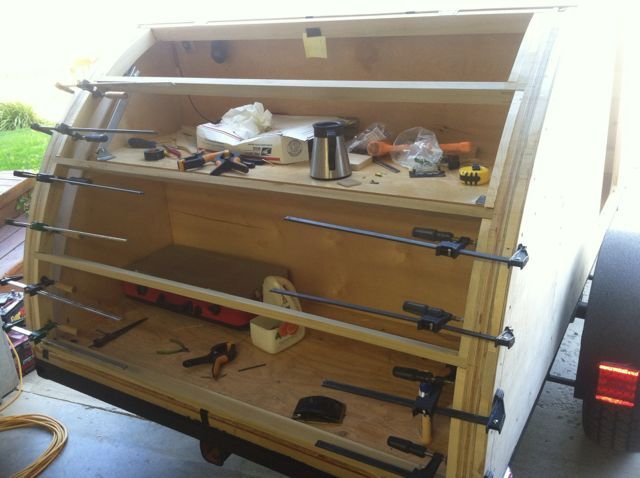
Trailer arrived today. Got it all put together and squared up. Left the fenders and lights off so I can build easier.

IMG_3388.JPG
IMG_3388.JPG (142.02 KiB) Viewed 3149 times


I also found some good deals on plywood this week. A cabinet shop had ordered 150 pieces of 3/4" birch for a customer who couldn't pay. They listed them on craigslist for $32 a sheet, $14 per sheet cheaper than I could find locally. Also got a good deal on some 3/8" ply used for subfloors.

image1.JPG
image1.JPG (135.42 KiB) Viewed 3149 times
Cheers,
Scott

My build thread: http://tnttt.com/viewtopic.php?f=50&t=63853
User avatar
sincere01
Teardrop Advisor
 
Posts: 64
Joined: Mon Jul 20, 2015 5:03 pm
Top

Re: Oregon Teardrop

Postby Vedette » Wed Aug 05, 2015 10:27 am

You look to be well on your way. :thumbsup:
We will follow your build over those long winter nights while we are home instead of camping. :thinking:
Good Roads
Brian & Sandi
Good Roads
Brian & Sandi
Here is a link to my Build Journal
viewtopic.php?f=50&t=50912
Image109106109111109110138766
User avatar
Vedette
Silver Donating Member
 
Posts: 5141
Images: 443
Joined: Thu Dec 01, 2011 4:28 am
Location: Westbank B.C.
Top

Re: Oregon Teardrop

Postby sincere01 » Fri Sep 11, 2015 5:10 pm

Sorry its been so long since I've posted. I was on vacation for a while and have been busy since I got back.

I am using my brother-in-law's garage which has been quite a mess. I spent a day cleaning it up and building a plywood/lumber rack to keep everything organized. I figure that day of work will save me a lot of time down the road.

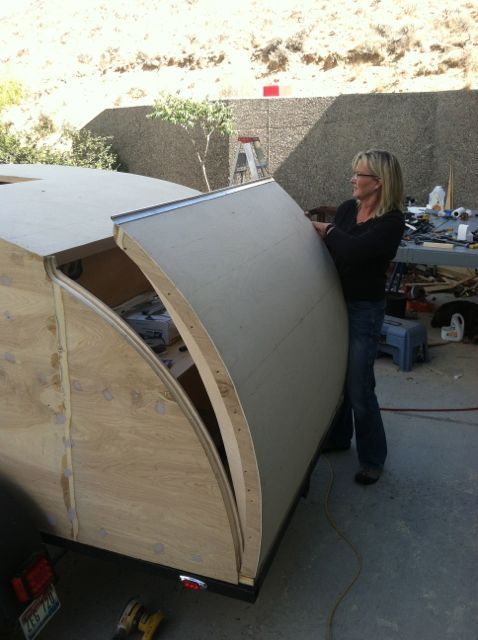
Not much has gotten done on the actual trailer. I extended a piece of OSB with a half-lap joint to use as a guide template for the router when I start making my walls. Here is a picture of it being glued up:

IMG_3580 (1).JPG
OSB Template Glue Up
IMG_3580 (1).JPG (40.46 KiB) Viewed 2973 times


I have started drawing the outline and hope to cut it within the next week and start cutting out my sidewalls.

I have been pondering something lately and was wondering if anyone had thoughts or advice on it. I was able to obtain some pretty nice 3/4" birch ply for cheap on craigslist. Because this isn't ACX or CDX and it looks nice I thought of a way I might be able to save money, reduce weight, and reduce cost. Most of the time when using plywood for the walls it seems people skeletonize it. This helps with weight and insulation. My thought is to skeletonize it but set the router depth so it only goes through 5/8" of the wood, leaving an 1/8". What this would do is leave one side completely flat and useful as a finish piece but the other side is still cutting out a bunch of weight and leaves an area for insulation. I would use the side that is not cut through as the inside of the teardrop and be able to finish it as is. The insulation would go in and then a 1/8" piece would need to skin the outside.

One difficulty I have thought about is that is A LOT of material to hog out with a router and would take a considerable amount of time. I also would be concerned running wires through a thinner area. The good thing is I wouldn't need to skin the inside which would reduce the weight of needing another piece and reduce costs by not needing to buy another sheet of ply for that.

Let me know what you think. Have you ever seen this done before? What potential problems do you see that I haven't thought about.
Cheers,
Scott

My build thread: http://tnttt.com/viewtopic.php?f=50&t=63853
User avatar
sincere01
Teardrop Advisor
 
Posts: 64
Joined: Mon Jul 20, 2015 5:03 pm
Top

Re: Oregon Teardrop

Postby KCStudly » Sat Sep 12, 2015 11:16 am

You nailed it, too much work to hog out. You would likely need to add the cost of a worn out router into the budget, and I bet that would shift the cost factor back over to doing thin outer skins.

Another thing to consider is what do you want your overall wall thickness to be? Door and window hardware, trim, etc. Pick your hardware to work with a specific wall thickness and work toward that. The effort to pad out areas that extra 1/8 inch might not be worth the difference of having 1/8 inch thinner walls.
KC
My Build: The Poet Creek Express Hybrid Foamie

Poet Creek Or Bust
Engineering the TLAR way - "That Looks About Right"
TnTTT ORIGINAL 200A LANTERN CLUB = "The 200A Gang"
Green Lantern Corpsmen
User avatar
KCStudly
Donating Member
 
Posts: 9640
Images: 8169
Joined: Mon Feb 06, 2012 10:18 pm
Location: Southeastern CT, USA
Top

Re: Oregon Teardrop

Postby sincere01 » Sun Sep 13, 2015 9:23 pm

Thanks kc! I had been contemplating it for a while but didn't think i was gonna go through with it. It's nice to have confirmations from others about my concerns. I think the time saved and money saved from router bits or even burning up a motor will more than outweigh the weight and cost of a sheet of 1/8 ply
Cheers,
Scott

My build thread: http://tnttt.com/viewtopic.php?f=50&t=63853
User avatar
sincere01
Teardrop Advisor
 
Posts: 64
Joined: Mon Jul 20, 2015 5:03 pm
Top

PreviousNext

Return to Build Journals

Who is online

Users browsing this forum: No registered users and 19 guests