MyAway build - Updates for space usage & organization

...ask your questions in the appropriate forums BUT document your build here...preferably in a single thread...dates for updates, are appreciated....

Postby aggie79 » Thu Mar 04, 2010 9:47 am

Sharon,

I'm happy to see that you worked out the separation of the propane and electrical. Your "kitchen" is really looking fantastic! I really like the way you constructed your doors.

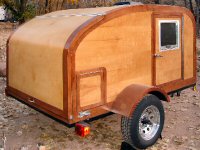
As far as CPES making pine less resistant to impact, I can tell you from experience that it is a fact. In the front of my teardrop I have a "roll pan" constructed to a small radius. Rather than trying to fabricate the part below the floor out of plywood rinbs and skin, I used solid pine and planed it to the radius. I chose the pine for its light weight and easy cutting. After it was shaped, I coated it with 2 coats of CPES, and it became quite solid.

Keep up the good work. Maybe some day an interloper from Texas will show up to IRG so I can see your TTT.

Tom
Tom (& Linda)
For build info on our former Silver Beatle teardrop:
Build Thread

93503
User avatar
aggie79
Super Duper Lifetime Member
 
Posts: 5405
Images: 686
Joined: Tue Aug 07, 2007 5:42 pm
Location: Watauga, Texas

Postby S. Heisley » Thu Mar 04, 2010 3:24 pm

Ward wrote:
I like your stove where did you get it?


Thanks, Ward. The stove is a Wedgewood, distributed by Atwood Mobile Products. You can get it at most RV supply stores or probably via the internet.
User avatar
S. Heisley
Super Lifetime Member
 
Posts: 8866
Images: 495
Joined: Mon Sep 17, 2007 10:02 am
Location: No. California

Postby S. Heisley » Thu Mar 04, 2010 3:55 pm

Thanks to everyone for your support and good comments. It keeps me moving!

Shadow Catcher wrote:
How about next year at the international gathering


Unfortunately, IRG only happens every other year...unless you can talk Dean into changing that! ;) :lol: By the way, congrats on selling your Mega Mini!

Aggie79:
Hi, Tom: I want to see your finished teardrop, too! It's good to know that you've had success with CPES. I've got my 'sticks' covered with CPES and Urethane and I can already see that it will be better. I might as well go ahead with my experiment and see exactly how much of a difference it will make in the depth/amount of denting. Like you, I am optimistic.

As far as getting a chance to see everyone’s trailers and meet everybody, I have friends and family scattered from the Atlantic to the Pacific and may someday just tool across this wonderful continent of ours, visiting. But, that will have to wait until I get a ‘younger' tow vehicle. Let's just hope I still feel young enough then! :worship:
User avatar
S. Heisley
Super Lifetime Member
 
Posts: 8866
Images: 495
Joined: Mon Sep 17, 2007 10:02 am
Location: No. California
Top

Postby Shadow Catcher » Thu Mar 04, 2010 4:07 pm

I was thinking about the ITG in Minden Nebraska next year. We will have ours shaken down and the bugs worked out by then, I hope, and you will have yours done by then.
User avatar
Shadow Catcher
Donating Member
 
Posts: 6008
Images: 234
Joined: Sat Apr 11, 2009 8:26 pm
Location: Metamora, OH
Top

Postby S. Heisley » Thu Mar 04, 2010 4:10 pm

Uh Huh!

But, that will have to wait until I get a ‘younger' tow vehicle. Let's just hope I still feel young enough then!


I do want to visit Yellowstone next year..... :thinking:
User avatar
S. Heisley
Super Lifetime Member
 
Posts: 8866
Images: 495
Joined: Mon Sep 17, 2007 10:02 am
Location: No. California
Top

Postby bve » Thu Mar 04, 2010 8:59 pm

S. Heisley wrote:I'm finding that, with possible gas issues, you can't ask too many people.
It sounds like you have that problem solved, which is good news. I usually don't like to talk to others about my gas issues. :oops: :lol:

I sure would like to see a close-up of that handle rosette detail, did you make those yourself?

Image
Burke

KISS > COMPLEX
Image
Image

Build threads converted to PDFs.
As of 2008-08-08 I have added more build threads to the pdf collection
User avatar
bve
500 Club
 
Posts: 694
Images: 98
Joined: Sat Aug 25, 2007 1:44 am
Location: Edmonton, Alberta, Canada
Top

Postby S. Heisley » Thu Mar 04, 2010 9:46 pm

BVE wrote: I usually don't like to talk to others about my gas issues.

Oh, I dunno. I usually blame it on the dog! :lol:

Here ya go, Burke:

Image

Simple, huh? The cabinets were going to need something to set them off a bit, so, I looked around at the blue and yellow big box store and found these. All you do is drill a hole through the center and clean it up with a small rat-tail file or a hand-held drill bit. (As you can see, the drill will slip some. The ones in the picture aren’t cleaned up yet.) Slap a couple generous coats of urethane on them; let them dry; then, slip them on the screw. I may not glue them on….might want to change my mind later to change the look.
User avatar
S. Heisley
Super Lifetime Member
 
Posts: 8866
Images: 495
Joined: Mon Sep 17, 2007 10:02 am
Location: No. California
Top

Postby bve » Thu Mar 04, 2010 11:57 pm

Thanks for the close-up Sharon, that's great idea to add a nice detail.
Burke

KISS > COMPLEX
Image
Image

Build threads converted to PDFs.
As of 2008-08-08 I have added more build threads to the pdf collection
User avatar
bve
500 Club
 
Posts: 694
Images: 98
Joined: Sat Aug 25, 2007 1:44 am
Location: Edmonton, Alberta, Canada
Top

Postby S. Heisley » Sun Mar 07, 2010 5:50 pm

As promised, here are the results of the CPES vs. Urethane denting tests. The purpose of this test was to find out which one would dent the most and if I should sand the Urethane off my trim and recoat with CPES followed by new coatings of Urethane.

I cut three one foot pieces of trim board and sanded each. One was coated twice with CPES; one, twice with Spar Urethane; and one, twice with CPES followed by two coats of Spar Urethane. Each was given at least 4 hours between coatings and a final cure time of more than 48 hours. The one with both CPES and Urethane on it was given 24 hours between the CPES and the Urethane coatings.

First, I tried a pressure test. I laid them, equally spaced out on a weighing scale and applied the edge of a metal ruler to them, pressing on either side of the middle board, until the scale read 50 pounds.

Image

Nothing happened! So, I tried 60 pounds and still couldn’t get as much as a whisper of a dent out of any of them!

Okay, on to the dreaded can test! Fearing this one could get messy (I was using a can of condensed milk), I took it outside:

Image

I tested each board individually, rolling the can off or slipping the can off on its head from a height of 2 feet. I was able to get dents in all of the sticks this way.

Next, I put all the sticks together and compared the dents visually and by touch:

Image

My conclusion? It made no difference. They all dented equally; so, I won’t be refinishing my trim to add CPES underneath the Urethane.
User avatar
S. Heisley
Super Lifetime Member
 
Posts: 8866
Images: 495
Joined: Mon Sep 17, 2007 10:02 am
Location: No. California
Top

Postby Cliffmeister2000 » Sun Mar 07, 2010 5:57 pm

Interesting test. It would be nice to do comparison tests on poplar, maple, and oak. A can from 2 feet would put a pretty good dent in a toe!
God Bless

Cliff

♥God. ♥People.
1 John 4:9-11

My Teardrop build pictures
User avatar
Cliffmeister2000
Titanium Donating Member
 
Posts: 3622
Images: 157
Joined: Thu Jul 26, 2007 10:18 pm
Location: Phoenix, AZ
Top

Postby S. Heisley » Sun Mar 07, 2010 6:09 pm

I was surprised at the results. Being a fan of CPES, I really expected it would be better. But, when CPES dries in the bottom of a margarine tub, you can remove it and it is like a piece of soft rubber. My guess is that it just lets the force move right on through. Nothing really split open on either the CPES or the Urethane coated wood. It just dented.
User avatar
S. Heisley
Super Lifetime Member
 
Posts: 8866
Images: 495
Joined: Mon Sep 17, 2007 10:02 am
Location: No. California
Top

Postby Shadow Catcher » Sun Mar 07, 2010 7:53 pm

I would think you would want a finish that penetrates and strengthens the wood fiber. I used Daly's Foorfin on the heart pine flooring in our 100+YO house 30 years ago and will be patching worn places this year. Does it have dents and dings, you bet, but when I did it the first time I did not sand out the burn marks from the old coal/wood stove (I knew it was there from the thimble in the chimney, after I found the burn marks).

Floorfin is still available from http://www.dalyswoodfinishes.com

Most importantly, each dent and ding and scrape from now on will have a memory attached, and you know that can be a good thing. memories are the one thing that can not be taken away from you, unless you have a memory as bad as mine. :D
User avatar
Shadow Catcher
Donating Member
 
Posts: 6008
Images: 234
Joined: Sat Apr 11, 2009 8:26 pm
Location: Metamora, OH
Top

Postby S. Heisley » Sun Mar 07, 2010 8:58 pm

Shadow Catcher wrote:
memories are the one thing that can not be taken away from you, unless you have a memory as bad as mine.


:lol: Now, that's a good one! I'll have to commit it to memory! :lol:
User avatar
S. Heisley
Super Lifetime Member
 
Posts: 8866
Images: 495
Joined: Mon Sep 17, 2007 10:02 am
Location: No. California
Top

Postby bve » Sun Mar 07, 2010 8:58 pm

And the lesson learned...

...don't throw canned goods at your wood cabinets. ;)
Burke

KISS > COMPLEX
Image
Image

Build threads converted to PDFs.
As of 2008-08-08 I have added more build threads to the pdf collection
User avatar
bve
500 Club
 
Posts: 694
Images: 98
Joined: Sat Aug 25, 2007 1:44 am
Location: Edmonton, Alberta, Canada
Top

Postby S. Heisley » Sun Mar 07, 2010 9:09 pm

:rofl: :rofl2:
User avatar
S. Heisley
Super Lifetime Member
 
Posts: 8866
Images: 495
Joined: Mon Sep 17, 2007 10:02 am
Location: No. California
Top

PreviousNext

Return to Build Journals

Who is online

Users browsing this forum: No registered users and 14 guests