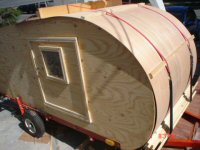
Compact family camper Build - Always something...

...ask your questions in the appropriate forums BUT document your build here...preferably in a single thread...dates for updates, are appreciated....

Re: Compact family camper Build - Aluminum Diamond Plate

Postby KCStudly » Mon Nov 10, 2014 8:12 pm

That's looking pretty nifty! :thumbsup: :applause:

You've reminded me that I need to plan for some blocking to allow for the attachment of the top of the diamond plate I plan to put on the front of TPCE, and I need to do it sooner than later.

That J-molding is a nice way to fasten and trim the top of the plate. Couple of questions: is it predrilled under the lip for mounting, and where did you get it?
KC
My Build: The Poet Creek Express Hybrid Foamie

Poet Creek Or Bust
Engineering the TLAR way - "That Looks About Right"
TnTTT ORIGINAL 200A LANTERN CLUB = "The 200A Gang"
Green Lantern Corpsmen
User avatar
KCStudly
Donating Member
 
Posts: 9616
Images: 8169
Joined: Mon Feb 06, 2012 10:18 pm
Location: Southeastern CT, USA

Re: Compact family camper Build - Aluminum Diamond Plate

Postby noseoil » Mon Nov 10, 2014 10:38 pm

Ryu, looks like things are moving along very well for you. The diamond plate looks great and should be good for rocks, dings and general wear & tear. Excellent!
Build log: viewtopic.php?f=50&t=60248
The time you spend planning is more important than the time you spend building.........

137905
User avatar
noseoil
1000 Club
1000 Club
 
Posts: 1820
Images: 669
Joined: Sun Apr 27, 2014 8:46 am
Location: Raton, New Mexico, living the good life!

Re: Compact family camper Build - Aluminum Diamond Plate

Postby ryuandwings » Tue Nov 11, 2014 3:21 pm

KCStudly wrote:That's looking pretty nifty! :thumbsup: :applause:

You've reminded me that I need to plan for some blocking to allow for the attachment of the top of the diamond plate I plan to put on the front of TPCE, and I need to do it sooner than later.

That J-molding is a nice way to fasten and trim the top of the plate. Couple of questions: is it predrilled under the lip for mounting, and where did you get it?


I got my J-cap molding from here. http://www.eagle-aluminum.com/Aluminum- ... p_256.html
There are predrilled holes and slots for mounting I think every 4" or so.
Image
I enlarged holes with counter sink to get the flat head screws away from the gap.

As for the blocking, that will be wise thing to do.
I'm not concerned at the wall since there are solid plywood there, but at the front of the trailer, I'm mounting the J-cap at the roof spars.

Thanks. :beer:
User avatar
ryuandwings
Teardrop Master
 
Posts: 187
Images: 61
Joined: Wed Feb 13, 2013 5:22 am
Location: West Tennessee
Top

Re: Compact family camper Build - Aluminum Diamond Plate

Postby ryuandwings » Tue Nov 11, 2014 3:25 pm

noseoil wrote:Ryu, looks like things are moving along very well for you. The diamond plate looks great and should be good for rocks, dings and general wear & tear. Excellent!

Thank you.

It's funny, I feel like I'm moving and getting close to finishing, but that same time I'm finding more things to work out. I guess I'm being more careful since things I'm working on are finishing stuff and I will see all these details when I finish.
But all I can do is one step at a time. I hate to rush something and ruin the whole build. :)
User avatar
ryuandwings
Teardrop Master
 
Posts: 187
Images: 61
Joined: Wed Feb 13, 2013 5:22 am
Location: West Tennessee
Top

Re: Compact family camper Build - Aluminum Diamond Plate

Postby Johnysteam » Tue Nov 11, 2014 5:11 pm

Looks very neat and professional. A very desirable trailer to own
User avatar
Johnysteam
Silver Donating Member
 
Posts: 80
Images: 40
Joined: Mon Sep 16, 2013 6:28 pm
Top

Re: Compact family camper Build - Aluminum Diamond Plate

Postby ryuandwings » Wed Nov 12, 2014 6:07 pm

Johnysteam wrote:Looks very neat and professional. A very desirable trailer to own


Thank you very much. :D
It certainly been a blast so far, I just need to finish... :beer:
User avatar
ryuandwings
Teardrop Master
 
Posts: 187
Images: 61
Joined: Wed Feb 13, 2013 5:22 am
Location: West Tennessee
Top

Re: Compact family camper Build - Aluminum Diamond Plate

Postby ryuandwings » Fri Nov 14, 2014 2:41 pm

I just wanted to share I did last night.
It turned out better than I was expecting. The diamond plate adds a lot of impact to the appearance! :beer:

Image

Image
User avatar
ryuandwings
Teardrop Master
 
Posts: 187
Images: 61
Joined: Wed Feb 13, 2013 5:22 am
Location: West Tennessee
Top

Re: Compact family camper Build - Aluminum Diamond Plate

Postby Nammy » Sat Nov 15, 2014 12:32 pm

Great build! Can't wait to see the finished product :)
User avatar
Nammy
Teardrop Inspector
 
Posts: 3
Joined: Sun Jul 27, 2014 4:24 pm
Location: New Maryland, NB, Canada
Top

Re: Compact family camper Build - Aluminum Diamond Plate

Postby lrrowe » Sat Dec 13, 2014 10:43 am

I cannot wait either. I like the box in the front. I want something like that, but bigger, for my CT.
Bob

First Post on Purchase of Trailer: http://www.tnttt.com/viewtopic.php?f=42&t=60722
Hot water infloor and radiator heating project:[url]http://www.tnttt.com/posting.php?mode=reply&f=54&t=62327[/

Image Image
User avatar
lrrowe
Donating Member
 
Posts: 3285
Images: 439
Joined: Sun Feb 10, 2013 5:54 am
Location: SW Virigina
Top

Re: Compact family camper Build - Aluminum Diamond Plate

Postby dales133 » Sat Dec 13, 2014 7:18 pm

This is a realy classy looking build.great work
User avatar
dales133
4000 Club
4000 Club
 
Posts: 4605
Images: 1
Joined: Mon Oct 13, 2014 5:26 pm
Top

Re: Compact family camper Build - Aluminum Diamond Plate

Postby felixx » Sun Dec 14, 2014 3:24 am

WOW, just WOW!
I just read all 11 pages and am in awe

Well done
felixx
Donating Member
 
Posts: 644
Images: 22
Joined: Sun Nov 30, 2014 3:01 pm
Location: Christchurch, New Zealand
Top

Re: Compact family camper Build - Aluminum Diamond Plate

Postby ryuandwings » Mon Dec 15, 2014 10:51 am

Thanks guys. :)

Progress has been really slow lately due to the job's work load.

My wife want me to complete this before the New Year, so I need to find time to work on this.
Before the trailer becomes my permanent bedroom... :? :cry:
I hope to update some new progress soon.
User avatar
ryuandwings
Teardrop Master
 
Posts: 187
Images: 61
Joined: Wed Feb 13, 2013 5:22 am
Location: West Tennessee
Top

Re: Compact family camper Build - Aluminum Diamond Plate

Postby backstrap bandit » Mon Dec 15, 2014 12:36 pm

How about putting the switch behind license plate out of sight it looks like a push switch then u just push corner of plate it contacts switch and turns on lights that way it's out of sight from passers by no worries on them turning lights on and running dwn battery
User avatar
backstrap bandit
Teardrop Master
 
Posts: 188
Images: 15
Joined: Mon Feb 10, 2014 4:49 am
Location: Louisiana
Top

Re: Compact family camper Build - Aluminum Diamond Plate

Postby ryuandwings » Wed Dec 17, 2014 10:32 am

backstrap bandit wrote:How about putting the switch behind license plate out of sight it looks like a push switch then u just push corner of plate it contacts switch and turns on lights that way it's out of sight from passers by no worries on them turning lights on and running dwn battery


To be honest, I haven't put much thoughts into this yet.

I agree with your line of thought to locate it such that it is hard to see so no one can mess with it. But then on the other hand, what are the likely hood of someone actually seeing the switch on the license plate?
I would have to look at it when I actually get there... :roll:
User avatar
ryuandwings
Teardrop Master
 
Posts: 187
Images: 61
Joined: Wed Feb 13, 2013 5:22 am
Location: West Tennessee
Top

Re: Compact family camper Build - Bending Aluminum Moldings

Postby ryuandwings » Mon Dec 22, 2014 10:06 am

OK, here are some updates. This time, I'll document my experience about bending aluminum moldings and trims.
I'm not an expert in this so I can't guaranty what I did will work for you too. But I found all my techniques from this forum and Google, so I feel this should work for you too.

First the materials.
I'm using "M20 Corner Insert" by All-Rite. This has 5/8" leg. This comes in 16' long so the first problem is getting the material longer than 8' long if you don't have the source near by. I needed mine at least 12' so I strapped 4" PVC pipe on the roof of my car and traveled about 400 miles to get some. I combined my vacation, so it worked out fine. :R This was cheaper than freight.
This molding is used at edge of roof and wall, and hatch edges.

I'm also using "Regular Roof Edge Molding". This will be used mainly at base of walls.
Both types were able to bend with same method.

OK, here is actual bending.
I first try to bend without annealing. I haven't measured the radius, but I think it is around 6-8". And this happened. :cry:
Image

So it's time to bring on some fire power! I think other type of torch will work too, but you need something that gets hot enough. I got BernzOmatic Mapp/Map torch.
Image
Before I start annealing the piece, I made a bending jig.
Image
There are rabbits on both sides of edge so that legs of aluminum can be recessed to clamp.
Image

When I first researching annealing, this seemed very specific and technical. But the "Sharpie" method works so easily.
Basically you mark the area that you want to bend with sharpie (I don't think color matters, but I used orange and red), then heat the area with torch until the marking disappear. What I understand is that the whatever the ingredient in the Sharpie burn off at the similar temperature aluminum softens. I guess it depends on the ambient and material temperature, but it took me about 20-30 seconds.
Once you get the aluminum heated, start bending using the jig and clamps.
Image
Image

Here are some pointers
1. When you are bending "insert" type molding, put blockings in the insert to clamp so you don't damage the lips for insert.
2. You will have better grip and leverage to bend if you have extra length on ends. You can trim afterward.
3. When you make a jig, make it such that you count for the "bounce back".
4. Don't freak out if you see some kinks. If you annealed, you can hammer it back easily. Make sure you use wood blocks or rubber mallet.
5. I don't have it shown in the photos, but I used other clamps to hold legs from kinking.
6. Go slow. Only heat and bend small portion. For the piece shown in the photo, I probably heat and bent in 3 sections.
7. Wear heavy leather glove. It will get hot! Once you burn off sharpie marks, it's hard to see hot section. I burnt my thumb really good... :cry:
8. Go to Harbor Freight and buy a few more clamps than you think you need.
9. Make sure you follow instruction of your torch. I don't want to hear you blowing up your garage. 8)

Thanks for looking. :beer:
User avatar
ryuandwings
Teardrop Master
 
Posts: 187
Images: 61
Joined: Wed Feb 13, 2013 5:22 am
Location: West Tennessee
Top

PreviousNext

Return to Build Journals

Who is online

Users browsing this forum: No registered users and 7 guests

cron