Building The Atma Travelear Teardrop

...ask your questions in the appropriate forums BUT document your build here...preferably in a single thread...dates for updates, are appreciated....

Postby DMcCam » Thu May 05, 2011 10:08 am

The wall interior skins are all glued up now. We used Titebond 2 on the passenger side wall and had to work fast to clamp it all down. On the driver's side we changed over to Titebond 3 which is supposed to have more working time. For some reason it was even worse! What a struggle!

Image
Here's the detritus left over from the battle.

Image
We decided to quickly clamp the walls into place to see how she's shaping up.

Image
My brother the master cabinet maker and I are doing most of the work. Here he's getting an idea of the cabinet area. I think we'll be building all the cabinets outside the trailer then assembling most of the cabin at one time.

Image
A view from the rear.

More to come soon.

Cheers,

Dave
Last edited by DMcCam on Tue Mar 06, 2012 4:41 pm, edited 1 time in total.
User avatar
DMcCam
Gold Donating Member
 
Posts: 883
Joined: Wed Jan 06, 2010 8:30 pm
Location: Reno, Nevada

Postby aggie79 » Thu May 05, 2011 2:47 pm

Dave,

Y'all (Texan for the plural form of "you") are really moving along on your build. The precision is amazing!

Regarding your glue comments, I used TB3 and was having trouble with it "flash setting" due to the dryness of the wood and plywood coupled with the summer heat. I found a technique somewhere on a woodworking site that worked well for me. It uses a two-stage glue-up. In the first step, both pieces are lightly coated with TB3 diluted approximately 10% with water. Then you come back with a fairly heavy coat of full strength TB3 on both pieces. You will get a lot of squeeze out and it can be messy. But on the structural portions of the build, the squeeze out is not that critical.

Take care,
Tom
Tom (& Linda)
For build info on our former Silver Beatle teardrop:
Build Thread

93503
User avatar
aggie79
Super Duper Lifetime Member
 
Posts: 5405
Images: 686
Joined: Tue Aug 07, 2007 5:42 pm
Location: Watauga, Texas

Postby DMcCam » Fri May 06, 2011 9:53 am

Hi Tom, thanks for the kudo's and the TB3 tips, I wish we knew that before we tackled the inside skins. By the time we got to the last little 1/8" panel we had to use a wet rag to remove the glue as it had already set up. The moisture made the panel much easier to glue up after that. Our weather is getting hotter so your technique will come in very handy for sure.

We have a ton of sub assembly work now then we'll hopefully be able to make huge leaps. :)

Thanks again,

Dave
User avatar
DMcCam
Gold Donating Member
 
Posts: 883
Joined: Wed Jan 06, 2010 8:30 pm
Location: Reno, Nevada
Top

Postby DMcCam » Sun May 08, 2011 12:59 pm

I've been worried about proceeding until we sealed the wood deck. Friday we sprayed on a two part urethane bed-liner.

Image
First we turned the chassis on its edge.

Image
Here we are almost finished.

Image
We sprayed a nice heavy coat to make sure that the exposed wood is well protected.

Yesterday we put her back on the stands and are working on the cabinets.

Cheers,

Dave
Last edited by DMcCam on Tue Mar 06, 2012 4:42 pm, edited 1 time in total.
User avatar
DMcCam
Gold Donating Member
 
Posts: 883
Joined: Wed Jan 06, 2010 8:30 pm
Location: Reno, Nevada
Top

Postby Rudyjr » Sun May 08, 2011 8:19 pm

WOW! Go away for a week on vacation and you miss alot on this build. Looks great, Jim
Rudyjr
Teardrop Builder
 
Posts: 47
Joined: Sun Apr 10, 2011 2:03 pm
Location: Central Ohio
Top

Postby Rudyjr » Tue May 17, 2011 7:36 pm

Anxiously awaiting more pictures and an update on this build!!
Rudyjr
Teardrop Builder
 
Posts: 47
Joined: Sun Apr 10, 2011 2:03 pm
Location: Central Ohio
Top

Postby DMcCam » Wed May 18, 2011 9:55 am

Sorry for the late updates, been sidetracked with work this week. We did get the bending form ready for the aft cabinet drawer faces last weekend though.

Image
We started with 4 sheets of 1 1/8" plywood. Right after this shot I ran out of battery power. (I'll shoot more as soon as I can of the form and insert them)

Image
Here's the form covered in clamps with our first go of bending the 4 sheets of 1/8" birch.

Image
It looks like the top layer may have failed so we'll add a couple of extra sheets on top next time. We'll see once the clamps are removed.

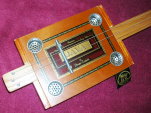
Yesterday we finally put together the forward cabinet shelves. The 4 vertical curved supports were routed from the cnc pattern.

Image
Here's the completed assembly face up ready for the face frame to come.

Image

Image
A couple of shots of the back side.

Image
Here are a few shots where we test fit the frame. The walls and frame are being held in place with just 2 hand clamps.

Image

Image
A couple of shots looking from the outside in.

Once we have the face frame and cabinet doors done, we'll move on to the aft cabinet work.

Thanks for following the build,

Dave
Last edited by DMcCam on Tue Mar 06, 2012 4:43 pm, edited 1 time in total.
User avatar
DMcCam
Gold Donating Member
 
Posts: 883
Joined: Wed Jan 06, 2010 8:30 pm
Location: Reno, Nevada
Top

Postby Dusty82 » Wed May 18, 2011 6:10 pm

I love it! Can't wait to see the face frame and doors. It's really coming together nicely!
TV: 2004 Jeep Liberty Sport

Currently stuck in a tent.
User avatar
Dusty82
The 300 Club
 
Posts: 313
Joined: Thu Jan 28, 2010 8:15 pm
Location: Southern Oregon
Top

Postby Rudyjr » Wed May 18, 2011 6:17 pm

Nice! Amazing how perfectly everything fits up and aligns so precisely.
Rudyjr
Teardrop Builder
 
Posts: 47
Joined: Sun Apr 10, 2011 2:03 pm
Location: Central Ohio
Top

Postby DMcCam » Wed May 18, 2011 9:58 pm

Thanks Dusty and Rudy! More to come soon.

Cheers,

Dave
User avatar
DMcCam
Gold Donating Member
 
Posts: 883
Joined: Wed Jan 06, 2010 8:30 pm
Location: Reno, Nevada
Top

Postby DMcCam » Sun May 22, 2011 1:12 pm

Here are a few images of the bending form for my aft cabinets. My camera ran out of battery right before I cut the shapes on the band-saw then smoothed them using the vertical sander. My brother constructed the form with mostly plywood and my side shapes.

Image
Here's the completed form standing on end.

Image
This is what the underside looks like.

Image
The first attempt was successful! We did have to soak the 4 sheets of 1/8" ply in hot water for 45 minutes then bent them around the form for a couple of days to dry before gluing them up.

Image
Here's a side view; 2 more to go.

All the best,

Dave
Last edited by DMcCam on Tue Mar 06, 2012 4:44 pm, edited 2 times in total.
User avatar
DMcCam
Gold Donating Member
 
Posts: 883
Joined: Wed Jan 06, 2010 8:30 pm
Location: Reno, Nevada
Top

Postby Cliffmeister2000 » Sun May 22, 2011 1:18 pm

Wow! That's a pretty radical bend! I can't wait to see it in action! :thumbsup:
God Bless

Cliff

♥God. ♥People.
1 John 4:9-11

My Teardrop build pictures
User avatar
Cliffmeister2000
Titanium Donating Member
 
Posts: 3622
Images: 157
Joined: Thu Jul 26, 2007 10:18 pm
Location: Phoenix, AZ
Top

Postby Rudyjr » Sun May 22, 2011 1:42 pm

Those cabinet doors will really be retro looking. This is a really cool build to follow. Keep up the good work, Jim
Rudyjr
Teardrop Builder
 
Posts: 47
Joined: Sun Apr 10, 2011 2:03 pm
Location: Central Ohio
Top

Postby DMcCam » Sun May 22, 2011 11:21 pm

Cliffmeister2000 wrote:Wow! That's a pretty radical bend! I can't wait to see it in action! :thumbsup:


Hi Cliff, yeah it's pretty tight, about 5". The first dry attempt snapped before it got even halfway around the form. I think the next bend will need about an hour in the hot water before pre-bending. Thanks for the enthusiasm my friend!

Rudyjr wrote:Those cabinet doors will really be retro looking. This is a really cool build to follow. Keep up the good work, Jim


Thanks Jim, we're going for a flush fit for the doors and drawers. I hope it works as designed. :worship:

Thanks again,

Dave
User avatar
DMcCam
Gold Donating Member
 
Posts: 883
Joined: Wed Jan 06, 2010 8:30 pm
Location: Reno, Nevada
Top

Postby aggie79 » Mon May 23, 2011 8:48 am

:applause: Very nice Dave,

I'm not sure how, but I missed your last two updates. Your headboard cabinets look great! And thank you for the tutorial on the bending form and radiused panels.

Take care,
Tom
Tom (& Linda)
For build info on our former Silver Beatle teardrop:
Build Thread

93503
User avatar
aggie79
Super Duper Lifetime Member
 
Posts: 5405
Images: 686
Joined: Tue Aug 07, 2007 5:42 pm
Location: Watauga, Texas
Top

PreviousNext

Return to Build Journals

Who is online

Users browsing this forum: No registered users and 14 guests