Cross Bow / trolley / renamed little blue trolley

...ask your questions in the appropriate forums BUT document your build here...preferably in a single thread...dates for updates, are appreciated....

Re: Cross Bow

Postby Ron Dickey » Thu Nov 07, 2013 12:18 am

Yesterday I used the dremel with a sanding disk, this is on a round cylinder with a small sanding disk held on with pressure.
http://www.dremel.com/en-US/Accessories ... ding+Bands

the problem I found was in so being a small place when I was trying to keep the flat areas flat at the corners I would go to far in and have an shape not like I wanted.

Now I will have to add wood putty or filler or Bondo to the area and try and flatten it.

building this Trolley top is a little like building a miniature teardrop sides top but with the shape and planning it out just the same.
So now I am working on 4 projects.
!. the Arch almost done.
Put in insolation at the top of the curve today getting ready for the top to be put on. there is a lot of space above the insolation and it might shake loose so I will run tape over it and staple the tape to the wood to keep it in place. waiting to install inside wall and ceiling.
2. the trolley
cut to design needed windows cut and tapered so water will run off on to the roof below.
inside where roof vent will go is drawn with where supports will go for roof, and vent. Also support bars for the roof above the trolley have been drawn in too.
outside of trolley placement of where the trailer roof support studs will go has been drawn in. (pictures to follow)
3. the main Body
wall support studs in place up to the beginning of the galley are in place. Wiring has been held back until studs are in place for the roof so wholes can be drilled for wires to go through. One side has drawings on it for door and hatch cuts. Need to buy other side and 1 or 2 inside walls. ( I have one inside wall but it may cut up for the inside arch wall and maybe trolley roof or saddle bag curve parts. ) Plan as I go project.
4. Wiring
non started wires for trailer stop and clearance LED lights are bought except for the back fender lights. Plug and most of the wires are ready for install. However the wall and roof clearance lights must have a white ground wire to work. I have not gotten that but plan to this week.
Battery placement will better be known when saddle bags are built. Battery size and clearance is an issue.
Reading lights DC (cigarette lighter type female) and AC plugs have not been purchased nor have boxed to hold them.
Connectors for running PVC pipes have be bought for under trailer wiring. This is not needed but I just want to do it.
5. Saddle bags
design is basically done. want to make of wood will need to start on that as soon as walls are up.
6. Galley
Design 3/4 done. top cupboards still being worked on. have one set of pull side brackets need to buy 2 or 3 more.
need to design pull out for cooler and stove, pull out and insert for sink, what to put on counter top (sheet metal, tile, Polyurethane )
Swing out support shelves for side of trailer will need to be measured before designed (must have galley mostly done for that)
:oops: now I know I left something out? :thinking:
am I talking to much :lol:
Ron
121377......134179
Inside almost done--Trolly top has opening windows & roof.doors need assembling--pictured above waley windows..galley 1/3 done
Cross Bow in Build Journals....http://www.tnttt.com/viewtopic.php?f=50&t=54108
User avatar
Ron Dickey
Silver Donating Member
 
Posts: 3078
Images: 711
Joined: Tue Apr 20, 2004 5:56 pm
Location: Central Coast, CA

Re: Cross Bow

Postby Ron Dickey » Sun Nov 10, 2013 1:53 am

114165
121377......134179
Inside almost done--Trolly top has opening windows & roof.doors need assembling--pictured above waley windows..galley 1/3 done
Cross Bow in Build Journals....http://www.tnttt.com/viewtopic.php?f=50&t=54108
User avatar
Ron Dickey
Silver Donating Member
 
Posts: 3078
Images: 711
Joined: Tue Apr 20, 2004 5:56 pm
Location: Central Coast, CA

Re: Cross Bow

Postby S. Heisley » Sun Nov 10, 2013 7:11 pm

It's taking shape! :thumbsup: :applause:
User avatar
S. Heisley
Super Lifetime Member
 
Posts: 8775
Images: 495
Joined: Mon Sep 17, 2007 10:02 am
Location: No. California
Top

Re: Cross Bow

Postby Ron Dickey » Mon Nov 11, 2013 11:20 pm

S. Heisley wrote:It's taking shape! :thumbsup: :applause:


thanks, It take me almost more mental work then wood work, I plan to put the side wall back up so I can figure out how and where the saddle bags will go. I have some good ideas for that but until I get real measures will I be ready for that build part. I will hold much of my electrical both AC and DC electrical.

I need to figure where the wires will go and where the batteries or battery will sit, as wall as what type battery.

Where the brake lights will go on the back and clearance lights go and in the front before the tire I plan to have a small deck. So my wives feet will not dangle.

So once the roof and trolley are done. then I can start building the saddle bags. cut and install the outside walls. By then I should have the inside wall for the cross bow front end installed and start figuring how it's upper shelf will be installed.

Along with the saddle bags I will start building the doors. Steve B. 8) helped me build my doors for the Box Kite after having doors that were only one layer and locked with hinged pad lock latch and Gun port windows. And now is the time to rethink the locks, the locks on the Door that Steve helped me put in used a outdoor door latch. (looked nice) but screws came out on rough roads. (no lock tight)

Now I am planning out the cross bars for the roof, I want them to be a tad slanted down toward the side walls. That way when it rains it will run off and not puddle in the center.

Thank you your comments it keep me going.

Ron
121377......134179
Inside almost done--Trolly top has opening windows & roof.doors need assembling--pictured above waley windows..galley 1/3 done
Cross Bow in Build Journals....http://www.tnttt.com/viewtopic.php?f=50&t=54108
User avatar
Ron Dickey
Silver Donating Member
 
Posts: 3078
Images: 711
Joined: Tue Apr 20, 2004 5:56 pm
Location: Central Coast, CA
Top

Re: Cross Bow

Postby Ron Dickey » Thu Nov 14, 2013 2:07 am

I am researching how to cut Plexiglass and found this video.
http://www.youtube.com/watch?v=nF8-SV6ZA0M

I have bit 561 and got a small pc of Plexiglass to try. I think for now I will try and cut out the the air vent closing hatch. After all I find I am inventing the windows as I go. This is very time consuming but fun. If this works I will buy a large pc to cover the trolley windows with tinted plexiglass. and Figuring out the gasket is another problem.

I have cut the cross bars for the top of the Trolley top and am working on the ones for the back roof section that goes near the rear vent. I plan to have the trolley top assembled before I cut the roof. That way I will have the true dimensions of the trolley to tell where to cut the roof for it to slide into.

Seeing what others have done with their trailer inspires me to try new things and in some cases imitate paths that others have found in their builds.

This should look like a Chinese Junk boat by the time I am done. :lol: but at least I tried. and it is nice to know if I did not know where I was going with this I would end up somewhere else and still camping in it. :thumbsup:

The trap door for the vent for closing when in storage or in bad weather. I was going to put it inside then realized the water will get in and it must go on the outside just like the store bought ones.
121377......134179
Inside almost done--Trolly top has opening windows & roof.doors need assembling--pictured above waley windows..galley 1/3 done
Cross Bow in Build Journals....http://www.tnttt.com/viewtopic.php?f=50&t=54108
User avatar
Ron Dickey
Silver Donating Member
 
Posts: 3078
Images: 711
Joined: Tue Apr 20, 2004 5:56 pm
Location: Central Coast, CA
Top

Re: Cross Bow

Postby oakinteriors1 » Thu Nov 14, 2013 7:59 am

Ron that is one awesome build...I really like the trolly tops...On the port holes why not rout out a rabbet from the inside for the plexi to fit into and silicone in or use retainers and a foam gasket... I assume you will have enough access from the inside..
User avatar
oakinteriors1
Silver Donating Member
 
Posts: 297
Images: 1
Joined: Tue Sep 03, 2013 4:47 pm
Location: Bates City Mo.
Top

Re: Cross Bow

Postby Ron Dickey » Fri Nov 15, 2013 2:03 am

oakinteriors1 wrote:Ron that is one awesome build...I really like the trolly tops...On the port holes why not rout out a rabbet from the inside for the plexi to fit into and silicone in or use retainers and a foam gasket... I assume you will have enough access from the inside..

Great Idea at first I just wanted to do it on the outside now I just want to do it on the inside. And I find I am spending so much time on it that it is like building a trailer on top of a trailer. :?
I am not sure if my skills can go that far. But the router is the first power tool I owned next to a sewing machine. I just used my router today to cut out an angle for the front trolley roof to attach to. And sometimes I get carried away and realize I have to take two steps back. I am starting to work on the saddle bags to take my mind off the trolley so I can back off and take a look before I do the wrong thing and have to stop for a week before fixing an oweeeeee. :x 
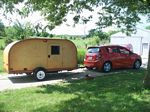
Like I got carried away when I sanded out the windows and one got way out of whack and I will have to fill it in with wood putty to bet back in the direction I was going. :worship:

But you are right the walls of the trolley are thick enough that I can cut out enough for the glass to fit in. I just have to make a jig that the router can ride in.
And it would look cool. And I could run a router bit with a roller on it so it would cut the outside edge of the window. :thinking:

Sorry even Mike says I am long winded.

Thanks for you info.
Ron
121377......134179
Inside almost done--Trolly top has opening windows & roof.doors need assembling--pictured above waley windows..galley 1/3 done
Cross Bow in Build Journals....http://www.tnttt.com/viewtopic.php?f=50&t=54108
User avatar
Ron Dickey
Silver Donating Member
 
Posts: 3078
Images: 711
Joined: Tue Apr 20, 2004 5:56 pm
Location: Central Coast, CA
Top

Re: Cross Bow

Postby oakinteriors1 » Fri Nov 15, 2013 3:32 am

Add this to your router bit collection.... Then you can rabbet the back side of picture frames- door frames etc..
Image
User avatar
oakinteriors1
Silver Donating Member
 
Posts: 297
Images: 1
Joined: Tue Sep 03, 2013 4:47 pm
Location: Bates City Mo.
Top

Re: Cross Bow

Postby Ron Dickey » Fri Nov 15, 2013 3:30 pm

I put back up the side that I use for where the galley goes and saddle size to get my mind of the Trolley while I obsorb what I have learned and have the next step ready for me so it too will move along smoothly.

The top Board that runs on top of the Saddle will be 56" long (back to door) and 7 " deep

The saddle will be 22" high at the lowest point that being the hight of the axel to the bottom of the top board.

I want to keep the finder on that came with the HF trailer. I am thinking of putting a battery there but if I do it will be shorter then a regular battery.
I started this site a while back to see what others had found!
viewtopic.php?f=30&t=57154
121377......134179
Inside almost done--Trolly top has opening windows & roof.doors need assembling--pictured above waley windows..galley 1/3 done
Cross Bow in Build Journals....http://www.tnttt.com/viewtopic.php?f=50&t=54108
User avatar
Ron Dickey
Silver Donating Member
 
Posts: 3078
Images: 711
Joined: Tue Apr 20, 2004 5:56 pm
Location: Central Coast, CA
Top

Re: Cross Bow

Postby Ron Dickey » Sat Nov 23, 2013 11:51 pm

With a death in the family, I have not had a chance to work on the trailer this wk and next. But I have kept working on it in my mind.
It is interesting how therapeutic the cross bow build helps.

heater:
I have a possible new addition this thread viewtopic.php?f=2&t=18902 about a furnace heated with candles has come along and if I can figure out a way a simpler version can be made I might make it, too.

saddle curv.
A long time back I designed a table to go on the back of the Box Kite it was a failure but I still have parts around from it.
I cut this out to go on top of a tire. 53296
Now I am thinking of cutting it and using it for the rear curved angle of the saddle bags I might make a second one. My plan it to cut it in half each for the outside and the second one for the inside against the trailer body. It's curve is similar to the one of the hatch and should work.

air vent
I am also thinking of putting air inlets where the last holes in the trolley are, the little ones. many people use them for airing out let for their battery's Round sheet metal with slits looking like vents on a custom car hood. http://ecx.images-amazon.com/images/I/4 ... AA300_.jpg but I am not sure what will happen in a rain storm. maybe I can put quarks in them. but I had thought it would work for a vent for a heater unit??

trolley roof support
I am working on cross bars for the trolley tops roof support. Vent idea is getting closer have to work out top cover. figuring out how to make the hatch over the vent water proof is the hard part. Usually if I work to hard at it I make it to hard and it may not work.

inside bow wall
I plan to cut the wall for the inside of the bow soon and insert it.
then I can work on it's shelf, that will go above out head when we sleep.

future steps.
1. Trolley in time should be done then I can cut the roof and slide the trolley in.
2. I will need to get the rest of the plywood before working on the saddle set up.
3. cut the curve to the hatch for the galley
4. cut the door openings
5. design the doors
6. complete wiring
a. ac/dc/sound/tv
b. lights inside and outside.
1b. trailer clearance lights
2b. lights for cabin and galley
3b. entrance ground lights

trying to keep myself on track
Ron
121377......134179
Inside almost done--Trolly top has opening windows & roof.doors need assembling--pictured above waley windows..galley 1/3 done
Cross Bow in Build Journals....http://www.tnttt.com/viewtopic.php?f=50&t=54108
User avatar
Ron Dickey
Silver Donating Member
 
Posts: 3078
Images: 711
Joined: Tue Apr 20, 2004 5:56 pm
Location: Central Coast, CA
Top

Re: Cross Bow

Postby Ron Dickey » Wed Dec 04, 2013 2:57 am

today I cut out a pc for the inside of the front of the Arch.

I cut it 43 1/2 inches high and after the cut found I should have measured the board better because I was 1/8th inch to long. I then cut it in half the other way so like the front I could put in the left and the right skins. I can fill in the gap in the middle with wood putty.

It is nice to be back to working on the trailer again. Gets me focused again. sometimes a break is needed so you can take 2 steps back.

I realized the bolts on the trailer wheel cover that came with the trailer need to be farther apart. If I am to put a battery there.

I have been working on how to enter the saddle bags.
1. from the sides to I could work on the tail lights if need be. I also realized I need a small top one for Battery up keep.
2. I found some Iron bars that I used in the box kite build that I could use in this build too.

Ron
121377......134179
Inside almost done--Trolly top has opening windows & roof.doors need assembling--pictured above waley windows..galley 1/3 done
Cross Bow in Build Journals....http://www.tnttt.com/viewtopic.php?f=50&t=54108
User avatar
Ron Dickey
Silver Donating Member
 
Posts: 3078
Images: 711
Joined: Tue Apr 20, 2004 5:56 pm
Location: Central Coast, CA
Top

Re: Cross Bow

Postby Ron Dickey » Fri Dec 06, 2013 11:57 pm

The boss is letting me have a vac. Now I get to do catchup, I hope :?

The trolley still needs some touches I keep trying to smooth out the windows and they seem to be getting bigger. I know where it will sit and should be able to cut out the roof. The vent is still in the works and the fan is still to be an experiment.

The saddle will not be as long in the front as I thought. But it is coming together. I know where the access doors will be, and their shape. Hinges and catches are still in the works. I found some angle iron I used on the boxkite and should be helpful in the bottom of the saddle so it it hits anything the iron will keep it more solid.

Next week I should be able to buy the other outside wall, cut the curve for the galley and cut out the door ways.

Right now I am working on the inside wall of the bow and realized i do not have to glue it in I can just staple it in.

I draw new picture everyday finding new ways searching for new ideas, finding answers. And I keep going back and looking at other trailers it hopes of finding answers I missed.

I keep reminding myself of what it will look like. 8) If you do not know where you are going you will end up somewhere else. :roll:

Ron :thumbsup:
121377......134179
Inside almost done--Trolly top has opening windows & roof.doors need assembling--pictured above waley windows..galley 1/3 done
Cross Bow in Build Journals....http://www.tnttt.com/viewtopic.php?f=50&t=54108
User avatar
Ron Dickey
Silver Donating Member
 
Posts: 3078
Images: 711
Joined: Tue Apr 20, 2004 5:56 pm
Location: Central Coast, CA
Top

Re: Cross Bow

Postby Ron Dickey » Sat Dec 07, 2013 12:52 am

Where did the time go.....

I am one month and 7 days away from one year on this build.

But I am doing things that I have never done before and to some degree may be things in this that few have done and if they did I have not found them or they are going in a much different direction. Like using a pre-made thing where as I am doing it from scratch.

1. There are several who have done the bow front like mine. And I have tried to include photo's and info on those I did find.
1a. the bow is a little heavy and i could have done it with less weight. I should have had a welder add a arch at the same height as the trailer bed, I sued wood that added weight.

2. The Trolley top is nothing new and cutting out the design was simple it was the windows that have me a little unsure. But I will stager on.

3. The saddle: storage kept above and behind the wheel. Is something I have been thinking about for a long time. I kept hoping to find someone with that idea. Others have offered me pictures of what others have done.

4. the screen door idea passed on by another thread. One gentleman suggested one that slides out from inside the wall, however I have other needs for that wall. So I came up with putting a roller shade with a screen on it. So either I can use one with a spring or but a crank on the side. A couple at the IRG who's teardrop door was one big window came up with that idea as a decorative shade that accented the inside of the trailer.

5. A long time ago I was on a thread talking about using the spare tire as a table. I have not forgotten it. And am still looking for a place for it.
Many of the folks on the forum made the trailer wheels the same size as the pulling units wheels so they could carry one spare for the entire unit.

6. Roly has proven that you are never to old to build another trailer. But if I build any more trailers it will be a utility trailer for hauling stuff to the dump!! Or going around to garage sales getting more Junk!!

It would be nice to have the shape done for christmas so I can decorate 2 trailers in front of my yard!
Ron :thinking:
121377......134179
Inside almost done--Trolly top has opening windows & roof.doors need assembling--pictured above waley windows..galley 1/3 done
Cross Bow in Build Journals....http://www.tnttt.com/viewtopic.php?f=50&t=54108
User avatar
Ron Dickey
Silver Donating Member
 
Posts: 3078
Images: 711
Joined: Tue Apr 20, 2004 5:56 pm
Location: Central Coast, CA
Top

Re: Cross Bow

Postby Ron Dickey » Wed Dec 11, 2013 12:13 am

Have to down load some pictures tomorrow :pictures: . of center bars so trolley can be dropped in through hole in roof and be attached from underneath.

Trailer Roof is ready to be cut :) , but first - I need to do more work on the Trolley parts before that happens. :hammer:
Trolley
Trolley vent needs to be made.
roof support bars need to be carved and installed.
windows need Glass and gaskets or siliconed

Saddle
I need to get the battery so I will know if it will fit where I want it.
The design of the saddle is becoming more a reality. been looking at boat building because it is a hallow structure with a skin.

Bow.... I may install inside wall tomorrow.

Walls ... outside skin for the other side will be bought this week and hopefully I will get door cut out and galley hatch curve cut too.


with all that I am doing and have done the frightening part for me is the Galley hatch. And making it fit without leaking.
I have gone to so many events and seen so many trailers and heard what they had done and how they stopped it from leaking. But I keep on listening and watching that hopefully I will get it right the first time. :? :worship:


Doors.....Then I will have the outside skin for the doors and be able to start working on the doors as well.
121377......134179
Inside almost done--Trolly top has opening windows & roof.doors need assembling--pictured above waley windows..galley 1/3 done
Cross Bow in Build Journals....http://www.tnttt.com/viewtopic.php?f=50&t=54108
User avatar
Ron Dickey
Silver Donating Member
 
Posts: 3078
Images: 711
Joined: Tue Apr 20, 2004 5:56 pm
Location: Central Coast, CA
Top

Re: Cross Bow

Postby Ron Dickey » Thu Dec 12, 2013 2:27 am

This is a board left over from when I built the boxkite. the new board will be deeper. it will run from where you see it starting here to the end of the trailer, same as the boxkite but higher.
115164

The rest are small steps to allow me to finish the trolley and slide it into place after the roof is cut.
115165
above is the front is one bar. I was carful during the build to know where center was and marked it so, so when I glued it in place I could keep the center lines in line!
115166
The trolley when I cut it in the back it was a little to deep so I had to add a cross bar that it would rest in.

Now I am working on the vent and the cross bars for the trolley top will come after that . mean while I can experiment with the windows and better understand how it will fit.

Just to remind you I am not using plans so I have to plan out every step as I go. I draw it and rethink it and may stop until the next day so my mind can process each move. I guess I build it in my head, looking for mistakes or a better way. I also look on the net at pictures of cars, boats, trailer, books, magazines, and wood working of all types. Seeing your build if I find you have the answer I will try and imitate but never do it as well as you did.

Ron
121377......134179
Inside almost done--Trolly top has opening windows & roof.doors need assembling--pictured above waley windows..galley 1/3 done
Cross Bow in Build Journals....http://www.tnttt.com/viewtopic.php?f=50&t=54108
User avatar
Ron Dickey
Silver Donating Member
 
Posts: 3078
Images: 711
Joined: Tue Apr 20, 2004 5:56 pm
Location: Central Coast, CA
Top

PreviousNext

Return to Build Journals

Who is online

Users browsing this forum: No registered users and 13 guests