TwilightLane Cubbie Build

...ask your questions in the appropriate forums BUT document your build here...preferably in a single thread...dates for updates, are appreciated....

Postby TwilightLane » Sun Nov 21, 2010 10:51 pm

Aspen enjoying some fall sun.

Image
Rob & Lori
Aspen & Tundra
My Instructable: http://www.instructables.com/id/Teardro ... l-Trailer/
User avatar
TwilightLane
The 300 Club
 
Posts: 484
Joined: Thu May 14, 2009 4:59 pm

Postby TwilightLane » Sun Nov 21, 2010 10:52 pm

Latch the door:

Image
Rob & Lori
Aspen & Tundra
My Instructable: http://www.instructables.com/id/Teardro ... l-Trailer/
User avatar
TwilightLane
The 300 Club
 
Posts: 484
Joined: Thu May 14, 2009 4:59 pm

Postby TwilightLane » Sun Nov 21, 2010 10:53 pm

Bought some #10 gauge. Starting to hook things up.

Image
Rob & Lori
Aspen & Tundra
My Instructable: http://www.instructables.com/id/Teardro ... l-Trailer/
User avatar
TwilightLane
The 300 Club
 
Posts: 484
Joined: Thu May 14, 2009 4:59 pm
Top

Postby TwilightLane » Sun Nov 21, 2010 10:55 pm

I ran the #10 through some conduit I had. Not positive how to do that turn as clean as I like. Mounted the master cut-off switch.

Image

You can see where I jacked up a cut by 1/2 inch. Still cannot figure out how I did that. Geez.
Last edited by TwilightLane on Sun Nov 21, 2010 11:45 pm, edited 1 time in total.
Rob & Lori
Aspen & Tundra
My Instructable: http://www.instructables.com/id/Teardro ... l-Trailer/
User avatar
TwilightLane
The 300 Club
 
Posts: 484
Joined: Thu May 14, 2009 4:59 pm
Top

Postby TwilightLane » Sun Nov 21, 2010 10:55 pm

Here is how the battery box will sit.

Image
Rob & Lori
Aspen & Tundra
My Instructable: http://www.instructables.com/id/Teardro ... l-Trailer/
User avatar
TwilightLane
The 300 Club
 
Posts: 484
Joined: Thu May 14, 2009 4:59 pm
Top

Postby TwilightLane » Sun Nov 21, 2010 11:25 pm

Face of the closet. I'll attach the LED spar and add a switch over on the right side.

Image
Rob & Lori
Aspen & Tundra
My Instructable: http://www.instructables.com/id/Teardro ... l-Trailer/
User avatar
TwilightLane
The 300 Club
 
Posts: 484
Joined: Thu May 14, 2009 4:59 pm
Top

Postby TwilightLane » Sun Nov 21, 2010 11:26 pm

Switch installed on the attic. On the right.

Image
Rob & Lori
Aspen & Tundra
My Instructable: http://www.instructables.com/id/Teardro ... l-Trailer/
User avatar
TwilightLane
The 300 Club
 
Posts: 484
Joined: Thu May 14, 2009 4:59 pm
Top

Postby TwilightLane » Sun Nov 21, 2010 11:29 pm

I also wired the 12-volt outlets in the attic. And chased them into the walls. Turned our pretty sweet.

Image

Image
Rob & Lori
Aspen & Tundra
My Instructable: http://www.instructables.com/id/Teardro ... l-Trailer/
User avatar
TwilightLane
The 300 Club
 
Posts: 484
Joined: Thu May 14, 2009 4:59 pm
Top

Postby TwilightLane » Sun Nov 21, 2010 11:35 pm

I had the idea to line the 'attic' with felt. I thought that would reduce things bouncing around and keep sound down. My wife had some red left over from some project. I used a hot glue gun to attach it. Came out pretty cool.

Image

Image

I created some partitions too. Then polyurathaned them with the same stuff I used on the interior.

Image

Image

The partitions are just wedged into place. I want to maintain access in case I need to yank out the LEDs and fiddle with them.
Rob & Lori
Aspen & Tundra
My Instructable: http://www.instructables.com/id/Teardro ... l-Trailer/
User avatar
TwilightLane
The 300 Club
 
Posts: 484
Joined: Thu May 14, 2009 4:59 pm
Top

Postby S. Heisley » Mon Nov 22, 2010 11:36 am

Twilight:

:o 
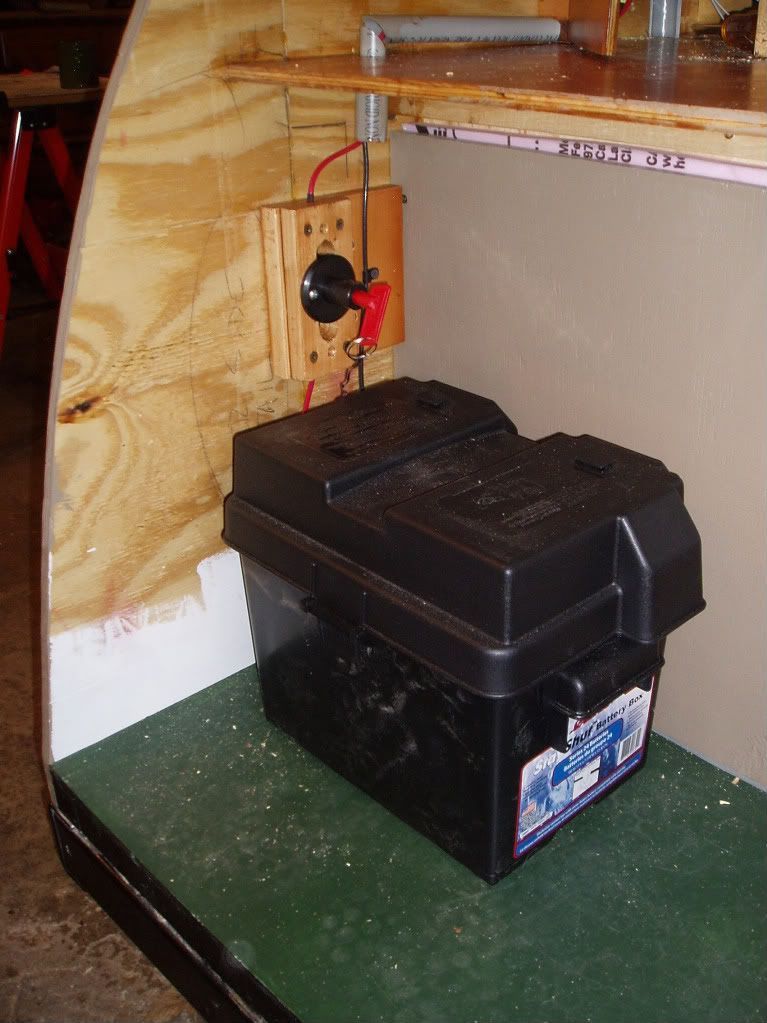
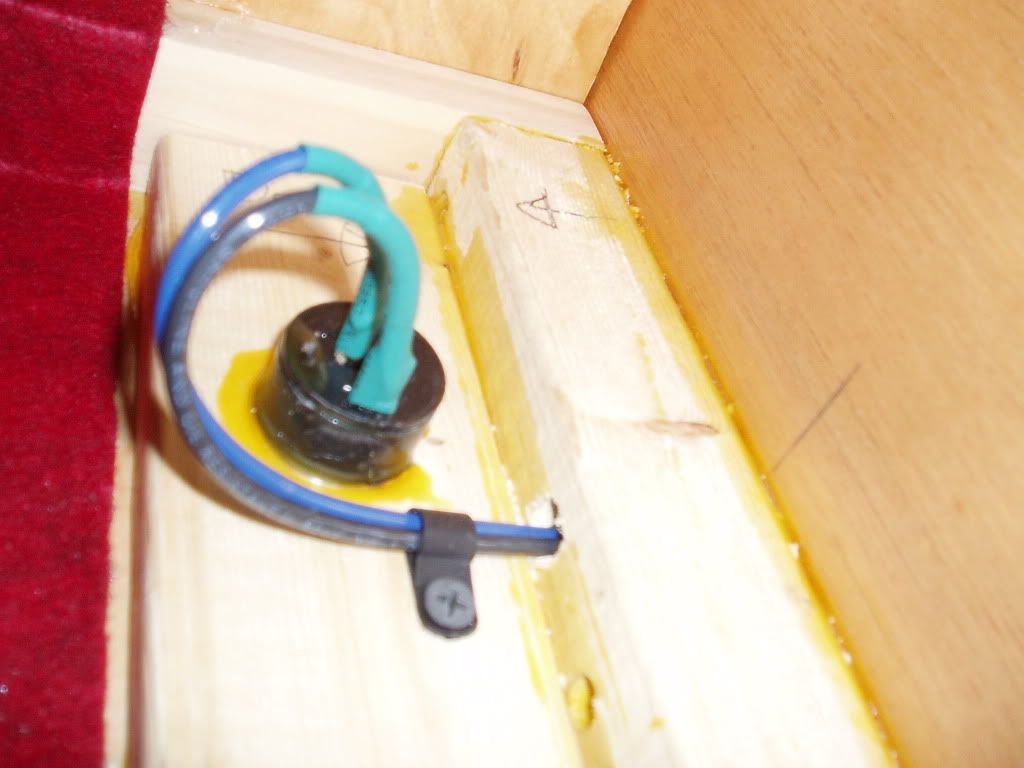
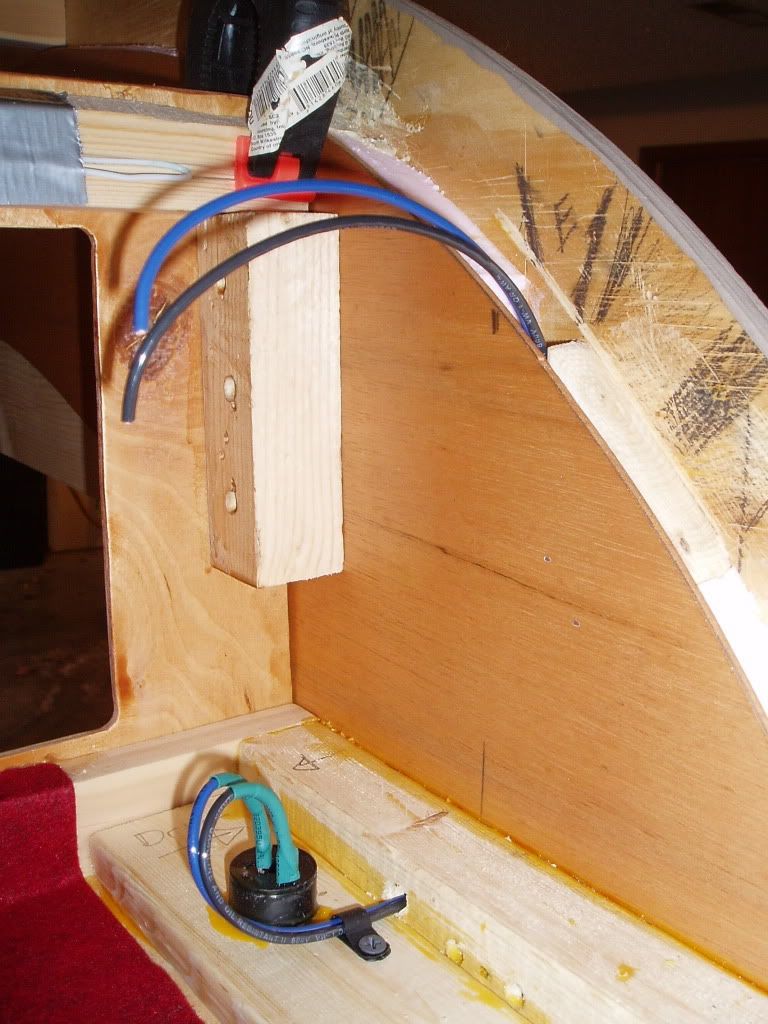
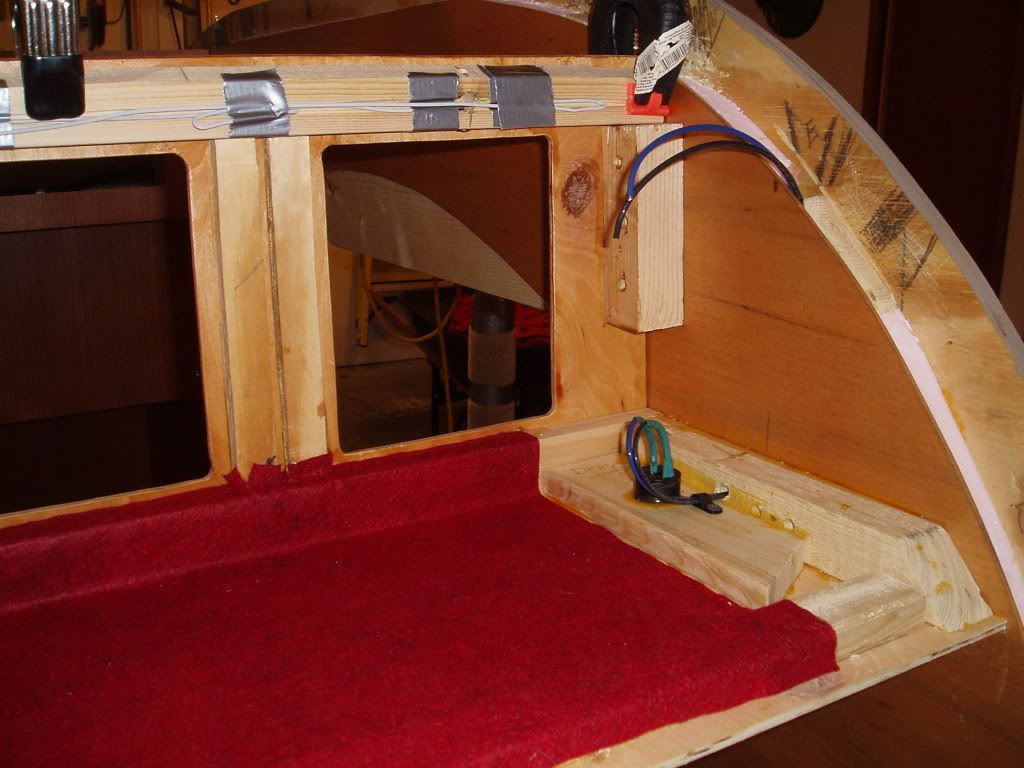
I don't think you can sit a battery on end like that. I'd worry that acid would spill out. If you're using an AGM...maybe; but I'd ask the manufacturer first with whatever type of battery you are planning to use.

Making a turn with your pipe can be done using a PVC elbow fitted to your pipe...even a sprinkler PVC elbow would probably work okay.
User avatar
S. Heisley
Super Lifetime Member
 
Posts: 8867
Images: 495
Joined: Mon Sep 17, 2007 10:02 am
Location: No. California
Top

Postby S. Heisley » Mon Nov 22, 2010 9:59 pm

Wait! I think you got me! :lol: The picture is on it's side, isn't it!?! :lol:
User avatar
S. Heisley
Super Lifetime Member
 
Posts: 8867
Images: 495
Joined: Mon Sep 17, 2007 10:02 am
Location: No. California
Top

Postby TwilightLane » Tue Nov 23, 2010 12:09 am

Ha! Sharon! Thanks for chiming in, yeah I posted the pic sideways somehow. The battery box will sit on it's base, normal-style, in the corner. No fancy on-its-side business. Thanks!

:lol: :lol: :lol:
Rob & Lori
Aspen & Tundra
My Instructable: http://www.instructables.com/id/Teardro ... l-Trailer/
User avatar
TwilightLane
The 300 Club
 
Posts: 484
Joined: Thu May 14, 2009 4:59 pm
Top

Postby TwilightLane » Tue Nov 23, 2010 12:21 am

Sharon, now people will think we are crazy. I just rotated the original pics in Photobucket, so they appear correctly in the thread. Instead of sideways like before.

:lol: :lol: :lol:
Rob & Lori
Aspen & Tundra
My Instructable: http://www.instructables.com/id/Teardro ... l-Trailer/
User avatar
TwilightLane
The 300 Club
 
Posts: 484
Joined: Thu May 14, 2009 4:59 pm
Top

Postby S. Heisley » Tue Nov 23, 2010 9:50 am

:rofl:
User avatar
S. Heisley
Super Lifetime Member
 
Posts: 8867
Images: 495
Joined: Mon Sep 17, 2007 10:02 am
Location: No. California
Top

Postby TwilightLane » Sun Dec 05, 2010 9:31 pm

A lot of progress this weekend. I installed the headliner/ceiling on Saturday. I was worried about bending the luaun but it went very smoothely. In fact, I did it entirely myself - I thought I would need some extra hands to help me make it come together.

One of the steps I took was to apply the polyurethane stain to the sheet while it was already slightly bent. Here is my high-tech jig that I used:

Image

Another view:

Image

If you look close, you can see how the stain ran and puddled into the middle of the sheet. Fortunately that part will be hidden by the shelves.
Rob & Lori
Aspen & Tundra
My Instructable: http://www.instructables.com/id/Teardro ... l-Trailer/
User avatar
TwilightLane
The 300 Club
 
Posts: 484
Joined: Thu May 14, 2009 4:59 pm
Top

PreviousNext

Return to Build Journals

Who is online

Users browsing this forum: No registered users and 8 guests