StandUpGuy's TTT (Not-a-RV)

...ask your questions in the appropriate forums BUT document your build here...preferably in a single thread...dates for updates, are appreciated....

Postby starleen2 » Thu Nov 03, 2011 8:46 pm

Nice water heater - is that the 2.5 or 4 gallon model? ;)
User avatar
starleen2
5th Teardrop Club
 
Posts: 16272
Images: 224
Joined: Sat May 12, 2007 8:26 pm
Location: Pea Ridge ,AR

Postby StandUpGuy » Thu Nov 03, 2011 9:14 pm

4 gal.
User avatar
StandUpGuy
1000 Club
1000 Club
 
Posts: 1090
Images: 52
Joined: Sun Mar 27, 2011 6:15 pm

Postby StandUpGuy » Sat Nov 05, 2011 7:11 pm

I installed the wall mount for my mini tank water heater today. The mini tank has one issue and that is the need to remove the tank at the end of the season to drain it of water. so in order to do that the plumbing must be diesngaged from the unit. I am exploring just how I am going to make that as easy as possible. Here is a photo of the mounted tank with some plastic pipes dry fitted in place. I have to unscrewable unions in place but there will be an issue. The unit has a mount that requires it to be lifted up about an inch from it to release the tank. If pipe is attached in the manner I have shown the pipes will hinder the lifting of the tank.


Image
By justoneman at 2011-11-05
User avatar
StandUpGuy
1000 Club
1000 Club
 
Posts: 1090
Images: 52
Joined: Sun Mar 27, 2011 6:15 pm
Top

Postby StandUpGuy » Sat Nov 05, 2011 7:12 pm

Image
By justoneman at 2011-11-05
User avatar
StandUpGuy
1000 Club
1000 Club
 
Posts: 1090
Images: 52
Joined: Sun Mar 27, 2011 6:15 pm
Top

Postby Ratkity » Sat Nov 05, 2011 7:15 pm

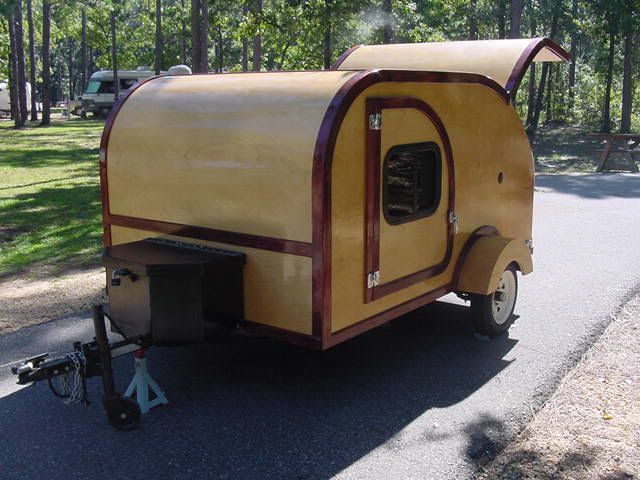
StandUpGuy wrote:I installed the wall mount for my mini tank water heater today. The mini tank has one issue and that is the need to remove the tank at the end of the season to drain it of water. so in order to do that the plumbing must be diesngaged from the unit. I am exploring just how I am going to make that as easy as possible. Here is a photo of the mounted tank with some plastic pipes dry fitted in place. I have to unscrewable unions in place but there will be an issue. The unit has a mount that requires it to be lifted up about an inch from it to release the tank. If pipe is attached in the manner I have shown the pipes will hinder the lifting of the tank.


Image
By justoneman at 2011-11-05


I've seen some xylophone type plastic connectors for connecting sinks with odd angles. I used one in my bathroom from big box store. It might allow you to move that inch up? Or maybe some radiator clamps and tubing? Just thinking out loud here. Good luck on your solution!!

Hugs,
Ratkity
Ratkity
Gold Donating Member
 
Posts: 1065
Images: 0
Joined: Wed May 26, 2010 1:01 pm
Top

Postby StandUpGuy » Sat Nov 05, 2011 7:22 pm

I am probably going to use flexible connectors to connect up to the sink and shower controller. Since I am having both the shower and the sink supplied off the mini tank It has to "tee" off. I am also having the main cold water line come in where you see the valve in the photo. this all needs to be rigid I think.
User avatar
StandUpGuy
1000 Club
1000 Club
 
Posts: 1090
Images: 52
Joined: Sun Mar 27, 2011 6:15 pm
Top

Postby StandUpGuy » Sat Nov 05, 2011 7:24 pm

I have shown one removable union at the outlet and inlet of the tank. One thought is to add a second union just above the first. This way I can have a removeable "section". This would give me the clearance I would need for removal of the tank.
User avatar
StandUpGuy
1000 Club
1000 Club
 
Posts: 1090
Images: 52
Joined: Sun Mar 27, 2011 6:15 pm
Top

Postby StandUpGuy » Sat Nov 05, 2011 8:53 pm

Oh and just so nobody says anything, I am not using the white schedule 40 on the hot side of the water heater. It is just a dry fit to test a layout. So just chill. :lol:
User avatar
StandUpGuy
1000 Club
1000 Club
 
Posts: 1090
Images: 52
Joined: Sun Mar 27, 2011 6:15 pm
Top

Postby starleen2 » Sun Nov 06, 2011 8:59 am

Save yourself some trouble and use the flexible connections - you could always put a loop in one to take up and "extra" length of the flexhose.
User avatar
starleen2
5th Teardrop Club
 
Posts: 16272
Images: 224
Joined: Sat May 12, 2007 8:26 pm
Location: Pea Ridge ,AR
Top

Postby StandUpGuy » Sun Nov 06, 2011 9:38 am

starleen2 wrote:Save yourself some trouble and use the flexible connections - you could always put a loop in one to take up and "extra" length of the flexhose.
I cannot use flexible hose for the whole thing. I have the main water line coming into trailer. I have two faucets that are being served by the water heater. This requires a "TEE". It is not as simple as you make it out.
Last edited by StandUpGuy on Sun Nov 06, 2011 8:31 pm, edited 1 time in total.
User avatar
StandUpGuy
1000 Club
1000 Club
 
Posts: 1090
Images: 52
Joined: Sun Mar 27, 2011 6:15 pm
Top

Postby starleen2 » Sun Nov 06, 2011 8:09 pm

StandUpGuy wrote:
starleen2 wrote:Save yourself some trouble and use the flexible connections - you could always put a loop in one to take up and "extra" length of the flexhose.
I cannot use flexible hose for the whole thing. I have the main water line coming into trailer. I have to faucets that are being served by the water heater. This requires a "TEE". It is not as simple as you make it out.

Image
The flex hose I was thinking about was from the point of entry on both the hot and cold side of the heater instead of the unions - the rest of the system can be hard piped as shown. Then if you need to remove the heater you'll plenty of clearance before you hit the pipes
User avatar
starleen2
5th Teardrop Club
 
Posts: 16272
Images: 224
Joined: Sat May 12, 2007 8:26 pm
Location: Pea Ridge ,AR
Top

Postby StandUpGuy » Sun Nov 06, 2011 8:30 pm

I was planing on using the flex hoses to connect to the faucet sets. I suppose I could hard pipe to the faucets. One thing I was wondering in either cas was how well a seal the flex hose would make to an all plastic connection? I am used to using them to connect to a metal threaded pipe on the faucet set and to a metal pipe emerging through the wall in the house.
User avatar
StandUpGuy
1000 Club
1000 Club
 
Posts: 1090
Images: 52
Joined: Sun Mar 27, 2011 6:15 pm
Top

Postby bdosborn » Sun Nov 06, 2011 9:38 pm

Sharbite fittings and PEX tubing is what I would use:

Image

Bruce
2009 6.5'X11' TTT - Boxcar
All it takes is a speck of faith and a few kilowatts of sweat and grace.
Image
Boxcar Build
aVANger Build
User avatar
bdosborn
Donating Member
 
Posts: 5594
Images: 806
Joined: Wed May 05, 2004 11:10 pm
Location: CO, Littleton
Top

Postby chartle » Sun Nov 06, 2011 9:49 pm

Every single "How its made" TV show on building trailers I have seen them only use flextubing.

I see two problems, rigid piping leaking cracking and the like due to the fact that the trailer is moving and a shaking and any issues with pipes freezing.

Pretty sure you can freeze PEX solid without any issues of burst pipes.
chartle
Teardrop Master
 
Posts: 159
Images: 3
Joined: Thu Aug 18, 2011 8:30 pm
Location: Pgh
Top

Postby StandUpGuy » Sun Nov 06, 2011 9:52 pm

The PEX would be good in that I would have a metal to metal connection. Still it is an increased expense with the crimping tool and all.
User avatar
StandUpGuy
1000 Club
1000 Club
 
Posts: 1090
Images: 52
Joined: Sun Mar 27, 2011 6:15 pm
Top

PreviousNext

Return to Build Journals

Who is online

Users browsing this forum: No registered users and 14 guests