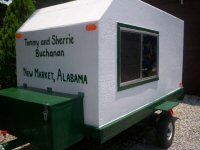
Lance and Becky's Sagwagon

...ask your questions in the appropriate forums BUT document your build here...preferably in a single thread...dates for updates, are appreciated....

Re: Lance and Becky's Sagwagon

Postby High Desert » Thu Jul 12, 2012 9:20 pm

Thanks for the link Becky (bookmarked). What kind of coverage can a person expect from your experience? As it's sold by the quart a person could fine tune their costs to a point at least. Looks like great stuff for this type on application. This is looking like a real winner.

I used some polyurethane equipment paints (sprayed)some years ago and I know that stuff was far superior to regular enamels. Held up well under some very harsh treatment.
Shaun

"it's not the years honey, it's the mileage"
High Desert
Platinum Donating Member
 
Posts: 8780
Images: 27
Joined: Wed Apr 08, 2009 1:46 pm
Location: SW Washington state

Re: Lance and Becky's Sagwagon

Postby Oldragbaggers » Thu Jul 12, 2012 9:30 pm

I used 2 quarts of primer and 2 coats of topcoat for just the exterior. In addition I am using an additional quart of topcoat in the galley, but only because I wanted that bright white rather than the Matterhorn White. I will be using regular Rustoleum enamel on the interior since it will not be exposed to the elements and that will be a big cost savings.
Life is sooooo good.........
Sail...camp....bike...repeat
Becky

Build Journal http://www.tnttt.com/viewtopic.php?f=50&t=45917
Visit our blog at http://www.oldragbaggers.com
Image Image
User avatar
Oldragbaggers
Gold Donating Member
 
Posts: 1842
Images: 331
Joined: Mon Aug 01, 2011 9:22 pm
Location: Essex, MD

Re: Lance and Becky's Sagwagon

Postby TheDuke » Wed Jul 18, 2012 3:04 pm

Becky:
Sorry to bug you with a question that's probably been covered before, but can you list the materials you finished it with, starting with the wood and going out? I"m particularly interested in whether the finish you achieved was over fiberglass, or bare wood.

TheDuke
User avatar
TheDuke
Teardrop Master
 
Posts: 207
Images: 68
Joined: Sun Mar 25, 2007 8:15 pm
Location: Lynden, WA
Top

Re: Lance and Becky's Sagwagon

Postby Doon » Wed Jul 18, 2012 5:31 pm

Thanks for sharing this build. I just read through 13 pages of inspiration. :thumbsup:
Doon
Teardrop Inspector
 
Posts: 4
Joined: Tue Jul 17, 2012 7:22 am
Top

Re: Lance and Becky's Sagwagon

Postby Oldragbaggers » Wed Jul 18, 2012 8:40 pm

TheDuke wrote:Becky:
Sorry to bug you with a question that's probably been covered before, but can you list the materials you finished it with, starting with the wood and going out? I"m particularly interested in whether the finish you achieved was over fiberglass, or bare wood.

TheDuke


Hi Duke, and thank you for asking. My exterior wall skins are 3mm Okoume Marine plywood, covered with 6 oz. fiberglass cloth. The roof is 1/8" baltic birch plywood, covered with 12 oz fiberglass cloth. I used Raka epoxy and non-blushing resin for the layup. The primer is Interlux Pre-Kote and the paint is Interlux Brightsides one-part polyurethane marine paint. Application of primer 2 coats, sanding in between with 150 grit paper and wipe down with Interlux 333 Brushing Liquid (also used to thin the primer and paint if needed). I then applied 2 transition coats which are half primer and half topcoat. Only one is necessary but I mixed too much paint and didn't want to waste it. I have 3 topcoats on, very light sanding in between with 220 grit paper.

Doon, I take that as a very high praise. There is no better reason to have a build journal than to inspire someone else to take this wonderful creative journey. Have you started building yet??
Life is sooooo good.........
Sail...camp....bike...repeat
Becky

Build Journal http://www.tnttt.com/viewtopic.php?f=50&t=45917
Visit our blog at http://www.oldragbaggers.com
Image Image
User avatar
Oldragbaggers
Gold Donating Member
 
Posts: 1842
Images: 331
Joined: Mon Aug 01, 2011 9:22 pm
Location: Essex, MD
Top

Re: Lance and Becky's Sagwagon

Postby Doon » Wed Jul 18, 2012 9:56 pm

Becky-
No, we are still in the planning stage. I am going to look at a trailer frame Saturday.
Doon
Teardrop Inspector
 
Posts: 4
Joined: Tue Jul 17, 2012 7:22 am
Top

Re: Lance and Becky's Sagwagon

Postby TheDuke » Thu Jul 19, 2012 12:59 am

BumbleB has just had it's frame completed, with gas piping and spare tire holder, and the floor is built and about to go on. The intent is for it to look just like my Avatar. Thanks for the very complete finishing instructions. That's what I'm going to do. I hope I can approach your quality, and have as much fun as you did.

TheDuke
User avatar
TheDuke
Teardrop Master
 
Posts: 207
Images: 68
Joined: Sun Mar 25, 2007 8:15 pm
Location: Lynden, WA
Top

Lance and Becky's Sagwagon Update 7/24/2011

Postby Oldragbaggers » Tue Jul 24, 2012 9:57 am

I haven't posted an update in a couple weeks, but in between the horrible heat and the pouring rain, there has been a little bit of progress.

Lance took over the painting for me for the last couple of coats. God bless his heart, I was getting sick of painting and anxious to get back to working on the hatch and galley. Plus he is so much better at it than I am.

Image

I started the hatch frame by rough cutting the ribs with the jig saw. (I cut an extra, just because I had enough wood for it and I figured it would give me a spare in case I slipped up with the router and messed one up. Sure enough I did, so it was a good thing. I will use that one to pre-form my hatch molding.)

Image

I had already made a template for the ribs out of some 1/2" scrap ply I had laying around. That gave me a chance to tweak it with the sander until I had it just the way I wanted it. I fastened the template to a work surface with a couple of screws.

Image

Then one by one I fastened each rough cut rib to the template with a couple of screws.

Image

Nothing makes piles of sawdust faster than a router.

Image

I have six identical ribs, down to the last bump and imperfection.

Image

In the meantime Lance cleaned, sanded and primed my fenders (which had already started to rust a little), and my drip caps.

Image

This is a little rack I built to keep my 2 Coleman lanterns and can of fuel from moving around in transit. They will be secured in place with some line and a couple of cleats when finished. I've seen several threads where people ask what we do with all that "wasted" plywood we cut away when we are doing insulated sandwich walls. It comes in really handy for little projects like this, and sometimes just having it laying around inspires you to think up things to do with it.

Image

This Saturday was a wash (literally) as it poured rain all day long, but on Sunday I got some good progress on the hatch frame.

Image

I will admit, it did kick my rear end. It's unwieldy to work with, even with someone helping you to hold it (thanks Lance). Getting the fit was difficult, and made more so by the fact that my opening isn't exactly symmetrical. Plus, it seems to have "tweaked" a bit as I put it together. I am hoping that by getting it fastened to the skin straight, that will straighten it out. If not I may end up joining the ranks of those who had to build their hatch twice.

The ribs were attached to the spars with the Kreg jig.

Image

I started out trying to screw my blocks in using the holes I had made fastening the ribs to the template for routing, but getting the drill in between the ribs to drive the screws was difficult so in the end I just glued them in with Titebond III. I still have to do two rows of blocks and I will be ready to skin.

I also got a bit of varnish on my galley cabinet face frame and my little lantern holder.

Image

The grain in the maple is really pretty and should look really nice against the white galley walls. I am getting so excited to see it come together, but I want to wait until the hatch frame is done before I put the final finish coat of paint on the galley since I seem to keep banging it up.

That's it for now. We're on vacation the next two weekends. We will be on a cruise with our daughter and two grandchildren and we've really been looking forward to it for a while. We haven't seen them for a year and I have a whole lot of kid hugging to catch up on!!

Take care all and I'll "talk" to you in a few weeks!!
Life is sooooo good.........
Sail...camp....bike...repeat
Becky

Build Journal http://www.tnttt.com/viewtopic.php?f=50&t=45917
Visit our blog at http://www.oldragbaggers.com
Image Image
User avatar
Oldragbaggers
Gold Donating Member
 
Posts: 1842
Images: 331
Joined: Mon Aug 01, 2011 9:22 pm
Location: Essex, MD
Top

Re: Lance and Becky's Sagwagon - Update 7/24/2012

Postby PSBreen » Tue Jul 24, 2012 12:29 pm

Wow! You guys are making great progress. Great pictures of your hatch. Those are going to be really helpful when I get to that point.
Steve & Cynthia
User avatar
PSBreen
Donating Member
 
Posts: 185
Images: 93
Joined: Tue May 24, 2011 12:36 pm
Location: Layton, UT
Top

Re: Lance and Becky's Sagwagon - Update 7/24/2012

Postby Forrest747 » Tue Jul 24, 2012 12:36 pm

Looks good Becky. I really am going to have to break out my pocket screw jig and give it another whirl.
THe hatch looks great and Im keeping the fingers crossed that it fits well.
Are the Ribs for teh hatch solid wood?
My lantern came in a box and I am thinking of ditching it and a simple slot to keep it in may be the right thing.
95644
"All the success on the trail can not compensate for having square headlights"

"I've got a fever and the only prescription is more cowbell!"
http://www.tnttt.com/viewtopic.php?f=50&t=37701 Build Journal
User avatar
Forrest747
Cowbell Donating Member
 
Posts: 1327
Images: 447
Joined: Mon Apr 06, 2009 3:40 am
Location: West Valley Utah, Utah
Top

Re: Lance and Becky's Sagwagon - Update 7/24/2012

Postby Oldragbaggers » Tue Jul 24, 2012 1:05 pm

Thank you!!

The ribs are 3/4" plywood, the spars and blocks are 1x2 poplar.

I found I had just exactly enough room for 2 lanterns and the can of fuel in the space behind my cooler, but not enough room for cases or boxes.
Life is sooooo good.........
Sail...camp....bike...repeat
Becky

Build Journal http://www.tnttt.com/viewtopic.php?f=50&t=45917
Visit our blog at http://www.oldragbaggers.com
Image Image
User avatar
Oldragbaggers
Gold Donating Member
 
Posts: 1842
Images: 331
Joined: Mon Aug 01, 2011 9:22 pm
Location: Essex, MD
Top

Re: Lance and Becky's Sagwagon - Update 7/24/2012

Postby cop1406 » Tue Jul 24, 2012 6:27 pm

Awesome job on the hatch. I am going to have to tackle mine pretty soon. Not looking forward to it, but I wasn't looking forward to the wiring either and that was kinda fun..... :)
User avatar
cop1406
Donating Member
 
Posts: 63
Images: 14
Joined: Fri Apr 27, 2012 1:03 am
Top

Re: Lance and Becky's Sagwagon - Update 7/24/2012

Postby KCStudly » Tue Jul 24, 2012 6:44 pm

Good progress, Becky! Nice work on the lantern holder. I like. :thumbsup:
KC
My Build: The Poet Creek Express Hybrid Foamie

Poet Creek Or Bust
Engineering the TLAR way - "That Looks About Right"
TnTTT ORIGINAL 200A LANTERN CLUB = "The 200A Gang"
Green Lantern Corpsmen
User avatar
KCStudly
Donating Member
 
Posts: 9616
Images: 8169
Joined: Mon Feb 06, 2012 10:18 pm
Location: Southeastern CT, USA
Top

Re: Lance and Becky's Sagwagon - Update 7/24/2012

Postby S. Heisley » Tue Jul 24, 2012 6:47 pm

Beautiful progress, Becky.

Bon Voyage....I'm jealous. :D
User avatar
S. Heisley
Super Lifetime Member
 
Posts: 8774
Images: 495
Joined: Mon Sep 17, 2007 10:02 am
Location: No. California
Top

Re: Lance and Becky's Sagwagon - Update 7/24/2012

Postby CliffinGA » Tue Jul 24, 2012 10:56 pm

Good luck on skinning the hatch Becky I'm still working on mine (2 ruined skins) and the spars still tweek some. Looking good and you got a lot work done on it, enjoy your cruise and the time with your daughter and grandkids@

Cliff :thumbsup:
In God we trust, shoot the rest and he will sort out!

My Build:

viewtopic.php?f=50&t=42628
User avatar
CliffinGA
1000 Club
1000 Club
 
Posts: 1499
Images: 207
Joined: Sat Nov 14, 2009 1:29 pm
Location: Jefferson, GA
Top

PreviousNext

Return to Build Journals

Who is online

Users browsing this forum: No registered users and 10 guests