Cross Bow / trolley / renamed little blue trolley

...ask your questions in the appropriate forums BUT document your build here...preferably in a single thread...dates for updates, are appreciated....

Re: Cross Bow

Postby Ron Dickey » Mon Dec 16, 2013 12:49 pm

I have been working on all sides of the trailer at different sites working on parts.
viewtopic.php?f=2&t=18902
this site or thread they are talking about heaters for inside the tailer. There are several electric ideas and one that is unusual with little to no weight and cost next to nothing to buy or use. It used candles and cookie metal boxes.
I want to cross the tin box with a heat sink and a computer fan. as seen at the bottom of page 14 at the above sit.

1. the front cross bow is 85% done got the inside wall up. Need to install the upper cabinet and reading lights.
2. The trolley is taking more time then I thought
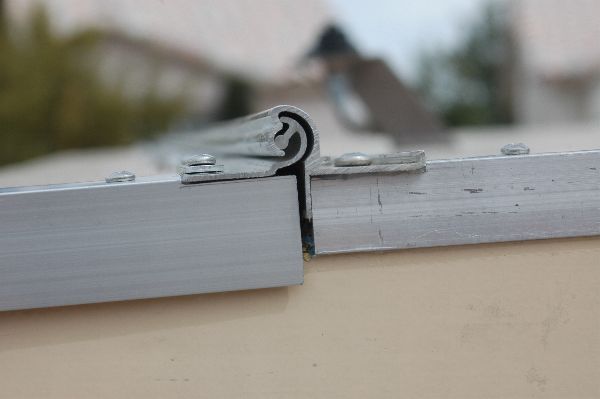
3. the Saddle I am working out the kinks am waiting to get the sides up before I start to put it together.
4. I have most of the parts for the trailer clearance and stop lights and wiring.
5. I will be cutting out the plexiglass vent door today, and cutting the support parts for the trolley.

I have along list of things I need to get from the store to continue will get that when I go to work tue with the car and get more of my big pc's of wood with a truck later in the wk.

I mostly know what I want to do in the galley lower but the upper is still being worked on.

The cabin insides is begging to take shape in my mind and on paper. I am planning drawers on the lower left for folded clothing and cabinet doors will be install too so when we travel the drawers will stay shut. there will be a shoot in the center that will lead to the galley so in bad weather we can slide food through and eat inside. It will have a closing door inside to keep heat in at night. Both A/C and D/C plugs and sound will be inside. I am thinking that in a rain storm it would be nice to put ear buds on and listen to birds singing. :lol:

Trolley windows will be one big pc of Plexiglass on the outside and when it is dark you will see the holes that are cut out.

I plan to have this done by IRG 8 months away ....... :NC It may not be painted but at least I have a back up camper if not.

Ron
121377......134179
Inside almost done--Trolly top has opening windows & roof.doors need assembling--pictured above waley windows..galley 1/3 done
Cross Bow in Build Journals....http://www.tnttt.com/viewtopic.php?f=50&t=54108
User avatar
Ron Dickey
Silver Donating Member
 
Posts: 3078
Images: 711
Joined: Tue Apr 20, 2004 5:56 pm
Location: Central Coast, CA

Re: Cross Bow

Postby Gunguy05 » Mon Dec 16, 2013 12:55 pm

More photos! More photos! How's the overall look of the build?
Brian


Checkout my buildThe Regal Eagle Bow front for 4
Image
Also my teardrop updates from blog on Dad Rambles
User avatar
Gunguy05
The 300 Club
 
Posts: 385
Images: 6
Joined: Mon Dec 02, 2013 4:45 pm
Location: South GA

Re: Cross Bow

Postby Ron Dickey » Wed Dec 18, 2013 10:43 pm

115352

115351 this is how I will hold cross bars on as I attach them to the roof and Trolley

115350 This is why I needed to put the roof on first then the Trolley!! :thumbsup:

115349

Now that the trolleys fit I can work on attaching things to sides of trolley sides and then attaching cross bars from body walls to trolley and cross bars for Trolley roof

In the last shot you can see where I will have a lower plywood sheet lay. The Vent will go at the end of this and be vertical. The plywood sheet is there so if it rains the water will run back and not into the cabin.

Ron
121377......134179
Inside almost done--Trolly top has opening windows & roof.doors need assembling--pictured above waley windows..galley 1/3 done
Cross Bow in Build Journals....http://www.tnttt.com/viewtopic.php?f=50&t=54108
User avatar
Ron Dickey
Silver Donating Member
 
Posts: 3078
Images: 711
Joined: Tue Apr 20, 2004 5:56 pm
Location: Central Coast, CA
Top

Re: Cross Bow

Postby Ron Dickey » Sat Dec 28, 2013 2:02 am

I painted the outside of the trolley with white primer paint. picking a color to paint it before I cut and install the outside plexiglass.

I am starting to work on wiring I need to know where things will go before I cut and install the outside walls.

I may jump to the saddle build next so when the walls go in I can also cut out openings for A/C and D/C wires, coaxel, and any other additions I have not yet thought of :scratchthinking:

I am holding back on photo's so I can pay attention to the act of working. Once I get the other side wired and the trailer light wires ready for walls then I will give you some more shots. :pictures: :thumbsup:

I was talking with Robert Spencer about the candle heater and may have to add a second cookie can to the mix to increase heat before passing it to the heat sink I am planing to attach above.
Thank you for staying tune.

Ron
121377......134179
Inside almost done--Trolly top has opening windows & roof.doors need assembling--pictured above waley windows..galley 1/3 done
Cross Bow in Build Journals....http://www.tnttt.com/viewtopic.php?f=50&t=54108
User avatar
Ron Dickey
Silver Donating Member
 
Posts: 3078
Images: 711
Joined: Tue Apr 20, 2004 5:56 pm
Location: Central Coast, CA
Top

Re: Cross Bow

Postby Ron Dickey » Wed Jan 15, 2014 2:48 am

Before one puts on the sides one must put in the wires.
115890
with my wide angle lens broken I must use the tele until I get a new lens or camera with a set wide angle view.

I ran wires from where the battery up to the front of the trailer where I will have switches for inside upper lights, outside lower lights, and reading lights. I also ran wires for the clearance lights and roof stop and turn lights. I will also have a plug on each side under the cabin cabinets.

I have most of the lights for the clearance to brake/turn lights. needing only the main ones for the lower rear.

When the out side walls get put in I will drill holes where the wires for those clearance lights. First painting the outside body then attach the lights with ground wires. The inside walls will need to be cut for light switches and D/C plugs. Only the galley will have A/C plugs.

I am planning to have a open area between the cabin and the galley so if I need to run a A/C cord I can connect it through there.

I am working on how to connect the saddle to the side of the trailer. The trolley will be painted light blue paint sample next to trolley in photo. The inside of the trolley will be the same color. The rear air opening had to be redesigned I am not sure I like it any better but I will make it so I can remove it of it does not work. The body to the trailer will be a different shade of blue from the trolley. And the roof will be white. The hatch color is unknown. There will be upright wood strips at the center front, and each side where the walls had a gap I am thinking of painting them white.

I have been playing with the candle heater on cold nights, One day I will take out to the Box Kite and see if it gives me warmth I plan to use 2 cookie tins and a heat sink. The air for the candle and the exhaust will go through a window in the trolley.

I am beginning to plan in the screen for the doorways. I made a place above the doors for the back half of the roller to go. should be pretty straight forward.

I keep playing with brake light ideas and the Hatch and am unsure where the license will go. Back of saddle or hatch.

Steve B. showed me a place where I might get better wood for the hatch. Plan to check them out soon.

Once the Trolley if fully painted I can put it all together and attach the roof, I have not drilled holes for the brake/blinker nor clearance lights until I better know where I want them to go.

I caught one of those winter colds going around which slowed the physical build down but I keep working on the drawings and playing it out in my head. 8)
121377......134179
Inside almost done--Trolly top has opening windows & roof.doors need assembling--pictured above waley windows..galley 1/3 done
Cross Bow in Build Journals....http://www.tnttt.com/viewtopic.php?f=50&t=54108
User avatar
Ron Dickey
Silver Donating Member
 
Posts: 3078
Images: 711
Joined: Tue Apr 20, 2004 5:56 pm
Location: Central Coast, CA
Top

Re: Cross Bow

Postby S. Heisley » Wed Jan 15, 2014 9:49 pm

Get well soon, Ron. Drink lots of liquids and rest. :coffee:
User avatar
S. Heisley
Super Lifetime Member
 
Posts: 8775
Images: 495
Joined: Mon Sep 17, 2007 10:02 am
Location: No. California
Top

Re: Cross Bow

Postby Ron Dickey » Tue Jan 28, 2014 10:06 pm

over my cold and back to work.

116261
I have spent every day painting, most of the wiring is done, started putting in some insolation, talking to my wife as to what she wants to see.
I have 3 parts to the trolley that need to be completed for the most part.
116262
The vent plate is painted, and may be mounted after the Trolley is in place, along with the sides, the plate that goes up to the vent, the cross bars that hold the sides up.
I need to get the wood for the roof of the trolley top. I also need to get and cut the plexi for the windows.
I want to start putting it all together but am stopped I need to get the Galley hatch hinge because the roof needs to be cut for the hinge and the it must be cut to accommodate the top rear of the hinge.

Need to write Grant and look at his site for de-mentions. I had thought of using the hinge used by SCtear which does not have a top support but uses the space between the hatch and cabin top to work.
like this
http://www.asolidfoundation.com/dd_478a.jpg
or that
https://www.socalteardrops.com/parts/31_lg.jpg
the first one looks more stable in the way it is attached.

Getting anxious to install the outside walls but first I will need to buy one side so I can cut the galleys together with the same ( mistakes :roll: ) curve
The insides for the galley I already have so I can cut inside and outside galley hatch curve together.

I have been designing the Saddle I want to start with cedar board but the ones I found were to wet. (will have to look away from HD for that.) Steve B. pointed out a wood company in San Luis Obispo which I may check into soon.

I am thinking of putting drawers inside the cabin on one side with an hatch door to keep them closed while traveling and a small clothes rack on the other side??? still up in the air there. My wife is shorter then I so that leaves room for them.

We went to an RV supply house today near Paso Robles, CA and I found some really nice LED reading lights. Priced DC wall plugs and found door insolation that just might work for me.

Ron
121377......134179
Inside almost done--Trolly top has opening windows & roof.doors need assembling--pictured above waley windows..galley 1/3 done
Cross Bow in Build Journals....http://www.tnttt.com/viewtopic.php?f=50&t=54108
User avatar
Ron Dickey
Silver Donating Member
 
Posts: 3078
Images: 711
Joined: Tue Apr 20, 2004 5:56 pm
Location: Central Coast, CA
Top

Re: Cross Bow

Postby Ron Dickey » Wed Jan 29, 2014 11:46 pm

bought some tinted plexiglass today. will use it for over the first 3 windows of the trolley on the outside.
I plan to cut it with a dremel, I used it on a different pc of plexiglass and it worked fine as long as I went in the right direction.
I am planning to drill holes in the tinted plex and mount it with either screws or nut's and bolts. I wonder if I should not protect the front edge from the wind. I plan to use silicon around the edges.

I could mount it inside instead but this is all up in the air.
Anyone have experience with this stuff.

The other plexiglass I cut earlier is for the hatch that will go over the vent that I am creating as we speak.

Ron
121377......134179
Inside almost done--Trolly top has opening windows & roof.doors need assembling--pictured above waley windows..galley 1/3 done
Cross Bow in Build Journals....http://www.tnttt.com/viewtopic.php?f=50&t=54108
User avatar
Ron Dickey
Silver Donating Member
 
Posts: 3078
Images: 711
Joined: Tue Apr 20, 2004 5:56 pm
Location: Central Coast, CA
Top

Re: Cross Bow

Postby Ron Dickey » Fri Jan 31, 2014 2:58 am

Today I put the one wall up that I have so I could measure where the inside wall would fall before cutting it when I buy the other outside wall.
The inside wall will be higher and so when I cut the walls all at one time I will need to adjust for the difference. In that way when they get installed I will not have 2 part higher then the rest.

I wrote Grant last night and he sent me a picture of the hinge for the galley hatch so I knew how much to cut from the roof before installing the trolley top.

I have to research the plexiglass more in books and on line before starting to cut it. But I realized that I would need some sort of wind deflector at the front of the trolley plexi window so when driving down the road it would not get under it and blow it off.

I am thinking metal strip to deflect the air. I'll have to look at a car parts place.

Now that I have most of the Trolley done I can move on to the finalizing the design for the side saddles.

I looked at drawers and realized the weight is something to consider. I may take a closer look at plastic drawers and attach wood fronts. I am also looking at metal baskets with will let clothing air too. This will be at the back of the cabin for clothing and bedding storage.

The sink in the galley has come down to 3 choices
1. under the counter and be a pull out
2. under the counter but the counter lifts up there exposing the sink
3. the counter above the sink becomes a pull out pc exposing the sink below.

Ron
121377......134179
Inside almost done--Trolly top has opening windows & roof.doors need assembling--pictured above waley windows..galley 1/3 done
Cross Bow in Build Journals....http://www.tnttt.com/viewtopic.php?f=50&t=54108
User avatar
Ron Dickey
Silver Donating Member
 
Posts: 3078
Images: 711
Joined: Tue Apr 20, 2004 5:56 pm
Location: Central Coast, CA
Top

Re: Cross Bow

Postby S. Heisley » Fri Jan 31, 2014 7:30 pm

The sink in the galley has come down to 3 choices
1. under the counter and be a pull out
2. under the counter but the counter lifts up there exposing the sink
3. the counter above the sink becomes a pull out pc exposing the sink below.


Personally, Ron, if those are your choices, I'd make it a pull-out. You'll have better ability to control, contain, and wipe up water spills that way. Drainage will be easier, too, as you can just put a bucket underneath to catch the gray water, if you want.
User avatar
S. Heisley
Super Lifetime Member
 
Posts: 8775
Images: 495
Joined: Mon Sep 17, 2007 10:02 am
Location: No. California
Top

Re: Cross Bow

Postby Ron Dickey » Sat Feb 01, 2014 10:40 pm

Thanks Sharon I think you are totally right I just need to make a support that can swing out from it and hold the weight so the weight of the water does not bend the pull out arms.

Next week I will send off, for my Galley hatch, the hinge from Grant at Li'l Bear. http://www.lilbear.teardrops.net/index.html

"Better-Than-Hurricane" Leakproof Galley Lid Hinge

2-piece Extruded Aluminum - mill finish!
Lower Profile Crown
Tighter "Nesting Pocket" Within the Crown (less slop/play)
NO Lid-to-Roof Offset!

Grant in an email answered my questions. 1 what is the measurement. 2. which is back and which is front. 3. how to keep it from sliding left or right. With a set screw.

I still need to cut the roof but before I did I put the trolley on one more time to play with the back vent system.

116463

in the photo above,
I have that one wall up to check it out to make sure all in the wall was where it should.
The roof will be cut sometime next week to make room for the Hatch hinge.
The trolley will not be assembled until I get the Plexiglass cut and mounted on the outside of each trolley top side.
By then I should know how I want to do the vent.
116462
above this is what I had planned and will attach after some cutting and making sure I am ready to glue/staple and/or screw them in place.
116461
above was my first plan and the roof would keep it from falling rain to come in.
I went to several rv parts places in the past 3 days look to see what I could get in the future. Today I went to Auto Zone and found a car vent
like the one at the below site.
http://litbimg.rightinthebox.com/images ... 551187.jpg
I realized I could make it of wood and in fact had most of it already there.
116460
above is my first attempt hard to see but if I put meshed wire between those 2 woods it would help.
other I am thinking of putting the mesh at the back so I can change to different types of vent screens depending if I am in the cold or in 110 degree weather, or heavy rain.
121377......134179
Inside almost done--Trolly top has opening windows & roof.doors need assembling--pictured above waley windows..galley 1/3 done
Cross Bow in Build Journals....http://www.tnttt.com/viewtopic.php?f=50&t=54108
User avatar
Ron Dickey
Silver Donating Member
 
Posts: 3078
Images: 711
Joined: Tue Apr 20, 2004 5:56 pm
Location: Central Coast, CA
Top

Re: Cross Bow

Postby Ron Dickey » Thu Feb 06, 2014 1:44 pm

I realized in the above entry that the top of the vent will be the Trolley roof. I need to find a grill that will go in there to keep unwanted's out. and then put a trap at the back end.

I have begun to work on the trolley window, while I wait for my 4' Galley Hatch Hinge :thumbsup: to come to me from Li'l Bear Teardrops in Northern California.

116574

A friend had some left over pc's of Plexiglass left over from his Kitchen Florissant lights covers.

I drew the outline in with a blue sharpie, I bought some tented pleli from HD and laid down some light paper then put some boards on top to put the plexi on. first the template then the Tented plexi and flowed the traced lines. I have plenty of plexi so I have room fore error.

I will also need a small pc to experiment with drilling. if the drill rips or graps the plexi it will crack. It is said I should put some veg. oil or water to lub the drill as it cuts into the plexi for the screw holes.

I bought some DC plugs for the walls and have been to all kind of shops looking at LED lights for under the trailer and inside the cabin. I am still looking for some LED tail lights I already have the wires.

I am working on how to support the batteries, the right ribbing for the saddle bags, and once I get the walls cut. I can begin to design the hatch ribs. I see lots of pictures of them putting it together but very few of them cutting or shaping the ribs for the hatch. :NC :scratchthinking:

Ron
121377......134179
Inside almost done--Trolly top has opening windows & roof.doors need assembling--pictured above waley windows..galley 1/3 done
Cross Bow in Build Journals....http://www.tnttt.com/viewtopic.php?f=50&t=54108
User avatar
Ron Dickey
Silver Donating Member
 
Posts: 3078
Images: 711
Joined: Tue Apr 20, 2004 5:56 pm
Location: Central Coast, CA
Top

Re: Cross Bow

Postby aggie79 » Thu Feb 06, 2014 4:53 pm

Ron,

Your teardrop is coming along nicely. I'm a big fan of the trolley top, but I'm too lazy to build one for all the work it involves. Thank you for sharing your trolley top build details.

Take care,
Tom
Tom (& Linda)
For build info on our former Silver Beatle teardrop:
Build Thread

93503
User avatar
aggie79
Super Duper Lifetime Member
 
Posts: 5405
Images: 686
Joined: Tue Aug 07, 2007 5:42 pm
Location: Watauga, Texas
Top

Re: Cross Bow

Postby Ron Dickey » Fri Feb 07, 2014 8:08 pm

thanks here is some more, on the plexiglass project for my trailer.

116579 116580 116581
traced out from template ..... The tool and blade...and we begin

116582 116583 116584
Reflecting light under it....making lines show up....and the tool and the window

116585 116586
template and window.... The window still needs to be sanded and drilled, with calking and the rear plate for air or the candle heater still in the works

Ron
121377......134179
Inside almost done--Trolly top has opening windows & roof.doors need assembling--pictured above waley windows..galley 1/3 done
Cross Bow in Build Journals....http://www.tnttt.com/viewtopic.php?f=50&t=54108
User avatar
Ron Dickey
Silver Donating Member
 
Posts: 3078
Images: 711
Joined: Tue Apr 20, 2004 5:56 pm
Location: Central Coast, CA
Top

Re: Cross Bow

Postby Ron Dickey » Fri Feb 07, 2014 8:32 pm

The Window still it need of much sanding. one side is a little shorter then the other, did not take my time but the second one has straighter lines top and bottom. The curves of the first worked very well sit few problems. The second one I moved the shaft part up and found the drill would wobble and cut a bigger hole. So I moved it closer to the tip and it stopped that part.

You need a light under it to see the lines. At first I just put a light under it aimed up and blinded myself. I then took at light colored surface and put it at an angle and reflected the light up and it worked better.

I will need to experiment with different drills and oils or water to see if I can cut it with out creating a crack of any type. :worship:

I feel a little like I am setting up dominos so when the hatch hinge comes in I will then they will all fall in place. Hinge, trolley, roof studs, Trolley studs, trolley vent shelf, trolley vent screen, trolley roof.

I now need to attach the window on the trolley top, buy other side for outside walls so I can cut the galley hatch curve, cut out the doors, attach the outside walls and start building the saddle bags, and wiring the trailers travel road lights.

Gosh that was along sentance :sweaty: I think I need to rest after all those words... :relaxing:

I can hardly wait until the galley is done so I can go out an celebrate make a fire :campfire: and eat some campin food. :picnic:

Ron
121377......134179
Inside almost done--Trolly top has opening windows & roof.doors need assembling--pictured above waley windows..galley 1/3 done
Cross Bow in Build Journals....http://www.tnttt.com/viewtopic.php?f=50&t=54108
User avatar
Ron Dickey
Silver Donating Member
 
Posts: 3078
Images: 711
Joined: Tue Apr 20, 2004 5:56 pm
Location: Central Coast, CA
Top

PreviousNext

Return to Build Journals

Who is online

Users browsing this forum: No registered users and 22 guests