Camp Critter update 11/6/2013
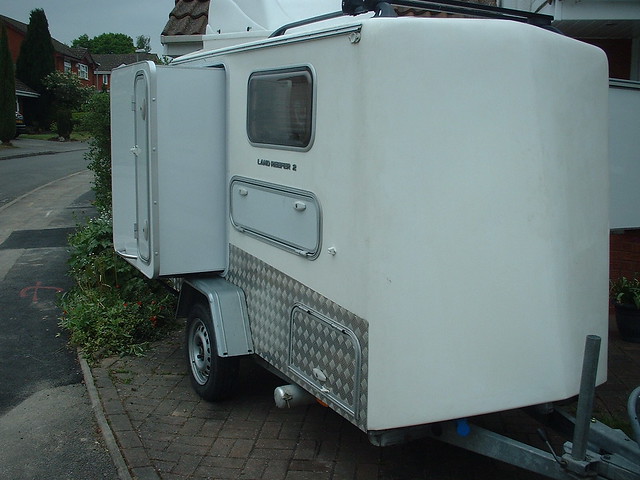
...ask your questions in the appropriate forums BUT document your build here...preferably in a single thread...dates for updates, are appreciated....

Postby S. Heisley » Thu Sep 08, 2011 8:13 pm

WooHoo! Good job! :applause: You're almost there!!!!
User avatar
S. Heisley
Super Lifetime Member
 
Posts: 8866
Images: 495
Joined: Mon Sep 17, 2007 10:02 am
Location: No. California

Postby LDK » Thu Sep 08, 2011 9:07 pm

down under tech wrote:Hi Larry: Sorry to hear about your trouble with the side skins. I just floated my skin on the Silver Nugget. My trim holds it all together. I trimmed out the bottom of the front and sides with 1 1/2" x 1/8" flat aluminum held in place every 6" with SS screws. I like the look of your hatch. Wasn't that fun to build??? I will use T molding for my lower trim pice on the hatch. I still have some left over.
Any estimate of the first trip out and camping in it? Keep going, and keep up the nice work. :thumbsup:


Hi Johnny

I worked on the side skin some and I think it helped alittle. I guess when me and my brother in law installed it , we got in too big of a rush. I guess my skin is considered semi-floated. I used 3m 4200 adhesive/sealant around the premeter with a few brad nails and homemade trim. :) I'm hopeing to be done and camping by next week.
LDK
Gold Donating Member
 
Posts: 1419
Images: 1
Joined: Fri Jan 22, 2010 8:29 pm

Postby LDK » Thu Sep 08, 2011 9:13 pm

S. Heisley wrote:WooHoo! Good job! :applause: You're almost there!!!!


Yes ma'am, I'm almost there. :lol:
LDK
Gold Donating Member
 
Posts: 1419
Images: 1
Joined: Fri Jan 22, 2010 8:29 pm
Top

Postby LDK » Thu Sep 08, 2011 9:16 pm

campmasterk wrote:Thanks Larry I will do one or the other. I did not even think about t mold. Have you slept in it yet?


Hey cmk

I hope to be sleeping in it sometime next week, if I can get my wife to go camping. If not maybe I'll go solo. :lol:
LDK
Gold Donating Member
 
Posts: 1419
Images: 1
Joined: Fri Jan 22, 2010 8:29 pm
Top

Postby Loader » Thu Sep 08, 2011 9:18 pm

Looks great Larry!! :thumbsup: :thumbsup:

A liitle sealant, a little trim work and you are hitting the road to that first outing! Nice. :applause:
Earl & Kerry

"Loader"

Blue Yonder Build Thread - viewtopic.php?f=50&t=42611

ImageImage
User avatar
Loader
Platinum Donating Member
 
Posts: 1584
Images: 245
Joined: Tue Apr 26, 2005 2:33 pm
Location: Fort Worth, Texas
Top

Postby LDK » Thu Sep 08, 2011 9:20 pm

WhitneyK wrote:I wanted my hatch lid to be sturdy, not wimpy, but I guess I may have "over engineered" it too. Checked the weight of mine while being lifted, the first couple of feet it goes up to 45#. A lot more than I'd hoped for. :shock:


Hey Whitney

I definitely over engineered that hoss of a hatch lid! :lol:
My wife is so small I might have to open and close it for her. :lol:
LDK
Gold Donating Member
 
Posts: 1419
Images: 1
Joined: Fri Jan 22, 2010 8:29 pm
Top

Postby LDK » Thu Sep 08, 2011 9:24 pm

Loader wrote:Looks great Larry!! :thumbsup: :thumbsup:

A liitle sealant, a little trim work and you are hitting the road to that first outing! Nice. :applause:


Hey Earl

Not much left to do. sealant, trim, and hanging the door and I'm off. I also have a few decals to put on it too. :) I'm on vacation next week. 8)
LDK
Gold Donating Member
 
Posts: 1419
Images: 1
Joined: Fri Jan 22, 2010 8:29 pm
Top

Postby CliffinGA » Thu Sep 08, 2011 9:33 pm

Larry looks great and you just changed my mind about trying to do my hatch ribs like yours :lol:. I'll stck to 3/4" ply and have a lil lighter since mines 18" wider and I think ends up farther forward than yours. You might try some of those gas struts that were on the forum last week, and make it easier to open for the Mrs! Hope you'll have good weather for camping next weekend.

Cliff :thumbsup:
In God we trust, shoot the rest and he will sort out!

My Build:

viewtopic.php?f=50&t=42628
User avatar
CliffinGA
1000 Club
1000 Club
 
Posts: 1499
Images: 207
Joined: Sat Nov 14, 2009 1:29 pm
Location: Jefferson, GA
Top

Postby LDK » Thu Sep 08, 2011 9:47 pm

CliffinGA wrote:Larry looks great and you just changed my mind about trying to do my hatch ribs like yours :lol:. I'll stck to 3/4" ply and have a lil lighter since mines 18" wider and I think ends up farther forward than yours. You might try some of those gas struts that were on the forum last week, and make it easier to open for the Mrs! Hope you'll have good weather for camping next weekend.

Cliff :thumbsup:


Thanks Cliff

Gas struts :thinking: Yeah Cliff if you did yours like mine, that would definitely be a bear because yours is alot bigger. You could use a wide 3/4" pine board to cut your ribs out with. Might be better than using plywood. :thinking:
LDK
Gold Donating Member
 
Posts: 1419
Images: 1
Joined: Fri Jan 22, 2010 8:29 pm
Top

Postby CliffinGA » Thu Sep 08, 2011 10:07 pm

Larry,

How many 2' wide x 1" boards have you seen :thinking:? :lol: thats reason I was just going to stick with ply and severa; cross pieces between the ribs.

Cliff (& Sheri) :thumbsup:
In God we trust, shoot the rest and he will sort out!

My Build:

viewtopic.php?f=50&t=42628
User avatar
CliffinGA
1000 Club
1000 Club
 
Posts: 1499
Images: 207
Joined: Sat Nov 14, 2009 1:29 pm
Location: Jefferson, GA
Top

Postby LDK » Thu Sep 08, 2011 10:11 pm

CliffinGA wrote:Larry,

How many 2' wide x 1" boards have you seen :thinking:? :lol: thats reason I was just going to stick with ply and severa; cross pieces between the ribs.

Cliff (& Sheri) :thumbsup:


You could always glue them together. Ply is fine but I had the problem of voids on the end grain. :)
LDK
Gold Donating Member
 
Posts: 1419
Images: 1
Joined: Fri Jan 22, 2010 8:29 pm
Top

Postby CliffinGA » Thu Sep 08, 2011 10:30 pm

The extra ply I have now has a eucalypse core and only seen a few voids. I figured I would epoxy them before I skin to fill the voids I do see, couldn't hurt I guess :lol:. Really enjoyed watching your build Larry and all the help bud!

Cliff :thumbsup:
In God we trust, shoot the rest and he will sort out!

My Build:

viewtopic.php?f=50&t=42628
User avatar
CliffinGA
1000 Club
1000 Club
 
Posts: 1499
Images: 207
Joined: Sat Nov 14, 2009 1:29 pm
Location: Jefferson, GA
Top

Postby aggie79 » Fri Sep 09, 2011 12:35 pm

Larry,

The hatch looks great! Wasn't it a relief when it fit? (I know I had a few moments of trepidation when I put my hatch on for the first time.)

I think that plastic film grows if you leave any of it on. I still picking out bits of plastic here and there.

I the 1" x 1/8" trim at the bottom of the hatch works well. I used it in the same way you are doing. On our first - and only to date - outing, it rained all the way back home. I didn't have any water get past the aluminum. I did come back and add a weatherseal later for "insurance purposes".

Take care,
Tom
Tom (& Linda)
For build info on our former Silver Beatle teardrop:
Build Thread

93503
User avatar
aggie79
Super Duper Lifetime Member
 
Posts: 5405
Images: 686
Joined: Tue Aug 07, 2007 5:42 pm
Location: Watauga, Texas
Top

Postby LDK » Fri Sep 09, 2011 9:46 pm

aggie79 wrote:Larry,

The hatch looks great! Wasn't it a relief when it fit? (I know I had a few moments of trepidation when I put my hatch on for the first time.)

I think that plastic film grows if you leave any of it on. I still picking out bits of plastic here and there.

I the 1" x 1/8" trim at the bottom of the hatch works well. I used it in the same way you are doing. On our first - and only to date - outing, it rained all the way back home. I didn't have any water get past the aluminum. I did come back and add a weatherseal later for "insurance purposes".

Take care,
Tom


Thanks Tom

You're right about that plastic film. I'm still finding it on the edges. :lol:
When you put the weatherseal on the lower hatch, did you apply it on the trim or on the bottom of the hatch? :thinking:
LDK
Gold Donating Member
 
Posts: 1419
Images: 1
Joined: Fri Jan 22, 2010 8:29 pm
Top

Postby campmaster-k » Tue Sep 13, 2011 3:57 pm

Today your build was #30 down on the list. Just checking on ya Larry.
-Kirk

>TnTTT ORIGINAL 200A LANTERN CLUB

>CEO Coleman Recovery Inc.

>Nor Cal Camping Pinewood Racing Team


Build thread -

viewtopic.php?t=45307&postdays=0&postorder=asc&start=180

Check out my Pictures -

http://s1199.photobucket.com/albums/aa4 ... 0QQtppZZ24
User avatar
campmaster-k
Lifetime member
 
Posts: 3030
Images: 17
Joined: Fri Jun 17, 2011 5:02 pm
Location: Colusa, California
Top

PreviousNext

Return to Build Journals

Who is online

Users browsing this forum: No registered users and 17 guests