Compact family camper Build - Always something...

...ask your questions in the appropriate forums BUT document your build here...preferably in a single thread...dates for updates, are appreciated....

Re: Compact family camper Build - Final Stretch!

Postby ryuandwings » Tue Jan 20, 2015 5:59 am

Gunguy05 wrote:Looks great! Getting closer every day!

Do you have a goal for having it complete, or at least campable?


Thank you!
The campable date is set for the last weekend in January, 2015, that's in less than 2 weeks... :shock:
The completion date would be the day I die... :lol:
User avatar
ryuandwings
Teardrop Master
 
Posts: 187
Images: 61
Joined: Wed Feb 13, 2013 5:22 am
Location: West Tennessee

Re: Compact family camper Build - Final Stretch!

Postby ryuandwings » Tue Jan 20, 2015 6:15 am

S. Heisley wrote:It gets more beautiful every time I look! :o

Thank you very much.
I was thinking about my building journey last weekend, how I managed to get it this far. :? 
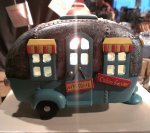
If I show a picture of my trailer to myself before I started almost 2 years ago, I would have said no way I can do this. :shock: Each small progress how it is getting close to the end kept me going. Off course the support, knowledge, experience of people here, that's invaluable. :thumbsup:
User avatar
ryuandwings
Teardrop Master
 
Posts: 187
Images: 61
Joined: Wed Feb 13, 2013 5:22 am
Location: West Tennessee

Re: Compact family camper Build - Final Stretch!

Postby ryuandwings » Tue Jan 20, 2015 7:35 am

dales133 wrote:P's can you show me a bit more detail on the drop down bunk, I have been toying with the same idea myself for resale value


First, my concept of my trailer is to be able to use with 2 adults and 2 small kids. We are physically small people, but still need to find a space for at lease one child. On top of that, I wanted to cabin to double as a small living space in a case we encounter a rain storm or something. So the bunk bed was an obvious route, but it needed to be storable because I did not want to deal with loose bed sections.So tossed around different ideas and came to an idea of a pull out bed that is pushed under the cabin cabinet when not in use. The problem was that my cabinet was only 14" deep. I have about 3"x3" raceway tucked under as well. Then I thought if I made the pull out section flip out as well, I can double the bed space.I was able to made the flip section a little wide there than the base section.
I used Accuride 3640, 14" full extension with 1" over travel so that when it is fully pulled out, the bed is about 30" from the cabinet. This slide is rated at 200lb, so should be fine carrying my 5 years old. :lol:
Here are slides fully extended.
Image

Off course I need to support the flip section. Again, I tossed around different idea on this issue, and settled on hanging from the ceiling. I used aluminum quick disconnect tie down anchors.
Image
I can remove the anchor from the base when I not using the bed and it won't be that eye sore. These things are rated at 2000lb each, so I can be safe even my kids get really big,,, :? :lol:

Another issue I ran into was that fact the bend extend into the door opening. The door latch and harder to get in and out of the trailer. I was thinking it won't be a big deal, then Sharon had an idea to angle the corners. It probably obvious to her but I was the mindset to maximize the bed space so that I did not think about that.

When it is stored, I have 2 draw latches holding two sections together.

So that's how I came up with a bunk bed that can support up to a child weighs 200lbs! :lol:
Image
User avatar
ryuandwings
Teardrop Master
 
Posts: 187
Images: 61
Joined: Wed Feb 13, 2013 5:22 am
Location: West Tennessee
Top

Re: Compact family camper Build - Final Stretch!

Postby Johnysteam » Wed Jan 21, 2015 3:52 am

Fantastic workmanship.
Why is it that everyone on this forum seems to produce a quality and great looking product? Is everyone a born camper maker?
User avatar
Johnysteam
Silver Donating Member
 
Posts: 80
Images: 40
Joined: Mon Sep 16, 2013 6:28 pm
Top

Re: Compact family camper Build - Final Stretch!

Postby dales133 » Wed Jan 21, 2015 5:31 am

That's a realy cleaver design.
So from what I can tell it's actualy supported from the roof above your legs
User avatar
dales133
4000 Club
4000 Club
 
Posts: 4605
Images: 1
Joined: Mon Oct 13, 2014 5:26 pm
Top

Re: Compact family camper Build - Final Stretch!

Postby KCStudly » Wed Jan 21, 2015 8:33 am

Johnysteam wrote:Why is it that everyone on this forum seems to produce a quality and great looking product?

Pride and joy, baby. Pride and Joy.
KC
My Build: The Poet Creek Express Hybrid Foamie

Poet Creek Or Bust
Engineering the TLAR way - "That Looks About Right"
TnTTT ORIGINAL 200A LANTERN CLUB = "The 200A Gang"
Green Lantern Corpsmen
User avatar
KCStudly
Donating Member
 
Posts: 9616
Images: 8169
Joined: Mon Feb 06, 2012 10:18 pm
Location: Southeastern CT, USA
Top

Re: Compact family camper Build - Final Stretch!

Postby ryuandwings » Wed Jan 21, 2015 9:21 am

Johnysteam wrote:Fantastic workmanship.
Why is it that everyone on this forum seems to produce a quality and great looking product? Is everyone a born camper maker?


Thank you. :D
This is my first teardrop design+build experience, but I've been designing buildings for many years. There are many similarities between the two so I guess I'm familiar with the process.
But I think the biggest reason you see so many quality builds here on this site is that there are so many great examples to learn from. :thumbsup:
User avatar
ryuandwings
Teardrop Master
 
Posts: 187
Images: 61
Joined: Wed Feb 13, 2013 5:22 am
Location: West Tennessee
Top

Re: Compact family camper Build - Final Stretch!

Postby ryuandwings » Wed Jan 21, 2015 9:24 am

dales133 wrote:That's a realy cleaver design.
So from what I can tell it's actualy supported from the roof above your legs


Thank you. :)
The drawer slides are mounted on the walls. Bunk bed is not mounted on the cabinets.
User avatar
ryuandwings
Teardrop Master
 
Posts: 187
Images: 61
Joined: Wed Feb 13, 2013 5:22 am
Location: West Tennessee
Top

Re: Compact family camper Build - Final Stretch!

Postby ryuandwings » Wed Jan 21, 2015 9:27 am

KCStudly wrote:
Johnysteam wrote:Why is it that everyone on this forum seems to produce a quality and great looking product?

Pride and joy, baby. Pride and Joy.


Yeah, baby!! :beer:
User avatar
ryuandwings
Teardrop Master
 
Posts: 187
Images: 61
Joined: Wed Feb 13, 2013 5:22 am
Location: West Tennessee
Top

Re: Compact family camper Build - Final Stretch! #2

Postby ryuandwings » Mon Jan 26, 2015 9:14 am

I've been working hard to meet my deadline. Actually, last a few weeks have been the hardest I worked on the trailer. 8)
So here are what I've accomplished.

First, I added insulation to inside of tongue hatch. I used foil faced bubble insulation. I mainly used this for the finishing aspect and not much so for the insulation. It will hide some oops I made. :lol:
Image

Tongue hatch reinstalled with hatch adjuster. This is twist lock type hatch adjuster. I was originally thinking about using gas struts but the hatch is so light, I could not find any for this application. I think I like this adjuster better though. :thumbsup:
Image

I added seals. Need to install draw latch to finish tongue hatch.

Next is 110v electrical. I have 2 circuits at front of trailer. One is dedicated for AC and another is for receptacles. I'm using heavy duty extension cord for this. Located plugs at the rear so I could disconnect if I needed. This is so that if I had to remove the camper off the chassis I could. I really don't want to though. :?
Image
Image
Image
Image

Next is planning for galley hatch gas strut installation.
In order to find a location for the brackets, I needed to know how far hatch would cover the wall. I taped grid paper on the wall.
Image

Set smartphone camera to timer and close the hatch to take a photo.
Image

Using photo, transfer hatch edge to grid paper. Now I know the limit of location I can mount the bracket. :thumbsup:
Image

I will use this to plan my gas strut bracket location and shelves for galley area. I will have to put this on hold till I get all materials needed.
While I wait for the parts to come in, I worked on the cabinet doors. Decided to go with Shaker style for the simplicity and clean look. Middle panels are 1/2" birch plywood for durability and be able to screw stuff to in future.
Here are some rails and stiles but and started to make dado for panels to set.
Image

This is how plywood will be set.
Image

I'm using galley counter top as my work bench. I since it is unfinished, I can still screw jigs and clamps to it. Also in the photo below, you and see a switch I added at the hatch panel. This will be for the galley dome lights.
Image
Image

Dry fitting doors in place.
Rear of cabin.
Image
Image

There is another door that covers AC area, but I found out that area is not truly square. I need to redo that door.
I plan to hinge at top to swing up for rear cabin and bottom hinged for the front. I still need to tweak their fit, but seems like they would work. :D

That's all for now. I hope to get it "campable" in week or so.
Thanks for looking. :beer:
User avatar
ryuandwings
Teardrop Master
 
Posts: 187
Images: 61
Joined: Wed Feb 13, 2013 5:22 am
Location: West Tennessee
Top

Re: Compact family camper Build - Final Stretch! #2

Postby KCStudly » Mon Jan 26, 2015 3:11 pm

As usual, fabulous work! :thumbsup:
KC
My Build: The Poet Creek Express Hybrid Foamie

Poet Creek Or Bust
Engineering the TLAR way - "That Looks About Right"
TnTTT ORIGINAL 200A LANTERN CLUB = "The 200A Gang"
Green Lantern Corpsmen
User avatar
KCStudly
Donating Member
 
Posts: 9616
Images: 8169
Joined: Mon Feb 06, 2012 10:18 pm
Location: Southeastern CT, USA
Top

Re: Compact family camper Build - Final Stretch! #2

Postby ryuandwings » Tue Jan 27, 2015 8:54 am

KCStudly wrote:As usual, fabulous work! :thumbsup:

Thank you, KC. 8)
User avatar
ryuandwings
Teardrop Master
 
Posts: 187
Images: 61
Joined: Wed Feb 13, 2013 5:22 am
Location: West Tennessee
Top

Re: Compact family camper Build - Final Stretch! #2.5

Postby ryuandwings » Tue Jan 27, 2015 9:25 am

Since the weather was a bit colder, I did not want to work on the varnish for the cabinet doors. :(
But there are plenty of other things I need to do. :lol: I worked on some electrical stuff last night.

First was to wire tail/brake/turn signal lights, back up lights with switch, and license plate holder and its light.
Wiring turn signal lights and back up lights were straight forward. Since I don't have the TV with wiring, yet, I can't test the wiring. I hope I did them right. :worship:
For the back up light, as I posted before, I will have a switch to turn on/off at the license plate. I figure if I needed back up lights to back up, I would need to be there to check to see where I will be backing up to. So having to go to the rear of trailer to turn on the back up light is not cumbersome, it is actually a safety feature. :lol:

Here is back of license plate with frame and holder. What you see on lower left corner is the switch.
Image
Both license plate light and swich wires will be routed to interior through the wire cap located behind of license plate.

Here the the setup from the front.
Image

You can't obviously tell from the photo, but back up light turns on when I push the switch. :thumbsup:
Image
Here is license plate light.
Image

Now switching the gear and this is my USB charger. I hacked cig lighter USB charger and using Keystone style insert wall plate. The idea is that this is a module so if I needed to change or add something in future, it should be easier.
Image
Image
I tested them with iPad2, iPhone 4, and iPhone 6 and all worked charging simultaneously. I assume other USB device would work as long as it is similar power requirement. I will have two more of this setup. One at rear cabin cabinet at the media center and another one in galley area.

Thanks for looking. :beer:
User avatar
ryuandwings
Teardrop Master
 
Posts: 187
Images: 61
Joined: Wed Feb 13, 2013 5:22 am
Location: West Tennessee
Top

Re: Compact family camper Build - Campable!

Postby ryuandwings » Tue Feb 10, 2015 10:31 am

I'm finally here! It is campable and I have photos to prove it!!! :dancing :P :dancing :P

There were a few things I had to complete before I can call it campable.
First is the gas struts for galley hatch.
I went to O'reilly Auto and ordered 120 lbs struts, but those came with 13mm ends. I had ordered 10mm mounting brackets, so I had to order 13mm mounting brackets. While I was waiting for the 13mm brackets to arrive, I did more calculations, and decided 120 lbs were too big. I went back to the store and exchange to 80 lbs. Both times, store did not stock these struts, but they could have them shipped from their warehouse by next morning. The 80 lbs struts had 10mm brackets, so I tested with them.
I'm still not sure how I'm going to finish the galley cabinets, so I make this sacrificial plates held by 2x4 so I can find the best location for the wall brackets.
I first tested the shape of the wall plates.
Image
Holding the wall plate with 2x4s.
Image
You can see how strut fits when closed.
Image

It was good to see the geometry worked and I was able to fit everything. However, I had problem with physics and the struts were not strong enough to hold the hatch. I move the brackets on the wall, but 80 lbs were simply out matched against the hatch.

So I went back to the store to exchange with 110 lbs. Well, according to manufacture, there is such struts, but O'reilly Auto was not able to get them for me. So I searched online and found them on eBay. 110 lbs with 10mm ends.
When I got it, I hat to move the brackets on the hatch a little, so there are couple screw holes I need to patch, but I'm OK with that.
The end result! :D
Image
This was a huge milestone to achieve. I was happy to check this item off my list.

Other things I needed to do were;
Sill of galley hatch.
Image
Tidy up PD4045 bay. I fill that emply socket with spare breaker after I took the photo.
Image

Then the big moment. Removing films off the aluminum. :dancing :P
Image
Image

Since the past weekend was so nice, I pulled it out of the garage and camped in my driveway.
Image
Image

Here is a shot of us camping in out driveway. Temperature wasn't too bad, but the wind made it a little chilly.
Image

Here is how interior look in the morning after we camped in it.
Image
As planned, my 5 years old slept on the bunk bed and my wife, I and 2 years old slept on the main floor. It was much more comfortable and spacious than I was expecting.

There are several more items I need to do but, it was nice to see that we can actually use the trailer!
Thank you for looking and stay tune for more updates. :beer:
User avatar
ryuandwings
Teardrop Master
 
Posts: 187
Images: 61
Joined: Wed Feb 13, 2013 5:22 am
Location: West Tennessee
Top

Re: Compact family camper Build - Campable!

Postby tony.latham » Tue Feb 10, 2015 12:03 pm

I'm sooooooo impressed. This is one of those teardrops, that in my next life, I expect to see appraised on Antiques Roadshow.

t :thumbsup:
User avatar
tony.latham
Gold Donating Member
 
Posts: 6916
Images: 17
Joined: Mon Jul 08, 2013 4:03 pm
Location: Middle of Idaho on the edge of nowhere
Top

PreviousNext

Return to Build Journals

Who is online

Users browsing this forum: No registered users and 14 guests

cron