Grizz, the build is looking great.
I too like #3, however I think you should give the checkered flag a bit more rake by starting the bottom front of it ahead of the Sinclair logo leaving the top front where it is - so the flag is splitting the background behind the logo. While you are at it throw the 63 on in the lower rear quarter as you have done in #4.
No matter how you go it is going to look sweet behind the Transit.
Teardrops n Tiny Travel Trailersor t n ttt for short (tnttt.com) |

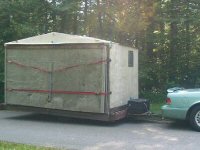
![]() by grizz » Tue May 18, 2010 11:51 pm
by grizz » Tue May 18, 2010 11:51 pm
S. Heisley wrote:I like #3 also but two things about the dinosaur bother me:
1) If you use the dinosaur, I agree with Ageless that he should be looking forward to where he is going and not where he's been.
2) I wouldn't want you to get into trouble for using a copyrighted logo so I'd change the words to something catchy or change the logo slightly so it isn't exact:
- Maybe something that rhymes with Sinclair, like "Beenthere" ...or "Seenthere". (Then, you could leave the dinosaur looking back.)
- Or something that relates to the teardrop like "DinoDrop" or "DinoPod"
- Or put the Circled 63 where the dinosaur is
- Or, since it's supposed to be a Grizz Pod, put a bear's claw or a bear's shape in place of the dinosaur, with the bear facing forward or the claw facing forward or upward and change "Sinclair" to "GrizzPod".
Okay, Grizz...Go ahead and roll your eyes at me...

Thanks all for the responses so far.
No3 is mu prefered choice too, the Dino would always face forward yes.
Sharon, I have actually spoken to Sinclair's legal department, and got premission to use their logo's as they are not being used for comercial gain.
My research went pretty deep, and I am the last person to ever infringe copyright etc.
I am probably going to run this as a woode side this season, and then do the colours/kolors at the end of the season when I get to do the bus.
Greetings from England.
Rian.
Hoping to get it all done in time.
Rian.
Hoping to get it all done in time.
-

grizz - 1000 Club

- Posts: 1210
- Images: 29
- Joined: Mon Sep 21, 2009 2:37 pm
- Location: Rochester, Kent, UK