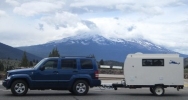
4-Day Weekender - Toddler bed!

...ask your questions in the appropriate forums BUT document your build here...preferably in a single thread...dates for updates, are appreciated....

Re: 4-Day Weekender - Paint

Postby KCStudly » Sat Sep 06, 2014 4:46 pm

Looks good! :thumbsup:
KC
My Build: The Poet Creek Express Hybrid Foamie

Poet Creek Or Bust
Engineering the TLAR way - "That Looks About Right"
TnTTT ORIGINAL 200A LANTERN CLUB = "The 200A Gang"
Green Lantern Corpsmen
User avatar
KCStudly
Donating Member
 
Posts: 9640
Images: 8169
Joined: Mon Feb 06, 2012 10:18 pm
Location: Southeastern CT, USA

Re: 4-Day Weekender - Paint

Postby S. Heisley » Sat Sep 06, 2014 8:23 pm

You're doing good!
I like the idea of putting the utilities in a tongue box.
:thumbsup:
User avatar
S. Heisley
Super Lifetime Member
 
Posts: 8869
Images: 495
Joined: Mon Sep 17, 2007 10:02 am
Location: No. California

Re: 4-Day Weekender - Paint

Postby Kharn » Sat Sep 06, 2014 9:23 pm

Thanks! :D

I found out my brother has a scroll saw, I had to teach him how to set it up (blade guide was all wrong and he complained about poor performance) but then it worked for trimming the ends. I ended up having to take 1/16" off the front piece, the circular saw we'd used had a very small kerf so it did not sit well with the gasket, and I split one of the side pieces while screwing it to the front face so I had to glue and will leave it clamped that overnight. I picked up the brass screws for the ceiling and round-head stainless for the latches.

I'm going to stick with the current latches, since the T-molding is trimmed, the holes drilled, etc, to fit them plus I can use keyed-alike locks for the coupler and AC door and not have another key (now I'm at 4, truck, doors, hatch/tongue box, and coupler/AC) on our camping rings.
User avatar
Kharn
500 Club
 
Posts: 655
Images: 1
Joined: Sun Jul 17, 2011 1:54 pm
Top

Re: 4-Day Weekender - Paint

Postby Kharn » Sun Sep 07, 2014 7:30 pm

So today was almost exclusively about fitting the beadboard ceiling panels. They're all ready for varnish now, I may wait until the sliding doors are ready and do them all at the same time.
20140907 beadboard fitting small.jpg
20140907 beadboard fitting small.jpg (100.46 KiB) Viewed 1918 times

Here's the largest panel, and the most fragile with the roof vent cut-out.
20140907 big panel small.jpg
20140907 big panel small.jpg (157.27 KiB) Viewed 1918 times

Good thing the fan has a big trim ring...
User avatar
Kharn
500 Club
 
Posts: 655
Images: 1
Joined: Sun Jul 17, 2011 1:54 pm
Top

Re: 4-Day Weekender - Paint

Postby Kharn » Wed Sep 10, 2014 8:33 pm

So yesterday was planning all of the insulation work, it turns out I was able to get all the needed pieces from a single 4x8 sheet so I have an entire extra sheet I can return to the store. :applause:

Today was cutting all of the insulation out. Using a large square and a utility knife for cutting the panels apart was slow but very clean.
20140910 insulation pile small.jpg
20140910 insulation pile small.jpg (127.12 KiB) Viewed 1850 times

And then inside the tear I used a drywall saw to make final adjustments and cut the various wiring/lighting holes. That was not very clean. :shock:
20140910 insulation installed small.jpg
20140910 insulation installed small.jpg (100.56 KiB) Viewed 1850 times

Now the cabin's roof is covered in 1" of solid insulation. I'm not sure how much of a difference it will make, but I can say I tried.
User avatar
Kharn
500 Club
 
Posts: 655
Images: 1
Joined: Sun Jul 17, 2011 1:54 pm
Top

Re: 4-Day Weekender - Paint

Postby noseoil » Wed Sep 10, 2014 9:02 pm

Good job using the knife instead of a circular saw. Nice to see some progress!

I met a guy this weekend who used cans of expanding foam on the top of his tear for insulation, after he put in the head liner. As you might expect, it was a little lumpy, so he used a belt sander to knock it back down & fair things up. He said it was a "bit messy" out in the yard that day. I'll bet it was, must have looked like a blizzard in the desert and that stuff must still be lurking around.
Build log: viewtopic.php?f=50&t=60248
The time you spend planning is more important than the time you spend building.........

137905
User avatar
noseoil
1000 Club
1000 Club
 
Posts: 1822
Images: 670
Joined: Sun Apr 27, 2014 8:46 am
Location: Raton, New Mexico, living the good life!
Top

Re: 4-Day Weekender - Paint

Postby Kharn » Thu Sep 11, 2014 8:16 am

Oh, I forgot to mention I found the source of my electrical switch problem. The switches were advertised as fitting in a 3/4" hole. Only problem? They actually measured out at 0.783", or 19.9mm and just a hair over 25/32". So I ordered a new Forstner bit advertised as 20mm/25/32" (I bet it is actually 25/32") but that should make my light switch panels much easier to produce.

I also found out I can use a pulse width modulated dimmer to dim the two reading lights, but the general lights aren't dimmable (even though they're in identical housings, I thought the only difference was 9 vs 12 LEDs). I think we'll see how the reading lights work out on our first trip before thinking about adding dimmers. If we decide we want them, I'll just pull the forward-most ceiling panels, cut out a chunk of insulation and put a single-gang low voltage box but I'll put an extra few inches of wire in that area for each run so I can add the dimmer easily. I'll have to do some more research on the "undimmable" LEDs...

Noseoil,
The previous owner for my house decided to fill a hole where an old toilet paper dispenser had been mounted with expanding foam and a bit of leftover wallpaper. Thanks buddy, now there's a 3/4" high bulge in the drywall between those studs, and the wallpaper patch was from the wrong section of the pattern. :lol:
User avatar
Kharn
500 Club
 
Posts: 655
Images: 1
Joined: Sun Jul 17, 2011 1:54 pm
Top

Re: 4-Day Weekender - Paint

Postby noseoil » Thu Sep 11, 2014 9:10 am

I bought a 20mm bit & it was too small for the rocker switches I got from amazon (the ones with the blue LEDs). Found a "stepped bit" at harbor freight yesterday which worked better (13/16" is what was correct). Not sure if this will work for you or not. In my build thread with the cover plates. tim
Build log: viewtopic.php?f=50&t=60248
The time you spend planning is more important than the time you spend building.........

137905
User avatar
noseoil
1000 Club
1000 Club
 
Posts: 1822
Images: 670
Joined: Sun Apr 27, 2014 8:46 am
Location: Raton, New Mexico, living the good life!
Top

Re: 4-Day Weekender - Paint

Postby Kharn » Thu Sep 11, 2014 9:12 am

I might get to add a new bit to my collection if that is the case.
Or we'll see if I can just trim the holes with a knife to fit.
User avatar
Kharn
500 Club
 
Posts: 655
Images: 1
Joined: Sun Jul 17, 2011 1:54 pm
Top

Re: 4-Day Weekender - Paint

Postby KCStudly » Thu Sep 11, 2014 2:53 pm

Link shows cutout dimensions for the switches I am using, which appear to be the same.

The hole diameter called out is 20.2 mm (0.795 inch, while the dimension "across flats" for thinner (less than 2 mm) panels is 19.0 mm.

I used a 3/4 inch punch in a hydraulic iron worker which gave a very snug fit (...preferred!), and used a small fine file to make the anti-rotation notch (2.2 mm wide x 1 mm deep).

Could it be the anti-rotation tab that is holding you up?

If you're interested, there are some more details about how I filed the notches in one of my build entries here.

Edit: A little more about my switch plates here.
KC
My Build: The Poet Creek Express Hybrid Foamie

Poet Creek Or Bust
Engineering the TLAR way - "That Looks About Right"
TnTTT ORIGINAL 200A LANTERN CLUB = "The 200A Gang"
Green Lantern Corpsmen
User avatar
KCStudly
Donating Member
 
Posts: 9640
Images: 8169
Joined: Mon Feb 06, 2012 10:18 pm
Location: Southeastern CT, USA
Top

Re: 4-Day Weekender - Paint

Postby Kharn » Thu Sep 11, 2014 3:29 pm

KCStudly,
Your switches are bigger than mine by a little bit, I was cutting the anti-rotation notch using a jeweler's file so it was definitely the body of the switches that were binding on the holes.
User avatar
Kharn
500 Club
 
Posts: 655
Images: 1
Joined: Sun Jul 17, 2011 1:54 pm
Top

Re: 4-Day Weekender - Paint

Postby Kharn » Fri Sep 12, 2014 12:53 pm

So I started with putting the filler on the tongue box lid. I really should've done this earlier in the week because the front lip has a significant amount of filler on it and will take forever to dry. I also put the first coat of paint on the AC trim, the corner and edged the galley. Now that I'm waiting for both of those things to dry, I've been puttering around working on small stuff.

20140912 tongue lid small.jpg
20140912 tongue lid small.jpg (121.58 KiB) Viewed 1745 times


I attached the galley latch panels to the hatch but forgot to take a picture before I took it apart. I also taped the side of the trailer for the paint design, it will get painted on Sunday after SWMBO gives her final approval.

20140912 taped side small.jpg
20140912 taped side small.jpg (203.59 KiB) Viewed 1745 times

20140912 taped front small.jpg
20140912 taped front small.jpg (135.25 KiB) Viewed 1745 times


The drill bit arrived, it turned out to be a fully 20mm metric bit so the switches drop right in once I trim the anti-rotation notch. Unfortunately the smallest plastic cover plates (so they don't extend over my trim rings) I could find at Home Depot are really junky and the first panel broke into several pieces when I went to drill the second hole. :thinking:
User avatar
Kharn
500 Club
 
Posts: 655
Images: 1
Joined: Sun Jul 17, 2011 1:54 pm
Top

Re: 4-Day Weekender - Paint

Postby rdraider » Sat Sep 13, 2014 11:17 am

Trailer is coming along great!

I have a question. Why are you using epoxy and cloth on the edges? I know it helps strengthen the edges, but i'm wondering if this is how you are sealing the exposed edges, or if there is another weather proofing need.

Thanks
User avatar
rdraider
Teardrop Advisor
 
Posts: 71
Joined: Sun Jul 18, 2010 10:51 am
Location: Sheffield, Texas
Top

Re: 4-Day Weekender - Paint

Postby Kharn » Sat Sep 13, 2014 11:21 am

Basically as extra protection for the edges. The manufacturer says 2 coats of 100% acrylic primer and two coats of 100% acrylic paint are sufficient to protect the MDO, but I wanted to ensure the corners can stand up to a bit more abuse, like a tree limb scraping it as I back into a site at night, getting hit by an Easy-Up, etc. With the fiberglass, there's a good margin for error before the wood is compromised.

Is it excessive and an unneeded expense? Probably, but without it I'd worry about every nick and scratch on the edges instead of just touching up the paint when I have a chance. It also added a lot to the price of the build, I think it has been around $400 for the supplies and tools.
User avatar
Kharn
500 Club
 
Posts: 655
Images: 1
Joined: Sun Jul 17, 2011 1:54 pm
Top

Re: 4-Day Weekender - Paint

Postby rdraider » Sat Sep 13, 2014 12:52 pm

Thanks! Just wondering about the mdo. I read the apa guide and there was good information there. Price is a concern for me, but when my local supplier carries the mdo for roughly the same price as marine grade and for not much more than birch, I can't see why i wouldn't use it.

My intention is to stay away from the epoxies as much as possible.

Keep up the good work! :beer:
User avatar
rdraider
Teardrop Advisor
 
Posts: 71
Joined: Sun Jul 18, 2010 10:51 am
Location: Sheffield, Texas
Top

PreviousNext

Return to Build Journals

Who is online

Users browsing this forum: jdeleon and 3 guests