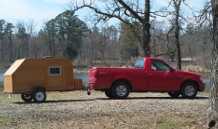
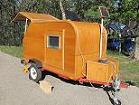
Compact family camper Build - Always something...

...ask your questions in the appropriate forums BUT document your build here...preferably in a single thread...dates for updates, are appreciated....

Re: Compact family camper Build - Campable!

Postby Junkboy999 » Fri Feb 13, 2015 10:58 pm

Super build.

I bet the kids loved it. Let us know how the first outing goes.☺
User avatar
Junkboy999
1000 Club
1000 Club
 
Posts: 1259
Images: 52
Joined: Fri Jul 06, 2012 9:18 pm
Location: Wichita, KS

Re: Compact family camper Build - Campable!

Postby capnTelescope » Fri Feb 13, 2015 11:08 pm

Very nice, Ryu. It's good to be to the point where you're done, except for all the other things that need to be done. :lol:
I'll burn that bridge when I come to it.

Brad
ImageImageImage

Building the Bed & Breakfast
User avatar
capnTelescope
Lifetime member
 
Posts: 1218
Images: 368
Joined: Sun Jun 27, 2004 3:44 pm
Location: Round Rock, TX

Re: Compact family camper Build - Campable!

Postby Mike46 » Fri Feb 13, 2015 11:19 pm

ryuandwings wrote:It's the manual galvanized roof vent I bought from eTrailer.com.
It is 14 x14. It seems like a little flatter than some of the plastic vent.


I like the low profile too, what do you think of the quality, does the mechanism work smoothly and gasket seal OK.

Keeping the fans inside the screen was also a space saver. I was thinking about using an 8" computer fan http://amzn.com/B008G3OLRQ, do you think it could fit in the space where you put your (2) fans?

Thanks
User avatar
Mike46
Teardrop Builder
 
Posts: 37
Images: 15
Joined: Sun Feb 17, 2013 10:13 am
Location: Metro Denver, Colorado
Top

Re: Compact family camper Build - Campable!

Postby ryuandwings » Sat Feb 14, 2015 9:09 am

Junkboy999 wrote:Super build.

I bet the kids loved it. Let us know how the first outing goes.☺


Thank you. :)
They love it so much. I wish weather get better so we can use it other than our driveway. :lol:
Right now, schedule maiden voyage is in April to TJ TN gathering. Can't wait. 8)
User avatar
ryuandwings
Teardrop Master
 
Posts: 187
Images: 61
Joined: Wed Feb 13, 2013 5:22 am
Location: West Tennessee
Top

Re: Compact family camper Build - Campable!

Postby ryuandwings » Sat Feb 14, 2015 9:11 am

capnTelescope wrote:Very nice, Ryu. It's good to be to the point where you're done, except for all the other things that need to be done. :lol:

Yeah, my list of upgrades are probably as long as the original build. :lol:
User avatar
ryuandwings
Teardrop Master
 
Posts: 187
Images: 61
Joined: Wed Feb 13, 2013 5:22 am
Location: West Tennessee
Top

Re: Compact family camper Build - Campable!

Postby ryuandwings » Sat Feb 14, 2015 9:37 am

Mike46 wrote:
ryuandwings wrote:It's the manual galvanized roof vent I bought from eTrailer.com.
It is 14 x14. It seems like a little flatter than some of the plastic vent.


I like the low profile too, what do you think of the quality, does the mechanism work smoothly and gasket seal OK.

Keeping the fans inside the screen was also a space saver. I was thinking about using an 8" computer fan http://amzn.com/B008G3OLRQ, do you think it could fit in the space where you put your (2) fans?

Thanks


Since I have not seen other fan units like fantastic fans, I can't compare my fan quality, but my impression on this fan is I say it is more for an utility trailer. Galvanize give that utility feel to me. Plastic covers hide it enough that you won't see much from inside. I'm thinking about painting the plastic or making wood trim to dress it up. Lift mechanism does not feel all that smooth. It will go up and down and I can stop at any position. It seems to seal fine.
Overall, I'm happy with this fan unit. I wanted to add my own fans so I looked for an inexpensive housing that are low profile.

As for fitting you fan, I took some dimensions. I think you should be able to fit that 8x8x1.2 fan.
First, here is a close up of fan from inside. There is a mesh screen that snaps into the trim. You can see two aluminum angles I attached my fans. There is another metal piece that runs perpendicular to the angle that is the guide rail for the lift mechanism. You will be fitting your fan in between the guide rail and screen.
Image

Here is a shot with screen removed. From bottom of guide rail to bottom of alum angle is about 1" and there is another 1/2" from angle to screen.
Image

Here is a shot measuring front to back. From inside of trim to the plastic around knob is about 8". Knob is held with screw, so there are another 1" or so if you needed more space.
Image

Here are exterior shots. Fan cover sticks out about 2" from the roof.
Image
Image

I hope this helps. If you need more, let me know. :thumbsup:
User avatar
ryuandwings
Teardrop Master
 
Posts: 187
Images: 61
Joined: Wed Feb 13, 2013 5:22 am
Location: West Tennessee
Top

Re: Compact family camper Build - Campable!

Postby Mike46 » Sat Feb 14, 2015 10:27 am

ryuandwings wrote:Since I have not seen other fan units like fantastic fans, I can't compare my fan quality, but my impression on this fan is...


Ryu, thanks so much for the detailed pics & measurements, that really helps. I see what you mean about perceived quality from the material, I nice paint job would definitely help. Good news about the space for the 8" fan, that's a big perk to keep it in the unit. I was looking at this 9" vent http://amzn.com/B0027XEKMW but it would require keeping the fan inside the tear, outside of the unit.

Thanks for the help. Enjoy your job well done with your family.
User avatar
Mike46
Teardrop Builder
 
Posts: 37
Images: 15
Joined: Sun Feb 17, 2013 10:13 am
Location: Metro Denver, Colorado
Top

Re: Compact family camper Build - Finishing touches

Postby ryuandwings » Wed Mar 04, 2015 2:25 pm

I have been working on "softer side" of trailer lately. Since weather was so bad, and I reached the campable state, it's been hard to keep the same build intensity. :?
My main tool has shifted to sewing machine now. :lol:

First is the mattress on the floor. I decided to go a bit thin. 2" memory foam topper and another 1" regular topper. The decision was all based on the budget.
Since there is a under floor storage/ table, I made the mattress into 3 sections.
Image
I used regular queen size fitted sheets once I got all completed. The sheets pulled the corners in a little, but corners will be under the pillow so it should be ok.


Next is the curtain. This is really a necessity. Without the curtain, trailer would be wide open at night.
The rod is 1/2" aluminum tube with decorative wood epoxied on the ends.
Image
Image
Image


Bunk bed fall protection.
I had to make this so that my son won't be crushing down on us at night. :lol:
Image
The middle section can be unbuckled and drop down to make a step.
Image


Added a knob/latch on cabinet doors and holder to keep them open.
I wanted to use knobs that are low profile since my kids run around inside. I found a lot of manufactured RV use push latch that you push to pop out a pull. Most of them are expensive, but I found these at $5 each. These are plastic, so the quality is not that great, but I am happy with them.
Image
Image
Image

Image
Image
Image


The next big item is the TV.
The TV I originally thinking about was 19 inch DVD combo from Bestbuy, but it was discontinued while I was building my trailer. The next size available was 20 inch, but the width of it was very close, especially rotate to expose the side to insert DVD. I went head and ordered it, and it works great.
Image
It seems like this 20 inch is being discontinued as well. It was out of stock online and I could only buy open box unit.
I just got my TV mount yesterday. I need to make an adapter to center the TV and the mount.

I tested the TV with cheap indoor antenna inside of aluminum trailer that is inside of brick garage. I was surprised to get a few channels with this simple setup.
Image
If I comeup with an outdoor antenna with some kind of mast, I should be able to get good reception.


I'm planning a test camp sometime in April so I got less than month to get everything button down.

Thank you for looking. :beer:
User avatar
ryuandwings
Teardrop Master
 
Posts: 187
Images: 61
Joined: Wed Feb 13, 2013 5:22 am
Location: West Tennessee
Top

Re: Compact family camper Build - Finishing touches

Postby KCStudly » Wed Mar 04, 2015 3:42 pm

All of your details are really coming together to make a very well crafted TD! The curtain material works really nicely to compliment your wood finishes w/o screaming out or competing.

The pop out knobs look like a perfect solution and look good, too. :thumbsup:

How do you like that style of lid lifter? I looked at those for my locker door, but just couldn't seem to jump at them, so I am curious about your opinion.

Again, you should be very proud, beaming from ear to ear at the fine results. Very proud indeed. :thumbsup:
KC
My Build: The Poet Creek Express Hybrid Foamie

Poet Creek Or Bust
Engineering the TLAR way - "That Looks About Right"
TnTTT ORIGINAL 200A LANTERN CLUB = "The 200A Gang"
Green Lantern Corpsmen
User avatar
KCStudly
Donating Member
 
Posts: 9618
Images: 8169
Joined: Mon Feb 06, 2012 10:18 pm
Location: Southeastern CT, USA
Top

Re: Compact family camper Build - Finishing touches

Postby ryuandwings » Wed Mar 04, 2015 4:54 pm

KCStudly wrote:All of your details are really coming together to make a very well crafted TD! The curtain material works really nicely to compliment your wood finishes w/o screaming out or competing.

The pop out knobs look like a perfect solution and look good, too. :thumbsup:

How do you like that style of lid lifter? I looked at those for my locker door, but just couldn't seem to jump at them, so I am curious about your opinion.

Again, you should be very proud, beaming from ear to ear at the fine results. Very proud indeed. :thumbsup:


Thank you, KC.
It was actually really hard to find a right hardware for different applications. :?
And a lot of what I wanted were way over my budget. In a way price help me choose what I can use. :lol:

As for the lifter, it is a nice quality product. The install was very easy and documentations that came with the package made it almost foolproof.
One thing I don't like about it (I know this before I bought this) is that it only open to about 90 degrees. I wish it opens more than that. But it is ONLY $18 each (other similar lifts were a lot more than that.
I haven't looked at it enough to know how much adjustments I can make to this lift. The speed of closing probably depends on the weight of the door. In my case, once I give a small pull down to starts closing, it moves smoothly to about 45 degrees. It really slows down at about 45 degrees to the point I can't wait for it to close by itself. I give the final push. It kind slams at the end. I will need to provide a rubber or felt pad.

For your application, I think your door is much bigger than my doors, so I would study the weight and size limit chart carefully.
By the way, this is where I got mine. This is lowest price I could find.
http://www.thehardwarehut.com/catalog-p ... ref=262837

I hope this helps.
User avatar
ryuandwings
Teardrop Master
 
Posts: 187
Images: 61
Joined: Wed Feb 13, 2013 5:22 am
Location: West Tennessee
Top

Re: Compact family camper Build - Finishing touches

Postby KCStudly » Wed Mar 04, 2015 5:49 pm

Yeah, those were the ones I was looking at. My door, tho wide, is not very tall, and is reasonably light weight, being that the panels are only 5 mm thk. The heaviest thing on it is the handles. After re-reading the specs I'm reminded that the issue for me wasn't weight, but the need for a single pivot hinge. Whereas I was already committed to the articulated link style hinges. That way my door can swing away then pivot down in its footprint, keeping clearance tight under my key catcher shelf, but still covering the locker box trim when closed.

Thanks for your impression. :thumbsup: I am not in love with my simple hinged brace, but I guess it will do.
KC
My Build: The Poet Creek Express Hybrid Foamie

Poet Creek Or Bust
Engineering the TLAR way - "That Looks About Right"
TnTTT ORIGINAL 200A LANTERN CLUB = "The 200A Gang"
Green Lantern Corpsmen
User avatar
KCStudly
Donating Member
 
Posts: 9618
Images: 8169
Joined: Mon Feb 06, 2012 10:18 pm
Location: Southeastern CT, USA
Top

Re: Compact family camper Build - Finishing touches

Postby rebapuck » Wed Mar 04, 2015 10:56 pm

At night, turn on the lights inside. Then stand outside and look in. That should tell you if your curtains are thick enough.
Judy
1966 VW camper
1967 VW singlecab
Image
User avatar
rebapuck
.
 
Posts: 2243
Images: 1
Joined: Thu May 14, 2009 1:55 pm
Location: Chapel Hill NC
Top

Re: Compact family camper Build - Finishing touches

Postby S. Heisley » Thu Mar 05, 2015 9:10 pm

:thumbsup: Awesome build...Well thought out and executed. :thumbsup:
User avatar
S. Heisley
Super Lifetime Member
 
Posts: 8775
Images: 495
Joined: Mon Sep 17, 2007 10:02 am
Location: No. California
Top

Re: Compact family camper Build - Finishing touches

Postby backstrap bandit » Fri Mar 20, 2015 6:05 am

I would like to know where u got the tounge hatch adjusters and great quality build
User avatar
backstrap bandit
Teardrop Master
 
Posts: 188
Images: 15
Joined: Mon Feb 10, 2014 4:49 am
Location: Louisiana
Top

Re: Compact family camper Build - Finishing touches

Postby ryuandwings » Fri Mar 20, 2015 7:47 am

Sorry guys, looks like I missed some of your posts. :R

rebapuck wrote:At night, turn on the lights inside. Then stand outside and look in. That should tell you if your curtains are thick enough.

Yep, I tested it and I can't see in after dark. I makes the inside very cozy and comfortable. :thumbsup:

S. Heisley wrote::thumbsup: Awesome build...Well thought out and executed. :thumbsup:

Thank you very much. :thumbsup:
User avatar
ryuandwings
Teardrop Master
 
Posts: 187
Images: 61
Joined: Wed Feb 13, 2013 5:22 am
Location: West Tennessee
Top

PreviousNext

Return to Build Journals

Who is online

Users browsing this forum: No registered users and 13 guests