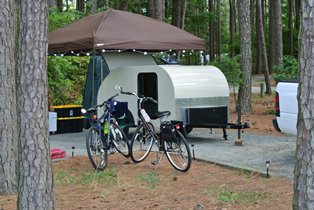
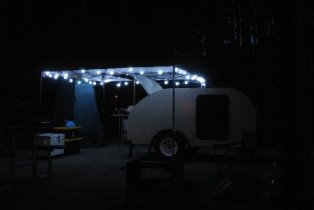
Lance and Becky's Sagwagon

...ask your questions in the appropriate forums BUT document your build here...preferably in a single thread...dates for updates, are appreciated....

Re: Lance and Becky's Sagwagon - Hatch Update

Postby Cliffmeister2000 » Mon Oct 08, 2012 12:34 pm

Sounds great, but it says I am not authorized to view the photos. :roll:
God Bless

Cliff

♥God. ♥People.
1 John 4:9-11

My Teardrop build pictures
User avatar
Cliffmeister2000
Titanium Donating Member
 
Posts: 3622
Images: 157
Joined: Thu Jul 26, 2007 10:18 pm
Location: Phoenix, AZ

Re: Lance and Becky's Sagwagon - Hatch Update

Postby Oldragbaggers » Mon Oct 08, 2012 12:47 pm

Oh crap. Okay. I'll fix it.
Life is sooooo good.........
Sail...camp....bike...repeat
Becky

Build Journal http://www.tnttt.com/viewtopic.php?f=50&t=45917
Visit our blog at http://www.oldragbaggers.com
Image Image
User avatar
Oldragbaggers
Gold Donating Member
 
Posts: 1842
Images: 331
Joined: Mon Aug 01, 2011 9:22 pm
Location: Essex, MD

Re: Lance and Becky's Sagwagon - Hatch Update

Postby Oldragbaggers » Mon Oct 08, 2012 1:03 pm

Please let me know if there is still a problem with any of the pictures.
Life is sooooo good.........
Sail...camp....bike...repeat
Becky

Build Journal http://www.tnttt.com/viewtopic.php?f=50&t=45917
Visit our blog at http://www.oldragbaggers.com
Image Image
User avatar
Oldragbaggers
Gold Donating Member
 
Posts: 1842
Images: 331
Joined: Mon Aug 01, 2011 9:22 pm
Location: Essex, MD
Top

Re: Lance and Becky's Sagwagon - Hatch Update

Postby PSBreen » Mon Oct 08, 2012 1:28 pm

Looking awesome. You are really good at painting a picture with words, so we won't need a video. I can just picture you stretched out on top that hatch. Your toes holding two corners down, one hand clamping another corner while you staple that ornery piece of ply in place. Throw in a few balloons with colorful words inside to finish it off and we get the picture. :D

But hey it's done and you won, congratulations. :applause:
Steve & Cynthia
User avatar
PSBreen
Donating Member
 
Posts: 185
Images: 93
Joined: Tue May 24, 2011 12:36 pm
Location: Layton, UT
Top

Re: Lance and Becky's Sagwagon - Hatch Update

Postby KCStudly » Mon Oct 08, 2012 2:37 pm

Hey Becky, you're getting there. +1 what Cliff said; I also enjoy your story telling. :thumbsup: (I know I have said that before, but it bears repeating.)

Re: the outer skin being harder than expected to form. I wonder if by breaking the panel into two sections you robbed yourself of the leverage that the longer panel could have afforded (?). It looks good in the photo. Did you have any trouble keeping the curve fair at the joint between panels? In order to improve the yield from my ply skins I sized several of my panels to start at tangent points between flat and curved, and I have curved sections consisting of more than one panel, so I'm curious as to weither that was a problem or not (of course mine is going to be covered with foam, so not such a big deal).

Oldragbaggers wrote:I wish my skills were such that I didn’t make these mistakes in the first place. Or maybe if I had more woodworking experience I would have seen a simpler more effective solution.


Your fiberglass built up edges appear to be working out fine for you. Stick to what you know and you can't go wrong! Though, I am a little surprised that you didn't glue down a small strip of wood and then encapsulate that in epoxy; cheaper and lighter than all glass and may have taken less work to build up. I know, "now you tell me", doh. Maybe you didn't have a good way to rip small strips of wood? No matter, you've got it licked now.

I'm hearing the mantra of a perfectionist. This is the attitude that has produced such a well crafted product. Embrace it. We are our own worst critics and we see all of our own little flaws up close. Some things are unacceptable to ourselves as builders and MUST be amended, some things we let skate by as "good enough" if they won't be too obvious, and other things we get just right and couldn't be happier with our own handy work. look at the big picture. Look at what you have done. Be resolved that nothing is ever perfect no matter the skill level or experience. It is a fleeting notion.

There is good, and there is better. Your TD is better. :thumbsup:

Keep on keepin' on! :applause:
KC
My Build: The Poet Creek Express Hybrid Foamie

Poet Creek Or Bust
Engineering the TLAR way - "That Looks About Right"
TnTTT ORIGINAL 200A LANTERN CLUB = "The 200A Gang"
Green Lantern Corpsmen
User avatar
KCStudly
Donating Member
 
Posts: 9633
Images: 8169
Joined: Mon Feb 06, 2012 10:18 pm
Location: Southeastern CT, USA
Top

Re: Lance and Becky's Sagwagon - Hatch Update

Postby Oldragbaggers » Mon Oct 08, 2012 3:43 pm

KC...I did not break the panel into two pieces. It is only one piece, I just tackled the job of gluing it down a section at a time to give my self the advantage of having a smaller section to work with so more time to get it fastened down before glue started to cure. Having the flat section (the bottom) completely fastened down was good because then I could really concentrate all my effort on getting it around that curve knowing the bottom section wasn't going to move. It also gave me more clamps available for the curved section as I have a limited number of the good C clamps. I have a kajillion of the spring clamps but they just didn't seem to be strong enough to hold it down around that curve.

I did think of strips of wood, but you hit the nail on the head, I don't have a good way to rip it (crappy table saw) and I needed to vary the thickness in different areas. It is easier to make very small adjustments where you need them with the fiberglass tape.

And thank you so much for all your kind words. Your support means a lot to me. The encouragement of the people on this board is what keeps me going when I get discouraged. It really does mean a lot.
Life is sooooo good.........
Sail...camp....bike...repeat
Becky

Build Journal http://www.tnttt.com/viewtopic.php?f=50&t=45917
Visit our blog at http://www.oldragbaggers.com
Image Image
User avatar
Oldragbaggers
Gold Donating Member
 
Posts: 1842
Images: 331
Joined: Mon Aug 01, 2011 9:22 pm
Location: Essex, MD
Top

Re: Lance and Becky's Sagwagon - Hatch Update

Postby KCStudly » Mon Oct 08, 2012 8:36 pm

Oldragbaggers wrote:I did not break the panel into two pieces. It is only one piece, I just tackled the job of gluing it down a section at a time to give my self the advantage...

That makes a lot of sense.

Oldragbaggers wrote:The encouragement of the people on this board is what keeps me going when I get discouraged. It really does mean a lot.

Amen. :thumbsup:
KC
My Build: The Poet Creek Express Hybrid Foamie

Poet Creek Or Bust
Engineering the TLAR way - "That Looks About Right"
TnTTT ORIGINAL 200A LANTERN CLUB = "The 200A Gang"
Green Lantern Corpsmen
User avatar
KCStudly
Donating Member
 
Posts: 9633
Images: 8169
Joined: Mon Feb 06, 2012 10:18 pm
Location: Southeastern CT, USA
Top

Re: Lance and Becky's Sagwagon - Hatch Update

Postby DMcCam » Mon Oct 08, 2012 9:47 pm

Wow, nice job on your hatch Becky! :thumbsup: Hatches sure seem harder than the rest of the build at least that's what happened on mine. I'm confident that you'll get it to fit, it doesn't look too far off at all! Keep up the great work! :applause: :applause:

All the best,

Dave
User avatar
DMcCam
Gold Donating Member
 
Posts: 883
Joined: Wed Jan 06, 2010 8:30 pm
Location: Reno, Nevada
Top

Re: Lance and Becky's Sagwagon - Hatch Update

Postby CliffinGA » Sun Jan 27, 2013 10:36 pm

Hey Becky its been 4 months was wondering if you've done anthing else to it over the winter months?

Cliff :thumbsup:
In God we trust, shoot the rest and he will sort out!

My Build:

viewtopic.php?f=50&t=42628
User avatar
CliffinGA
1000 Club
1000 Club
 
Posts: 1499
Images: 207
Joined: Sat Nov 14, 2009 1:29 pm
Location: Jefferson, GA
Top

Re: Lance and Becky's Sagwagon - Hatch Update

Postby Oldragbaggers » Mon Jan 28, 2013 8:56 pm

I work outside Cliff so she is all put away for the winter. I've been away from the board for awhile too. We've been super busy at work this year and I just started a couple of online classes through the community college. I can see my garage from my seat on the couch though and I find myself often looking at it longingly and wishing I could get out there and work on the teardrop. (Unfortunately I'd probably slip on the ice on the drive and break my bottom.) Can' t wait for spring!! How are things with you??
Life is sooooo good.........
Sail...camp....bike...repeat
Becky

Build Journal http://www.tnttt.com/viewtopic.php?f=50&t=45917
Visit our blog at http://www.oldragbaggers.com
Image Image
User avatar
Oldragbaggers
Gold Donating Member
 
Posts: 1842
Images: 331
Joined: Mon Aug 01, 2011 9:22 pm
Location: Essex, MD
Top

Re: Lance and Becky's Sagwagon - Hatch Update

Postby CliffinGA » Mon Jan 28, 2013 10:28 pm

Lol not as bad here as up north as it will in the 60's tomorrow but I will be out of town working but been planning and looking at when I can do some work on it. Right now I've been looking at redoing both doors, make a square template and route the door openings to a square. I've found it has been to hard to seal both doors when I cut the openings and was not that straight with a jig saw. also looking at having a second door on driver side for the ac to mount into for summer camping and regular door with the window for spring and winter camping. Just plans at this point and will be sanding and primering the fenders next weekend so I can paint them a nice black to match what I'm going to paint the rims.

Cliff :thumbsup:
In God we trust, shoot the rest and he will sort out!

My Build:

viewtopic.php?f=50&t=42628
User avatar
CliffinGA
1000 Club
1000 Club
 
Posts: 1499
Images: 207
Joined: Sat Nov 14, 2009 1:29 pm
Location: Jefferson, GA
Top

Re: Lance and Becky's Sagwagon - Hatch Update

Postby Oldragbaggers » Tue Jan 29, 2013 12:46 pm

Like they say, Cliff, they are never really done are they??

60 degrees sounds heavenly. It will be in the high 40's today and that sounds so good to me that I am going bike riding when I get home!! But I am at a stage with the teardrop where more fiberglass is required before I am ready to put the finishing touches on so I need to wait for temps that are warm enough for cure.

Take care. I'll have to check out your build journal again. I haven't looked at it in awhile.
Life is sooooo good.........
Sail...camp....bike...repeat
Becky

Build Journal http://www.tnttt.com/viewtopic.php?f=50&t=45917
Visit our blog at http://www.oldragbaggers.com
Image Image
User avatar
Oldragbaggers
Gold Donating Member
 
Posts: 1842
Images: 331
Joined: Mon Aug 01, 2011 9:22 pm
Location: Essex, MD
Top

Re: Lance and Becky's Sagwagon - Hatch Update

Postby 91kuhndog » Sun Feb 17, 2013 10:08 pm

Becky, that's an impressive piece of work. I considered going to the fiberglass route and decided to skin mine in aluminum but after seeing yours, I may back up & wrap it in glass. Living along the S. Carolina coast, I hav eworked glass building boats and rebuilding a few too, I prefer that route to other types of finishes. That looks great though, I'll keep watching!
Our only limitations in life are purely self-induced!

My build; viewtopic.php?f=50&t=54749
User avatar
91kuhndog
Donating Member
 
Posts: 104
Images: 91
Joined: Wed Jan 23, 2013 4:45 pm
Location: Charleston SC
Top

Re: Lance and Becky's Sagwagon - Hatch Update

Postby Oldragbaggers » Sun Feb 17, 2013 11:28 pm

Thanks Kuhndog. The only downside is all the sanding. But I like working with it and it and I love that mistakes, no matter how large, are fixable with enough time, patience and sandpaper.
Life is sooooo good.........
Sail...camp....bike...repeat
Becky

Build Journal http://www.tnttt.com/viewtopic.php?f=50&t=45917
Visit our blog at http://www.oldragbaggers.com
Image Image
User avatar
Oldragbaggers
Gold Donating Member
 
Posts: 1842
Images: 331
Joined: Mon Aug 01, 2011 9:22 pm
Location: Essex, MD
Top

Re: Lance and Becky's Sagwagon - Hatch Update

Postby nevadatear » Mon Feb 18, 2013 8:51 pm

Becky, you got the hatch! Draw latches can fx a multitude of sins. I just don't look at my hatch without it closed anymore, then i don't see the gaps!

Deb
Debbie (with Randy looking over my shoulder)
Our build thread: http://www.tnttt.com/viewtopic.php?t=41295&highlight=monstero
2009 Homebuilt woody, Kenskill inspired 5 wide
ImageImage
User avatar
nevadatear
Silver Donating Member
 
Posts: 2377
Images: 171
Joined: Mon Nov 10, 2008 2:37 pm
Location: No. Nevada
Top

PreviousNext

Return to Build Journals

Who is online

Users browsing this forum: No registered users and 7 guests