I just found this build, great job on a woody, Lauren!
I sealed a slide in truck camper i built a few years ago with spar urethane. And for the most part, it worked really well. There were a few failures, but they were my fault not design or material related. So don't worry.
One question, where did you get the windows for the doors?
I'm getting supplies to start a trailer build this next year.
Teardrops n Tiny Travel Trailersor t n ttt for short (tnttt.com) |
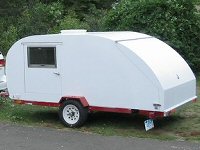
Father-Daughter Build 2013-14
Re: Father-Daughter Build 2013-14
![]() by rdraider » Thu Jul 03, 2014 9:46 pm
by rdraider » Thu Jul 03, 2014 9:46 pm
-

rdraider - Teardrop Advisor
- Posts: 71
- Joined: Sun Jul 18, 2010 10:51 am
- Location: Sheffield, Texas
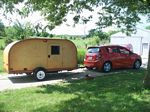
Re: Father-Daughter Build 2013-14
![]() by oakinteriors1 » Fri Jul 04, 2014 6:58 am
by oakinteriors1 » Fri Jul 04, 2014 6:58 am
Helmsman Spar urethane on a cedar outside TV cabinet 3 years now... http://s147.photobucket.com/user/scrawf ... t=3&page=1
My kayaks: http://www.flickr.com/photos/mo_kayaks/
My build projects.....
http://s147.photobucket.com/user/scrawf ... t=3&page=1
Camper ........
http://s147.photobucket.com/user/scrawf ... t=6&page=1
THE FRAUD WILL NOT GO AWAY..9-11 concrete and steel turns to dust in seconds, where's the rubble..
https://www.youtube.com/watch?v=T1NbBxDGSkI#t=2828
http://www.drjudywood.com/
-
oakinteriors1 - Silver Donating Member
- Posts: 297
- Images: 1
- Joined: Tue Sep 03, 2013 4:47 pm
- Location: Bates City Mo.


 ). I'll take a look for where I may have read that and report back.
 , it looks real nice. Its good to hear it has turned out how you planned it,thats more than can be said of mine
  .
.