Tucson tortoise: Edit for photos

...ask your questions in the appropriate forums BUT document your build here...preferably in a single thread...dates for updates, are appreciated....

Re: Tucson tortoise

Postby lfhoward » Thu Oct 08, 2015 6:31 pm

Tim, thank you for the detailed explanation of how you cut and fit your aluminum! I can imagine how I am going to do it now. The discussion on butyl tape under the trim is very helpful too, as is your description of using stainless screws and spacing them. Great info! Thank you.
My off-road camper build on an M116A3 military chassis:
http://www.tnttt.com/viewtopic.php?f=50&t=62581
Tow vehicle: 2008 Jeep Liberty with a 4 inch lift.
User avatar
lfhoward
1000 Club
1000 Club
 
Posts: 1370
Joined: Wed Jan 22, 2014 6:10 pm
Location: Philadelphia, PA

Re: Tucson tortoise

Postby daveesl77 » Thu Oct 08, 2015 6:34 pm

That is one SWEET looking trailer!!! Wow, the fit and finish are absolutely top notch.

dave
*******
Dave and Regina - Enjoying old age, a LOT!

Build Journal - http://www.tnttt.com/viewtopic.php?f=50&t=62386
User avatar
daveesl77
Donating Member
 
Posts: 871
Images: 273
Joined: Tue Jan 27, 2015 4:33 pm
Location: Pocahontas County, West Virginia

Re: Tucson tortoise

Postby McGuffin » Fri Oct 09, 2015 3:31 pm

Hi Tim,

Thanks for the detailed information about the screws. I find that getting all the right bits and pieces is quite difficult and it is hard to order online when I don't know exactly how the screws and fasteners will look in real life. I'll keep you posted on how I get on.

You really seem to have the bit between your teeth now and it is all coming together beautifully.

Larry
User avatar
McGuffin
Teardrop Advisor
 
Posts: 90
Images: 211
Joined: Sat Jan 04, 2014 6:04 am
Location: Ireland
Top

Re: Tucson tortoise

Postby dales133 » Fri Oct 09, 2015 4:35 pm

Yea those chicago screws are just what i need for my hatch trim.
My hatch skin is only 3mm thick with canvas wraped each side and need something to hold the trim down that wont interfere with the hatch seal that will be directly under the trim.
How flat are the tops.on them?
User avatar
dales133
4000 Club
4000 Club
 
Posts: 4605
Images: 1
Joined: Mon Oct 13, 2014 5:26 pm
Top

Re: Tucson tortoise

Postby noseoil » Sat Oct 10, 2015 11:14 pm

The domed section is about a mm thick at the top of the curve, so that's pretty thin. Hopefully that's good enough to preserve your seal & not displace the gasket too much.

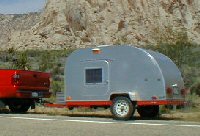
Installed the solar panel this morning. Will have to get a picture. It was early & cloudy, but it started putting out power immediately. Since I'm not really ready for the battery yet, I used the shipping box to make a cover for it & keep it safe for now while I'm still working on things. The canopy finally gave up the ghost yesterday afternoon. We had a pretty good wind storm & when I came home from work, it was shredded. Had to pull it down & toss it out this morning.

I finally installed Frank's (Sheddie's) kiwi door catches today. I used some 3M automotive adhesive to locate things on the door & the side panel. It's easier than measuring things & doing a layout, just stick it where it belongs & run the fasteners in. Used the stainless steel sheet metal screws on the body & some short stainless machine screws with acorn nuts in the door panel. I was surprised by the thickness of the aluminum door panel, had to make a trip out for longer screws to fit the catch on the door, but that's checked off the list now as well.

Ran some more screws into the front seam at the air conditioning box area, since the sheet I bought wasn't long enough to do the whole roof in one piece. It's just a lap joint, but it should be weatherproof now.

I tried the hatch struts & had a small problem to deal with. At first I thought my math was off a bit, as the hatch wouldn't close completely. I had done all of this last year, very early in the build, set the threaded inserts in epoxy, laid it all out & then forgot about it all until now. I climbed in and looked at it as it was closing slowly, with a flashlight. The problem was my "over engineering" of the fasteners. I decided the #10 screws were too small last year, so I went with some 1/4" machine bolts (hex head bolts). Here's what the plate looks like with the bolts in place.
160135

Unfortunately, the bolt heads were too large & the fat end of the strut was hitting the bolts & causing a problem as the hatch moved through its arc. Chalk one up to a complete lack of experience on my part! Plan "B" was back to the hardware store again for some 1/4" flat head machine screws & a 1/2" 82 degree countersink to go with them. I took it all apart, brought the plates into the shop, used the drill press to open up the plates for the screw heads for a flush fit & put it all back together once more. I'll take a picture tomorrow to show the changes, but the struts work the way they should now. They do change the hatch closure slightly, but it should be OK. There's about 1/100th clearance between the screw heads & the fat end of the strut (plenty?), but at least it misses & nothing was boogered up too badly.

Watch out for this one if you're working on strut mounts on your build. The fasteners should be flush with the surface of the mounting plate if you use the type in the above picture and turning the plate like I did.

I'm using 100# struts, which should be just about right once the speakers are hung & the rest of the stuff is mounted inside the hatch. The ones & got are about 28 1/2" when open & about 17" in the closed position. Still need to do the lights, inner skin & a "few" other odds & ends. This hatch is really a time consuming item, probably the most complicated thing on the entire build the way I'm doing it. The good news is that it works, it stays open & stays closed.

Worked on the latch this afternoon for the hatch as well. I ended up using some masking tape on the jamb & red lipstick on the rod ends to spot the holes at the sides. It was a little bit "fiddly" to get things right, but I was able to locate the rods, bronze bushings & epoxy them in place, so it should be set up well enough over night. I use paste wax as a mold release agent, so the epoxy doesn't stick to the rods and glue the hatch shut. Again, will take more pictures tomorrow to add to the post. I was too pooped this afternoon after working to take any pictures.

Thanks to Brian for the door bushing idea (Vedette) & Dales133 for the idea of tapering the rod ends to make the fit easier when closing the latch. Both ideas worked very well, thanks guys.
Last edited by noseoil on Sat Nov 09, 2019 8:41 am, edited 1 time in total.
Build log: viewtopic.php?f=50&t=60248
The time you spend planning is more important than the time you spend building.........

137905
User avatar
noseoil
1000 Club
1000 Club
 
Posts: 1822
Images: 670
Joined: Sun Apr 27, 2014 8:46 am
Location: Raton, New Mexico, living the good life!
Top

Re: Tucson tortoise

Postby capnTelescope » Sat Oct 10, 2015 11:55 pm

Hang in there, Tim. Getting the hatch holder-opener right was one of the biggest headaches of my build. The geometry just refused to work out for gas struts. The wooden strut clears things by a fraction of an inch when closed. The cut and try method left several scars. This is probably one of the main reasons people talk about the "next build" all the time.

Maybe carriage bolts? It would leave a nut and bolt end sticking out the side. :thumbdown: Pretty ugly. :frightened:

Everything else is looking really fine. :thumbsup: :beer:
I'll burn that bridge when I come to it.

Brad
ImageImageImage

Building the Bed & Breakfast
User avatar
capnTelescope
Lifetime member
 
Posts: 1222
Images: 368
Joined: Sun Jun 27, 2004 3:44 pm
Location: Round Rock, TX
Top

Re: Tucson tortoise

Postby noseoil » Sun Oct 11, 2015 3:40 pm

I hear you about the struts Capn'. Here's the amount of clearance I have now with the counter sunk machine screws, as I said, there's plenty of room!
160136

160138

The upper bracket, lots of room on this one with the bolts in place. Still need the inner skin on the hatch, but some stuff left to do first.
160137

Hatch rod with the bushing (epoxied in place).
160139

Booty shot from today. Back-up lights are just set in place for the picture. The lower trim is in place, along with a hunk of 1/8" X 2" flat stock to tie things together and make a better grab on the .040" skin, better anchor this way. Still need to hold the lights in place & do the sealant. There are no studs on the back to tighten them with & I'm thinking of some epoxy with a piece of 1/8" & screws to hold them in place.

Any suggestions on setting them for good for mounting? I would like some type of positive holding power, not just a "press fit" installation.
160141

Thanks for looking, tim
Last edited by noseoil on Sat Nov 09, 2019 9:16 am, edited 1 time in total.
Build log: viewtopic.php?f=50&t=60248
The time you spend planning is more important than the time you spend building.........

137905
User avatar
noseoil
1000 Club
1000 Club
 
Posts: 1822
Images: 670
Joined: Sun Apr 27, 2014 8:46 am
Location: Raton, New Mexico, living the good life!
Top

Re: Tucson tortoise

Postby capnTelescope » Sun Oct 11, 2015 11:11 pm

I like the Kiwi door holder. Gotta linky?
I'll burn that bridge when I come to it.

Brad
ImageImageImage

Building the Bed & Breakfast
User avatar
capnTelescope
Lifetime member
 
Posts: 1222
Images: 368
Joined: Sun Jun 27, 2004 3:44 pm
Location: Round Rock, TX
Top

Re: Tucson tortoise

Postby noseoil » Mon Oct 12, 2015 8:00 am

Howdy Cap'n, unfortunately there's no place I was able to find them here in the states. I spent a long time looking, but finally contacted "Sheddie" in the land of Kiwi & he was kind enough to get some for me & ship them over here. It would have been cheaper to use the plastic or metal type which has the pivot, but these are much nicer, have good holding power & look better IMO.

They really are nice to use & are small & strong. If someone knows where to find them online, I would like to have a spare set lying around so please let us know....
Build log: viewtopic.php?f=50&t=60248
The time you spend planning is more important than the time you spend building.........

137905
User avatar
noseoil
1000 Club
1000 Club
 
Posts: 1822
Images: 670
Joined: Sun Apr 27, 2014 8:46 am
Location: Raton, New Mexico, living the good life!
Top

Tires

Postby noseoil » Tue Oct 13, 2015 9:00 pm

After some soul searching, a bit of thought & a few questions I've ordered the tires I'm going to use. I found some decent Goodyear Marathon 13" tires at Discount tire for $72 each, so I ordered this afternoon. They are in town & available, so I'll pick them up tomorrow after work, mounted, balanced & ready to roll. Too bad the trailer isn't done yet, but one thing at a time.

I appreciate the input from folks on my questions. There just wasn't much of a selection of passenger car tires near me in 13", so these were only about $12 more than a light duty car tire which wasn't as robust & was a lot lighter in the sidewall. Decided to err on the side of caution, spend a little more & have a better tire with a good national warranty included.

I had spoken with Costco about trailer tires, but the two different stores in town were a bit funny about trailers. One guy told me they were rated for 55,000# (?) so I went to a different location. The other guy said he could order them, but they would be better if I ordered online, because they didn't have much luck ordering with their system in the store (?). I decided to go with Discount as I've had better luck & service in general there.
Build log: viewtopic.php?f=50&t=60248
The time you spend planning is more important than the time you spend building.........

137905
User avatar
noseoil
1000 Club
1000 Club
 
Posts: 1822
Images: 670
Joined: Sun Apr 27, 2014 8:46 am
Location: Raton, New Mexico, living the good life!
Top

Re: Tucson tortoise

Postby noseoil » Sat Oct 17, 2015 5:22 pm

Worked on a couple of different things this morning. Prepping the back-up lights for a better attachment than just the gasket fit. I was worried about bumpy roads & the lights coming loose. Made some 1/8" wood plates, with machine screws epoxied in place to fasten from the back of the hatch (inside). Scuffed up the back side of the lights so the epoxy will stick. Used some 30 minute slow cure from the hobby shop.
160148

Glued & ready to install now.
160149

Osi Quad in the opening. I had the cuts in the skin too close to the radius, so I added a few SS screws to hold things in place so the skin will stay put.
160150

Here's the finished installation. It worked & the lights should stay where they are now, better safe than sorry, even if it is a bit more work.
160151

Starting on the air conditioning installation.I added a small layer of wood to the edge of the box to have a better area to bond for the skin & added inserts (1/4" X 20 "T" nuts) for the lock-pin in both sides. The lock pin holds the air conditioner in place for travel & for running. Keeps it from moving front or back.
160152

Made a bottom panel which will give the unit about 1/8" of slope for it to run with the condensate drip (about 1/4" per foot). Just some wedges & an 1/8" panel with a solid edge, where it faces the interior at the face frame. Here's the bottom side.
160153

Laminated the sloping shelf panel with aluminum (some of the off-cut .040" since I have some laying around). Just used contact cement like it's a formica panel instead of aluminum. This will be where the air conditioner sits for travel or when running. Mixed another batch of epoxy & bedded the panel in place (wedges & edges), then put some weights on top to secure it while the mix sets up. Used the blue masking tape as a dam in case it tries to run into the face frame on the inside, or outside onto the skin. Once it sets it should be very strong in this area.
160154

I still need to laminate inside the box with aluminum (the sides & top), then the outside, & finally trim it out with the angle which will secure the face panel and keep it in place when moving. Taking a bit of time but hopefully it will be a good tight box when all is said & done. Just needs to be water, air & bug proof. Will do more tomorrow.
Last edited by noseoil on Sun Nov 10, 2019 9:36 am, edited 2 times in total.
Build log: viewtopic.php?f=50&t=60248
The time you spend planning is more important than the time you spend building.........

137905
User avatar
noseoil
1000 Club
1000 Club
 
Posts: 1822
Images: 670
Joined: Sun Apr 27, 2014 8:46 am
Location: Raton, New Mexico, living the good life!
Top

Re: Tucson tortoise

Postby dales133 » Sat Oct 17, 2015 5:38 pm

Looking good,tricky place to get right
User avatar
dales133
4000 Club
4000 Club
 
Posts: 4605
Images: 1
Joined: Mon Oct 13, 2014 5:26 pm
Top

Re: Tucson tortoise

Postby KCStudly » Sat Oct 17, 2015 8:42 pm

Every little piece has a purpose and sometimes it is the small details that seem to take the longest. Keep plugging away, it's turning out very nicely! :thumbsup:
KC
My Build: The Poet Creek Express Hybrid Foamie

Poet Creek Or Bust
Engineering the TLAR way - "That Looks About Right"
TnTTT ORIGINAL 200A LANTERN CLUB = "The 200A Gang"
Green Lantern Corpsmen
User avatar
KCStudly
Donating Member
 
Posts: 9640
Images: 8169
Joined: Mon Feb 06, 2012 10:18 pm
Location: Southeastern CT, USA
Top

Re: Tucson tortoise

Postby tony.latham » Sat Oct 17, 2015 9:02 pm

The workmanship is remarkable.

And once again, I'm reminded I live in a an AC-free zone. Damn, that's a good thing. :thumbsup:

Tony
User avatar
tony.latham
Gold Donating Member
 
Posts: 7073
Images: 17
Joined: Mon Jul 08, 2013 4:03 pm
Location: Middle of Idaho on the edge of nowhere
Top

Re: Tucson tortoise

Postby noseoil » Sun Oct 18, 2015 8:40 am

Thanks again guys, we're moving along & making progress. Tony, I envy you your summers, but not the cold winters. I'd still rather spend my winters where it's warm, just getting to be a bit trying with the heat here in summer. Working on the build all summer was truly miserable, but the fall weather is here finally & I'm looking forward to some nice weather for building. Yesterday was great, never broke a sweat & it only got up to the high 80's for a change, downright cool for us here. Had some good rains this week & it looks like an "El Nino" winter for us, which means a gorgeous spring will be coming for anyone who's interested in escaping the cold for a trip into the desert (March-April is just right, May it's getting too hot again).

Will be working on the AC box again this morning. More to follow, but I do appreciate the support from people & the pointers along the way. Will post a few more images this afternoon of the work. My wife looked at the air conditioner last night in the living room & her eyes bugged out. "You're putting that thing in the trailer?" I reminded her that it was her idea to have it in the build for "comfort" & sleeping. It's another case of 10# of $hit in the proverbial 5# bag....

Here's the unit, 5K BTU, it's 16 3/4" wide, 12 9/16" tall & about 14" deep. The box is 17" wide, 13 1/4" tall & 7 7/8" deep. Took it apart & shortened the power cord last night, removed the feet & measured it for the "skids" it will sit on when it's in the box. No hardware for guides, just gravity & the lock pins to hold it in place (KISS). I'll make wood wedges so it will slide into place & some wood shims to keep it from moving around too much inside the box, bot more on that later.

For now here it is. The oval shaped cut-out in the background is in one of the speaker boxes, which go into the headliner once the inner skin is attached in the hatch.
160155
Last edited by noseoil on Sun Nov 10, 2019 9:42 am, edited 1 time in total.
Build log: viewtopic.php?f=50&t=60248
The time you spend planning is more important than the time you spend building.........

137905
User avatar
noseoil
1000 Club
1000 Club
 
Posts: 1822
Images: 670
Joined: Sun Apr 27, 2014 8:46 am
Location: Raton, New Mexico, living the good life!
Top

PreviousNext

Return to Build Journals

Who is online

Users browsing this forum: No registered users and 15 guests