I vote for one panel at a time. That's all you can do anyway, so just plan on getting one done & stopping, unless there's more time. I tarped my build with 2 tarps each time, so it adds time to things, but I didn't want any water getting in before it was time. PITA, but it's better than dealing with water damage & rot.
I wouldn't use tin snips, just a saber saw & metal blade. Make sure to protect the surface from scratches as any metal bits between the shoe & surface will scratch things (cheap duct tape works).
About the cold, I had the heat to deal with on mine, you have the cold, 6 of one & a half dozen of another. There are only so many articles of clothing you can remove before being arrested in the heat....
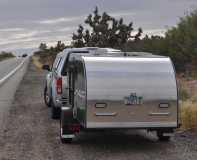
M116A3 Build
Re: M116A3 Build
![]() by noseoil » Tue Nov 17, 2015 7:30 pm
by noseoil » Tue Nov 17, 2015 7:30 pm
Build log: viewtopic.php?f=50&t=60248
The time you spend planning is more important than the time you spend building.........
The time you spend planning is more important than the time you spend building.........
-

noseoil - 1000 Club

- Posts: 1822
- Images: 670
- Joined: Sun Apr 27, 2014 8:46 am
- Location: Raton, New Mexico, living the good life!
Re: M116A3 Build
![]() by S. Heisley » Tue Nov 17, 2015 8:11 pm
by S. Heisley » Tue Nov 17, 2015 8:11 pm
noseoil wrote:About the cold, I had the heat to deal with on mine, you have the cold, 6 of one & a half dozen of another. There are only so many articles of clothing you can remove before being arrested in the heat....


...Sharon....
I think I can...I THINK I can...I THINK; I CAN! (I think I did it!)
http://www.doityourselfrv.com/handcraft ... g-trailer/
viewtopic.php?f=50&t=27313&start=555
http://www.squidoo.com/painting-a-campi ... ramebuster

I think I can...I THINK I can...I THINK; I CAN! (I think I did it!)
http://www.doityourselfrv.com/handcraft ... g-trailer/
viewtopic.php?f=50&t=27313&start=555
http://www.squidoo.com/painting-a-campi ... ramebuster
-

S. Heisley - Super Lifetime Member
- Posts: 8866
- Images: 495
- Joined: Mon Sep 17, 2007 10:02 am
- Location: No. California


 When you have a question like the above, you might do better to put it in


 I didn't have a budget planned out per se, but I know how much I had set aside at the beginning and now that's gone. But I am really happy with the trailer so far, and I know I got some good deals along the way for components that would have been 2-3x as expensive if they were new retail. The flatbed trailer came from a government auction, and the wheels and tires, aluminum sheeting, battery charger, inverter, and solar panel & charge controller were all Craigslist acquisitions.