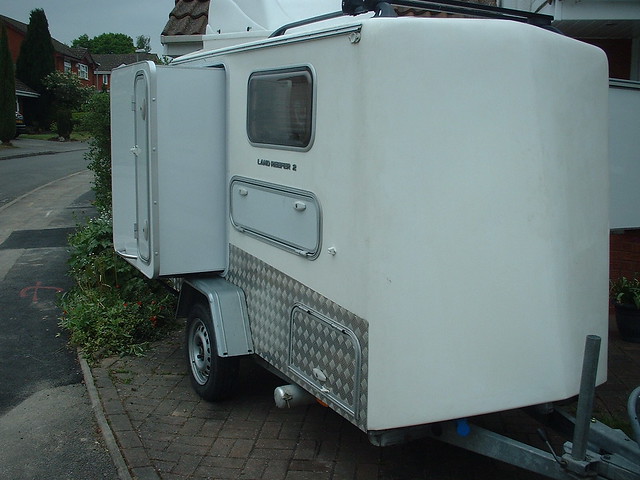
DD, on the road to LCG

...ask your questions in the appropriate forums BUT document your build here...preferably in a single thread...dates for updates, are appreciated....

Postby doctor phreak » Sat Mar 20, 2010 5:02 pm

ok gary looking good...me personally i would replace all the plywood that way i know its done and its not that expensive.....call Phoenix Hardwood talked to andy he will hook you up....just bought 3 sheets of 1/4" 5 x 5 baltic ply for $15.00 a sheet.....so cheap , easy fix and its done...but you got a good start keep it up.....
User avatar
doctor phreak
Teardrop Advisor
 
Posts: 57
Images: 8
Joined: Tue Aug 18, 2009 10:25 am
Location: Oklahoma City , Oklahoma

Postby StPatron » Sun Mar 21, 2010 12:55 pm

Hi doc: While I've been waiting for the snow to melt, I've reconsidered the patch job on the flooring and am going to go with new 5/8" (what was on it). That will save me from having to patch the floor and remove the old vinyl and will also give me a chance to undercoat the new flooring with roofing cement. I can also inspect the frame very closely once the flooring has been removed and make any needed repairs or adjustments. What's that old saying about having a solid foundation?

That sounds like a reasonable price for 1/4" BB. I'm looking for another BB plywood supplier. I called them a few weeks ago, got a quote on some 1/2" and then they tried to jack the price up on me after I got there. They finally decided to honor their quote as I was walking out the door.
User avatar
StPatron
Donating Member
 
Posts: 748
Images: 297
Joined: Tue Dec 15, 2009 8:38 pm
Location: OK

Postby StPatron » Tue Mar 23, 2010 1:57 am

Sure enough, we got the blizzard as predicted. Had to cover up my baby and wait for better weather.
Image

Here's part of the flooring removed. 5/8" plywood, still solid as a dance floor except for the corners where the roof pole brackets had loosened and caused leaks/rot. The strip left of center was used as a "nailer" for the plywood sections, with the 4' piece running along curbside. Nothing had been used to treat the underneath side of the ply, 40 yrs. later it was a bit weathered but fine. No signs of deterioration where it rested on frame.

Image

View from hitch with all flooring removed! Now, to prep the frame and paint it, replace wheel bearings and then put down new flooring.

Image

Been having some trouble tightening a lug bolt, time to clean up the threads. The tire on this side is a different size AND was mounted bass-ackwards! The valve stem is on the inside,,, go figure.

Image
User avatar
StPatron
Donating Member
 
Posts: 748
Images: 297
Joined: Tue Dec 15, 2009 8:38 pm
Location: OK
Top

Postby Miriam C. » Tue Mar 23, 2010 9:00 pm

:thinking: You might check the wear on the tire. Might be that the trailer was wearing on side and it was turned around to extend the use........maybe! Or someone didn't know better........ ;)
“Forgiveness means giving up all hope for a better past.â€
User avatar
Miriam C.
our Aunti M
 
Posts: 19675
Images: 148
Joined: Wed Feb 15, 2006 3:14 pm
Location: Southwest MO
Top

Postby StPatron » Tue Mar 23, 2010 9:18 pm

Thx for the suggestion Miriam. I plan to replace that tire/wheel and maybe use it as a spare. The curbside tire is a 6.00 x 12 and that one's a 5.30 x 12.

The wind blew hard today so I decided to make a shopping run instead of painting. Picked up a piece of remnant vinyl, vinyl adhesive, screws for attaching plywood flooring and "hammered" paint for the frame. And, found some remnant vinyl in the bargain bin at Hancock's, the heavy solid stuff vs. cloth backed. Will experiment with that for some areas of wall covering.
User avatar
StPatron
Donating Member
 
Posts: 748
Images: 297
Joined: Tue Dec 15, 2009 8:38 pm
Location: OK
Top

Postby StPatron » Mon Apr 19, 2010 2:48 am

The weather is now cooperating and finally the pace has picked up again. In the meantime I drove to the South Central Beavers Bend gathering and met a bunch of great folks and was able to see many trailers up-close. That was a huge help and I would recommend it to others in the "design stage". Several people patiently answered my many questions, a big thanks to Gary (Rayvillan), Thomas (2bits), CaseyDog, Spinnernut and Planovet.

Anxious to get rolling again, a few days later I was compressing the trash in the trash can and found a tin can edge with my thumb,,, doh! Not good. I threw a couple of sutures in it, taped it up and decided I wouldn't let that stop me. Hmmm, what can I do with a bum thumb? Paint, tar and poly, yeah that'll work.

The tar on the flooring, love that smell!
Image

The polyurethane on the luan:
Image

Chassis flipped, painted and part of the side bracing removed to allow more clearance for tire changing:
Image

Laying out the design on paper (thanks for the paper DrPhreak, I'll get the rest of the roll to you soon).
Image

Electrical conduit worked great for a batten:
Image

Part of the profile was cut out of Masonite:
Image

I got a longer hitch ball tube, now the tailgate clears the tongue jack:
Image

Left to right: Poly'd luan, vinyl for shower walls and upholstery material for cushions. I got the vinyl and material on remnant close-out sale. A test using 3M spray adhesive on the vinyl was successful providing bomb-proof adhesion to wood. There wasn't enough material on the bolt of fabric to completely cover the cushions so I will have to piece in something else on the bottoms. That's ok, gotta do what ya gotta do.

Image

This piece of fabric I purchased years ago will be for the curtains:
Image

The thumb's almost healed now, time to get in the shop and get busy. Finally!
Image
User avatar
StPatron
Donating Member
 
Posts: 748
Images: 297
Joined: Tue Dec 15, 2009 8:38 pm
Location: OK
Top

Postby jkidd6339 » Mon Apr 19, 2010 9:57 pm

Where are you going to mount the rubber chicken? :lol:
User avatar
jkidd6339
Teardrop Master
 
Posts: 198
Images: 1
Joined: Sat Jan 24, 2009 1:16 am
Top

Postby StPatron » Mon Apr 19, 2010 10:57 pm

jkidd6339 wrote:Where are you going to mount the rubber chicken? :lol:


Probably near the little bighorn skull, but I'm open to suggestions. :lol:
User avatar
StPatron
Donating Member
 
Posts: 748
Images: 297
Joined: Tue Dec 15, 2009 8:38 pm
Location: OK
Top

Postby doctor phreak » Tue Apr 20, 2010 2:15 pm

gary
no problem on the paper use as much as you like ....
looks like a good start if you need any help let me know....
i finally got my roof on mine the other day so i think im about half way there... :lol:
User avatar
doctor phreak
Teardrop Advisor
 
Posts: 57
Images: 8
Joined: Tue Aug 18, 2009 10:25 am
Location: Oklahoma City , Oklahoma
Top

Postby StPatron » Wed Apr 21, 2010 12:02 am

I couldn't have done without the paper, planning this build has been a challenge for sure and laying out the design on paper for cutting the templates has been key. Lots of erasing,,,

WOW! I just checked out your build pics!! Lotta progress there! Lookin' super, congrats! :thumbsup:

You'll be camping real soon. Oh,, and I got real hungry when I saw that BBQ background.

Stop by anytime, not much to look at now but you're always welcome.

Thunder up!!
User avatar
StPatron
Donating Member
 
Posts: 748
Images: 297
Joined: Tue Dec 15, 2009 8:38 pm
Location: OK
Top

Postby StPatron » Mon May 10, 2010 12:16 am

The thumb is now healed and I've been able to make sawdust finally!

The flooring is down, secured with screws to the chassis. My plan was to join the pre-tarred flooring sections with an occasional biscuit where I thought it needed a little extra support. So, those slots were cut and the biscuits were readied. Then, I edge-coated the interior flooring seams with asphalt emulsion before putting the clamps to it. One gooey mess as the still wet emulsion squeezed out of the joint.

Now, to fill in the counter-sunk screw holes and other flooring irregularities while avoiding the tar-pits. Wheel wells were constructed and attached, yeah,, more tar! That done, it was time to add more sticky goo,,, vinyl cement,, and cover up the whole mess with the vinyl.

Image
I used sheet vinyl from a big-box store, the kind that comes packaged pre-cut. I'm glad I spent the extra time in floor prep as the vinyl is thin and telegraphs any underlying surface imperfections. Next build I will go with a thicker product.

I then put sawhorses on the flooring to construct my "work table" (very limited working space), protecting the flooring from dents with plywood scraps underneath the sawhorse legs.

Then, the profile from my paper plan was marked on the back side of the interior and exterior "skins" and a jigsaw was used to cut the street-side sections. Then, I clamped the curbside pieces to them and used a top-bearing trim bit in my router to cut matching pairs.

I'm using 1 x 4's for framing, biscuit-joined on the perimeter and applied to the interior skins. Later, I will trim any framing overhang with the router.

Image
User avatar
StPatron
Donating Member
 
Posts: 748
Images: 297
Joined: Tue Dec 15, 2009 8:38 pm
Location: OK
Top

Postby aggie79 » Mon May 10, 2010 7:39 am

Your TD is looking nice. I like the flooring. With the floor done and the walls well on their way, you'll have your shell up in no time.

Glad to hear your thumb is doing better.
Tom (& Linda)
For build info on our former Silver Beatle teardrop:
Build Thread

93503
User avatar
aggie79
Super Duper Lifetime Member
 
Posts: 5405
Images: 686
Joined: Tue Aug 07, 2007 5:42 pm
Location: Watauga, Texas
Top

Postby StPatron » Mon May 10, 2010 12:37 pm

Thanks for your compliments and encouragement, Tom.

I've been in a holding pattern looking for windows, hope to find something soon so I can complete the sidewall framing and get 'em up!
User avatar
StPatron
Donating Member
 
Posts: 748
Images: 297
Joined: Tue Dec 15, 2009 8:38 pm
Location: OK
Top

Postby StPatron » Thu May 13, 2010 2:11 am

I got more work done on the sidewalls today. Cranked up some tunes and made sawdust,, yeah! While listening to Tab Benoit playin' the blues,, the router got a work-out.

Here's a pic of the curbside panel awaiting the router

Image

Router bit meets panel

Image

I had a few problems with the router bit. Occasionally the bearing would freeze up and start to burn wood. I'm not sure what the cause was, but it was frustrating to have to stop and get the bearing rolling again. The bearing was HOT and touching it bare-handed wasn't good. A tender grip with needle-nosed vise grips and a shot of WD-40 worked to get it rolling again.

When it works, it works great!

Image

Once the edge was trimmed, I flipped the panel over,, laying it on a piece of pink foam insulation so as to avoid scratching the finished interior luan and then added insulation. Windows are still "on hold", so insulation filling was limited.

Image

More insulation and windows will come later, time to stand the walls up now. I added a cross-brace for stability. I discovered later that it wasn't critical, the wall was very sturdy, but the brace served as a great hand-hold for moving the wall.
Image

I then placed both sidewalls together to check the fit. Somewhat surprisingly they were a mirror match for about 90% of the length.

Not too sure what happened here, but I will correct that with belt sanding,, :lol:

Image
User avatar
StPatron
Donating Member
 
Posts: 748
Images: 297
Joined: Tue Dec 15, 2009 8:38 pm
Location: OK
Top

Postby grizz » Thu May 13, 2010 2:27 am

Routers are batards = FACT !

I love my router, but it has to be one of the most unpredictable tool along with a jigsaw in my list.

Great progress.
Greetings from England.

Rian.


Hoping to get it all done in time.
User avatar
grizz
1000 Club
1000 Club
 
Posts: 1210
Images: 29
Joined: Mon Sep 21, 2009 2:37 pm
Location: Rochester, Kent, UK
Top

PreviousNext

Return to Build Journals

Who is online

Users browsing this forum: No registered users and 10 guests