Jumpin in on my first build "The Danger Cart"

...ask your questions in the appropriate forums BUT document your build here...preferably in a single thread...dates for updates, are appreciated....

Re: Jumpin in on my first build

Postby Cummins01 » Mon Mar 25, 2013 4:51 pm

WhitneyK wrote:
I think you'll be fine :thumbsup: Movin' along quite nicely, keep up the good work. :applause:

Thanks for the encouragement WhitneyK

KCStudly wrote:If it does end up bottoming out a bit you might be able to get away with just swapping in some slightly longer shackles, rather than losing all of the drop by moving the axle back.

1 inch longer shackle should give you about 1/2 additional clearance. (That may already have been said by someone else ^. I didn't look to see who it was; sorry.)

good point... we should be ok with it, its not going off roading or anything.
-Brad-
If it doesn't fit......... get a bigger hammer.

Build Thread:
viewtopic.php?f=50&t=54285&p=987867#p987867
User avatar
Cummins01
Teardrop Builder
 
Posts: 39
Joined: Mon Jan 28, 2013 5:45 pm
Location: Oregon

Re: Jumpin in on my first build "The Danger Cart"

Postby Cummins01 » Mon Apr 08, 2013 10:05 am

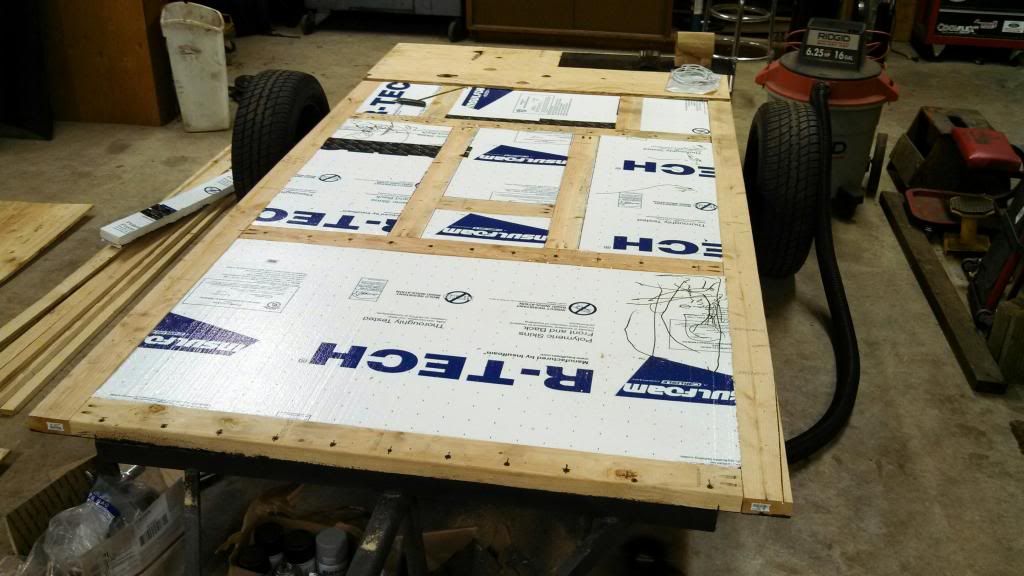
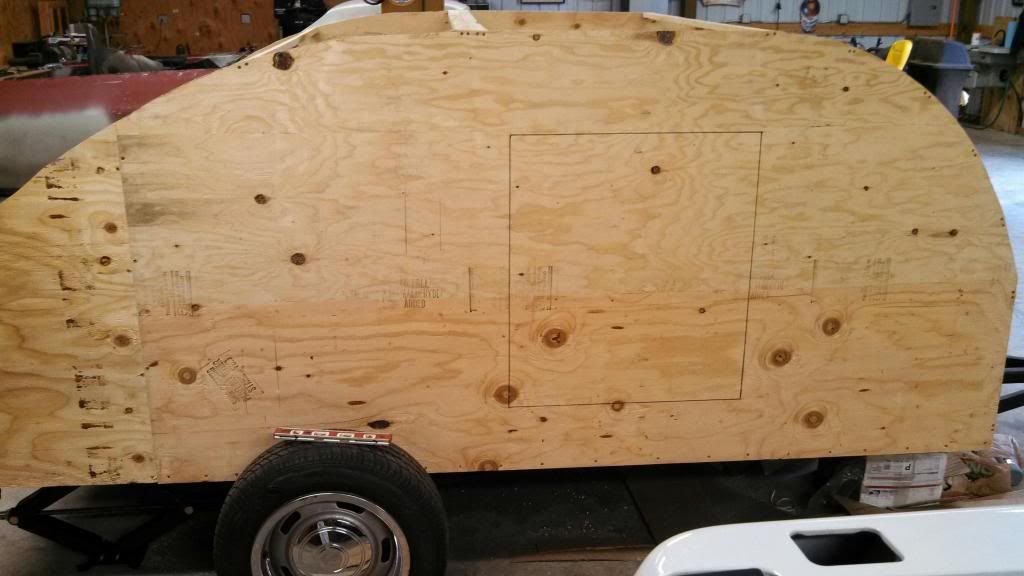
Well, in the last couple of weeks, we got the floor flipped back over once the asphalt coating dried and we got it secured to the steel. We got the plywood cut and screwed down to the 2x4 framing only to realize that I underesimated the strength of plywood. It didn't crack or anything but once I put some weight on it there was enough deflection to scare me, so we removed the front 2 pieces of ply and installed a couple more 2x4 braces and it stiffened right up. Then we finished the floor.
Image
Image
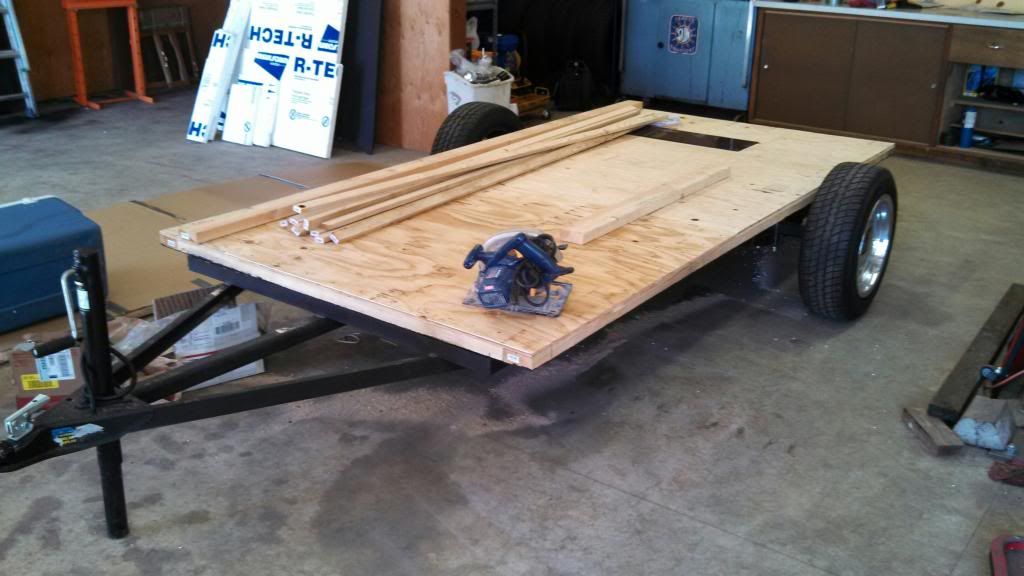
We also installed a 2" reciever in the rear so that my sister will have the option of installing her cargo tray or a bike rack when in travel.
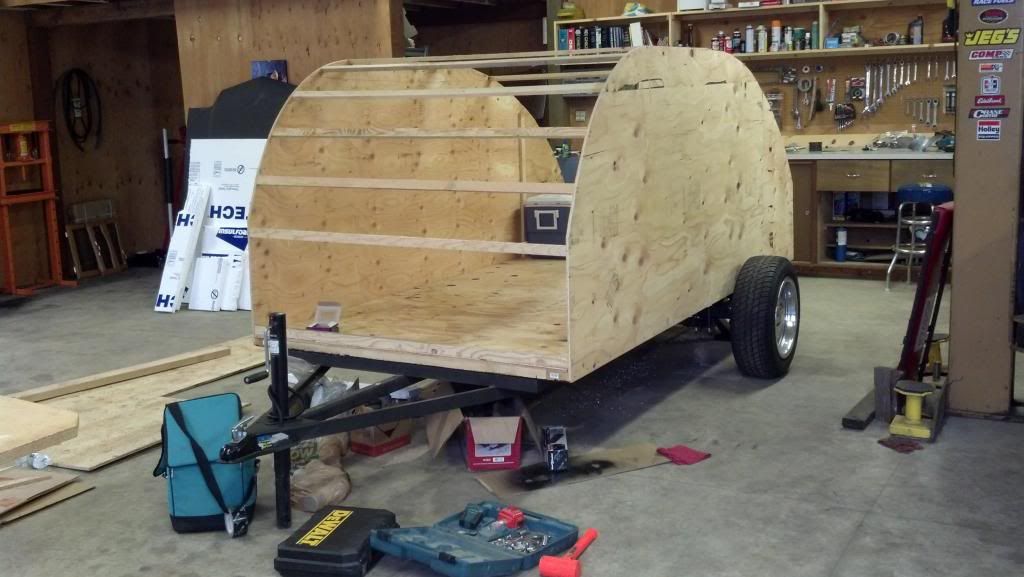
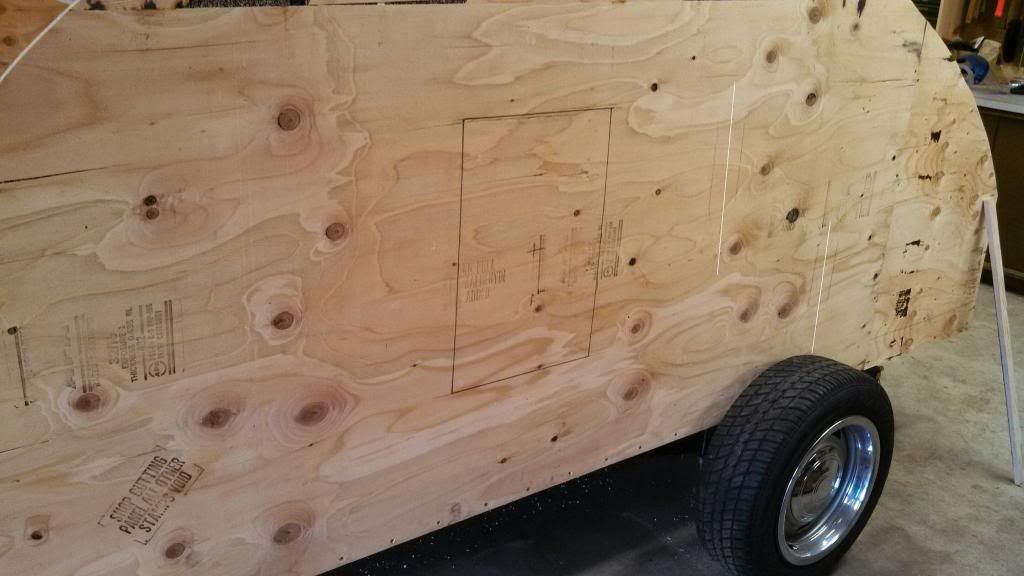
The best part was this Saturday when we finally got the side walls cut and stood up!!! We still have to ease the edge in the front, right before the curve there is more of a hard corner there than I would like so we'll smooth it out just a bit so that it transitions smoother. We then installed some roof spars to keep it all straight and started laying out where the bulkhead will go for the galley and how the countertop will fit and cabinets etc.... We are going to cut the voids in the walls after we have everything figured out as far as the door, window, cabinets etc... and install insulation.
Image
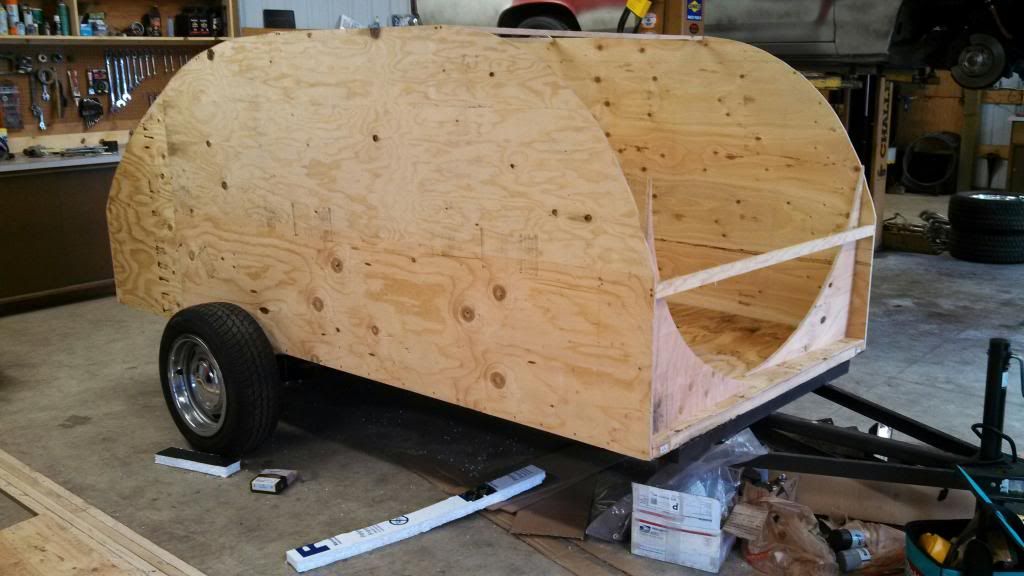
My sister wanted as much headroom as she could get inside so we left a pretty good portion of the top flat. I don't think it looks too bad beings that its 10' long.
Image
Image
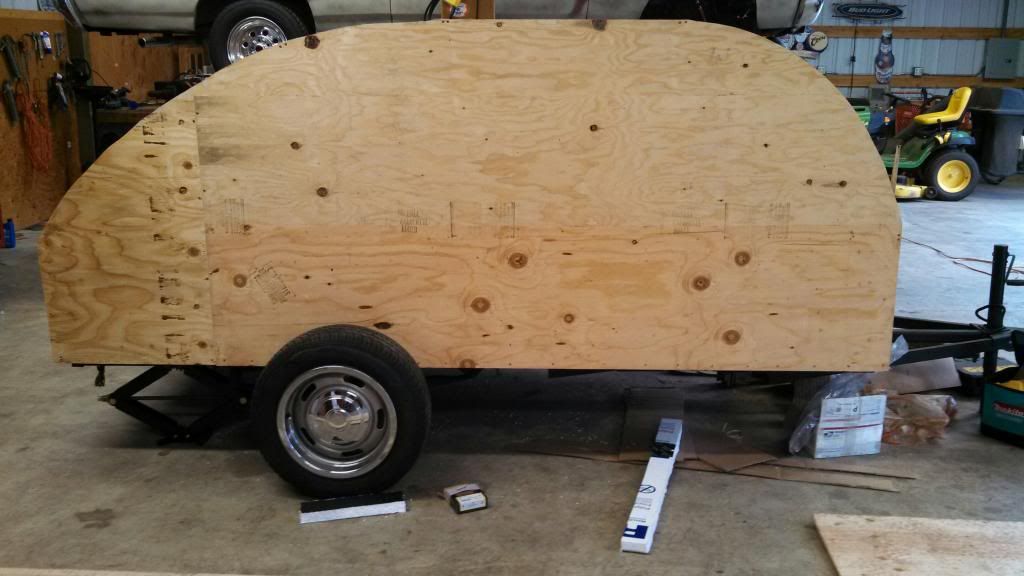
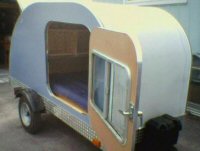
We are planning on using pre-finished hardwood flooring for the inside walls over top of the plywood and we are going to use Filon for the exterior sidewalls so it will just be white but look semi-professional. There will be a diamond plate rock guard on the front like most trailers have too. We'll see what we decide on the roof if we just go with Filon on the roof too or if we do aluminum kinda depends on price since we are building on a budget. Next weekend we'll get the bulkhead and countertop installed and get the gray water tank modified and mounted underneith.
-Brad-
If it doesn't fit......... get a bigger hammer.

Build Thread:
viewtopic.php?f=50&t=54285&p=987867#p987867
User avatar
Cummins01
Teardrop Builder
 
Posts: 39
Joined: Mon Jan 28, 2013 5:45 pm
Location: Oregon

Re: Jumpin in on my first build "The Danger Cart"

Postby Junkboy999 » Mon Apr 08, 2013 3:12 pm

Oh no. I’m sorry man. I did not mean to stick the term “Danger cart” in your head. :shock:

It is going to be a nice great looking Teardrop it should not be named “ Danger cart “, But if the name stick
you definitely need to carry a small photo album with you of your build, or at least a picture of the original
trailer framed in the galley so people know where the Danger part came from.
:lol:
User avatar
Junkboy999
1000 Club
1000 Club
 
Posts: 1259
Images: 52
Joined: Fri Jul 06, 2012 9:18 pm
Location: Wichita, KS
Top

Re: Jumpin in on my first build "The Danger Cart"

Postby Cummins01 » Mon Apr 08, 2013 4:34 pm

Junkboy999 wrote:Oh no. I’m sorry man. I did not mean to stick the term “Danger cart” in your head. :shock:

It is going to be a nice great looking Teardrop it should not be named “ Danger cart “, But if the name stick
you definitely need to carry a small photo album with you of your build, or at least a picture of the original
trailer framed in the galley so people know where the Danger part came from.
:lol:


No worries! My sister thought it was pretty funny so she said "I think we should just name it that" I'm sure she will have pictures with her of the build process, it seems that no matter how many of these are on the road people always ask questions. It will be cool for her to show people that we built it.
-Brad-
If it doesn't fit......... get a bigger hammer.

Build Thread:
viewtopic.php?f=50&t=54285&p=987867#p987867
User avatar
Cummins01
Teardrop Builder
 
Posts: 39
Joined: Mon Jan 28, 2013 5:45 pm
Location: Oregon
Top

Re: Jumpin in on my first build "The Danger Cart"

Postby Cummins01 » Tue Apr 09, 2013 10:58 am

Is there a specific formula or generic measurement for placement of the door? Or does everyone just kinda wing it and put it wherever it looks good to them? I started laying out the entry door on the "curb side" and a window on the "street side". The placement of the door will put the bottom of the door right at the top of the matress inside. We are centering the window on the street side on the door so that in the future should she ever decide to install a door on that side as well, she will just have to remove the window, enlarge the hole and install the door.
Image
Image
I drew a couple lines on these two, the upper line represents where the face of the interior cabinets will be, the lower line represents the bulkhead that spearates the galley from the cabin.
Image
Image
She is going to use the pre-fabbed door that Little Guy uses on the curb side and a 14"x21" verticle window on the street side.
-Brad-
If it doesn't fit......... get a bigger hammer.

Build Thread:
viewtopic.php?f=50&t=54285&p=987867#p987867
User avatar
Cummins01
Teardrop Builder
 
Posts: 39
Joined: Mon Jan 28, 2013 5:45 pm
Location: Oregon
Top

Re: Jumpin in on my first build "The Danger Cart"

Postby Oldragbaggers » Tue Apr 09, 2013 1:28 pm

You're really coming along. See what a case of beer with get you into..... :lol:
Life is sooooo good.........
Sail...camp....bike...repeat
Becky

Build Journal http://www.tnttt.com/viewtopic.php?f=50&t=45917
Visit our blog at http://www.oldragbaggers.com
Image Image
User avatar
Oldragbaggers
Gold Donating Member
 
Posts: 1842
Images: 331
Joined: Mon Aug 01, 2011 9:22 pm
Location: Essex, MD
Top

Re: Jumpin in on my first build "The Danger Cart"

Postby KCStudly » Tue Apr 09, 2013 2:58 pm

Couple of thoughts:
1) The recommended technique that I used for door placement was to sit on the edge of a work table or your bed, making a note of where you shoulders and butt are; then roll back lifting your knees and pivot into your laying position, making a note of where your head and feet end up. That way you can figure your door location pretty well and should not have to crawl or scoot around too much to get comfortable. Pay attention to the fender to make sure the door clears (don't forget any trim). This can also be helpful to determine how wide you may want to go with your doors (I went pretty wide as I am large and not very agile... knees don't come up to my chest like they used to :roll: :NC )

While you're at it, check the path that your head swings through when going from seated on the mattress to laying down, as well as from seated to reaching for your toes. You want to make sure that you are not going to clout your head on the interior cabinets. I did this by measuring from my seat to my head, added a couple of inches for good measure, then swung that arc on my side profile (in my case a sketch) from the center of my doorway (where my butt goes) from head to foot. All of my cabinet frame edges are an inch or two outside of this imaginary arc. Also, don't forget to allow for the mattress when figuring foot room under the rear cabinet.

3) I think you have your door too high. Most people recommend keeping the sill at or below half the thickness of the mattress so that the wall sill does not dig into the backs of your legs when sitting in the doorway. Don't forget that you are laying out the rough opening and the door assembly and sill trim will add to that. My door sill is only 1-1/2 inch, planning for a 4 inch mattress.

I'm glad you asked, hope this helps!
KC
My Build: The Poet Creek Express Hybrid Foamie

Poet Creek Or Bust
Engineering the TLAR way - "That Looks About Right"
TnTTT ORIGINAL 200A LANTERN CLUB = "The 200A Gang"
Green Lantern Corpsmen
User avatar
KCStudly
Donating Member
 
Posts: 9617
Images: 8169
Joined: Mon Feb 06, 2012 10:18 pm
Location: Southeastern CT, USA
Top

Re: Jumpin in on my first build "The Danger Cart"

Postby Cummins01 » Tue Apr 09, 2013 6:15 pm

Thanks for the input KC. The matress my sister will be using is 6" thick and the floor framing and plywood make up 2" so right now the bottom of the door is 8" above the bottom of the floor framing. Thats a good point about keeping it low enough so that you don't hang your legs over that opening. We aren't going to cut it quite yet, she'll be out this weekend and look at it first.
-Brad-
If it doesn't fit......... get a bigger hammer.

Build Thread:
viewtopic.php?f=50&t=54285&p=987867#p987867
User avatar
Cummins01
Teardrop Builder
 
Posts: 39
Joined: Mon Jan 28, 2013 5:45 pm
Location: Oregon
Top

Re: Jumpin in on my first build "The Danger Cart"

Postby Cummins01 » Wed Apr 10, 2013 9:58 am

Oldragbaggers wrote:See what a case of beer with get you into..... :lol:


Ha ha tell me about it! So far it has been a fun project actually.
-Brad-
If it doesn't fit......... get a bigger hammer.

Build Thread:
viewtopic.php?f=50&t=54285&p=987867#p987867
User avatar
Cummins01
Teardrop Builder
 
Posts: 39
Joined: Mon Jan 28, 2013 5:45 pm
Location: Oregon
Top

Re: Jumpin in on my first build "The Danger Cart"

Postby Cummins01 » Mon Apr 15, 2013 2:59 pm

We were able to finish installing the roof spars this weekend and installed the bulkhead between the galley and the cabin. We framed out for the vent/fan in the roof and then started skinning the interior. We used 1/4" plywood for the interior skin and it bent really nice around the front radius. We changed the galley a bit, instead of setting the cooler up to be installed wider, we turned it so it would go in deeper which allows more countertop space for the 2 burner cooktop and the sink to be installed and have clear space underneath for piping and such. The galley is 3' deep which will allow alot of storage back there while allowing the cabin to be 7' head to toe. Once the interior skin is all installed, we will begin building the interior cabinets, galley cabinets and insulating the walls. We decided rather than cut voids in the side walls, we will run some furring strips inside the walls and then attach insulation between the strips since we are going to be covering the interior walls anyway.
Image
we cut a small temporary hole in the side for the door. We will cut it to the proper size once we have the door in hand so that we don't accidentally cut it too large.
Image
Image
Image
Image
-Brad-
If it doesn't fit......... get a bigger hammer.

Build Thread:
viewtopic.php?f=50&t=54285&p=987867#p987867
User avatar
Cummins01
Teardrop Builder
 
Posts: 39
Joined: Mon Jan 28, 2013 5:45 pm
Location: Oregon
Top

Re: Jumpin in on my first build "The Danger Cart"

Postby KCStudly » Mon Apr 15, 2013 3:20 pm

Looking good and making progress! :thumbsup: :thumbsup:
KC
My Build: The Poet Creek Express Hybrid Foamie

Poet Creek Or Bust
Engineering the TLAR way - "That Looks About Right"
TnTTT ORIGINAL 200A LANTERN CLUB = "The 200A Gang"
Green Lantern Corpsmen
User avatar
KCStudly
Donating Member
 
Posts: 9617
Images: 8169
Joined: Mon Feb 06, 2012 10:18 pm
Location: Southeastern CT, USA
Top

Re: Jumpin in on my first build "The Danger Cart"

Postby Cummins01 » Mon Apr 29, 2013 9:52 am

We haven't worked much on the tear in the last couple of weeks. We did however go to an RV surplus shop here in town, holy cow they have everything! It was kind of a mess in there and you just go through and look at everything on your own till you find what you want. Some of their stuff looked to be priced pretty cheap other stuff I have seen cheaper online. Usually I would rather buy locally but we are trying to stay on a tight budget with this build so price is definitely a factor. We did find some cherry panelling in 4'x8' sheets for $9.00/sheet so we got some and thats what the inside walls are going to be covered in. We also found a small door complete with locks/keys/trim etc.... for $80.00 so we are probably going to go that route rather than ordering one off ebay. Its a bigger door but again when cost is a factor we'll make it work. We worked on the trailer this weekend and finished skinning the interior ceiling and started on the walls. We put some furring strips in for something to attach the panelling to and put 1/2" insulation between them so the walls will be insulated. We only got 1 piece of panelling up on the bulkhead wall but I think it looks pretty darn good and will look good on the side walls too. Once we finish the cabin area, we'll start on the galley hatch.
Image
Image
And since we just couldn't resist, we pulled it out and hooked it up to my sisters truck, the top of the trailer is right about level with the top of her truck so that will be nice to not affect fuel mileage as bad as me pulling my full-size trailer (AKA Brick) behind my truck
Image
-Brad-
If it doesn't fit......... get a bigger hammer.

Build Thread:
viewtopic.php?f=50&t=54285&p=987867#p987867
User avatar
Cummins01
Teardrop Builder
 
Posts: 39
Joined: Mon Jan 28, 2013 5:45 pm
Location: Oregon
Top

Previous

Return to Build Journals

Who is online

Users browsing this forum: No registered users and 24 guests