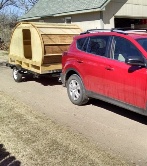
It has been a busy couple of weeks, but I finally got a weekend to work on the Colorado Flatlander. I did a few odds and ends and cleaned up my garage, but did no significant building until this weekend. I installed the sidewalls panels first as you can see below...
Then I insulated the roof and the galley. I used a technique to get the 1-1/2" roof insulation to curve that I learned from a TNTTT build. After cutting the pieces to fit, I cut kerfs in the foam with my tablesaw. It was so easy! I put my kerfs 1-1/2" apart and all the pieces curved in easily. I used scrap materials from my shop to hold the insulation in place until the glue dried. I only used 3/4" insulation in the galley, so those pieces bent easily enough for the glue to hold them in place without extra support. It was quite a bit of work, but I like how tightly it all fit into place. I did have to notch the roof panels where I had run the wiring to get it to fit properly.
After getting the insulation installed, I installed the exterior sheathing, which was 1/8" baltic birch plywood. It bent easily around the shape and I glued it and used 1/4" x 1/2" long staples to attach it to the roof spars. I ended up with a couple of bubbles, but nothing significant. Some day I will learn to ask for help when installing more complicated items. I also needed to finish some cutouts of the side walls. First, I cut out the door openings. I started by drilling a hole large enough for my flush-cut bit to fit in, then simply routed out the door. It turned out very well, matching up exactly with the original door opening.
Next, I cut out the side storage that will hold my solar panel and possibly some chairs or a small table. I forgot to mark it before I installed the wall, but fortunately I new the exact dimensions of the internal structure, so it was easy to mark it properly. I simply used an oscillating saw to cut an initial slot in each corner, then used my jigsaw to finish the cut. I used a flush cut bit in my router to finish it out smoothly (and a little sanding.)
I still need to put the exterior skin on the hatch, then I will be ready to put my final seal coats on the camper. I am excited for my next step, which will be putting on the exterior sheathing. I will be using 3" scored "brite" aluminum on the sides of the cabin, "Brite" diamond plate on the storage compartment, and white filon on the roof and galley hatch. I will use 1" vinyl insert aluminum on the roof edges and anyplace where two materials connect. I purchased red vinyl insert to give it a bit of color. Can't wait for my next step!
 I finally had a chance to work on my teardrop today! Another spring snowstorm in Colorado caused my scheduled track meet to be cancelled, so time to get to work! I did find a bit of time to put three coats of sealant on the finished exterior over the last couple of weeks, but that was about it. Today, I finally started putting the skin on my teardrop. I am using white filon for the front-roof-hatch skin. I started by cutting the filon to an approximate size, then used contact cement to attach it. Once the contact cement was set, I used a straight laminate trimming bit to cut the filon to size.


