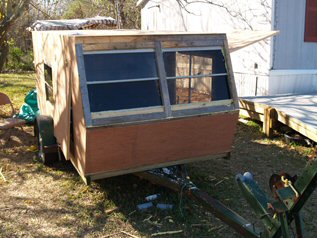
Albuquerque teardrop

...ask your questions in the appropriate forums BUT document your build here...preferably in a single thread...dates for updates, are appreciated....

Re: Albuquerque Benroy-type teardrop - mistakes to date

Postby Sheddie » Wed May 27, 2015 6:01 pm

ChasCABQ wrote:Mistakes to date:
  • Cut interior galley wall little short leaving side walls 1/4" to 1/2" closer than planned.
  • Floor panel bolt holes didn't line up so well leaving 1/8" gap in middle of floor to be sealed.
  • Roof panel overhangs sidewall slightly. Needs to be trimmed.
  • Front curves had some very small flat spots in a few places. Nails and glue fixed this.
  • First design, vented Kammback, looked too difficult so changed to generic Benroy
  • First wall panels based on Kammback profile were 1/2" thick. New wall panels are 3/4" which provide better attachment to roof with only a little extra weight.
  • Mismeasured some screw holes which will be patched.

Well that's not much :thinking:
As I said somewhere else, the sign of a good tradesman is how well he hides his mistakes. :twisted:
User avatar
Sheddie
1000 Club
1000 Club
 
Posts: 1499
Images: 1129
Joined: Mon Jul 01, 2013 3:26 pm
Location: Whangarei, New Zealand

Re: Albuquerque teardrop

Postby pchast » Wed May 27, 2015 9:38 pm

We don't do NO mistakes!

They are opportunities for customization. :D
pchast
Platinum Donating Member
 
Posts: 2056
Images: 97
Joined: Mon Jan 28, 2013 5:47 pm
Location: Athens, NY

Re: Albuquerque teardrop

Postby KCStudly » Thu May 28, 2015 7:39 am

Not mistakes, "design development"! :thumbsup:
KC
My Build: The Poet Creek Express Hybrid Foamie

Poet Creek Or Bust
Engineering the TLAR way - "That Looks About Right"
TnTTT ORIGINAL 200A LANTERN CLUB = "The 200A Gang"
Green Lantern Corpsmen
User avatar
KCStudly
Donating Member
 
Posts: 9633
Images: 8169
Joined: Mon Feb 06, 2012 10:18 pm
Location: Southeastern CT, USA
Top

Re: Albuquerque teardrop

Postby ChasCABQ » Thu May 28, 2015 8:47 am

Thank you for the good humor relating to my "design developments"...

Perfection is an unrealizable goal. Accepting mistakes leads to improvement. In my former career as an engineer we reviewed projects after completion with an eye towards "lessons learned."

I'm learning SOOO many lessons. :D Would have been more if I hadn't found this great forum with all you experienced builders. Thanks for the encouragement!
Build journal: http://www.tnttt.com/viewtopic.php?t=61303
In 2016, I received a kidney transplant, finished my teardrop, and took it on the road! In 2017 I sold it and am back to car camping.
Thanks to all forum members who provided advice about my build and posted info to help me get started.
User avatar
ChasCABQ
Donating Member
 
Posts: 95
Images: 18
Joined: Sat Sep 27, 2014 3:54 pm
Location: Albuquerque, NM
Top

Re: Albuquerque teardrop - installed rear shelf

Postby ChasCABQ » Wed Jun 03, 2015 11:23 am

I installed a simple rear shelf made of 1/2" birch plywood secured with pocket screws into galley divider and side walls. This keeps with my basic style of camping not to mention I'm no cabinet maker.
Image
Next I need some more 1x2s so I can finish roofing the sleeper and then start on the hatch.
Last edited by ChasCABQ on Thu Jun 04, 2015 9:30 am, edited 1 time in total.
Build journal: http://www.tnttt.com/viewtopic.php?t=61303
In 2016, I received a kidney transplant, finished my teardrop, and took it on the road! In 2017 I sold it and am back to car camping.
Thanks to all forum members who provided advice about my build and posted info to help me get started.
User avatar
ChasCABQ
Donating Member
 
Posts: 95
Images: 18
Joined: Sat Sep 27, 2014 3:54 pm
Location: Albuquerque, NM
Top

Re: Albuquerque teardrop

Postby KCStudly » Wed Jun 03, 2015 1:00 pm

Nothing wrong with keeping things basic and sticking to that plan. If I ever do a 2nd build that will be my mindset, too. Feature creep I do not want.

On the other hand, for your shelf, the very simple addition of a 1x1 (3/4 x 3/4 actual) cleat screwed and glued along the top "front" edge would help keep things from sliding off and would also help to stiffen the edge quite a bit; so that it is less likely to sag once you have your gear on it.

If you wanted to have a little more retention and even more stiffening, you could space the cleat up off of the shelf every 8 inches or so with some little blocks of wood and longer screws coming up from the bottom, making more of a raised rail effect. Again, very simple to do, just a few straight cuts and some more screws, not ornate at all but adding function and strength.

Anyway you go, build on! :thumbsup:
KC
My Build: The Poet Creek Express Hybrid Foamie

Poet Creek Or Bust
Engineering the TLAR way - "That Looks About Right"
TnTTT ORIGINAL 200A LANTERN CLUB = "The 200A Gang"
Green Lantern Corpsmen
User avatar
KCStudly
Donating Member
 
Posts: 9633
Images: 8169
Joined: Mon Feb 06, 2012 10:18 pm
Location: Southeastern CT, USA
Top

Re: Albuquerque teardrop

Postby ChasCABQ » Sat Jun 13, 2015 12:43 pm

I've been gardening more than working on my trailer but finally got back to it the last few days. I added a rail to my shelf (had planned to do this and also thanks to KCStudly for suggesting) then finished roof spars over sleeper. I was running short on 1x2s and my nearby lumber yard was out so I got some nice poplar 1x2s from local cabinet supply company. They are true 2", not 1-1/2" like previous, and straight and true. I installed them with pocket screws, flat along the straight section of roof for headroom and on edge over shelf along curved section of wall. Next I will install 1x2 bracing over galley for hurricane hinge and lay in next roof panel.
132968
Build journal: http://www.tnttt.com/viewtopic.php?t=61303
In 2016, I received a kidney transplant, finished my teardrop, and took it on the road! In 2017 I sold it and am back to car camping.
Thanks to all forum members who provided advice about my build and posted info to help me get started.
User avatar
ChasCABQ
Donating Member
 
Posts: 95
Images: 18
Joined: Sat Sep 27, 2014 3:54 pm
Location: Albuquerque, NM
Top

Re: Albuquerque teardrop

Postby ChasCABQ » Wed Jul 01, 2015 11:32 am

My daughter and I glued and nailed the second roof panel, 1/8" birch, to the roof spars and sidewalls. I left the last 20" unattached so I could accurately locate the last spar. I glued and attached the spar using pocket screws then glued and nailed (brass boat nails) the final edge at the galley. I will start building the hatch next.
Image
Image
Build journal: http://www.tnttt.com/viewtopic.php?t=61303
In 2016, I received a kidney transplant, finished my teardrop, and took it on the road! In 2017 I sold it and am back to car camping.
Thanks to all forum members who provided advice about my build and posted info to help me get started.
User avatar
ChasCABQ
Donating Member
 
Posts: 95
Images: 18
Joined: Sat Sep 27, 2014 3:54 pm
Location: Albuquerque, NM
Top

Re: Albuquerque teardrop - hatch half built

Postby ChasCABQ » Sat Jul 04, 2015 11:58 am

Over the last two mornings, I cut and attached six curved spars to top and bottom edges of hatch frame using TB3 and pocket screws. Next I'll install cross-bracing and 1/8" birch plywood to finish. Temperatures here have been in the 90s during the afternoon which is also when the sun comes in my garage.
Image
Build journal: http://www.tnttt.com/viewtopic.php?t=61303
In 2016, I received a kidney transplant, finished my teardrop, and took it on the road! In 2017 I sold it and am back to car camping.
Thanks to all forum members who provided advice about my build and posted info to help me get started.
User avatar
ChasCABQ
Donating Member
 
Posts: 95
Images: 18
Joined: Sat Sep 27, 2014 3:54 pm
Location: Albuquerque, NM
Top

Re: Albuquerque teardrop

Postby pchast » Sat Jul 04, 2015 10:14 pm

I notice you have the end panels spring clamped to the sides of your trailer.
Have you added shims to allow any clearance for opening and closing the
hatch?
:thinking:
pchast
Platinum Donating Member
 
Posts: 2056
Images: 97
Joined: Mon Jan 28, 2013 5:47 pm
Location: Athens, NY
Top

Re: Albuquerque teardrop

Postby Sheddie » Sun Jul 05, 2015 12:00 am

pchast wrote:I notice you have the end panels spring clamped to the sides of your trailer.
Have you added shims to allow any clearance for opening and closing the
hatch?
:thinking:

Well spotted Pete I was wondering that too. :thinking:
User avatar
Sheddie
1000 Club
1000 Club
 
Posts: 1499
Images: 1129
Joined: Mon Jul 01, 2013 3:26 pm
Location: Whangarei, New Zealand
Top

Re: Albuquerque teardrop

Postby ChasCABQ » Sun Jul 05, 2015 8:11 am

pchast wrote:I notice you have the end panels spring clamped to the sides of your trailer.
Have you added shims to allow any clearance for opening and closing the
hatch?
:thinking:

Yes, I cut top and bottom spars narrower than the opening to allow for paint, etc. Clamps are just to hold in place for now. After I finish the hatch, I'll patch and paint everything then install hurricane hinge over the painted surfaces.
Build journal: http://www.tnttt.com/viewtopic.php?t=61303
In 2016, I received a kidney transplant, finished my teardrop, and took it on the road! In 2017 I sold it and am back to car camping.
Thanks to all forum members who provided advice about my build and posted info to help me get started.
User avatar
ChasCABQ
Donating Member
 
Posts: 95
Images: 18
Joined: Sat Sep 27, 2014 3:54 pm
Location: Albuquerque, NM
Top

Re: Albuquerque teardrop

Postby KCStudly » Sun Jul 05, 2015 9:03 am

I used 5 mm (3/16) shims between first rib and side wall and would have been better off using 3/8.
KC
My Build: The Poet Creek Express Hybrid Foamie

Poet Creek Or Bust
Engineering the TLAR way - "That Looks About Right"
TnTTT ORIGINAL 200A LANTERN CLUB = "The 200A Gang"
Green Lantern Corpsmen
User avatar
KCStudly
Donating Member
 
Posts: 9633
Images: 8169
Joined: Mon Feb 06, 2012 10:18 pm
Location: Southeastern CT, USA
Top

Re: Albuquerque teardrop

Postby GeneralChingon » Thu Jul 09, 2015 11:56 pm

Very nice, I also live in Albuquerque, and will be starting working on one as well.
GeneralChingon
Teardrop Inspector
 
Posts: 6
Joined: Wed Jun 17, 2015 3:42 pm
Top

Re: Albuquerque teardrop - installed hatch bracing and lock

Postby ChasCABQ » Sun Jul 12, 2015 3:54 pm

I finished all the bracing and installed the hatch lock with room for exterior 1/8" plywood skin. Everything was assembled with pocket screws, tee nuts and bolts for easy maintenance. I will begin installing gas struts next.
Image
Image
Image
Build journal: http://www.tnttt.com/viewtopic.php?t=61303
In 2016, I received a kidney transplant, finished my teardrop, and took it on the road! In 2017 I sold it and am back to car camping.
Thanks to all forum members who provided advice about my build and posted info to help me get started.
User avatar
ChasCABQ
Donating Member
 
Posts: 95
Images: 18
Joined: Sat Sep 27, 2014 3:54 pm
Location: Albuquerque, NM
Top

PreviousNext

Return to Build Journals

Who is online

Users browsing this forum: No registered users and 6 guests