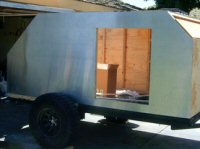
Finished the hatch wiring this afternoon (except for a few details).
Here are what the lights on the hatch look like
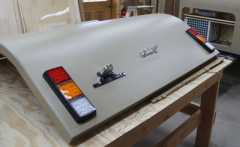
Note there are essentially nine lights: left running light, left brake light, left turn light, left backup light, license plate light, right... you get the idea. Oh wait, then there is the center brake light and center running light, and, on the other side of the hatch, a dome light (on an entirely different electrical system). Once I finally sat down and thought about this, I realized the wiring could be a real mess!

I could have just soldiered the wires together, or crimped them, but all of the grounds have to go together, and there are four wires connected together for running lights, etc. So I chose to use terminal blocks. Here is the result. Looks like some of the comm closets in buildings I've worked in
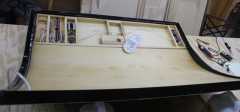
A bit complicated looking, but I'm pleased with how neat it came out. I'll have a Baltic birch panel that hides it all.
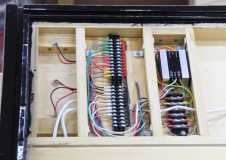
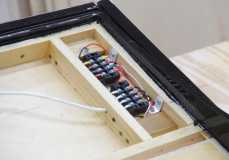
The color coding was a slight challenge. I'm using 6-18 gauge cable that has one less wire and different color wires than the trailer standard. Then, the lights have red and black leads, where black is ground, except the running light which shares a black ground and has a white +12 lead. The license plate light, on the other hand has a white ground and a black +12 volt lead. So I color coded the heat shrink on each ring stud instead. Mostly I tried to keep the shrink colors the same as the trailer standard. However, the little box on the left of the picture (and left of the hatch) converts the left turn/brake and right turn/brake inputs into separate outputs for the amber left and right turn and the brake lights. I decided to use burnt orange shrink for one of the turn signals, and yellow with green stripes for the other, because those are the colors I had left. I used red again for the brake light.
For the trailer fan and lights that run off of the battery, I generally use black for ground and red for +12 volts, but for this dome light, since it shares the ground with all the other hatch lighting, I just used white heat shrink for ground. Actually I didn't mean to, but it was late and I was a little confused!

In fact, re-reading the last two paragraphs, I realize it was probably very confusing, and unnecessarily detailed for you, the reader. Tell you what, just skip over those and let's move on.

I mounted the terminal strips and turn signal/brake converter box on scraps of 1/4 inch plywood that I'd varnished for waterproofing. I cut the aluminum angles from some scrap--they hold the plywood in place. I also made the aluminum straps that hold the converter box. It came with no ears for screwing in, but just some double sided tape.
The terminal strips on the left came with black and red buss bars with spade lugs. I used one for ground (black bar). The other I used where I needed multiple lights connected together, and to separate the groups I simply cut the red bar with dikes.
I used ring lugs for the wires. I couldn't find a suitable set for soldiering, so instead used crimp style, cut the plastic off, and pinched and soldiered. Dad taught me to soldier when I was 4 years old, and I would hate to have that training go to waste!
I'm hoping these terminal connections hold up to some hard travel. I'd hate it if we were, say, on the middle of the trans-Labrador highway and have a turn signal go out!
The dome light in the hatch is the same style as the one in the cabin, so I used the same connector, a T-30. In the unlikely event one did fail, we could swap them out so the more useful position had light.

The only other potential issue is whether all this is so heavy we'll need heavier struts on the hatch. Fortunately, I do have a secret weapon

I hate working with upsidasium. you can make it heavier by filing it down, but the dust tends to get into the eyes, and it makes a mess on the ceiling!
Tom
 (That's one of the times when I knew what I was going to say.)