New tug and new trailer....to be ....

...ask your questions in the appropriate forums BUT document your build here...preferably in a single thread...dates for updates, are appreciated....

Postby grizz » Sat May 15, 2010 12:01 pm

Well, I missed this one.....

Much more than I thought.


COMPLETE BIRTH ON VIDEO

http://s220.photobucket.com/albums/dd4/ ... ee33b6.pbw
Greetings from England.

Rian.


Hoping to get it all done in time.
User avatar
grizz
1000 Club
1000 Club
 
Posts: 1210
Images: 29
Joined: Mon Sep 21, 2009 2:37 pm
Location: Rochester, Kent, UK

Postby starleen2 » Sat May 15, 2010 2:32 pm

grizz wrote:Well, I missed this one.....

Much more than I thought.


COMPLETE BIRTH ON VIDEO

http://s220.photobucket.com/albums/dd4/ ... ee33b6.pbw


So THATS where little teardrops come from :roll: :cry:
User avatar
starleen2
5th Teardrop Club
 
Posts: 16272
Images: 224
Joined: Sat May 12, 2007 8:26 pm
Location: Pea Ridge ,AR

Postby jackdaw » Sat May 15, 2010 6:15 pm

We had a lot of fun , and got a load done yesterday.

We've had another very long , but also satisfying day today. All the ali has been weighed in .....netting £30 for the pot :D
All the wood has been cut up, bagged, and stored for kindeling for the woodburner. The rubbish has all gone to the recycling centre..... and I scored a twin burner gas cooker from a bloke who was about to dump it. :D

Simo came over to help out, and we got the axel moved forward on the chassis to the desired position. The back end has been cut and welded.

The joy's of owning a Delica....

Image
We've moved the axel just about 26 Inches forward. Welded some new angle to the frame, and bolted it up.

The back's been trimmed, and welded up. I did a similar thing with the Coppertop, but later cut it off. I'm thinking of using the box section chassis to rig up a support for the worktop......

This is how it's looking tonight


Image

I'll make up some wheelspacers tomorrow so I can get the trailer mounted to the chassis.
I'm hoping to win some wheels tomorrow night

And finally... The score from the recycling centre. I've just checked it out. It was still in the box and i havn't had time too look at it until now.
Image
I don't think it's boiled a kettle yet. It's got a bit of paint peeling, but it looks brand new.

Image

It's feels great to be building.
User avatar
jackdaw
500 Club
 
Posts: 598
Images: 124
Joined: Fri Feb 22, 2008 2:31 pm
Location: Wltshire, UK
Top

Grumman mk2 . A trailer is born!

Postby mezmo » Sun May 16, 2010 2:05 am

Hi jackdaw/Dave!

C o n g r a t u l a t i o n s ! ! ! !

It looks like "many hands make light work" also
applies to "labor" too! - (Or should that be "labour"?)

'Glad to see it was such a Fun Occasion for all involved!

Boy, 'youall' got a lot accomplished after the arrival!
You'll be able the get your "baby" into/onto its stroller/trolly
[aka known as the chassis] before all the commotion of
the birthday festivities die down!

So, did you 'youall' have any liquid "epidurals" later on to celebrate? -
deservedly so, if you did, I should say.

Cheers,

Mezmo/Norm
If you have a house - you have a hobby.
User avatar
mezmo
1000 Club
1000 Club
 
Posts: 1817
Images: 194
Joined: Fri Jan 01, 2010 4:11 am
Location: Columbia, SC
Top

Postby jackdaw » Sun May 16, 2010 4:27 am

Hi mezmo/Norm.
In true tradition, we indeed wet the baby's head :D :D Unfortunately our midwifery team had a two hour journey to get home , and had work the following day, so missed out.
We'll be spending the weekend with the couple at a custom show in mid June, and we can have a proper session.

I'm supprised at how quickly we managed to clear everything away.
User avatar
jackdaw
500 Club
 
Posts: 598
Images: 124
Joined: Fri Feb 22, 2008 2:31 pm
Location: Wltshire, UK
Top

Postby Evil Skippy » Mon May 17, 2010 1:48 am

This thread has just been fun.

Congrats on your birthing, glad to see you all dressed appropriately.

Can't wait to see it up on its feet.

digitally
Evil_Skippy
Great minds think alike.......and fools seldom differ.
User avatar
Evil Skippy
Teardrop Builder
 
Posts: 41
Joined: Fri Apr 09, 2010 1:15 am
Location: Duncanville Texas
Top

Postby jackdaw » Mon May 17, 2010 4:42 pm

It's been a fun build for sure, challanging , but fun.

We've got a bit more done yesterday, and a little more today.

First job was to get a coat of paint on the chassis. It's galvanised anyway, but the new welds needed doing, so I gave the hole thing a once over.

Image

I had a mate call around in the afternoon, and we got the little fella on his wheels :lol: :lol:
Image

I have a couple of inches for adjusting the balance, but as it stands the tounge weighs 35kg (77lbs)

Today I've fitted the front marker lights, and the roof vent. :D :D
User avatar
jackdaw
500 Club
 
Posts: 598
Images: 124
Joined: Fri Feb 22, 2008 2:31 pm
Location: Wltshire, UK
Top

Postby jackdaw » Sun Jul 11, 2010 5:07 pm

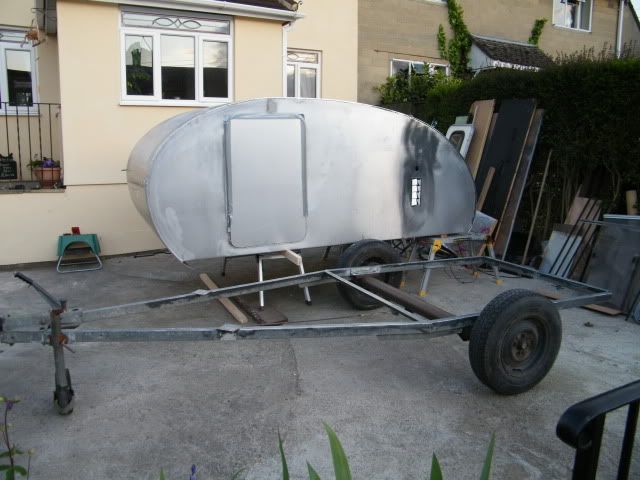
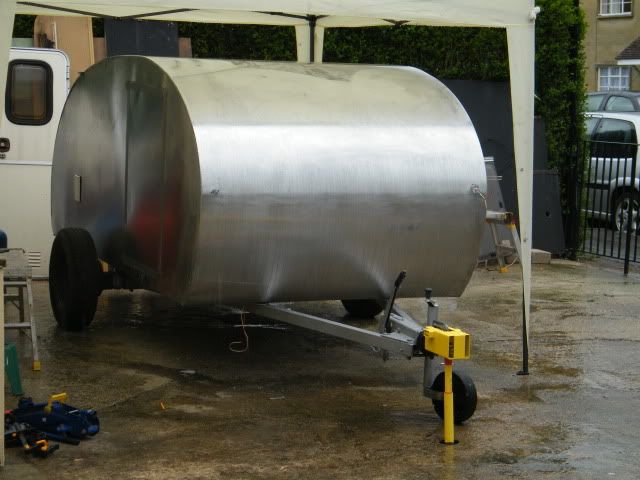
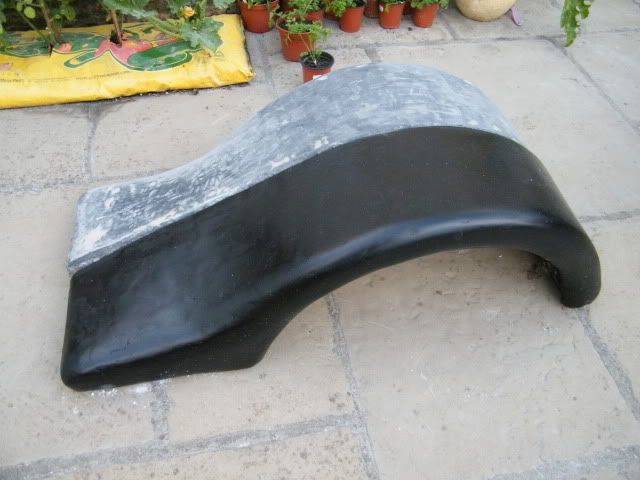
After what seems like ages since there's been any real progress, today was a great day. I seem to have missed out the making the doors from the old caravan doors, and fitting the windows...I annealed the old awning rail so we can re shape it, it's great for finishing off the sides and sliding the side tent into :thumbsup:
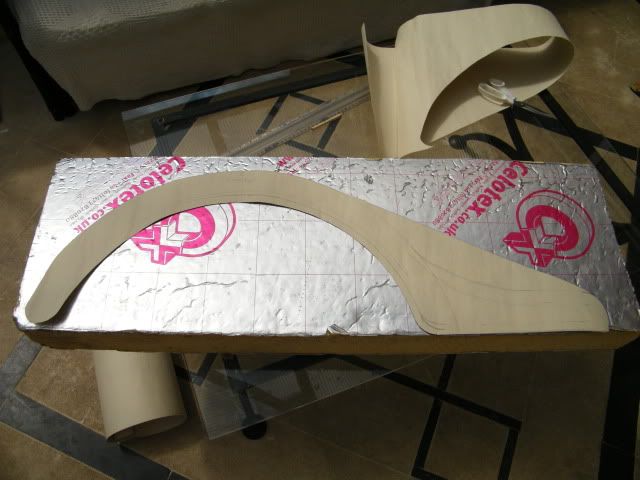
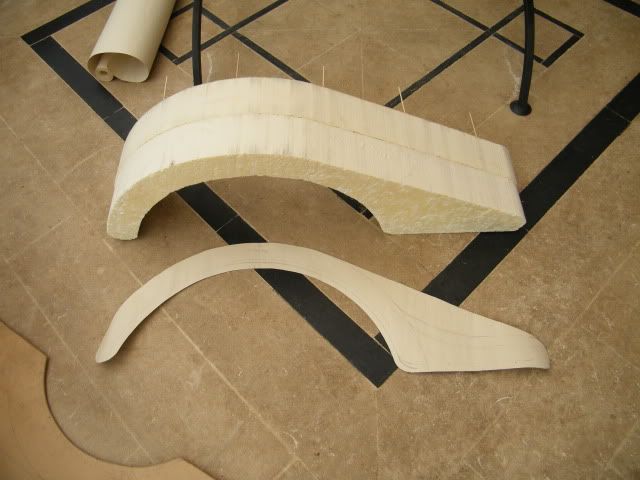
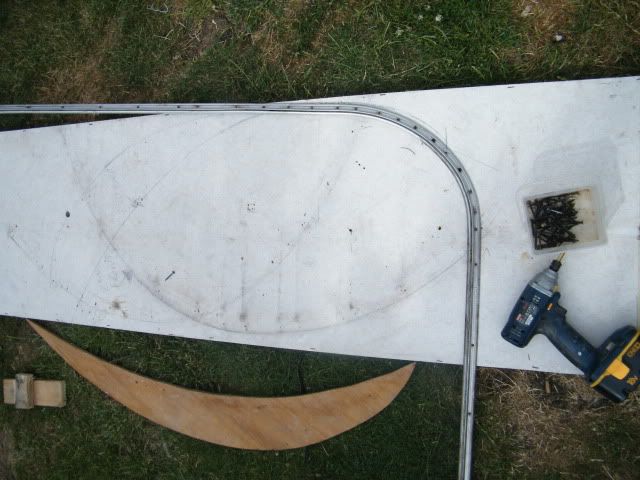
We'll start off with bending the awning rail. The method could be seen as primitive, but it worked. I drew around the profile of the trailer onto a piece of the old donor bulkhead. Front and back, and left and right sides, giving me four curves to follow. I used a curved off-cut of ply as a guide/ former, moving it as necessary, screwing the rail down as it was shaped into the right position.


Image

Image

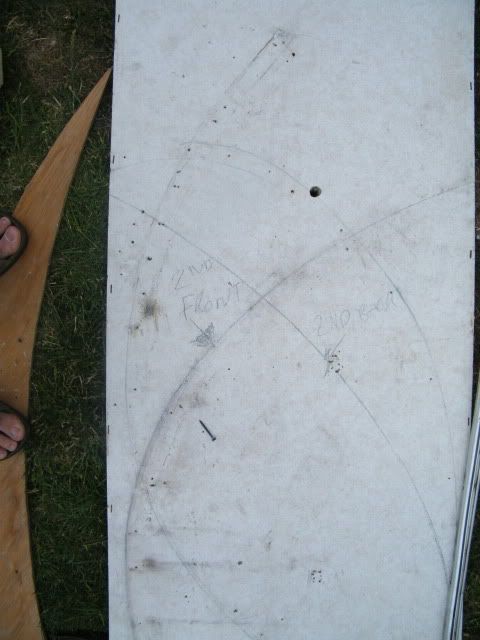
This is the rear left hand section

Image

It was actually a lot easier than I though it was going to be.
I used a tube of silkafex on each side fixing the rails in place with screws every 8-12 inches.

The guy I bought some wheels from turned up at lunchtime :D :D :D :D After months of searching and waiting a pair of cobra slot-mags, 4"PCD, 13x6 came up and were bagged and delivered for just over £50.
Image
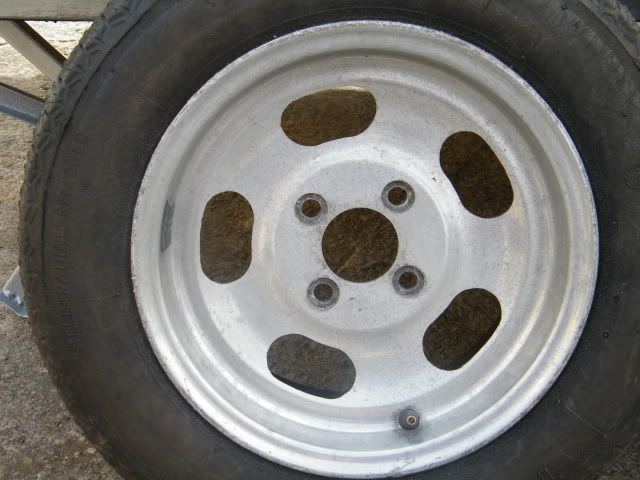
With a little auto-sol and the sheepskin they were soon transformed :D :D I had a couple of center caps in the garage

Image
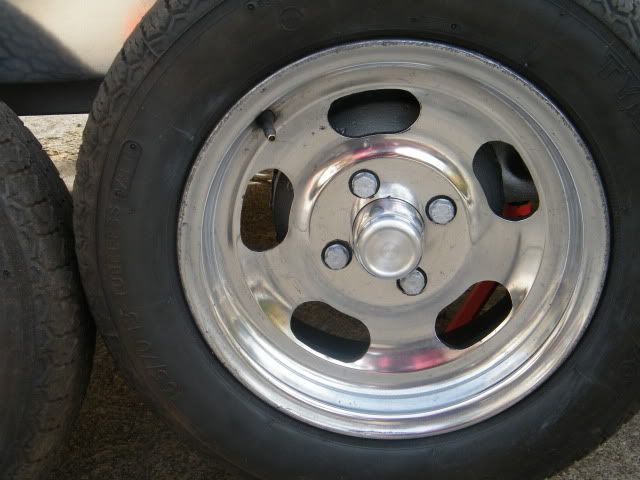
I'm very happy with the look :D :D :D

Image
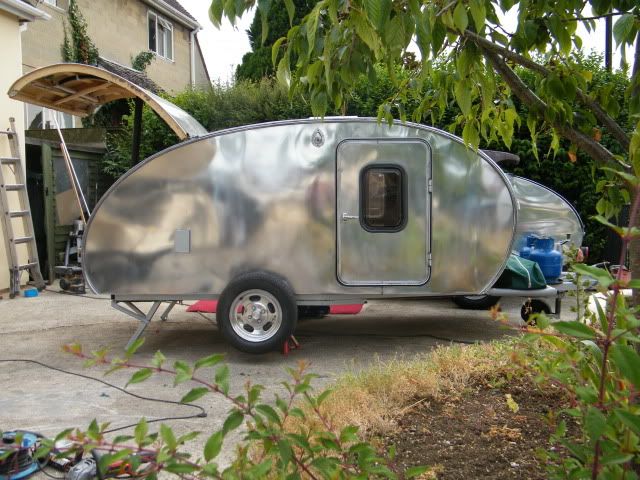
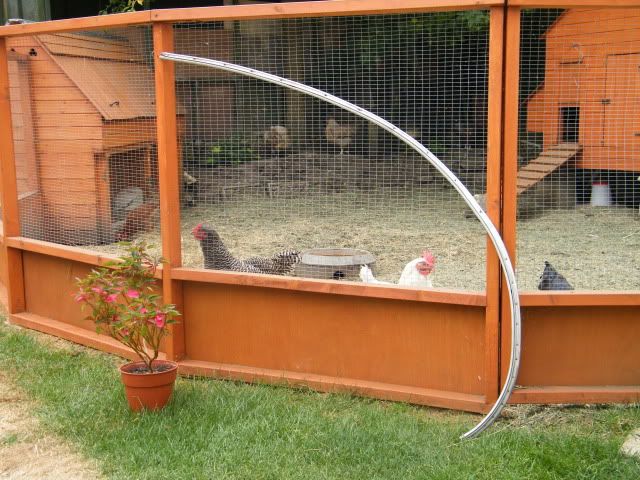
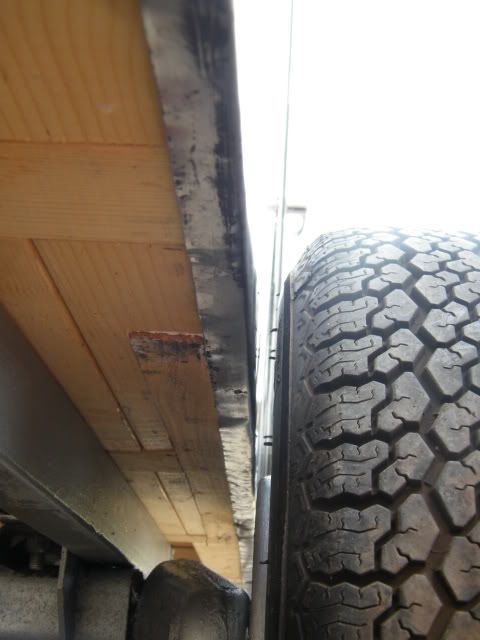
The awning rail finishes off the sides a treat. I've ordered some insert to cover over the screws.
Image
The backspacing is perfect. Snug to the trailer, with just enough clearance. I must admit it's more luck than judgment :mrgreen:

Image

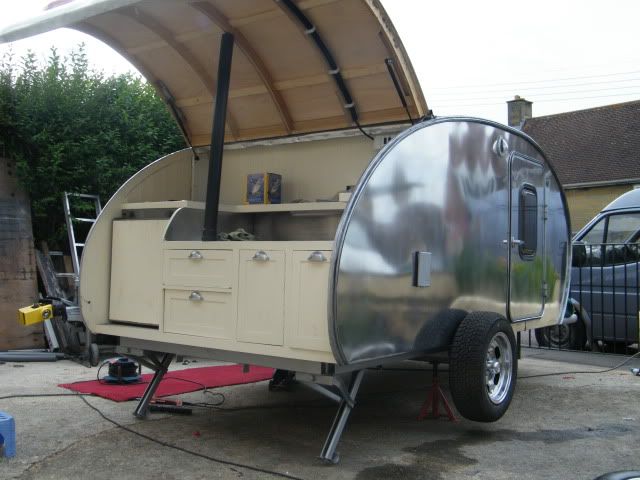
Rosie painted the sex protectors
Image
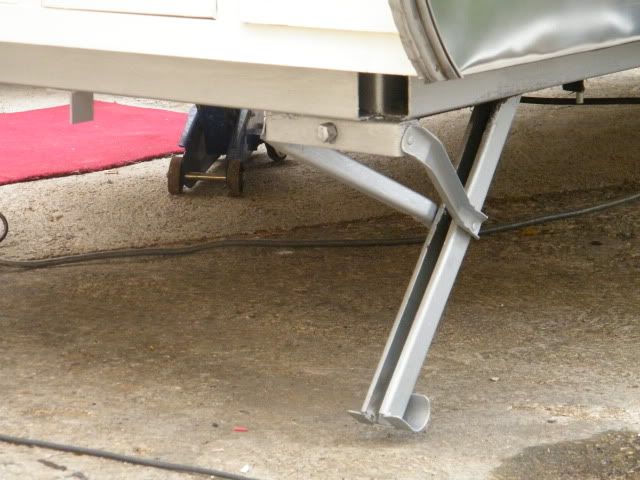
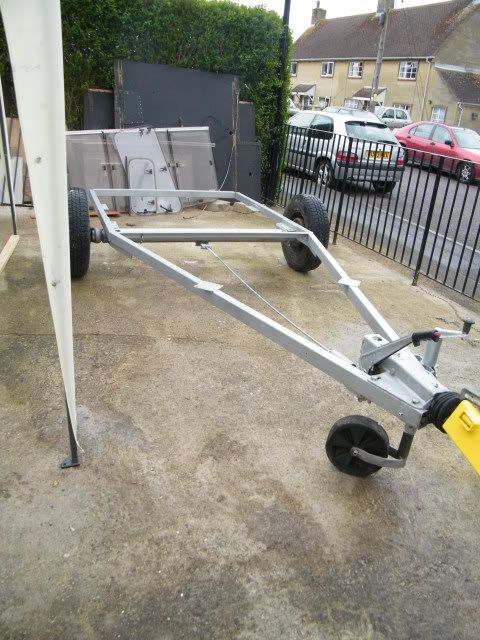
I finally got the trailer bolted to the chassis, so i could take it for a little road test, but that'll have to wait.
Last edited by jackdaw on Tue Jul 13, 2010 2:57 pm, edited 1 time in total.
User avatar
jackdaw
500 Club
 
Posts: 598
Images: 124
Joined: Fri Feb 22, 2008 2:31 pm
Location: Wltshire, UK
Top

Postby grizz » Tue Jul 13, 2010 1:45 pm

Awesome Dave.
Greetings from England.

Rian.


Hoping to get it all done in time.
User avatar
grizz
1000 Club
1000 Club
 
Posts: 1210
Images: 29
Joined: Mon Sep 21, 2009 2:37 pm
Location: Rochester, Kent, UK
Top

Postby jackdaw » Tue Jul 13, 2010 4:58 pm

Cheers Grizz.
I'm really pleased with how the awning rail kind of frames the profile.
With a bit of luck, and dry weather, we'll get the new side tent sorted at the weekend.
I happened to come across some 4" thick Celotex insulation on a job today, so I'll be making a start on the mudguards too.


Cheers Dave
User avatar
jackdaw
500 Club
 
Posts: 598
Images: 124
Joined: Fri Feb 22, 2008 2:31 pm
Location: Wltshire, UK
Top

Postby GuyllFyre » Tue Jul 13, 2010 7:00 pm

I love the wheels!
Pure sex!
Things I have for sale on craigslist:
http://albany.craigslist.org/search/?ar ... catAbb=sss

Things I have for sale on eBay:
http://www.ebay.com/sch/merchant/seansmith
User avatar
GuyllFyre
Donating Member
 
Posts: 209
Joined: Fri May 21, 2010 9:35 pm
Location: Scotia, NY
Top

Postby jackdaw » Fri Jul 16, 2010 5:53 pm

GuyllFyre wrote:I love the wheels!
Pure sex!


Thank Guy, They took some finding, but they are just what I wanted, and well worth the wait . :D

Now I've got the wheels sorted, I've been able to focus on the mudguards. I was undecided on going with aluminium , like the ones on the Coppertop, or fibre glass , a bit like Thypod. I came across some 100mm celotex on a job, that was surplus to requirements, and I took it as an omen to go with the fibreglass.
Here's what I've been up to today,
First job was to draw the shape of the mudguard. This time I've gone for a little more geometric in shape rather than the free hand drawing of the ones I made for Thypod.
This is a little faint, but I hope you can see whats going on
Image

Next job was to cut the shape out, and transfer it to the celotex

Image

I cut the shapes out using the band saw, and removed all the foil. I've used wooden skewers to hold the two pieces together.

Image

I transfered a few lines onto the blanks to give a guide as to where to sand them into shape.
Image

Using course sand paper, and a carving knife, It didn't take too long to get the desired shape.

Image

Then it was just a case of making a mirror image for the second one.
I think they're ready for resin.

Image

Image

I'll be getting on with them over the weekend, and keep you posted on how they turn out.
Last edited by jackdaw on Wed Apr 27, 2011 5:48 pm, edited 2 times in total.
User avatar
jackdaw
500 Club
 
Posts: 598
Images: 124
Joined: Fri Feb 22, 2008 2:31 pm
Location: Wltshire, UK
Top

Postby Classic Finn » Fri Jul 16, 2010 6:13 pm

jackdaw wrote:
GuyllFyre wrote:I love the wheels!
Pure sex!


Thank Guy, They took some finding, but they are just what I wanted, and well worth the wait . :D

Now I've got the wheels sorted, I've been able to focus on the mudguards. I was undecided on going with aluminium , like the ones on the Coppertop, or fibre glass , a bit like Thypod. I came across some 100mm celotex on a job, that was surplus to requirements, and I took it as an omen to go with the fibreglass.
Here's what I've been up to today,
First job was to draw the shape of the mudguard. This time I've gone for a little more geometric in shape rather than the free hand drawing of the ones I made for Thypod.
This is a little faint, but I hope you can see whats going on
Image

Next job was to cut the shape out, and transfer it to the celotex

Image

I cut the shapes out using the band saw, and removed all the foil. I've used wooden skewers to hold the two pieces together.

Image

I transfered a few lines onto the blanks to give a guide as to where to sand them into shape.
[IMG]http://i220.photob
ucket.com/albums/dd4/thejackdaw/Teardrop%20%203/2010_0716mudguards0006.jpg[/IMG]

Using course sand paper, and a carving knife, It didn't take too long to get the desired shape.

Image

Then it was just a case of making a mirror image for the second one.
I think they're ready for resin.

Image

Image

I'll be getting on with them over the weekend, and keep you posted on how they turn out.


Ok Dave thats it Im coming over. :lol: :lol: I cant take it anymore watching you how to make them mudguards.. ahh ok mercan wording fenders. :D :D Im watching this with great interest.

I will make some myself yet. Yes I will. :lol:

Dave will the blue styrofoam we have here work for the shapes and so on?

Sheeet, why dont ya just make me a pair and ship em over or better yet, bring them along to us :lol: :lol:

Nice work as usual :applause: :applause: :applause:
Royal Teardrop Society Scandinavian Bureau Chief of Staff

Image
User avatar
Classic Finn
Midnight Sun Voyager
 
Posts: 17488
Images: 146
Joined: Fri Apr 29, 2005 4:29 am
Location: Country of Finland
Top

Postby jackdaw » Fri Jul 16, 2010 7:39 pm

Cheers Heikki, I'm glad you like what you see... :lol:

I'm not familliar with your blue styrofoam, so I don't know if it would work or not. This Celotex is also known as kingspan insulation, it turns into very fine dust when you sand it. It's high performance insulation , and the same stuff that I've used in the roof of the trailers.

I have a couple of options on how I now proceed with the arches/fenders. If I wanted to make some molds, I could cover the insulation with resin, fill and sand them to a good finish. Then cover them in releasing agent, then gelcoat resin followed by a few layers of fibreglass matt to make the molds.
The alternative is to use resin and matting to make up the arches on top of the insulation. Fill and smooth them with easy sand/bondo. When they're finished I could use a releasing agent and make up the molds of the finished fenders, or just use them as one offs.
I'll probably go with the second alternative, as I like one offs, and often think that I could do it slightly different next time. I could always take a mold of them sometime in the future if I wanted to.

Cheers ,Dave
User avatar
jackdaw
500 Club
 
Posts: 598
Images: 124
Joined: Fri Feb 22, 2008 2:31 pm
Location: Wltshire, UK
Top

Postby jackdaw » Sat Jul 17, 2010 4:13 pm

I've spent all day fibre glassing them, gel coating them, filling and sanding them.
They're comming along, but need at least another day to get them right.

Here's how organised I was this morning :D :D
Image

It took a couple of hours to get the two layers of mat made up on the mudguards.

Image

After sanding off the high spots , they got a layer for black gelcoat added. Then easy fill body filler, then sanding and more sanding.

This is how they look as of this evening
Image

Image

Image
Last edited by jackdaw on Wed Apr 27, 2011 5:50 pm, edited 1 time in total.
User avatar
jackdaw
500 Club
 
Posts: 598
Images: 124
Joined: Fri Feb 22, 2008 2:31 pm
Location: Wltshire, UK
Top

PreviousNext

Return to Build Journals

Who is online

Users browsing this forum: No registered users and 5 guests