New build, "the 78 teardrop"

...ask your questions in the appropriate forums BUT document your build here...preferably in a single thread...dates for updates, are appreciated....

Postby Woodstramp » Sat Sep 03, 2011 11:36 pm

No pics...what you holding out for? I'd like to see the green skin.
User avatar
Woodstramp
The 300 Club
 
Posts: 438
Joined: Fri Nov 20, 2009 9:28 pm
Location: Aladambama

Postby CliffinGA » Sat Sep 03, 2011 11:52 pm

Danny a couple of quwstions for you bud. What did you use to seal the ply? What kind of filler to fill all those holes? What brand of paint did you use?

Cliff
In God we trust, shoot the rest and he will sort out!

My Build:

viewtopic.php?f=50&t=42628
User avatar
CliffinGA
1000 Club
1000 Club
 
Posts: 1499
Images: 207
Joined: Sat Nov 14, 2009 1:29 pm
Location: Jefferson, GA

Postby Danny » Sun Sep 04, 2011 10:15 am

:) PIX will be coming this week for sure. The first coat is not dry yet..oil takes 24 hours to cure in between coats. It is dry to the touch right now so,inspection reveals a few light spots and some rough patches on the top(murphys law) lol..So, some light sanding on the top in between coats will be needed.. Sides look fine and look very smooth and glossy( I can see my reflection) :shock: .. 8)
User avatar
Danny
The 300 Club
 
Posts: 333
Images: 108
Joined: Sat Oct 07, 2006 11:22 pm
Location: Nebraska
Top

Postby Danny » Sun Sep 04, 2011 10:34 am

CliffinGA wrote:Danny a couple of quwstions for you bud. What did you use to seal the ply? What kind of filler to fill all those holes? What brand of paint did you use?

Cliff
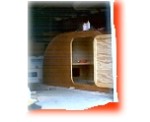
Hello Cliff..The ply always get a coat of poly to stabilize everything right off the bat. Then depending on final finish,in this case gloss oil base paint, A good quality oil primer,several coats with sanding in between untill desired smoothness is achieved.. to fill screw holes. i use an off the shelf wood filler,bordens ,dries fast and hard and is very sandable,all filled holes get spot sprayed with gray primer and sanded... Rustoleum oil based paint for the finish, dark hunter green in this case.. This stuff dries hard as nails..All joints are glued and screwed initially with gorilla glue,after a week or so, you can remove the screws, I also take an extra step when the ceiling liner goes in (glued not screwed, there are no holes at all in my ceiling(if you saw my homemade stick deadman clamps etc. during this process,it is a laugher but results are superb).. now, before top skin, i use a good quality clear acrylic/silicone adhesive caulk around every spar where it meets the ceiling and the sides..all ply edges get poly and, gorilla glue brushed on the bottom edges..Hard as nails when dry..
User avatar
Danny
The 300 Club
 
Posts: 333
Images: 108
Joined: Sat Oct 07, 2006 11:22 pm
Location: Nebraska
Top

Postby CliffinGA » Sun Sep 04, 2011 10:58 am

So your using something like this to initially seal first:
http://www.bing.com/shopping/high-build-polyurethane-gloss/p/12B11ACFA10E1CD45011?q=minwax+polyurethane&lpq=minwax%20polyurethane&FORM=HURE
then doing your oil primer and then your oil based paint finish right.

I was curious as I was thinking of doing this and using TSC Valspar restoration paint to finish mine.

Cliff
In God we trust, shoot the rest and he will sort out!

My Build:

viewtopic.php?f=50&t=42628
User avatar
CliffinGA
1000 Club
1000 Club
 
Posts: 1499
Images: 207
Joined: Sat Nov 14, 2009 1:29 pm
Location: Jefferson, GA
Top

Postby Danny » Sun Sep 04, 2011 11:31 am

CliffinGA wrote:So your using something like this to initially seal first:
http://www.bing.com/shopping/high-build-polyurethane-gloss/p/12B11ACFA10E1CD45011?q=minwax+polyurethane&lpq=minwax%20polyurethane&FORM=HURE
then doing your oil primer and then your oil based paint finish right.

I was curious as I was thinking of doing this and using TSC Valspar restoration paint to finish mine.

Cliff
..minwax makes excellent products...I forgot one step, the yellow cans of stain/ sealer..(I always have golden oak on hand)..This stuff is a sealer.. You could probably skip the poly,then go right to oil primer...I got lucky and picked up a gallon of bullseye oil primer for 5 bucks on clearance..Top coat with rustoleum....check this out(there are several vids on the net using this method).. http://www.youtube.com/watch?v=qUYJZHGgiFc
User avatar
Danny
The 300 Club
 
Posts: 333
Images: 108
Joined: Sat Oct 07, 2006 11:22 pm
Location: Nebraska
Top

Postby Danny » Mon Sep 05, 2011 8:43 am

Miriam C. wrote:
mikeschn wrote:I don't see any new pics in your album yet... We need pics... we luv dem pics... Please don't hold out on us! :lol: ;)

Mike...


;) Yep, if ya don't got da pics ya didn't do it! Beautiful job by the way! Image
Thanks Miriam..How is everything going down in joplin? Are you planning a new build yet? Danny
User avatar
Danny
The 300 Club
 
Posts: 333
Images: 108
Joined: Sat Oct 07, 2006 11:22 pm
Location: Nebraska
Top

Postby Danny » Mon Sep 05, 2011 4:32 pm

:shock: Second coat of paint on and, drying now...Looks pretty good so far. Really can't tell to you haul them out into the sunshine.. later this week. I need to get the door lock in yet and a rock shield cut out and painted for the bottom front, and a metal rain guard?(what the heck is that metal piece called anyway) :? for the bottom of galley hatch..Oh yeah and the louvered fresh air vents. 8)
User avatar
Danny
The 300 Club
 
Posts: 333
Images: 108
Joined: Sat Oct 07, 2006 11:22 pm
Location: Nebraska
Top

Postby Danny » Wed Sep 07, 2011 8:33 am

Image
User avatar
Danny
The 300 Club
 
Posts: 333
Images: 108
Joined: Sat Oct 07, 2006 11:22 pm
Location: Nebraska
Top

Postby Danny » Mon Sep 12, 2011 11:30 am

Finishing up a few details,side trim weatherproof for hatch, installed. bought the wrong size lock for door,need to go to the box store and get a new one..Other than that, this little RV is done :D PIX will come soon, I promise.
User avatar
Danny
The 300 Club
 
Posts: 333
Images: 108
Joined: Sat Oct 07, 2006 11:22 pm
Location: Nebraska
Top

Postby Danny » Tue Sep 13, 2011 7:51 pm

8) NEW PIX>Image
User avatar
Danny
The 300 Club
 
Posts: 333
Images: 108
Joined: Sat Oct 07, 2006 11:22 pm
Location: Nebraska
Top

Postby Danny » Tue Sep 13, 2011 7:56 pm

Image
User avatar
Danny
The 300 Club
 
Posts: 333
Images: 108
Joined: Sat Oct 07, 2006 11:22 pm
Location: Nebraska
Top

pix

Postby Danny » Tue Sep 13, 2011 7:58 pm

Image
User avatar
Danny
The 300 Club
 
Posts: 333
Images: 108
Joined: Sat Oct 07, 2006 11:22 pm
Location: Nebraska
Top

Postby Danny » Tue Sep 13, 2011 7:59 pm

Image
User avatar
Danny
The 300 Club
 
Posts: 333
Images: 108
Joined: Sat Oct 07, 2006 11:22 pm
Location: Nebraska
Top

Postby Danny » Tue Sep 13, 2011 8:00 pm

Image
User avatar
Danny
The 300 Club
 
Posts: 333
Images: 108
Joined: Sat Oct 07, 2006 11:22 pm
Location: Nebraska
Top

PreviousNext

Return to Build Journals

Who is online

Users browsing this forum: Bing [Bot] and 12 guests