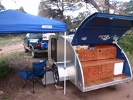
Colorado_Carter Teardrop Build
Re: Colorado_Carter Teardrop Build
Thanks Sharon!
-

Colorado_Carter - Teardrop Advisor
- Posts: 72
- Images: 102
- Joined: Mon Jun 04, 2012 12:17 pm
Re: Colorado_Carter Teardrop Build
Colorado_Carter wrote:KISS-keep it simple stupid. I need to get that tattooed somewhere.
...
A stick would have been sooo much easier.
Amen, brother!
 "Missed it by that much." - Maxwell Smart.
I've just worked my contingency plan through for gas struts six ways from Sunday (so to speak) using 3D CAD modeling and I can tell you that it is one of the most complex things to wrap your brain around, even with the advantage of these design tools. I'm still not sure that it will all workout in the end.
Here's a suggestion. Since your hatch and galley are already built and installed it may take a little transferring of points or making a mock-up piece to represent your hatch side due to lack of access to the inside when the hatch is closed, but I hope it can help you figure a solution. First pick which anchor point you want to leave put. Make up a "story pole" (a gauge stick) that has three holes in a row: one for the pivot point you do not want to change; one that represents the center to center (C/C) of your strut when it is just a little bit shy of being closed all of the way (allow maybe 1/8 to 3/16 inch longer than the collapsed length); and the third hole representing the extended C/C of your strut. Now prop your hatch up to where you want it to be in the raised position, put the story pole on the pivot point that is staying put and strike an arc with a pencil in the long hole on to the other side (hatch or wall, depending). Transfer or mock up a gauge piece that will show you where the known pivot point is in the closed position; then strike another arc through the short hole position using this as your fixed center point. Where the two arcs cross is a pretty good place to put the center of the pivot point that needs to be moved.
When the hatch is closed it would be good if the imaginary line passing through the long axis of the strut is aimed at or near the hatch hinge centerline. Since your farthest strut pivot point relative to the hinge anchors to your hatch, you can get a little positive closure by aiming your strut just slightly above the hinge a couple of degrees. (If your farthest strut pivot point had been anchored to your wall, then you could get a little positive closure by aiming your strut just slightly below the hinge a couple of degrees when the hatch is closed.)
Hope this helps. Clear as mud?
KC
My Build: The Poet Creek Express Hybrid Foamie
Poet Creek Or Bust
Engineering the TLAR way - "That Looks About Right"
TnTTT ORIGINAL 200A LANTERN CLUB = "The 200A Gang"
Green Lantern Corpsmen
My Build: The Poet Creek Express Hybrid Foamie
Poet Creek Or Bust
Engineering the TLAR way - "That Looks About Right"
TnTTT ORIGINAL 200A LANTERN CLUB = "The 200A Gang"
Green Lantern Corpsmen
-

KCStudly - Donating Member
- Posts: 9640
- Images: 8169
- Joined: Mon Feb 06, 2012 10:18 pm
- Location: Southeastern CT, USA


 )
)