Grizz-Pod Teardrop Trailer - New tow truck - 66 Chevy

...ask your questions in the appropriate forums BUT document your build here...preferably in a single thread...dates for updates, are appreciated....

Postby grizz » Sat Oct 31, 2009 4:32 pm

2fry wrote:What's the deal with converting the z tec to rear wheel drive.
i have the type 9 box in both my traveller and my ragtop.
I still have the A series engine,and the traveller is supercharged but it goes through fuel like theirs a hole in the tank. :cry:
Ulimately i'd like to fit a Ford diesel but don't know what fits what.


Check the bus thread above somewhere, Edd knows what he is up to.

I have no idea, just drive it.
Greetings from England.

Rian.


Hoping to get it all done in time.
User avatar
grizz
1000 Club
1000 Club
 
Posts: 1210
Images: 29
Joined: Mon Sep 21, 2009 2:37 pm
Location: Rochester, Kent, UK

Postby grizz » Sun Nov 01, 2009 2:30 pm

Just been stalking on EvilBay......

Wanted to make up a watertank to go below the floor, looked at various options, and also trawled Ebay the last few weeks.

Found this one earlier this week, 530 x570 x 270 mm and roughly about 80 litres, so a decent reservoir, only to be filled at destination.

Got it for £36 off Ebay, and £10 postage , brings it in below what is available form caravaning shops and the likes.

Pretty chuffed, it completes another part of the puzzle.

Next up I need a power tap, for cold only, or hot and cold..... anyone got one for sale, cheaply ??

Image
Greetings from England.

Rian.


Hoping to get it all done in time.
User avatar
grizz
1000 Club
1000 Club
 
Posts: 1210
Images: 29
Joined: Mon Sep 21, 2009 2:37 pm
Location: Rochester, Kent, UK

Postby grizz » Mon Nov 02, 2009 4:23 pm

Small update tonight, I think it has to be around 4'C out there, winter has suddenly landed, still not started my heating though, testing the cavity wall insulation I had fitted about 6 weeks ago, and it seems to work.

Tonight I just wanted to get the car jacks sorted out and the mounting points fitted to the chassis. Actually a simple job, but took a bit of time to do.
I had bought 2 scissor jacks and a wheelbrace for 50pence each at the Battlesbridge Autojumble, so the jacks will work at the rear to make up feet for the trailer to stand on when parked up.

I used some of the nuts and bolts that I removed when dismantling the trailer frame when I prepped the chassis. Welded a couple of washers to the bolt heads and ground them round like gutter bolts, then re-used 2 nylock nuts on each to both hold and space the heads under the chassis once I had drilled the holes to fit them.

Lastly, slipped the jack mounts that my faithfull angle grinder had modified over the gutter bolt heads, and extended, HEY PRESTO : Stabilisers.
Clearly, with the chassis off the gound on axle stands, the height is too high, they should work just fine once wheels are mounted and on the ground.

Image
Greetings from England.

Rian.


Hoping to get it all done in time.
User avatar
grizz
1000 Club
1000 Club
 
Posts: 1210
Images: 29
Joined: Mon Sep 21, 2009 2:37 pm
Location: Rochester, Kent, UK
Top

Postby grizz » Tue Nov 03, 2009 12:27 pm

Had a chat with the engineer who is making the wheel adaptors today, as I may have to space the wheels out a bit to fill the mudguards/fenders I want to put on the trailer. They are 11 inches wide and 40 inches over the top.

He suggested mocking the lot up, which means I had to go ahead and buy them.
Then we can see how thick he potentially needs to make the adaptors so as to fill the arches.

Pretty chuffed with the shape of them, kinda classic/retro looking I think.

Image
Greetings from England.

Rian.


Hoping to get it all done in time.
User avatar
grizz
1000 Club
1000 Club
 
Posts: 1210
Images: 29
Joined: Mon Sep 21, 2009 2:37 pm
Location: Rochester, Kent, UK
Top

Postby grizz » Fri Nov 06, 2009 3:02 am

Last night saw one of the most "Heroic" actions of combined effort to grace these pages of the Interweb.

I had been looking out for a small generatior to run the 3 way fridge, or even a 12V battery charger in the trailer for the last few weeks, scouring E-Bay for bargains, and bootfairs etc.

Last night someone on Volks Zone International was giving away a Brand New, unused small generator in Manchester which is 250 miles or 400km from where I live in Kent. Problem was the only way to have it was to pick it up immediately, as space was needed for a Recarro interior being delivered today.

I posted a thread on the general board [link=http://www.retrorides.proboards.com/index.cgi?board=general&action=display&thread=70145&page=1] HEROES DO IT LIKE THIS[/link], and in less than an hour it was wrapped up, and collected by Jon (Dugong), will be collected by Bruce (MysteryMachine) and taken to Bristol, then collected by PFChris and brought to Sevenoaks in Kent where I will collect it, about 30 miles from where I live. RESULT !!!!
Total distance traveled by generator based on peoples kindness and all thinking the same way = 350 miles or 7 hours.
These were not the only guys who had jumped up to offer help, with Marc (Hairnet) offering his pickup services, Mark (Reanimation) all in on it as well and relaying messages etc back and forth accros Greater Manchester.

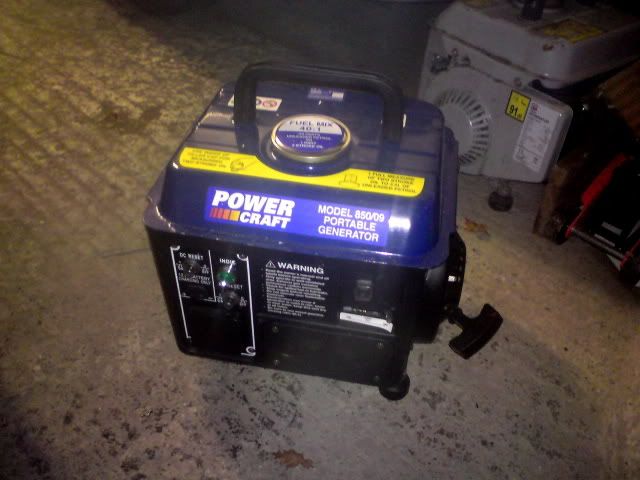
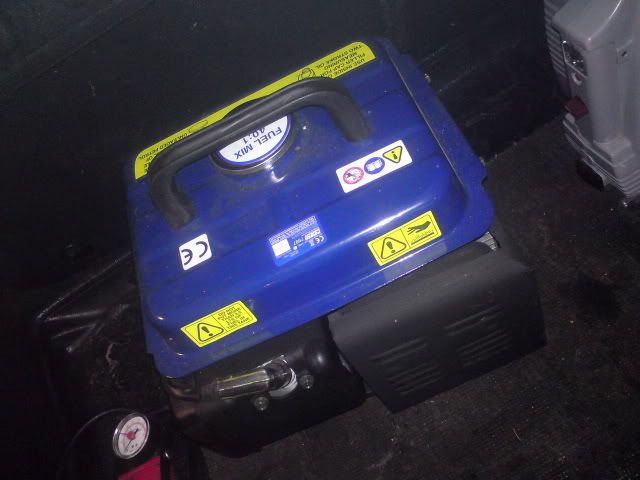
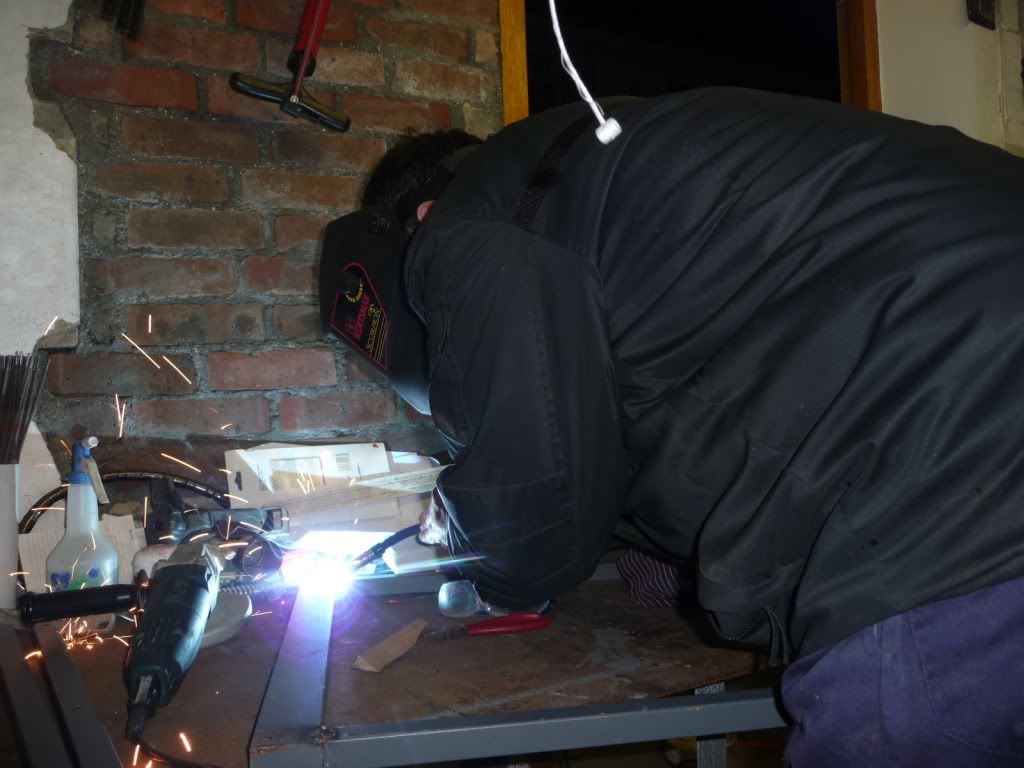
Said generator. Just need to make a bracket and box to hang it below the galley floor for transport now, next to the water tank. That should help get the weight distribution even more correct.

Image

Image


Looks like the build is still on track then, thanks to a real team effort.
Greetings from England.

Rian.


Hoping to get it all done in time.
User avatar
grizz
1000 Club
1000 Club
 
Posts: 1210
Images: 29
Joined: Mon Sep 21, 2009 2:37 pm
Location: Rochester, Kent, UK
Top

Postby aggie79 » Fri Nov 06, 2009 9:21 am

Grizz,

Your teardrop is coming together beautifully! The profile, fenders, and wheels seems like they were designed for each other. I'm amazed at your progress and resourcefulness.

Tom
Tom (& Linda)
For build info on our former Silver Beatle teardrop:
Build Thread

93503
User avatar
aggie79
Super Duper Lifetime Member
 
Posts: 5405
Images: 686
Joined: Tue Aug 07, 2007 5:42 pm
Location: Watauga, Texas
Top

Postby green_eyed_diablito » Fri Nov 06, 2009 11:21 am

aggie79 wrote:Grizz,

Your teardrop is coming together beautifully! The profile, fenders, and wheels seems like they were designed for each other. I'm amazed at your progress and resourcefulness.

Tom


ditto! :thumbsup:
Since this life here and now is all we can know, our most reasonable option is to live it fully.
ImageImage
User avatar
green_eyed_diablito
Teardrop Master
 
Posts: 226
Joined: Tue May 12, 2009 1:17 pm
Location: Los Angeles, CA
Top

Postby grizz » Fri Nov 06, 2009 12:36 pm

Thanks guys !!

A lot of my inspiration and amazement comes from you all, so I guess it is a team effort we have here.

I love making something out of nothing.

Today's score came from the one Psychiatric hospital I deal with thats busy with a refurbishment.

Ranging between 1m and 2.4m , a load of Oak banisters/rails that were being dumped. The square part is 45mm x 95mm and then it has a rounded cap with diameter around 70mm which is attached with screws. Perfect for some of my load bearing battens that will be carrying the front and rear mount of the ally, as well as the galley hinges.

Did I mention that I got a Tablesaw off Evilbay this week, hpe to get it home next week some time. Should help with ripping the lengths of oak to sizes I want.

Cost me £5 into the hospitals patient activity fund.

Image
Last edited by grizz on Fri Nov 06, 2009 1:21 pm, edited 1 time in total.
Greetings from England.

Rian.


Hoping to get it all done in time.
User avatar
grizz
1000 Club
1000 Club
 
Posts: 1210
Images: 29
Joined: Mon Sep 21, 2009 2:37 pm
Location: Rochester, Kent, UK
Top

Postby grizz » Fri Nov 06, 2009 1:19 pm

Just opened the post.

Submersible pump and switched tap off E-Bay arrived today as well it seems.

£20.00 all in, delivered. Guess there are better priced ones out there, but was in a bit of a hurry, and currently not much choice.

Progress in the right direction.

Image
Greetings from England.

Rian.


Hoping to get it all done in time.
User avatar
grizz
1000 Club
1000 Club
 
Posts: 1210
Images: 29
Joined: Mon Sep 21, 2009 2:37 pm
Location: Rochester, Kent, UK
Top

Postby grizz » Sun Nov 08, 2009 2:43 pm

Very little progress this weekend for various reasons.

Did manage to nick my index finger tip today with the angle grinder..... stupid.

Have started making a cradle for the spare wheel to go under the rear of the chassis.

I have some old office table frames and legs, that are perfect for the job.

May also put the water reservoir back on Ebay, as it is a bit lower than I want it to be.

Image
Greetings from England.

Rian.


Hoping to get it all done in time.
User avatar
grizz
1000 Club
1000 Club
 
Posts: 1210
Images: 29
Joined: Mon Sep 21, 2009 2:37 pm
Location: Rochester, Kent, UK
Top

Postby grizz » Mon Nov 09, 2009 6:26 pm

Carried on where I left off last night, ended up aborting that whole design, and decided to build a simple swing down carrier, like some of the French cars and lig commercial vehicles have.

Used bits of old chair, table legs and pipe to make up a lightweight frame that will hang below the chassis , and then pivot on a 10mm steel rod, that will run through the frame.

Attached to the rear angle iron chassis rail through some ingenious , quick release system I still have to figure out.

This is how far I got tonight, had a quite a few distractions, hence finishing at 11pm.

Image

Half way there, still need to fit and weld up pivot axle, and also side stops to stop spare wheel falling out, off the cradle. Hope that makes sense.

Image
Greetings from England.

Rian.


Hoping to get it all done in time.
User avatar
grizz
1000 Club
1000 Club
 
Posts: 1210
Images: 29
Joined: Mon Sep 21, 2009 2:37 pm
Location: Rochester, Kent, UK
Top

Postby grizz » Fri Nov 13, 2009 1:41 pm

Been pouring with rain here the last few days, and the weekend forecast is not at all cheerfull. :shock:

Got home tonight, to be greeted by this at my front door.....

The mudguards I ordered off Ebay 2 weeks ago.


Finish is far from perfect, and I am sure I will have to make it up as I go along, and maybe even learn how to work with fibreglass and resin, so as to make places for the mounting brackets to be mounted.

Image

11 inches wide, the adaptors should add an inch to the offset of the wheels once fitted, here just mocked up on a 15 inch wheel and tyre with a bit of wood on the inside.

Image

Mocked up on the existing 13 inch wheel , against the chassis, mudguard approximately in place where the trailer body will end.

Hope it all works out in the end, to look just right.

I do like the rearward curve of the mudguards though.

Image
Greetings from England.

Rian.


Hoping to get it all done in time.
User avatar
grizz
1000 Club
1000 Club
 
Posts: 1210
Images: 29
Joined: Mon Sep 21, 2009 2:37 pm
Location: Rochester, Kent, UK
Top

Postby planovet » Fri Nov 13, 2009 2:54 pm

Looks great! :thumbsup:
ImageMark (& Cindi)
Visit our website: Little Swiss Teardrop

I was wondering why the water balloon was getting bigger... and then it hit me.

ImageImageImageImage
User avatar
planovet
The Cat Man
 
Posts: 5583
Images: 3
Joined: Tue Nov 27, 2007 4:48 pm
Location: Plano, Texas
Top

Postby jackdaw » Fri Nov 13, 2009 2:58 pm

Oh yes, I like the look of them Grizz. They look like they were made for the job :thumbsup:
User avatar
jackdaw
500 Club
 
Posts: 598
Images: 124
Joined: Fri Feb 22, 2008 2:31 pm
Location: Wltshire, UK
Top

Postby S. Heisley » Fri Nov 13, 2009 9:32 pm

Nice style on those mud guard fenders. It's always a thrill to get a package you've been waiting for.

I'm watching and looking forward to seeing more of your build! :applause:
User avatar
S. Heisley
Super Lifetime Member
 
Posts: 8775
Images: 495
Joined: Mon Sep 17, 2007 10:02 am
Location: No. California
Top

PreviousNext

Return to Build Journals

Who is online

Users browsing this forum: No registered users and 16 guests