New tug and new trailer....to be ....

...ask your questions in the appropriate forums BUT document your build here...preferably in a single thread...dates for updates, are appreciated....

Postby Classic Finn » Sat Jul 17, 2010 4:26 pm

jackdaw wrote:I've spent all day fibre glassing them, gel coating them, filling and sanding them.
They're comming along, but need at least another day to get them right.

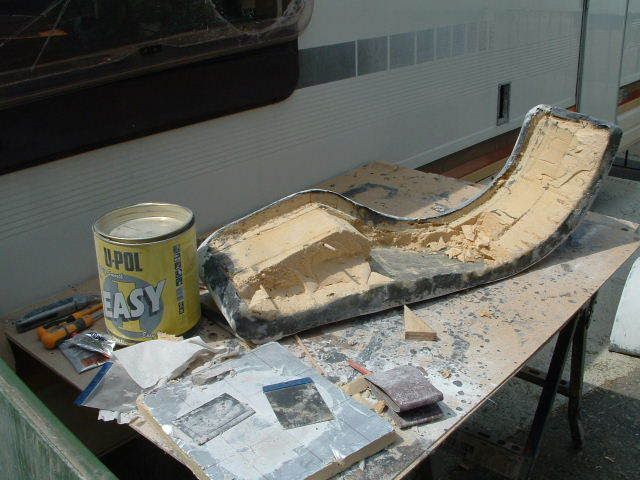
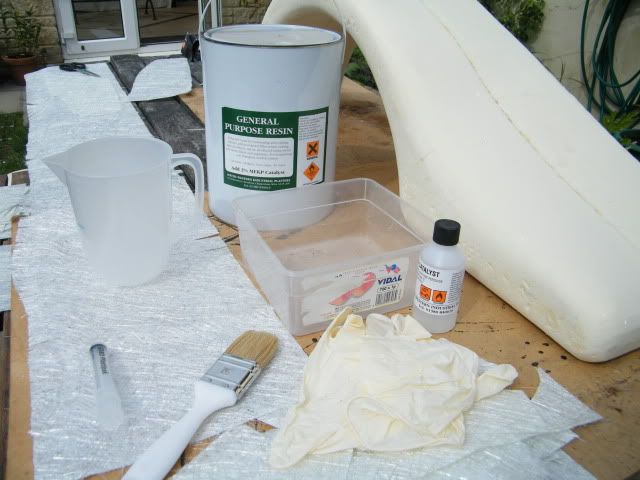
Here's how organised I was this morning :D :D
Image

It took a couple of hours to get the two layers of mat made up on the mudguards.

Image

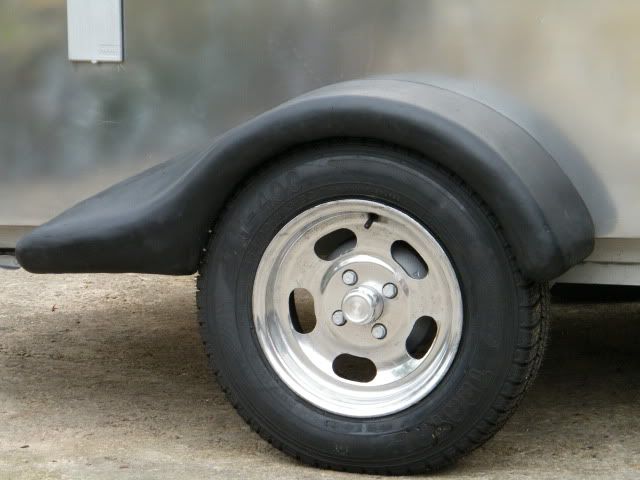
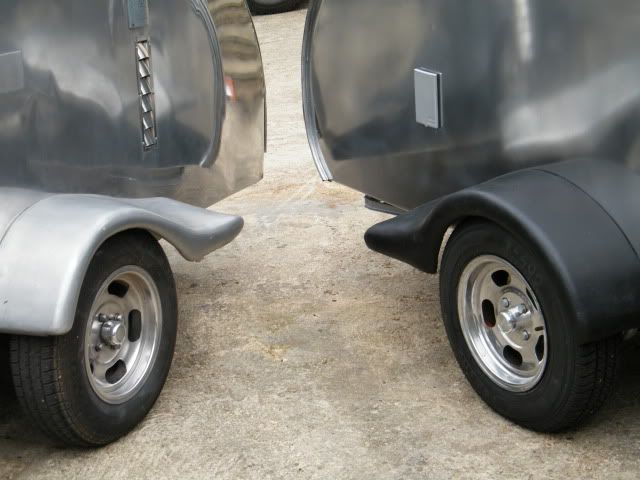
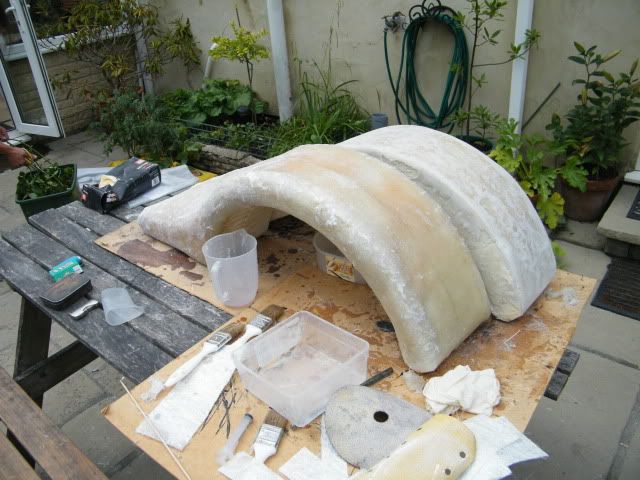
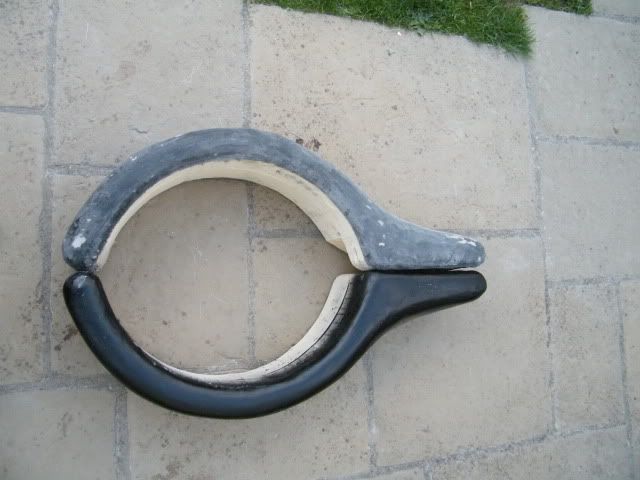
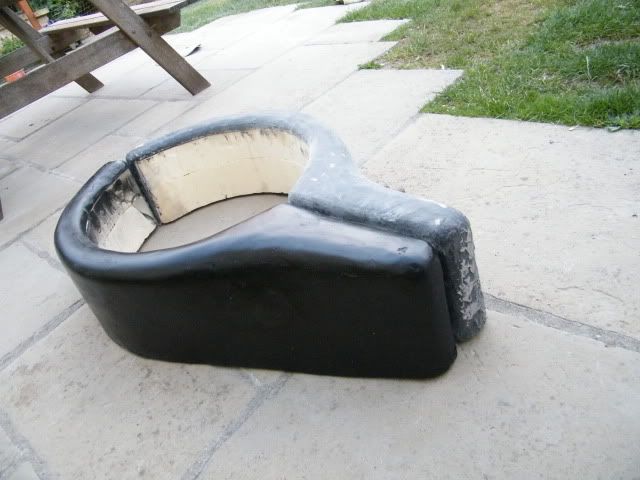
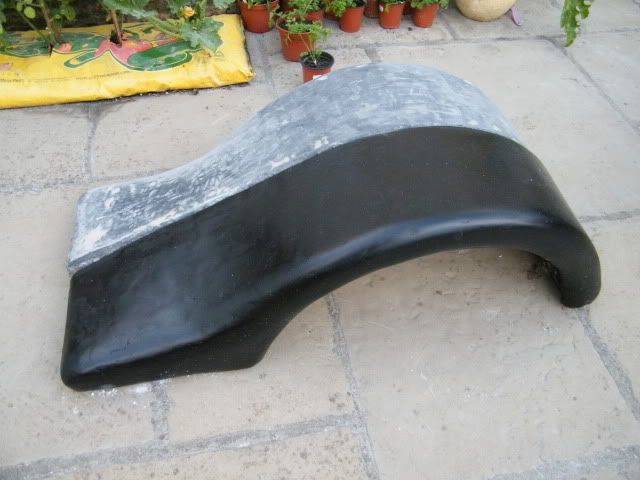
After sanding off the high spots , they got a layer for black gelcoat added. Then easy fill body filler, then sanding and more sanding.

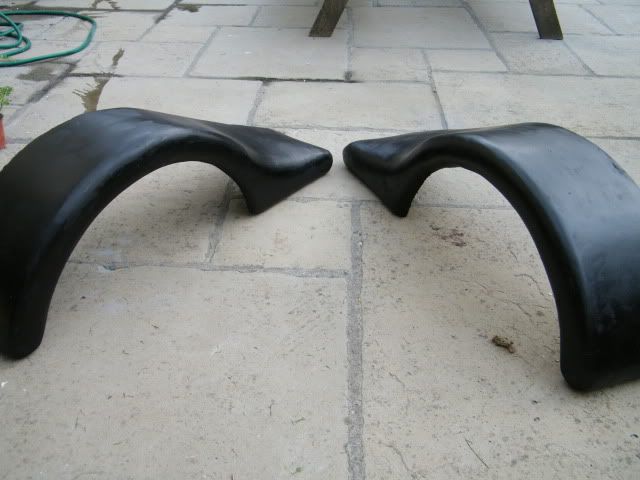
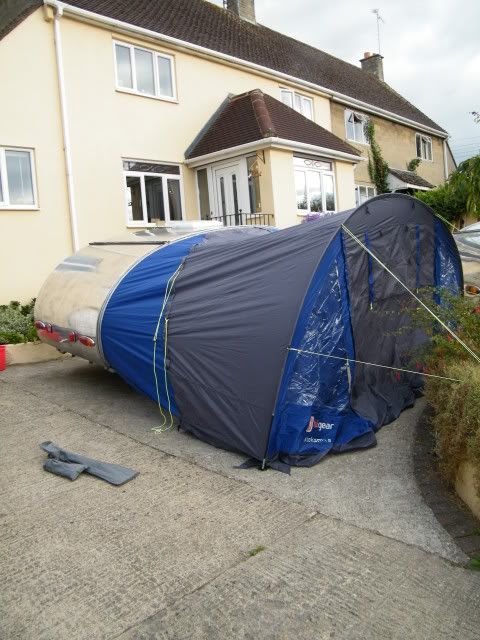
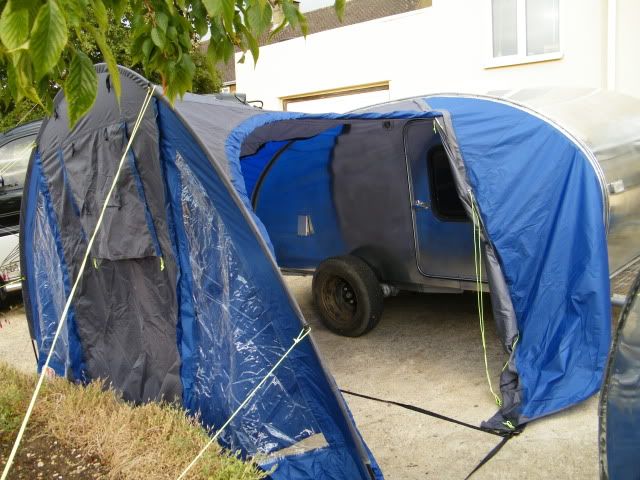
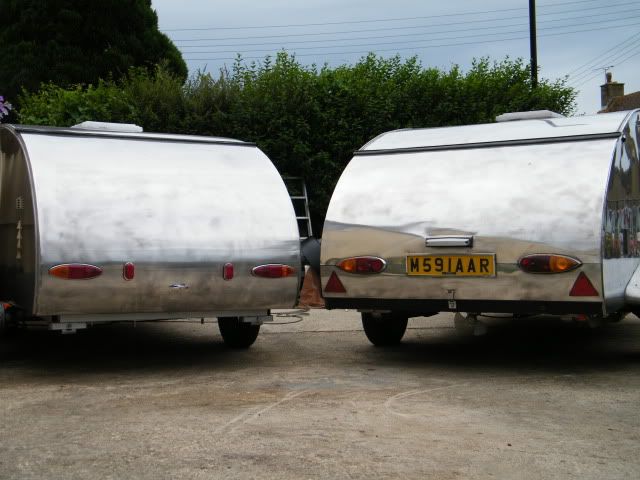
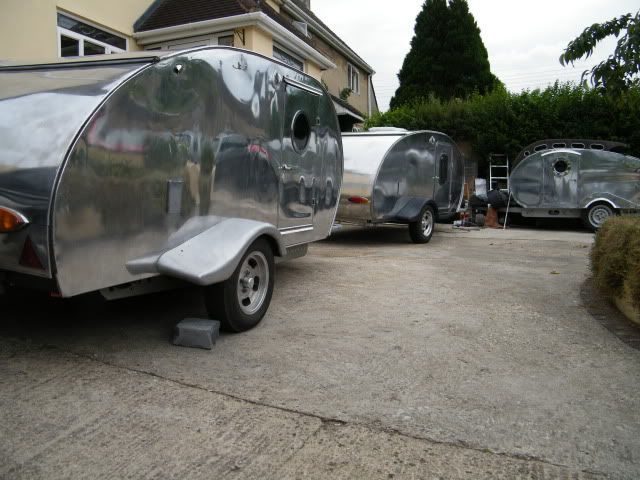
This is how they look as of this evening
Image

Image

Image


Again Im luvin this thread of yours Dave.

Let me get this into my ol 50+ yr old brain. :oops: :lol:

First the sanding into shape and carving if so needed. Then the fiberglass matting correct? How long do they have to sit before they are dry normally?

What actually is ( Gelcoat) ? Is this paint or ? I know its available in black, grey and as well as white. Pardon my illiteracy in this.. :oops: :D

After all the layers are dry and to your satisfaction Dave how do you get the styro seperated from the glass mudguards ? Is there some sort of lubricant under the glass or lets say on the styro forms?

:thinking: :? Again nice work Dave. :thumbsup:

Ive got fenders or mudguards in mind but they are simply round. Not kit style or.. ;)
Royal Teardrop Society Scandinavian Bureau Chief of Staff

Image
User avatar
Classic Finn
Midnight Sun Voyager
 
Posts: 17488
Images: 146
Joined: Fri Apr 29, 2005 4:29 am
Location: Country of Finland

Postby jackdaw » Sat Jul 17, 2010 5:34 pm

Heikki the mat is soaked in resin and added to the foam, or you can lay the mat on the foam and wet it with resin using a paint brush. either metod is fine.
The resin in mixed with catalist to speed up th chemical reaction . With 2% catalist the resin should be liquid for 20 minutes, and cured hard after 35 minutes. Sometimes the weather can have an effect on it, maling it go off quicker in the heat, or slowwing it down when it's cold.
I was mixing 500ml of resin with 10ml for catalist, and just had time to use it before it went jelly like. It's ready for sanding as soon as it's really hard.

Gel coat is a type of resin, and usually used to line a mould. It's the bit thats usually seen.

The foam will break out as it's weaker then the resin .
Here's a shot of the fenders I made for Thypod in the same way. I should add that these fenders are almost all the fibre-glassing I've done.I'm no expert thats for sure, but it works for me :D :D

Image
User avatar
jackdaw
500 Club
 
Posts: 598
Images: 124
Joined: Fri Feb 22, 2008 2:31 pm
Location: Wltshire, UK

Postby Lookfar » Sat Jul 17, 2010 7:33 pm

I've seen Celotex on jobsites and such before, but this is a much better use of it. I'll have to look around for some. I'd been thinking of laminating some, but this looks much better for me (done lots of fiberglas stuff).
Did you use matte for ease of laying up rather than cloth? I like these, thanks for thinking them up.
Butch
Image
User avatar
Lookfar
Donating Member
 
Posts: 225
Images: 22
Joined: Sun Jan 31, 2010 9:58 am
Location: Arkansas
Top

Postby jackdaw » Sun Jul 18, 2010 4:44 am

Lookfar wrote:I've seen Celotex on jobsites and such before, but this is a much better use of it. I'll have to look around for some. I'd been thinking of laminating some, but this looks much better for me (done lots of fiberglas stuff).
Did you use matte for ease of laying up rather than cloth? I like these, thanks for thinking them up.

I used the mat mainly because it was availlable locally, and it's what I've used before.
I'm not sure how the cloth would do the curves, as I've never used it before. It may well be better, and if you have some experience with it, you probably know better than I do. I did see some Fibreglass-Surface-Tissue-Mat that looks like it might of helped. The hard part is definately getting a good finish. It takes a lot of sanding and filling.
User avatar
jackdaw
500 Club
 
Posts: 598
Images: 124
Joined: Fri Feb 22, 2008 2:31 pm
Location: Wltshire, UK
Top

Postby jackdaw » Sun Jul 18, 2010 4:05 pm

I've spent the best part of the day rubbing down and filling the mudguards/fenders, and they're looking much better... but still not perfect. I'm reasonably happy with the results so far.
Image

Image

In between applying layers of resin yesterday, we put the tent up that we're planning to addapt to a side tent. A large outdoor retailer had these on offer couple of weeks ago. Marked down from £150 to around £50 ..with an extra 15% discount over the weekend.

Image

We measured the awning rail that runs around the trailer using a piece of rope. Then added the distance from the rail to the ground (X2).
The rope was put across the tent to see where we wanted to cut it.
Rosie 's stitched in the awning webbing along the cut edge, and today we tried it on the trailer.
One side just slides into the rail

Image

Then it's just one pole in the end, and a couple of guy ropes

Image

It's actually much bigger than we really need, but it doesn't take up much space, and it's quick to set up, so it should be fine. It has a door in the end, and another in the side, We'll probably use it on the other side of the trailer so you have quick access to the galley.

Image

It's not very traditional, but it is practical.

Cheers Dave.
Last edited by jackdaw on Sun Jul 18, 2010 5:22 pm, edited 1 time in total.
User avatar
jackdaw
500 Club
 
Posts: 598
Images: 124
Joined: Fri Feb 22, 2008 2:31 pm
Location: Wltshire, UK
Top

Postby Classic Finn » Sun Jul 18, 2010 4:20 pm

Wow Dave :o :o You are one top notch innovative dude. :lol: ;) :applause: :applause:

I can hardly wait to see the fenders on your tear. :) :)
Royal Teardrop Society Scandinavian Bureau Chief of Staff

Image
User avatar
Classic Finn
Midnight Sun Voyager
 
Posts: 17488
Images: 146
Joined: Fri Apr 29, 2005 4:29 am
Location: Country of Finland
Top

Postby Classic Finn » Sun Jul 18, 2010 4:23 pm

jackdaw wrote:Heikki the mat is soaked in resin and added to the foam, or you can lay the mat on the foam and wet it with resin using a paint brush. either metod is fine.
The resin in mixed with catalist to speed up th chemical reaction . With 2% catalist the resin should be liquid for 20 minutes, and cured hard after 35 minutes. Sometimes the weather can have an effect on it, maling it go off quicker in the heat, or slowwing it down when it's cold.
I was mixing 500ml of resin with 10ml for catalist, and just had time to use it before it went jelly like. It's ready for sanding as soon as it's really hard.

Gel coat is a type of resin, and usually used to line a mould. It's the bit thats usually seen.

The foam will break out as it's weaker then the resin .
Here's a shot of the fenders I made for Thypod in the same way. I should add that these fenders are almost all the fibre-glassing I've done.I'm no expert thats for sure, but it works for me :D :D

Image


I most definitely will give it a try in making some fenders :thumbsup:
Thank You for the advice and teachings. ;)
Royal Teardrop Society Scandinavian Bureau Chief of Staff

Image
User avatar
Classic Finn
Midnight Sun Voyager
 
Posts: 17488
Images: 146
Joined: Fri Apr 29, 2005 4:29 am
Location: Country of Finland
Top

Postby jackdaw » Sun Jul 18, 2010 5:12 pm

Classic Finn wrote:
jackdaw wrote:Heikki the mat is soaked in resin and added to the foam, or you can lay the mat on the foam and wet it with resin using a paint brush. either metod is fine.
The resin in mixed with catalist to speed up th chemical reaction . With 2% catalist the resin should be liquid for 20 minutes, and cured hard after 35 minutes. Sometimes the weather can have an effect on it, maling it go off quicker in the heat, or slowwing it down when it's cold.
I was mixing 500ml of resin with 10ml for catalist, and just had time to use it before it went jelly like. It's ready for sanding as soon as it's really hard.

Gel coat is a type of resin, and usually used to line a mould. It's the bit thats usually seen.

The foam will break out as it's weaker then the resin .
Here's a shot of the fenders I made for Thypod in the same way. I should add that these fenders are almost all the fibre-glassing I've done.I'm no expert thats for sure, but it works for me :D :D

Image


I most definitely will give it a try in making some fenders :thumbsup:
Thank You for the advice and teachings. ;)


Thanks for your comments Heikki.


Sharing what we do is all part of the fun. Even if I don't get many replies, I know folks are watching. I hope they like what they see, but there's a lot of builds on the go more interesting than mine :lol: :lol: .If I can help to inspire one builder , thats great :D :D . I often try stuff that I'm not sure about, but think should work.... it usually turns out OK .

It occured to me today as I was removing the foam, that if you wanted to make some moulds you could put a layer of gel coat straight over the foam , and then add a couple of layers of mat. When its cured, remove the foam and clean up the inside to use as the mould. Does that make sense :roll: :roll:

Cheers Dave
User avatar
jackdaw
500 Club
 
Posts: 598
Images: 124
Joined: Fri Feb 22, 2008 2:31 pm
Location: Wltshire, UK
Top

Postby glassice » Sun Jul 18, 2010 5:17 pm

Surface-Tissue-Mat make all the driftnets in the world it let's you sand a Little more these are the ones we make for food carts Image we get 150 at your door
I think you have a good sale over there if they use 8" are 12 tires
It is not the return ON my investment that I am concerned about; it is the return OF my investment
User avatar
glassice
Silver Donating Member
 
Posts: 588
Joined: Fri Sep 22, 2006 1:23 am
Location: E nev
Top

Postby jackdaw » Sun Jul 18, 2010 5:59 pm

glassice wrote:Surface-Tissue-Mat make all the driftnets in the world it let's you sand a Little more these are the ones we make for food carts Image we get 150 at your door
I think you have a good sale over there if they use 8" are 12 tires


I've used 13" wheels on all three of our trailers, but I think light weight trailers over here run on 10" rims.

You're fenders look like they have a great finnish on them :thumbsup: :thumbsup: . Next time I'll go with the tissue :lol: :lol:

I've made these so the bottom of the fender should be the same diameter as the outside of the tyre (around about 22"). They should look snug when they're fitted. I'm having new tyres fitted to the rims. They should be back with me tomorrow night, so if I get them mounted , and fit the fenders I'll post a photo of how they look.


Cheers Dave
User avatar
jackdaw
500 Club
 
Posts: 598
Images: 124
Joined: Fri Feb 22, 2008 2:31 pm
Location: Wltshire, UK
Top

Postby jackdaw » Tue Jul 20, 2010 2:31 pm

I put one of the arches on last night, but it was too dark to take any photos. I niped out tonight , before the rain :roll:

This is how they look

Image

Image

Image

Image


And a few for comparison
Image

Image

Image

Image

Image
User avatar
jackdaw
500 Club
 
Posts: 598
Images: 124
Joined: Fri Feb 22, 2008 2:31 pm
Location: Wltshire, UK
Top

Postby High Desert » Tue Jul 20, 2010 3:41 pm

Dave, you sir are an Innovator Extraordinaire. Have really enjoyed watching this build, as well as your others. Beautiful work. :thumbsup: :applause:
Shaun

"it's not the years honey, it's the mileage"
High Desert
Platinum Donating Member
 
Posts: 8780
Images: 27
Joined: Wed Apr 08, 2009 1:46 pm
Location: SW Washington state
Top

Postby jackdaw » Tue Jul 20, 2010 5:51 pm

High Desert wrote:Dave, you sir are an Innovator Extraordinaire. Have really enjoyed watching this build, as well as your others. Beautiful work. :thumbsup: :applause:


Thank you Shaun.
The teardrop bug has got me big time and I'm often thinking of how to use something in a diferent way on the build.

It's been a lot of fun for me. I'm glad you're enjoying it too :thumbsup: :thumbsup:
User avatar
jackdaw
500 Club
 
Posts: 598
Images: 124
Joined: Fri Feb 22, 2008 2:31 pm
Location: Wltshire, UK
Top

Postby Miriam C. » Tue Jul 20, 2010 6:32 pm

:thumbsup: You bet we are watching. Just don't want to tie up the thread too much... :D I just love your fenders. Well all of it really! :thumbsup:
“Forgiveness means giving up all hope for a better past.â€
User avatar
Miriam C.
our Aunti M
 
Posts: 19675
Images: 148
Joined: Wed Feb 15, 2006 3:14 pm
Location: Southwest MO
Top

Postby jackdaw » Tue Jul 20, 2010 7:18 pm

Miriam C. wrote::thumbsup: You bet we are watching. Just don't want to tie up the thread too much... :D I just love your fenders. Well all of it really! :thumbsup:


Thank you Aunti M, Feel free to tie it up :lol: :lol: It always good to get feed back , in whatever form...It helps spur us on sometimes, knowing we're going in the right direction, and others are along with you :thumbsup: :thumbsup:

Cheers Dave
User avatar
jackdaw
500 Club
 
Posts: 598
Images: 124
Joined: Fri Feb 22, 2008 2:31 pm
Location: Wltshire, UK
Top

PreviousNext

Return to Build Journals

Who is online

Users browsing this forum: No registered users and 1 guest