Un-named Travel Trailer Build - 99% Done! April 18

...ask your questions in the appropriate forums BUT document your build here...preferably in a single thread...dates for updates, are appreciated....

Postby fromeo » Mon Nov 01, 2010 6:34 pm

The weather wasn't 100% cooperative, but we did manage to get 5 days on the trailer this past week.


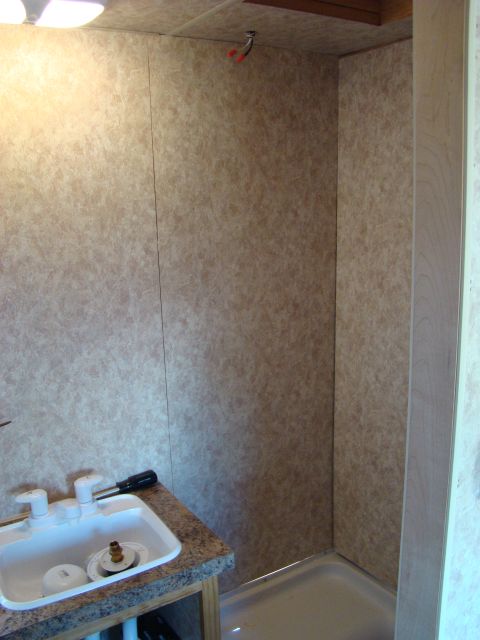
First, a few weeks back when my brother was here last we did a few little things, lined the walls over the tub with leftover paneling as a backer for the shower surround:

Image


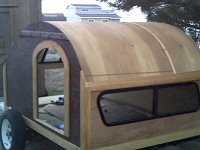
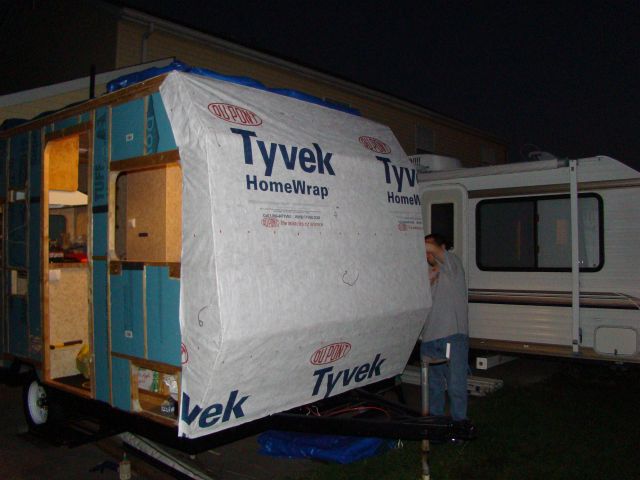
Also made some curved blocks to round off the sharp edges on the front. Then we wrapped some tyvek over the front for a little extra insurance against water intrusion. I wanted to do the whole thing, but didn't have enough tyvek.

Image


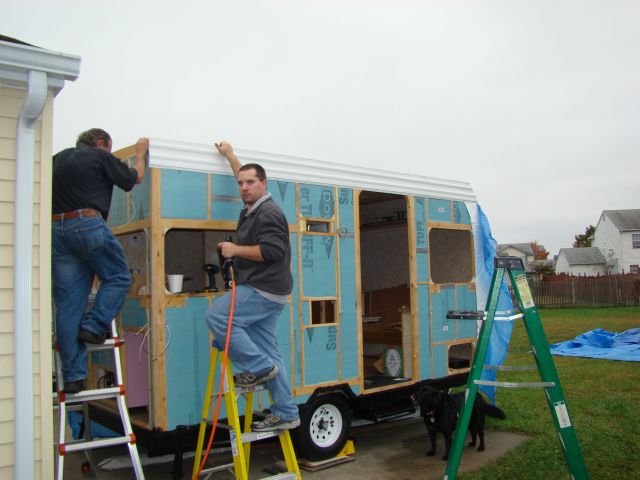
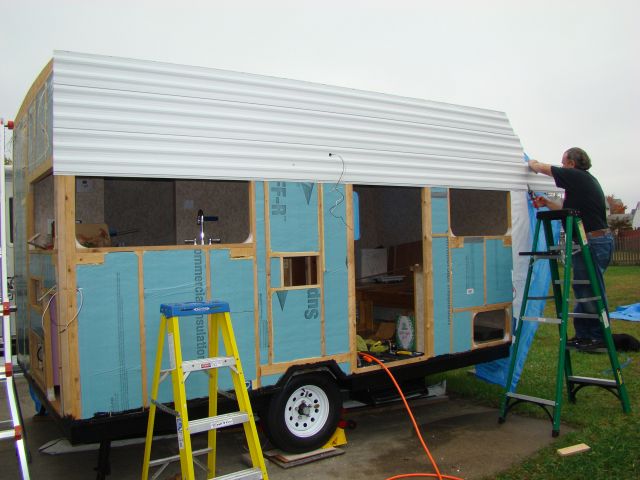
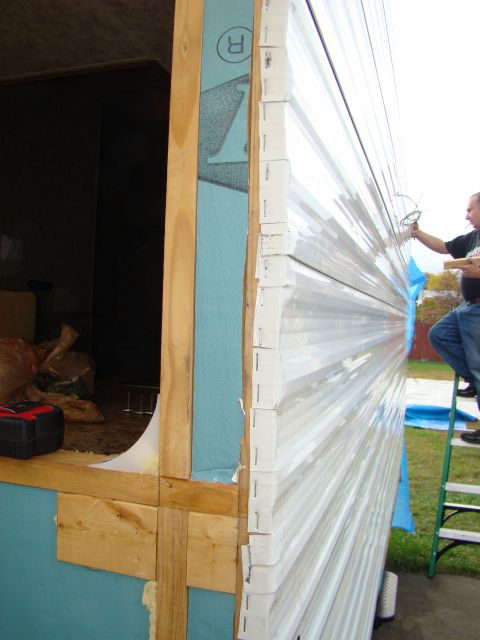
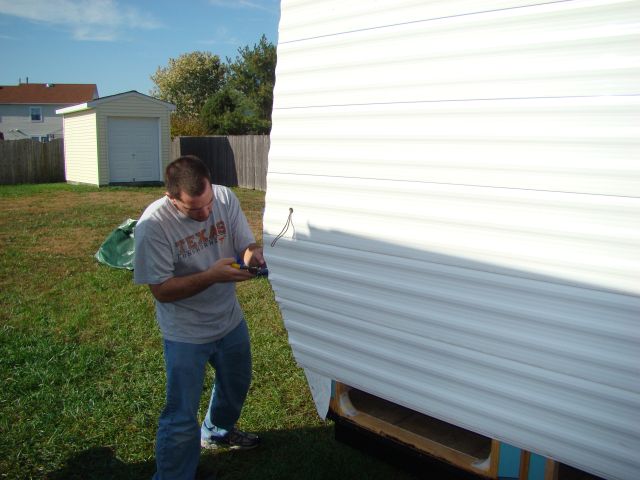
That brings us to this week. We got started on Tuesday, Oct 26. The first piece of siding is the most critical - if it's not level, the whole thing will be off. I also wanted the design to line up on the side and rear walls, so we had to cut the side pieces down (in height) since the rear wall crowns upwards due to the roof. Here's the first piece going on!

Image


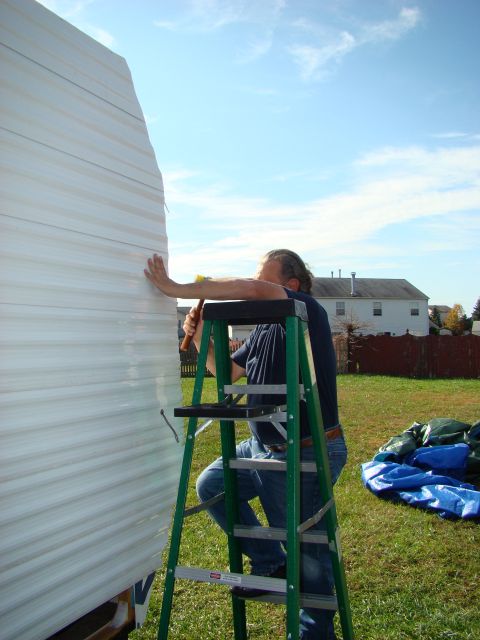
Then just add pieces and work your way down.

Image


We used full length pieces and then cut them to length once they were hung. The length is oversized about 1" on each end:

Image


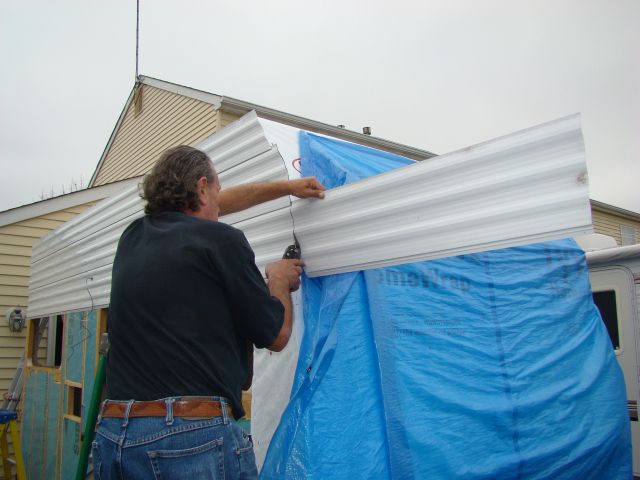
Went as far as we could with full height pieces on the door side:

Image


Then worked on the road side:

Image


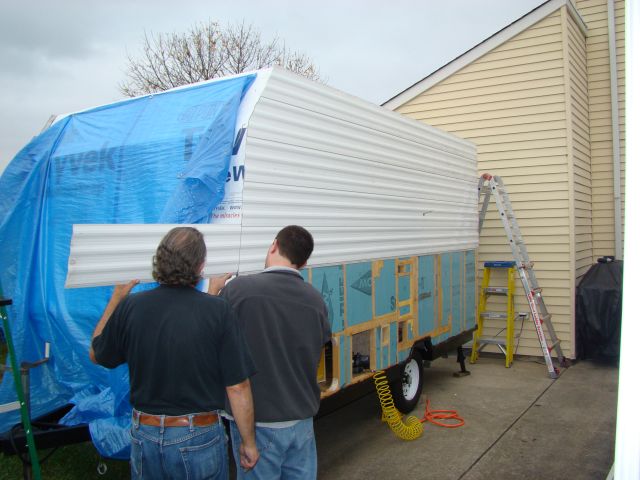
Same deal, as far as we can go with full height pieces:

Image


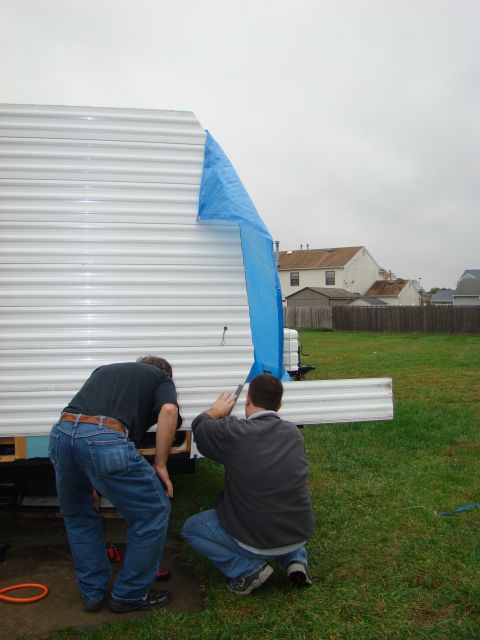
Now it's time to move to the rear wall. Here's where that 1" overhang I mentioned earlier comes in. We cut slits into the overhang every 1.5" or so:

Image


Bend the pieces around the corner, flatten them out with a plastic hammer and staple them down:

Image


The slits allow you to make the bend without distorting the siding pattern:

Image


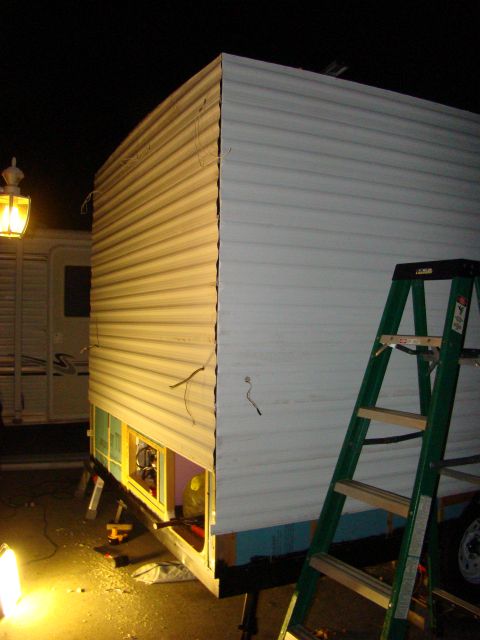
We made it as far as we could down the rear wall just as it got dark. You can't really see it in these pictures but a strip of butyl tape was laid down the length of the corner before the rear siding went on:

Image


Forecast said rain for Wednesday so we tarped it up and cleaned up.


Thursday, October 28:

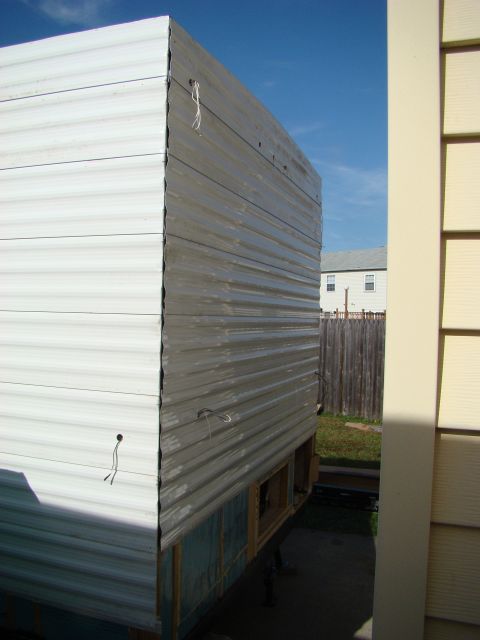
I took another picture of the rear in the daylight:

Image


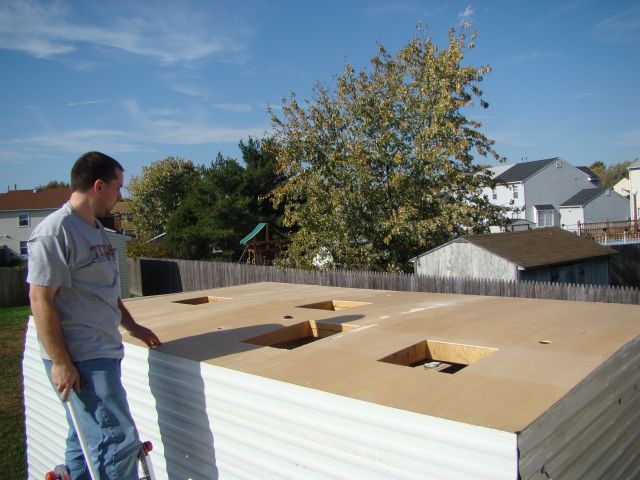
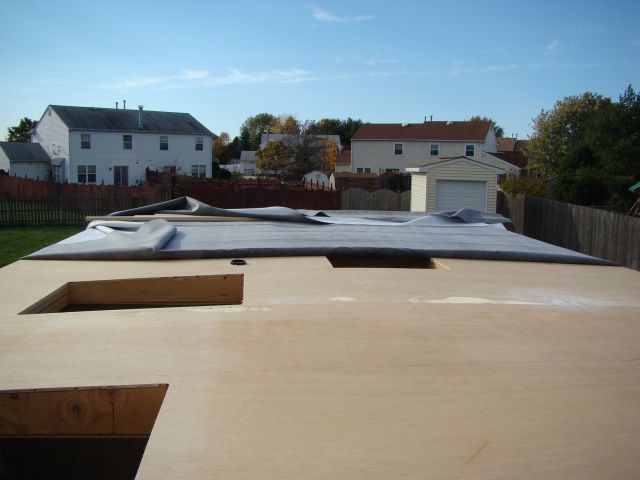
Since Thursday was warmer (around 70F), I decided to glue down the roof. I did not want to be laying adhesive in the 50's. Cut out the holes in the roof and gave it a quick light sanding:

Image


Then we slit, bent and secured the overhang on the front:

Image

Image


Next up is the EPDM roof rubber. I got the piece of rubber dirt cheap. The downside is it had to be shipped folded in a box. End result is some permanent crease lines in the rubber. I can deal with that considering the $200+ cost savings. To minimize the marks, we laid it out in the sun for a while then rolled it tight around a piece of pipe. Then it was rolled out on the roof and left to sit for a day. Cutting it to length:
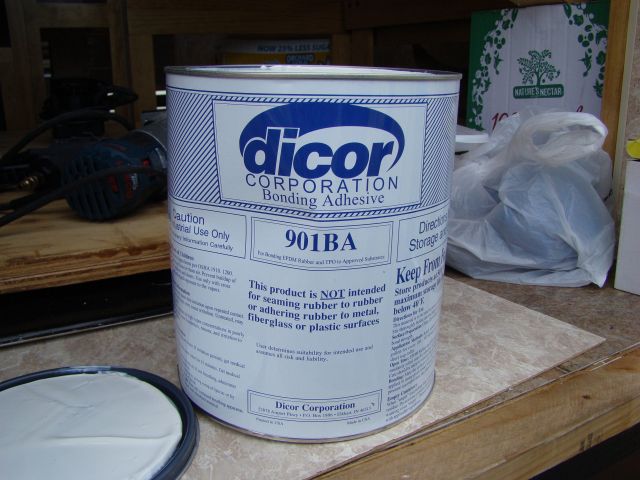
Image


Break out the glue:

Image


Fold the rubber back:

Image


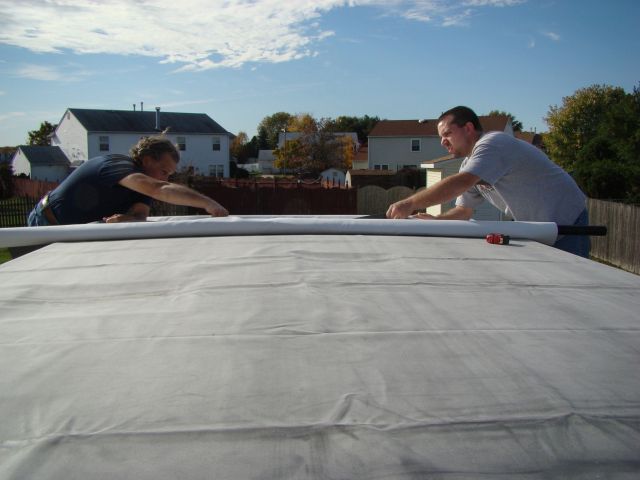
Apply the adhesive to half the roof with a roller:

Image


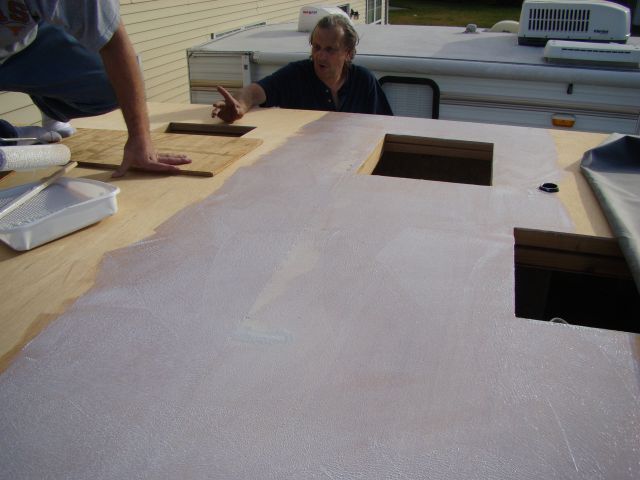
Lay down the rubber, work the air bubbles out with a broom and a squeegee, then fold the other half back and repeat:

Image


You can see some of those lines I was talking about in that picture. Not perfect, but no air bubbles, and it lays flat. Once it was down, we trimmed the excess, tack stapled the sides and called it a day.


Friday, October 29:

Time to finish siding the front wall. Thought the bends would make this a nightmare, but it was actually pretty easy. Getting the first piece straight was the only tough part. Here's the first couple of pieces on, you can see the butyl tape well in this shot. We also caulked the interlock on all the pieces:

Image


Keep on working the way down. We had to cut a few pieces to be shorter in height so no seams landed on a curve. You can see the seam lines if you look close:

Image

Image


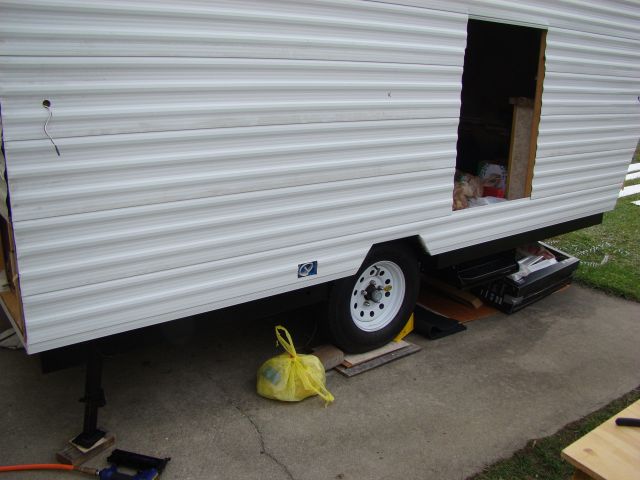
Here's another angle, you can see where we had to cut the door open partially so we could get inside:

Image


At this point all we are left with is the last few pieces of siding all the way around. It was less than a full piece, so we had to figure out how to terminate things and have it look clean. Also needed to work out a way to waterproof the wheel well to siding junction. I picked up a few pieces of drip edge from home depot. This is usually used on the edges of roofs on buildings, but it fit the bill here. We lined the perimeter of the base of the walls with the drip edge:

Image

Image


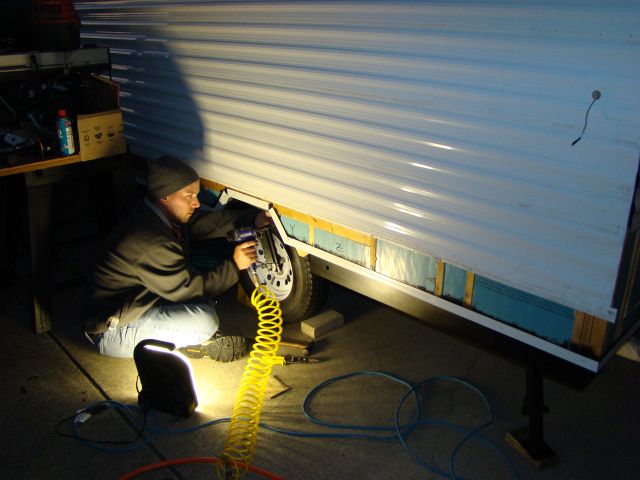
To seal the wheel wells, we brought the lip over and sealed the mating surfaces with flashing cement, then stapled it in place:

Image


Saturday, October 30:

Now we had to deal with terminating the last piece of siding. I wanted to bend the siding over at the bottom for a clean look, but I don't have access to a brake that long. I thought we could cut a piece just shy of the corner of the drop edge and get a decent look, but a test fit of a scrap also showed that the bottom landed on a high point of the pattern, so that wouldn't look good at all. What we did was cut down the height of a length of siding and installed that, leaving us with about 1" of uncovered area remaining:

Image

Image


At the wheel wells, we cut those out long:

Image


Then diagonal cut the corners:

Image


Bent them over:

Image


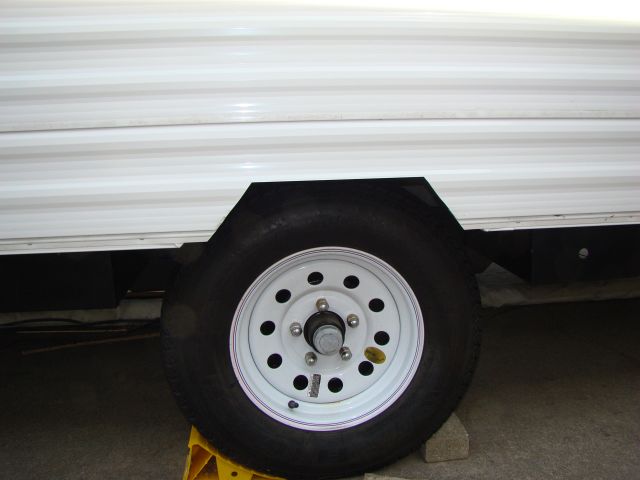
Sealed the mating surfaces with more flashing cement and stapled them down. Came out real good and the plastic fenders will fit nicely.


For that last 1", I ran back to HD and picked up some more drip edge. We cut that to length and trimmed a little off the height, slipped it into the groove in the siding and secured it underneath the wall edge with staples. A perfect finished edge without a brake!

Image

Image


We did the same on the rear, although I forgot to get a picture.


Sunday, October 31:

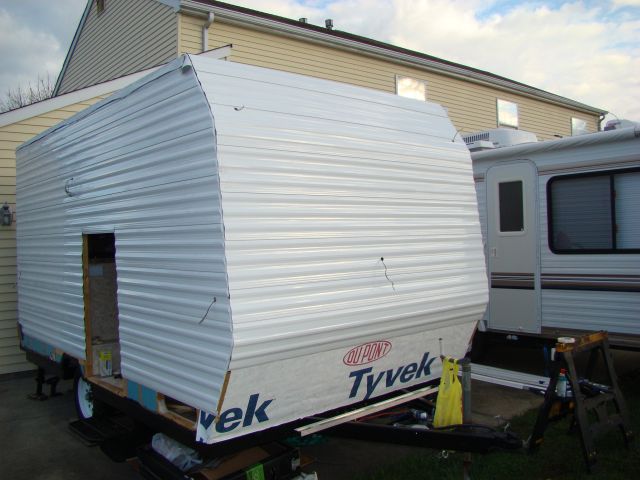
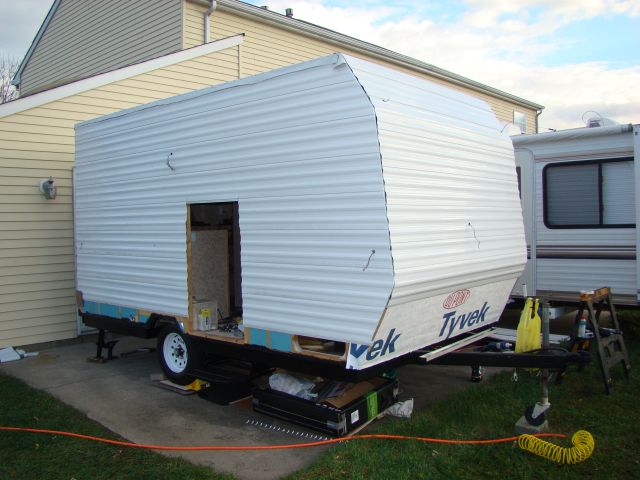
We finished up the front siding. Similar procedure as the sides, but we had about a 4" gap to fill that time. A piece of fascia from home depot was used to finish off that edge. I again forgot to take a picture :(


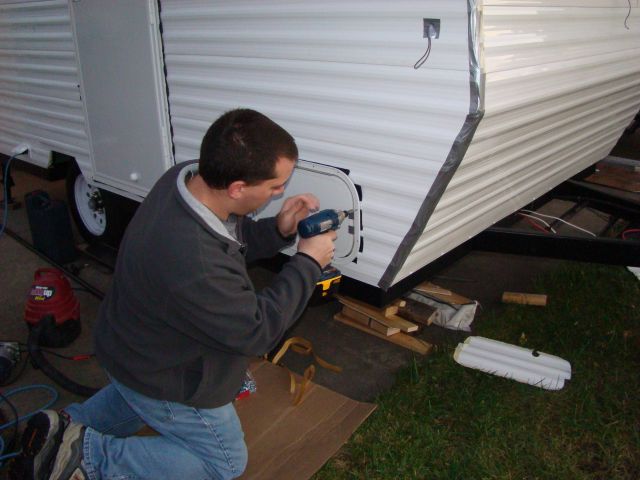
Next I installed the outside outlet and got the cover on and sealed up, and then we cut the full door opening. You can somewhat see the finished front edge behind the ladder:

Image


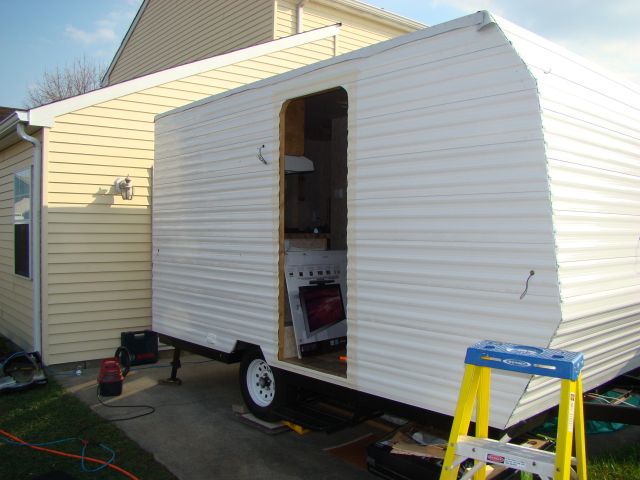
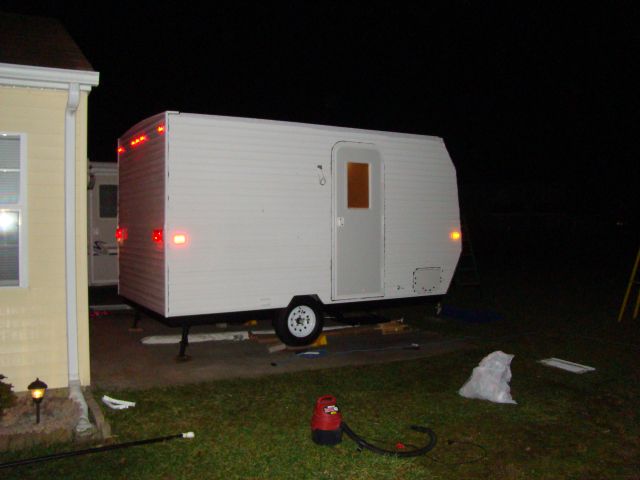
Finally we installed the door:

Image


And that was as far as we made it for the weekend. Next time we need to install the edge trim, gutters and roof vents, then it will be water tight.


- Frank
fromeo
Teardrop Master
 
Posts: 157
Joined: Tue Feb 27, 2007 2:01 pm
Location: Sicklerville, NJ

Postby Woodbutcher » Mon Nov 01, 2010 8:11 pm

Your doing a great job! You should be very proud. I've realy enjoyed following your build thread.
User avatar
Woodbutcher
Platinum Donating Member
 
Posts: 4187
Images: 45
Joined: Fri Mar 10, 2006 10:01 pm
Location: Chicago Suburbs

Postby AJP » Tue Nov 02, 2010 1:50 am

fromeo wrote:Thanks everyone!

Should have some new pictures in about a week. My brother's work schedule has gotten a bit crazy so he hasn't been here in 2 weeks. He is supposed to have a weeks vacation starting this Monday, so if the weather holds out we will be working as much as possible this week.

I'm going to be really disappointed if he can't get a trip in before it gets cold.


AJP, all said and done he will be in about $4500. All the supplies/materials have been bought and are sitting here waiting. The only thing left is a few tubes of caulk. It could have been done for considerably less, but the add-ons (extra light fixtures, new this, better that, bought the siding instead of making it) added quite a bit to the cost.

- Frank


$4500 seems like a steal for such a quality built unit. Plus it is built exactly how you want it. I am amazed with the quality of the work you have done.
AJP
Teardrop Inspector
 
Posts: 18
Joined: Sun Jul 25, 2010 7:15 pm
Top

Postby whtknight » Tue Nov 02, 2010 9:17 am

Yes Yes, this build id coming out great... and lots and lots of idea's...;-) AweSome build.... :applause: :thumbsup: :D
User avatar
whtknight
Teardrop Builder
 
Posts: 27
Joined: Wed Jun 16, 2010 9:14 pm
Location: Irving, Texas
Top

Postby angib » Tue Nov 02, 2010 10:58 am

Excellent set of photos - really informative.
User avatar
angib
5000 Club
5000 Club
 
Posts: 5783
Images: 231
Joined: Fri Apr 30, 2004 2:04 pm
Location: (Olde) England
Top

Postby whtknight » Thu Nov 18, 2010 5:08 pm

Any updates? The final touches? Camping pic's? :D
User avatar
whtknight
Teardrop Builder
 
Posts: 27
Joined: Wed Jun 16, 2010 9:14 pm
Location: Irving, Texas
Top

Postby fromeo » Fri Nov 19, 2010 11:45 am

Thanks everyone!

whtknight wrote:Any updates? The final touches? Camping pic's? :D


Unfortunately, I don't think we're going to have any camping pics until spring :cry: All these "little" jobs that you figure will take a few minutes wind up taking forever. I wasn't going to post an update until we got a bit more done to look at, but since you asked, here's a quick update.. :)

We took off the weekend of the 5th and 6th so that the wife and I could take our trailer down to DC for our wedding anniversary.

On the 13th, we were back to work. Saturday we installed the doorstop so we could open the door without worry, and then got the trim on the rear corners and then across the roof in the rear. Sunday we tried to install the trim on the front corners, but it refused to make the bend. First we tried bending it on the trailer, which didn't work - the side leg blew out and buckled badly. Then I made up a quick jig and tried bending it off the trailer - same result. Finally I cut a 2' long piece and we cut the side leg down from 3/4" to 3/8" and it made the bend perfectly. Cutting the leg down on a couple of 8' pieces of trim didn't sound like much fun, so I ordered 2 pieces of 3/8" leg stuff through the local RV dealer, it will be in on Tuesday the 23rd.

Since we couldn't finish the trim, I had my brother work on installing some of the cargo doors as well as the power cord access door and the fresh water tank fill door. He also got the city water inlet installed. While he was doing that, I got the tail lights and the 11(!) required marker lights installed. Installing 11 of those lights is absolutely the definition of monotony!

Here's some pictures from last week...


Front cargo door being installed:

Image


Image


The rear trim:

Image


Here's the road side of the trailer showing another cargo door, tank fill, power cord door, and city water inlet. You can also see the rear trim installed and a couple of lights:

Image


Close-up of the road side front half:

Image


And the rear half:

Image


Here's some shots from right after I finished all the light fixtures. It was a bit past dark and getting cold quick - you can see the dew forming all over the cold siding:

Image

Image

Image


Should look a lot better without the duct tape on the front corners once the trim arrives. :) I'll go back and trim the excess butyl tape from around the doors and trim once it is all installed.


Right now I'm debating what to do this weekend. I'm leaning towards installing the stuff on the roof before the weather turns cold. Not sure how cold it can get before the lap sealant doesn't want to set up. Hoping for one more nice weekend after this one so we can finish up the outside and it will be weather tight for the winter. Once that is done we can always turn a heater on inside to work on some of the smaller stuff.

- Frank
fromeo
Teardrop Master
 
Posts: 157
Joined: Tue Feb 27, 2007 2:01 pm
Location: Sicklerville, NJ
Top

Postby whtknight » Fri Nov 19, 2010 12:11 pm

Excellent... :) Don't keep us Hanging... :lol: All the pictures and writeups are needed for the "fix" to see how it comes along. Personally, I really like this build... Made me "plan" my next one and it has some great idea's. Thanks for the updates and let us know how things go.
User avatar
whtknight
Teardrop Builder
 
Posts: 27
Joined: Wed Jun 16, 2010 9:14 pm
Location: Irving, Texas
Top

Postby myoung » Fri Nov 19, 2010 6:52 pm

I wonder if there are rules or regulations about the placement of side running lights. Must they be a certain height above ground? Must they be placed in particular locations?

Does anyone know the answers?
Mike Young
build thread: viewtopic.php?t=40459
User avatar
myoung
500 Club
 
Posts: 644
Images: 250
Joined: Sat Aug 07, 2010 11:21 am
Location: Nipomo, CA
Top

Postby GuyllFyre » Fri Nov 19, 2010 7:49 pm

myoung wrote:I wonder if there are rules or regulations about the placement of side running lights. Must they be a certain height above ground? Must they be placed in particular locations?

Does anyone know the answers?


This varies by location and size of trailer.
I know the basic New York State rules say for a basic 4x8 trailer it must have running/turns, illuminated license plate, and amber marker lights at the front corners of the frame.

Once you go longer, there's a certain length where they require lights midway also.

Some places may also require them higher according to the height on the trailer also.
Things I have for sale on craigslist:
http://albany.craigslist.org/search/?ar ... catAbb=sss

Things I have for sale on eBay:
http://www.ebay.com/sch/merchant/seansmith
User avatar
GuyllFyre
Donating Member
 
Posts: 209
Joined: Fri May 21, 2010 9:35 pm
Location: Scotia, NY
Top

Postby fromeo » Fri Nov 19, 2010 8:07 pm

myoung wrote:I wonder if there are rules or regulations about the placement of side running lights. Must they be a certain height above ground? Must they be placed in particular locations?

Does anyone know the answers?


Mike, take a look here: http://www.nhtsa.gov/cars/rules/standards/conspicuity/trlrpstr.html
fromeo
Teardrop Master
 
Posts: 157
Joined: Tue Feb 27, 2007 2:01 pm
Location: Sicklerville, NJ
Top

Postby pete42 » Fri Nov 19, 2010 11:04 pm

Frank one time I had a couple small boo-boos on a travel trailer I was very far from home in fact days away and during the winter.

anyway I had to wait until spring before I removed the duct tape even tho it was only two small places it took forever to get rid of the sticky residue.

good luck removing all you have on your great little trailer build.
super job.

pete
User avatar
pete42
Super Lifetime Member
 
Posts: 2203
Images: 13
Joined: Sat Nov 07, 2009 11:52 am
Location: SouthWest Ohio
Top

Postby myoung » Fri Nov 19, 2010 11:13 pm

fromeo wrote:Mike, take a look here: http://www.nhtsa.gov/cars/rules/standards/conspicuity/trlrpstr.html


Excellent. Thanks. I wonder how much attention is paid to these specs on homebuilt trailers.
Mike Young
build thread: viewtopic.php?t=40459
User avatar
myoung
500 Club
 
Posts: 644
Images: 250
Joined: Sat Aug 07, 2010 11:21 am
Location: Nipomo, CA
Top

Postby Cliffmeister2000 » Fri Nov 19, 2010 11:21 pm

The 80 inch rule seems to be well adhered to. I have heard that the 80 inch width is calculated from the widest points of the trailer, which may be the door handles.
God Bless

Cliff

♥God. ♥People.
1 John 4:9-11

My Teardrop build pictures
User avatar
Cliffmeister2000
Titanium Donating Member
 
Posts: 3622
Images: 157
Joined: Thu Jul 26, 2007 10:18 pm
Location: Phoenix, AZ
Top

Postby fromeo » Wed Nov 24, 2010 11:30 am

pete42 wrote:Frank one time I had a couple small boo-boos on a travel trailer I was very far from home in fact days away and during the winter.

anyway I had to wait until spring before I removed the duct tape even tho it was only two small places it took forever to get rid of the sticky residue.

good luck removing all you have on your great little trailer build.
super job.

pete


Pete, I hear ya, it can be a real bear if you let it sit a while. What I've been doing so far is changing the tape every week so that the adhesive doesn't have a lot of time to bake on in the sun. The other thing that really helps is to gently warm up the adhesive with a heat gun as you remove it. I've had very little adhesive left, and a fresh piece of tape on and off pulls that right off.
fromeo
Teardrop Master
 
Posts: 157
Joined: Tue Feb 27, 2007 2:01 pm
Location: Sicklerville, NJ
Top

PreviousNext

Return to Build Journals

Who is online

Users browsing this forum: No registered users and 12 guests