Electrical meltdown.
Or how not to test out the wiring. I was doing a little test when I noticed the leads to the battery were red hot only moments after I connected them. The leads for the vent fan were touching each other causing the short. I used female spade connectors... The non-insulated ones. Lesson learned.
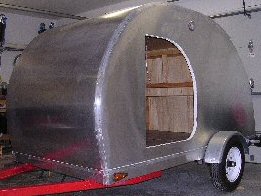
Okanagan build - my first Teardrop
Okanagan build - my first Teardrop
![]() by Koko65 » Sun Apr 15, 2012 5:14 pm
by Koko65 » Sun Apr 15, 2012 5:14 pm
- Attachments
-
- ImageUploadedByTapatalk1334528274.597959.jpg (22.43 KiB) Viewed 1754 times
Onno
Okanagan Valley, BC.
"Four wheels move the body, two wheels move the soul"
Build Journal viewtopic.php?f=50&t=46312
Okanagan Valley, BC.
"Four wheels move the body, two wheels move the soul"
Build Journal viewtopic.php?f=50&t=46312
-

Koko65 - Teardrop Master
- Posts: 119
- Images: 21
- Joined: Sat Jan 15, 2011 11:58 pm
- Location: Okanagan
Re: Okanagan build - my first Teardrop
![]() by crumbruiser » Sun Apr 15, 2012 6:07 pm
by crumbruiser » Sun Apr 15, 2012 6:07 pm
Your frame and lights look really good. If you put a fuse inline with that hot tap you can avoid any more melt downs, you probably know that now.
Frank
Frank
I am not weird, I am a Limited Edition.
Facebook http://www.facebook.com/profile.php?id=100000303236631
Facebook http://www.facebook.com/profile.php?id=100000303236631
-

crumbruiser - Teardrop Master
- Posts: 267
- Images: 255
- Joined: Sun Jul 10, 2011 6:11 pm
- Location: Central Ohio


 I'm such a wuss when it comes to dentists.


