Ethel has began

...ask your questions in the appropriate forums BUT document your build here...preferably in a single thread...dates for updates, are appreciated....

Re: Ethel has began

Postby Ned B » Mon Apr 08, 2013 5:07 am

Ben wrote:Omg I can't believe that there a huge goof in the first quilt. Let me know if you see what I see? Aww I can't believe it!! :x :x :x :x :x :x :x :x :x :x :x :x :x

That's a design feature!
User avatar
Ned B
1000 Club
1000 Club
 
Posts: 1036
Joined: Sat Apr 16, 2011 10:25 am
Location: Syracuse NY (ish)

Re: Ethel has began

Postby nevadatear » Tue Apr 09, 2013 8:07 am

Just put that one down at the foot of the bed. No one and i mean no one will ever notice. I realized after i spent a lot of time on a pieced border on our td quilt, it would never be seen since it was tucked in all the time.
Debbie (with Randy looking over my shoulder)
Our build thread: http://www.tnttt.com/viewtopic.php?t=41295&highlight=monstero
2009 Homebuilt woody, Kenskill inspired 5 wide
ImageImage
User avatar
nevadatear
Silver Donating Member
 
Posts: 2381
Images: 171
Joined: Mon Nov 10, 2008 2:37 pm
Location: No. Nevada

Re: Ethel has began

Postby Ben » Tue Apr 09, 2013 8:12 am

That's true and also it's not like we're going to have it hanging on a wall or any thing. I just try too hard sometimes to get things just right.
Going broke quick fixing a bad start!
Ben
Teardrop Master
 
Posts: 200
Images: 221
Joined: Sun Aug 05, 2012 8:39 pm
Location: Hocking hills Ohio
Top

Re: Ethel has began

Postby Ben » Tue Apr 09, 2013 7:03 pm

Alright chris here are some close ups of the galley hatchImage
Ok from left to right 3/4" ply outside wall, 3/4" frame, 3/4" spacer, and then 1/2" galley gusset I must say this is not the finished product but its where I'm at.
And here is the side wall construction Image from left to right. 1/2" galley inner wall 1/8" spacer, 3/4" wall frame and 3/4" out side plywood

Here is how I cut the lip for the seal its not the size I used I used a 1/4" straight bit. Set at the distance I needed to get a 1/2" lip Image I had traced where the hatch edge was Image and then cut on router table and ended up with this Image
Going broke quick fixing a bad start!
Ben
Teardrop Master
 
Posts: 200
Images: 221
Joined: Sun Aug 05, 2012 8:39 pm
Location: Hocking hills Ohio
Top

Re: Ethel has began

Postby Silvrzuki77 » Tue Apr 09, 2013 7:31 pm

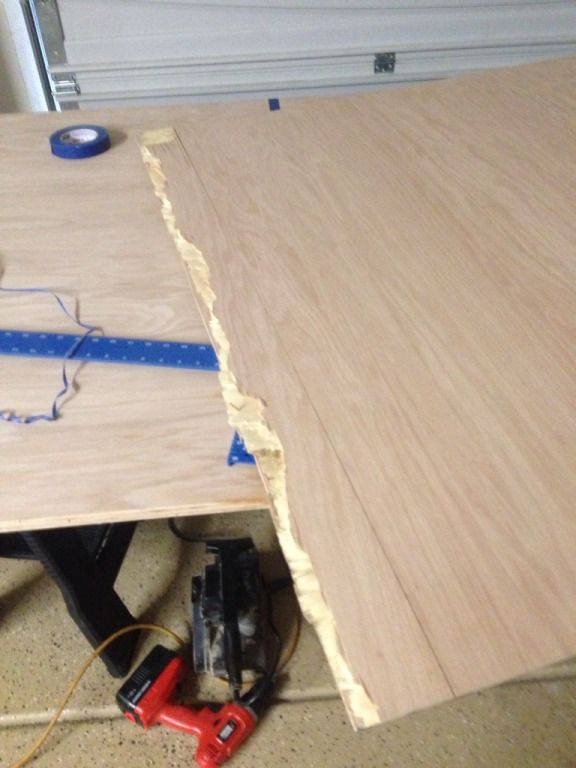
Sweet!! Looks really good might have to copy yours! Thanks for giving me those pics makes more sense. Hey question for you on your interior ceiling what thickness and how did you get it to form it soo well? I was trying to slowly for 1/4th and was going to wet towel it later on before i actually installed it and middle of the night it did this
Image
Sooo frustrated i drank all my beer. I dont know if i should find something thinner like 1/8th but it will be a different material and might look crappy.
Silvrzuki77
Teardrop Master
 
Posts: 188
Joined: Thu Jun 21, 2012 3:55 pm
Top

Re: Ethel has began

Postby Ben » Tue Apr 09, 2013 7:34 pm

Ok I also need to say that the piece that was trimmed off I used as a template to cut the 3/4" spacer piece for the lid.
Going broke quick fixing a bad start!
Ben
Teardrop Master
 
Posts: 200
Images: 221
Joined: Sun Aug 05, 2012 8:39 pm
Location: Hocking hills Ohio
Top

Re: Ethel has began

Postby Ben » Tue Apr 09, 2013 7:42 pm

Sorry chris I don't have a pic to show you but what I done was cut a bunch of braces to support the panels til the glue dried. And I used 1/8" Baltic birch but the prolb with that it only comes in 5x5 sheets so I had a gap on my edges cause my inside width is 61". Check a cabinet maker in your area and he should be able to point you in the right direction for 1/8" ply. That's what I did. I just picked a name and called him and he gave me a phone number and I called. The supplier was Baer supply their a large supplier might have one in your area also. If you don't have any luck ill give you their number and you can call and check
Going broke quick fixing a bad start!
Ben
Teardrop Master
 
Posts: 200
Images: 221
Joined: Sun Aug 05, 2012 8:39 pm
Location: Hocking hills Ohio
Top

Re: Ethel has began

Postby KCStudly » Tue Apr 09, 2013 7:59 pm

Deleted.
Last edited by KCStudly on Tue Apr 09, 2013 9:00 pm, edited 1 time in total.
KC
My Build: The Poet Creek Express Hybrid Foamie

Poet Creek Or Bust
Engineering the TLAR way - "That Looks About Right"
TnTTT ORIGINAL 200A LANTERN CLUB = "The 200A Gang"
Green Lantern Corpsmen
User avatar
KCStudly
Donating Member
 
Posts: 9640
Images: 8169
Joined: Mon Feb 06, 2012 10:18 pm
Location: Southeastern CT, USA
Top

Re: Ethel has began

Postby Ben » Tue Apr 09, 2013 8:08 pm

Chris I found a pic but its not a real good one but it gives you an idea
Image
Going broke quick fixing a bad start!
Ben
Teardrop Master
 
Posts: 200
Images: 221
Joined: Sun Aug 05, 2012 8:39 pm
Location: Hocking hills Ohio
Top

Re: Ethel has began

Postby Silvrzuki77 » Tue Apr 09, 2013 8:44 pm

I dont want to hijack ben's awesome build soo I am moving my problem to my bummer build. Sorry ben!
Silvrzuki77
Teardrop Master
 
Posts: 188
Joined: Thu Jun 21, 2012 3:55 pm
Top

Re: Ethel has began

Postby Ben » Tue Apr 09, 2013 8:48 pm

No prolb I'm alway here to help and you never know I might learn something also...lol
Going broke quick fixing a bad start!
Ben
Teardrop Master
 
Posts: 200
Images: 221
Joined: Sun Aug 05, 2012 8:39 pm
Location: Hocking hills Ohio
Top

Re: Ethel has began

Postby Ben » Sun Apr 14, 2013 3:07 pm

Alright I have a lot of pics of this weekends progress but I'm in a rock and a hard place. Let me know what you folks think, ok? Well here we go question one to ac or not to?
Image
Here is my problem how to vent the condenser and drain the water I have a few ideas but don't know if its worth the trouble? It gets hot and humid in ohio and I love a cold bed to sleep in.
Next, does this look good or is it too wide?
Image
I have to tire set to where its going to be with the axle installed. I have made the fenders yet I run out of tube and I want to make sure I don't oversize them and they look goofy! And here are some other pics at different angles
Image
Image
I ended up easing the corners instead of what else I was thinking
Image
And I hate it when I goof a cut I need a mig welder
Image

I was looking at doing a lifted tear drop and I'm liking the idea
Image
Going broke quick fixing a bad start!
Ben
Teardrop Master
 
Posts: 200
Images: 221
Joined: Sun Aug 05, 2012 8:39 pm
Location: Hocking hills Ohio
Top

Re: Ethel has began

Postby AlgoDan » Sun Apr 14, 2013 3:15 pm

Nice build you have going Ben, very rugged looking chassis too. Do you go 4 wheelin seeing you have all terrain tires ?AC or not totally your choice, if you need it do it..Good luck :beer:
Here now but Camping later.............Dan

Build Journal
http://www.tnttt.com/viewtopic.php?f=50&t=54681
102535 103199 105576
From .................Paper...........................To.......................... Pavement............................
User avatar
AlgoDan
The 300 Club
 
Posts: 449
Images: 238
Joined: Mon Feb 25, 2013 4:08 am
Location: Ontario, Canada
Top

Re: Ethel has began

Postby KCStudly » Sun Apr 14, 2013 3:48 pm

Stout looking chassis with nicely executed details. :thumbsup:

I like to give constructive criticism, and you asked, so don't take this the wrong way.

On the AC, do it, but I would have put the stereo somewhere else than under the drip pan. Just saying, why risk it?

The tire to main rail clearance looks fine, but the rub rail looks to my eye to be a little far out. I am getting the feeling that you think so too. Now is the time to fix it if you want to. It might seem like a big step backward and a lot of work, but it will be done before you know it and it will bug you forever if you don't take care of it now. Spend a day and tuck those rails in a bit more and you will be much happier in the end.

I know that is not what you wanted to hear, but on the other hand I think that is what you did want to hear! :?
KC
My Build: The Poet Creek Express Hybrid Foamie

Poet Creek Or Bust
Engineering the TLAR way - "That Looks About Right"
TnTTT ORIGINAL 200A LANTERN CLUB = "The 200A Gang"
Green Lantern Corpsmen
User avatar
KCStudly
Donating Member
 
Posts: 9640
Images: 8169
Joined: Mon Feb 06, 2012 10:18 pm
Location: Southeastern CT, USA
Top

Re: Ethel has began

Postby Ben » Sun Apr 14, 2013 4:46 pm

That's what I thought too kc its really not a hard fix just a couple of cuts and a little welding and its fixed. I left a 3/4" gap between the tire and tube but it looks a lot more with it being 2" tube
Going broke quick fixing a bad start!
Ben
Teardrop Master
 
Posts: 200
Images: 221
Joined: Sun Aug 05, 2012 8:39 pm
Location: Hocking hills Ohio
Top

PreviousNext

Return to Build Journals

Who is online

Users browsing this forum: No registered users and 13 guests