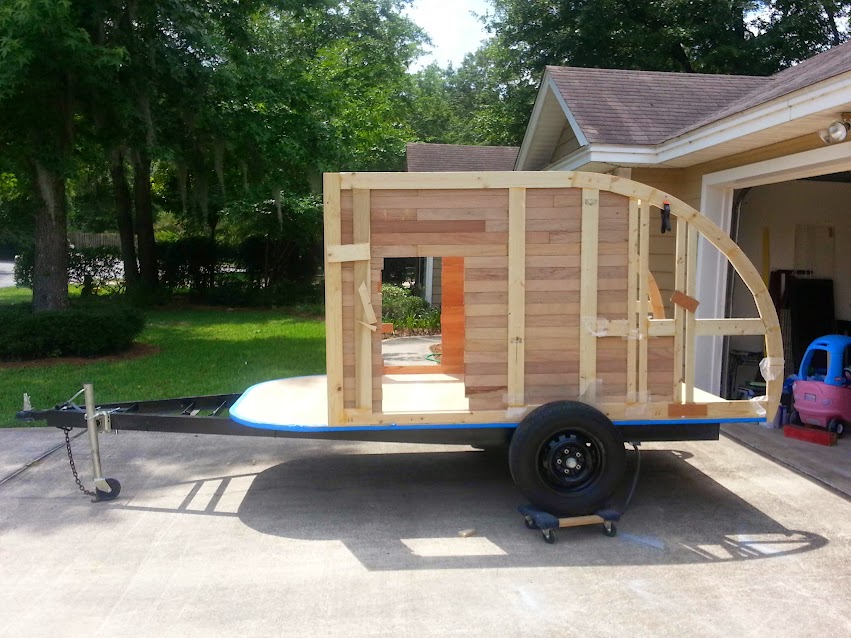
Regal Eagle Done! Video Tour 6/29/15

...ask your questions in the appropriate forums BUT document your build here...preferably in a single thread...dates for updates, are appreciated....

Re: 1st Build - Regal Eagle- Floor Framing Started

Postby RandyG » Thu May 01, 2014 5:34 pm

Sorry Brian, from the pic, I thought that was the piece you were using for the floor. One of the trickiest parts for me was getting the floor, bunk, and bed lined up with each other. I'm sure you have a better way of doing it, I just get those brain farts and start cutting and screwing, then the easy solution comes to mind. Any thoughts on the ac yet?
Randy
Aircraft fabricator, novice carpenter, electrical apprentice, audio engineer dropout.
Build thread - http://www.tnttt.com/viewtopic.php?f=50&t=54126
User avatar
RandyG
500 Club
 
Posts: 695
Images: 115
Joined: Thu May 10, 2012 6:52 pm

Re: 1st Build - Regal Eagle- Floor Framing Started

Postby Gunguy05 » Thu May 01, 2014 7:43 pm

RandyG wrote:Sorry Brian, from the pic, I thought that was the piece you were using for the floor. One of the trickiest parts for me was getting the floor, bunk, and bed lined up with each other. I'm sure you have a better way of doing it, I just get those brain farts and start cutting and screwing, then the easy solution comes to mind. Any thoughts on the ac yet?


Yes,

we have decided to do something almost identical to what planovent did on the little Swiss teardrop. Ac in the bottom middle of the galley, direct vented into the cabin. Want to keep it simple, and I think this will be the best route. Going to vent the rear of the unit down, with fans to circulate air across the back.

My plan for the front is to cut another piece of , probably 3/4 plywood,for the top, with cut outs and foam. Will use the template for this. Also, make beds using 1/8, 1x , and foam just like the floor. Trying to keep it light I'm the front since we have a long tongue and the axle slightly more rear than normal. Still working in that, but at least that is the plan for now.
Brian


Checkout my buildThe Regal Eagle Bow front for 4
Image
Also my teardrop updates from blog on Dad Rambles
User avatar
Gunguy05
The 300 Club
 
Posts: 385
Images: 6
Joined: Mon Dec 02, 2013 4:45 pm
Location: South GA

Re: 1st Build - Regal Eagle - Walls underway!

Postby Gunguy05 » Thu May 29, 2014 9:41 pm

Haven't posted much in a while because well, we haven't done much lately. We did get the floor finished, once we finalized the AC plan. Also we have started the side walls, and that seems to be going along pretty well. I am seeing more now how all the pieces fit together, and how all the details have to be figured out along the way. It seems like I am stopping every 5 seconds to make a decision on another part or piece, but hey, that what I enjoy about it!

As the doors are going to be framed, I am going to leave a 1/4 gap between the jamb and the door all the way around. This will be finished off with edge moulding on the jamb side outside and door inside, and then T moulding on the door outside. Will have a seal all the way around. I fought with myself as to the best way to do this .. but after research and deciding not to reinvent the wheel, this seems like the best route to take. Still don't have a definite window yet for the doors, but it will be one of the basic models... no biggie as I don't have the doors framed yet.. but that will be decided on soon, very soon.
Image

Had to go and purchase a biscuit joiner from my favorite store (Harbor Freight!). I had thought about it before, but forgot that the screws in the framing in the galley area will be in the way when I do the end cutouts with the Frederick style hatch seal. SO... quick trip on my lunch hour, a 20% off coupon, and I picked up the cutter for 40 bucks. :thumbsup: :thumbsup:

Image

Image
Should have a fair amount of time this weekend... the plan it to the this wall finished, the other pieces cut for the mirror side, and then glued up.. A best case scenario we might be able to start on the flooring on the walls. :lol: :lol:
Brian


Checkout my buildThe Regal Eagle Bow front for 4
Image
Also my teardrop updates from blog on Dad Rambles
User avatar
Gunguy05
The 300 Club
 
Posts: 385
Images: 6
Joined: Mon Dec 02, 2013 4:45 pm
Location: South GA
Top

Re: 1st Build - Regal Eagle- Floor Framing Started

Postby Gunguy05 » Sun Jun 01, 2014 3:45 pm

WoW! That took a while. I was was able to spend a good deal of the day on Saturday, and then this afternoon working on the side walls some more.

After measuring, cutting, and then cutting again... I HAVE 2 sides that look the same.

Below is one... the other is still on the work table drying.

Image

Next step is to work on putting the flooring on the walls. Might work on that tonight, or might be tomorrow night. Not sure. At any rate, a huge sense of progress to have these two things finished.

I did have a bit of a $$ setback. Thanks to Zach and his incredible build, I think we have once again changed directions on the doors. Going to buy them now! Just too much trim, figuring, and uncertainty in building them right now. We can spend that time on some other part of the project. We came up with a new finishing idea for the interior front of the cabin. Hope that all works out well.

Back to work!

**Edit**

Had a little time after dinner to get started on the inside flooring for the walls. Inspired by the outstanding work (and documentation) done by aggie79 on the Silver Bullet . This is only going to be in the main part of the cabin, not the galley because of the way that they hatch seal will be done. Might finish it off later depending on how that turns out, but it will be much, much later.

Image
Brian


Checkout my buildThe Regal Eagle Bow front for 4
Image
Also my teardrop updates from blog on Dad Rambles
User avatar
Gunguy05
The 300 Club
 
Posts: 385
Images: 6
Joined: Mon Dec 02, 2013 4:45 pm
Location: South GA
Top

Re: Regal Eagle Build for 4 - Wall in progress!

Postby Gunguy05 » Sat Jun 07, 2014 10:08 pm

Worked off and on this week and finished up the left wall. Got some time this morning and was able to finish it, ate breakfast, came back in a couple hours and routed the top off.

Image

I started using PL premium on the first few courses at the bottom of the wall. It was a little difficult to keep it nice and flat and solid. The PL Prem is really sticky, so things would stay put once I got them in place, but just didn't feel like it was flat. So, I decided to try some TB2 on the next few course and they come out perfect. It took a little more weight to hold things down so they would dry, but they ended up drying much flatter than with the PL prem.

So I just stared the other side wall, and am using the TB2 on it. Things should go much faster.

We made the change mid last week and decided to buy the doors from Frank Bear, so I am just letting the ends run wild in the door area, and I will trim them with the router after week add a couple pieces of framing for each of them.

So far so good. I can see progress more and more each time i work. It makes me work more! :shock:
Brian


Checkout my buildThe Regal Eagle Bow front for 4
Image
Also my teardrop updates from blog on Dad Rambles
User avatar
Gunguy05
The 300 Club
 
Posts: 385
Images: 6
Joined: Mon Dec 02, 2013 4:45 pm
Location: South GA
Top

Re: Regal Eagle Build for 4 - Wall in progress!

Postby Oldragbaggers » Sat Jun 07, 2014 11:01 pm

I love your design and you are obviously doing quality work. I wouldn't sweat it too much that it seems slow. I experienced that same feeling and then some major step will happen, like the walls going up, and all of a sudden you feel like you're really getting somewhere. You can't rush good work and once you're camping in it all the time and care you took will pay you back in spades. Your walls look really rich with that paneling. Very nice teardrop. I'm anxious to see how your bowed front goes together.
Life is sooooo good.........
Sail...camp....bike...repeat
Becky

Build Journal http://www.tnttt.com/viewtopic.php?f=50&t=45917
Visit our blog at http://www.oldragbaggers.com
Image Image
User avatar
Oldragbaggers
Gold Donating Member
 
Posts: 1842
Images: 331
Joined: Mon Aug 01, 2011 9:22 pm
Location: Essex, MD
Top

Re: Regal Eagle Build for 4 - Wall in progress!

Postby Gunguy05 » Wed Jun 11, 2014 9:28 am

Oldragbaggers wrote:I love your design and you are obviously doing quality work. I wouldn't sweat it too much that it seems slow. I experienced that same feeling and then some major step will happen, like the walls going up, and all of a sudden you feel like you're really getting somewhere. You can't rush good work and once you're camping in it all the time and care you took will pay you back in spades. Your walls look really rich with that paneling. Very nice teardrop. I'm anxious to see how your bowed front goes together.


Thank you for the complement. I know there are huge differences, but your build is one of the ones that I stalked constantly while I was planning mine. I like to read good documentation, so I try and put up some of the same (whenever possible).

The wood flooring, on the walls, was inspired by Aggie79 and his silver bullet design. I'm excited to see it up, looks even better than I would have thought.

I had a little time last night, and I was able to get the first coat of black goo on the floors. We taped off the edges (good move), and went at it with an old roller/frame. Took about 20 minutes. Check it this morning and it was still a little tacky, but more dry and I would have expected. Should be about 90 here today. Maybe it will be dry and I can put 2nd coat on tonight or tomorrow.

Image

Image
Brian


Checkout my buildThe Regal Eagle Bow front for 4
Image
Also my teardrop updates from blog on Dad Rambles
User avatar
Gunguy05
The 300 Club
 
Posts: 385
Images: 6
Joined: Mon Dec 02, 2013 4:45 pm
Location: South GA
Top

Re: Regal Eagle Build for 4 - Wall in progress!

Postby aggie79 » Thu Jun 12, 2014 4:53 pm

She's coming along nicely Brian! :thumbsup: :applause: :thumbsup:

As far as time, you're building at least twice as fast as I did on mine. I was initially disappointed that I missed a few camping outings but in the end I was glad that I took my time.

Take care,
Tom
Tom (& Linda)
For build info on our former Silver Beatle teardrop:
Build Thread

93503
User avatar
aggie79
Super Duper Lifetime Member
 
Posts: 5405
Images: 686
Joined: Tue Aug 07, 2007 5:42 pm
Location: Watauga, Texas
Top

Re: Regal Eagle Build for 4 - Wall in progress!

Postby Gunguy05 » Thu Jun 12, 2014 10:01 pm

aggie79 wrote:She's coming along nicely Brian! :thumbsup: :applause: :thumbsup:

As far as time, you're building at least twice as fast as I did on mine. I was initially disappointed that I missed a few camping outings but in the end I was glad that I took my time.

Take care,
Tom


Thanks Tom. Yeah, When I see how long your build took, it makes me seem like we are moving along pretty well. Since we have moved it to my house from my parents, I(we) have been able to get a lot done on it. I can work on it at night and do things that need to dry or set, that way the next time around we don't work for 20 min and stop to let something dry. Also, I can piddle, measure, and plan my next attack with it right outside. Works out very well.

Anyways, I put another coat (final) on the road side of the floor and attached my RDF (redneck drying fan) to hopefully speed things up. My goal for this coming weekend it to the the floor DONE and on the frame so that I can get 2 coats of varnish on this week and hopefully make the drive to Jacksonville for plywood on Friday. A lofty goal, but a goal nonetheless.

We must have goals, or it won't get finished!

Below is my RDF

Image
Brian


Checkout my buildThe Regal Eagle Bow front for 4
Image
Also my teardrop updates from blog on Dad Rambles
User avatar
Gunguy05
The 300 Club
 
Posts: 385
Images: 6
Joined: Mon Dec 02, 2013 4:45 pm
Location: South GA
Top

Re: Regal Eagle Build for 4 - Wall in progress!

Postby KCStudly » Fri Jun 13, 2014 2:50 pm

aggie79 wrote:As far as time... I was initially disappointed that I missed a few camping outings but in the end I was glad that I took my time.

This^.

Last night as I was going over progress and future steps on my build when I not so suddenly was struck, "what the H-E-double hokey sticks have I gotten myself into!" I mean, 3 years in and I'm blacking out the area under a striker plate... inside a cabinet... behind the door... that no one will ever see. But if I stuck my head half way into the locker and looked straight down I could see a little light speck of white primer under there in the paper thin gap between the striker plate and its recess. I must be certifiable.

But on the other hand when you sit back and look, surely there is great pride. Take your time, please yourself. It's looking great so far, and everything you do from here will live up to the same standard to justify the hard work. :thumbsup:

There are so many nice builds to inspire excellence and showing that it can be done if you persevere; Aggie Tom's being one of the top ones for me. :applause:
KC
My Build: The Poet Creek Express Hybrid Foamie

Poet Creek Or Bust
Engineering the TLAR way - "That Looks About Right"
TnTTT ORIGINAL 200A LANTERN CLUB = "The 200A Gang"
Green Lantern Corpsmen
User avatar
KCStudly
Donating Member
 
Posts: 9617
Images: 8169
Joined: Mon Feb 06, 2012 10:18 pm
Location: Southeastern CT, USA
Top

Re: Regal Eagle Build for 4 - Wall in progress!

Postby S. Heisley » Fri Jun 13, 2014 8:18 pm

aggie79 wrote: I was initially disappointed that I missed a few camping outings but in the end I was glad that I took my time.


Ditto!

You are doing good. Simply stay the course and do your best. If you get antsy to camp, borrow a tent or rent a camper for a weekend or week.
User avatar
S. Heisley
Super Lifetime Member
 
Posts: 8775
Images: 495
Joined: Mon Sep 17, 2007 10:02 am
Location: No. California
Top

Re: Regal Eagle Build for 4 - Wall in progress!

Postby Gunguy05 » Sat Jun 14, 2014 9:01 pm

We got some more done today. The walls were screaming to be test fit, so we did just that. Just well enough to take the final measurements for the door placement, and a kodak moment! :shock:
Image

Image

Image

Next we decided to put a good coast of spar varnish on the top side of the floor. It is good to go now to make the trip about an hour south to get the rest of the plywood that we need for the cabinets and the skin.

Image

Will probably take tomorrow off, then back to work this week when I have time.

Thanks for the words of encouragement. I know that it takes time, and things are speeding up a lot now. I enjoy just working on stuff, this or anything else, so that is fun on it's own. I'm even thinking about how "the next one" will be... but that is another build for another day.
Brian


Checkout my buildThe Regal Eagle Bow front for 4
Image
Also my teardrop updates from blog on Dad Rambles
User avatar
Gunguy05
The 300 Club
 
Posts: 385
Images: 6
Joined: Mon Dec 02, 2013 4:45 pm
Location: South GA
Top

Re: Regal Eagle Build for 4 - Wall in progress!

Postby tony.latham » Sun Jun 15, 2014 11:45 am

That beast is looking GREAT! I'm going to have to start stalking your build thread. It'll be curious watching the front come together. :beer:

I've built two 'drops using Fredrick's methods and swear by 'em. I'm a big believer in his hatch system for both ease of building and the water/dust-tight factor. :thumbsup:

Tony Latham
User avatar
tony.latham
Gold Donating Member
 
Posts: 6925
Images: 17
Joined: Mon Jul 08, 2013 4:03 pm
Location: Middle of Idaho on the edge of nowhere
Top

Re: Regal Eagle Build for 4 - Wall in progress!

Postby mallymal » Sun Jun 15, 2014 11:57 am

I'm really liking your profile, can't wait to see it with the curved front in place.

My problem is, every time I see an inspirational build like this, I go back to base, and start redesigning my design! (Fortunately, it's only at the scribble stage, so all it costs is pixels!) :applause:
User avatar
mallymal
The 300 Club
 
Posts: 308
Images: 18
Joined: Fri Sep 26, 2008 4:20 am
Location: manchester, UK
Top

Re: Regal Eagle Build for 4 - Wall in progress!

Postby Gunguy05 » Tue Jun 17, 2014 8:33 am

tony.latham wrote:That beast is looking GREAT! I'm going to have to start stalking your build thread. It'll be curious watching the front come together. :beer:

I've built two 'drops using Fredrick's methods and swear by 'em. I'm a big believer in his hatch system for both ease of building and the water/dust-tight factor. :thumbsup:

Tony Latham


mallymal wrote:I'm really liking your profile, can't wait to see it with the curved front in place.

My problem is, every time I see an inspirational build like this, I go back to base, and start redesigning my design! (Fortunately, it's only at the scribble stage, so all it costs is pixels!) :applause:


Thank you both for the complements. We are making progress, and it feels good. I feel impressed with myself when it actually turns out like the idea that I had in my head. Sometimes, when things don't pan out, they end up looking a like a broken version of the original vision, but this is actually looking like what I expected it to (or at least wanted it to).

Yes, Tony, the Frederick style hatch seems pretty convincing, and from a design point of view looks like it would do well at what it is built for, keeping out the water and dirt. This is what has pushed me in this direction, although there is a little more cutting and fitting of the side pieces, I know it will make up for it in a quality seal in the end. You pics you sent me of the Aluminum on the sides and how it meets at the hatch and sealing area were very helpful as well. THANK YOU!

Dont worry mallymal. I went back and forth on designs many times before we decided to "go with it". We are still working on things now (the AC placement) and where they will go. I feel like I reached a point where it was "just go with it", and decided that all the pieces would fall in to place at their give time.

We decided to put 2 more pieces of 2x4 under the frame for the two largest open area, gonna work on that tonight.

1. for support there, as the floor was a tad bit spongy.

2. It would give us a good place to drill a hole for the conduit that we are running the nav light wire in to the back, might as well serve double duty.

Should get those done tonight, and tarred up. Can screw them in later on in the week before we bolt the floor on.

Going to the plywood play in Jacksonville on Monday to get most/all of the plywood that we need to finish things up. I have had a difficult time finding 1/8 for the skin, they are the only ones that have it in stock. I called 2 other places in town ( local wood stores), and they acted like the didn't want to bother with me.

Back to work!
Brian


Checkout my buildThe Regal Eagle Bow front for 4
Image
Also my teardrop updates from blog on Dad Rambles
User avatar
Gunguy05
The 300 Club
 
Posts: 385
Images: 6
Joined: Mon Dec 02, 2013 4:45 pm
Location: South GA
Top

PreviousNext

Return to Build Journals

Who is online

Users browsing this forum: No registered users and 8 guests