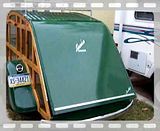
Where or When Jr. --Paint & New Tow Vehicle--update 5/17/15

...ask your questions in the appropriate forums BUT document your build here...preferably in a single thread...dates for updates, are appreciated....

Postby starleen2 » Sun Jan 02, 2011 6:12 pm

If it is not TOO late - you can remove the walls and apply the skins to the interior and exterior while the panel is flat. Sure makes gluing and attaching the panels a bit easier.
User avatar
starleen2
5th Teardrop Club
 
Posts: 16272
Images: 224
Joined: Sat May 12, 2007 8:26 pm
Location: Pea Ridge ,AR

Postby myoung » Sun Jan 02, 2011 6:16 pm

starleen2 wrote:If it is not TOO late - you can remove the walls and apply the skins to the interior and exterior while the panel is flat. Sure makes gluing and attaching the panels a bit easier.


Yes, I'm going to build from the inside out. The photos show the frame held in place by clamps and rope. I haven't fastened anything permanently to the floor or to any other wall yet. Later.
Mike Young
build thread: viewtopic.php?t=40459
User avatar
myoung
500 Club
 
Posts: 644
Images: 250
Joined: Sat Aug 07, 2010 11:21 am
Location: Nipomo, CA

Postby myoung » Mon Jan 03, 2011 5:03 pm

How's the tumbled paver look for a unique floor treatment? Thought so.

Actually this is the first skin applied to the frame of the pop-top looking from the underside. This was the simplest one to do first because the pop-top is exactly 4 x 8, just like the 5mm Luan skin.

Image

All sides are vertical except the upper third of the front, which is angled back 22 degrees. This is a terrible picture of the corner detail on the side frame. The front pieces fit inside the two side walls.

Image

Here's a better picture of the top corner detail. That little gap is of no material consequence, pun intended.

Image

I guess that this will be the last posting of build pictures for at least two weeks. Friday, we leave for our annual Florida vacation. Then, school resumes, which should put a big dent in my construction activity.

Pretty good progress, I'd say. Started the chassis on Dec 23rd and today is Jan 3rd. So, that is about 12 days of construction. Time for a break to heal my dry and cut hands and to give the muscles I didn't know I had a rest too. Chilling now.
Mike Young
build thread: viewtopic.php?t=40459
User avatar
myoung
500 Club
 
Posts: 644
Images: 250
Joined: Sat Aug 07, 2010 11:21 am
Location: Nipomo, CA
Top

Postby S. Heisley » Mon Jan 03, 2011 10:01 pm

Pretty good progress, I'd say.


Yup! :thumbsup: :applause:
User avatar
S. Heisley
Super Lifetime Member
 
Posts: 8775
Images: 495
Joined: Mon Sep 17, 2007 10:02 am
Location: No. California
Top

Postby YuGun » Mon Jan 03, 2011 10:09 pm

:applause: :applause: :applause:
User avatar
YuGun
The 300 Club
 
Posts: 445
Joined: Sun Apr 11, 2010 1:25 pm
Location: Turkey
Top

Postby steve smoot » Tue Jan 04, 2011 7:24 am

Mike, you are doing a great job there.

I don't like how the solid fold up panels look on my trailer, and I recall you are using a soft side for the top section. What material are you using, and how are you going to attach it?

Steve
I am not a complete idiot, some parts are missing...
User avatar
steve smoot
Lifetime member
 
Posts: 1355
Images: 62
Joined: Thu Sep 17, 2009 5:42 pm
Location: Boone NC
Top

Postby myoung » Tue Jan 04, 2011 7:44 am

steve smoot wrote:Mike, you are doing a great job there.

I don't like how the solid fold up panels look on my trailer, and I recall you are using a soft side for the top section. What material are you using, and how are you going to attach it?

Steve


Steve,

I decided against the solid panels for several reasons. First, my experience with the VW Westfalia and its fabric panels was positive. They had no wear and presented no problems over nearly a 20-year span of ownership.

Second, the solid panels occupy the space under the pop-up top that could add more interior height (3 to 5 inches) and offer less slouching and none for my wife. The fabric sides would simply roll up along the edges and could be held in place with just a few simple straps.

Third, the fabric will probably be rip stop nylon or something similar that is commonly used in tents. Strong, easy to fabricate, and lightweight. I'll stitch some screens into the sides or front.

Fourth, the attachment will be by means of simple snaps on the outer lip of the perimeter of the roof opening and on the inner lip of the pop-top. The gap between the lips only has to be about a half inch by I'll probably go for an inch. If I make the gap 4 or 5 inches, the rolled up fabric sides could fit neatly between the lips just like in the Westfalia. We'll see whether taking up that extra few inches in roof opening is worth the tradeoff.

Fifth, I will install an linear actuator to raise the front electronically either at the push of a button or possibly remotely for maximum coolness. I'm just waiting until I finish assembling the pop-top section to see whether I will have to go with the slower 150-pound model of the actuator or the much faster 40-pound model. Each has an 18-inch travel that is more than enough for the height I want.
Mike Young
build thread: viewtopic.php?t=40459
User avatar
myoung
500 Club
 
Posts: 644
Images: 250
Joined: Sat Aug 07, 2010 11:21 am
Location: Nipomo, CA
Top

Postby len19070 » Tue Jan 04, 2011 9:30 am

myoung wrote:Fifth, I will install an linear actuator to raise the front electronically either at the push of a button or possibly remotely for maximum coolness. I'm just waiting until I finish assembling the pop-top section to see whether I will have to go with the slower 150-pound model of the actuator or the much faster 40-pound model. Each has an 18-inch travel that is more than enough for the height I want.


I used an RV step Mechanism for a similar application. I'm sure one would work for your application.

Image

http://s26.photobucket.com/albums/c106/ ... railer.mp4

The stove slide is an electric Auto antenna...actully used the antenna itself for the linkage.

Happy Trails

Len
:peace: :peace: :peace: :peace: :peace:
http://s26.photobucket.com/user/len1907 ... 20trailers

"If you do good things, good things will happen to you"..... Earl Hickey
User avatar
len19070
3000 Club
3000 Club
 
Posts: 3054
Images: 24
Joined: Tue Aug 17, 2004 7:44 pm
Location: S.E Pa. Morton
Top

Postby myoung » Tue Jan 04, 2011 10:08 am

len19070 wrote:I used an RV step Mechanism for a similar application. I'm sure one would work for your application.

http://s26.photobucket.com/albums/c106/ ... railer.mp4

The stove slide is an electric Auto antenna...actully used the antenna itself for the linkage.

Happy Trails

Len


Love the video. It's magic. Way cool. It may inspire others to try these devices on TDs and TTTs. Lots of interesting possibilities, as you have shown.
Mike Young
build thread: viewtopic.php?t=40459
User avatar
myoung
500 Club
 
Posts: 644
Images: 250
Joined: Sat Aug 07, 2010 11:21 am
Location: Nipomo, CA
Top

Postby steve smoot » Tue Jan 04, 2011 2:06 pm

Thanks Mike. I can not wait to see how you handle the top section. It all sounds really good.

Len, I like the auto top. That is way cool. You guys sure are making it rough on the rest of us :applause:
Last edited by steve smoot on Tue Jan 18, 2011 5:08 am, edited 1 time in total.
I am not a complete idiot, some parts are missing...
User avatar
steve smoot
Lifetime member
 
Posts: 1355
Images: 62
Joined: Thu Sep 17, 2009 5:42 pm
Location: Boone NC
Top

Postby myoung » Wed Jan 05, 2011 3:19 pm

Okay. I lied. I didn't take two weeks off. Instead, I cut and glued the inner skins of the two front sections today.

Now, I'll rest.

BTW, I weighed the pop-top and skylight to see whether the 40 pound linear actuator would be sufficient. The total weight was 41 pounds, but there are still some pieces to add and some weight to consider for primer, finish paint, insulation, fiberglass tape for the edges, and another sheet of plywood for the inside surface. All that should produce a finished weight under 80 pounds, which is okay for the 40 pound actuator. Nonetheless, I'll opt for the slower, more powerful version that can push 150 pounds.
Last edited by myoung on Mon Jan 17, 2011 11:54 pm, edited 1 time in total.
Mike Young
build thread: viewtopic.php?t=40459
User avatar
myoung
500 Club
 
Posts: 644
Images: 250
Joined: Sat Aug 07, 2010 11:21 am
Location: Nipomo, CA
Top

Postby myoung » Mon Jan 17, 2011 11:49 pm

Got back from a week in Florida and really missed not working on the trailer. But before resuming on Saturday, I first had to get a bit of long-overdue exercise in the form of a 29-mile bike ride with the regulars here.

Later in the afternoon, I had to begin trimming the sheathing to the frame and cutting window openings with a router. I have never used a router before but understand the rudiments of its use. Fortunately, I bought a way cool and light Ridgid R2401 trim router, which has lots of features I didn't expect to find in such a compact machine. It cuts beautifully and makes this rank amateur look like he even knows what he is doing.

Image
Mike Young
build thread: viewtopic.php?t=40459
User avatar
myoung
500 Club
 
Posts: 644
Images: 250
Joined: Sat Aug 07, 2010 11:21 am
Location: Nipomo, CA
Top

Postby Cliffmeister2000 » Tue Jan 18, 2011 8:30 am

Welcome back, Mike!
God Bless

Cliff

♥God. ♥People.
1 John 4:9-11

My Teardrop build pictures
User avatar
Cliffmeister2000
Titanium Donating Member
 
Posts: 3622
Images: 157
Joined: Thu Jul 26, 2007 10:18 pm
Location: Phoenix, AZ
Top

Postby Hikerjohnd » Tue Jan 18, 2011 10:43 am

myoung wrote:Fortunately, I bought a way cool and light Ridgid R2401 trim router, which has lots of features I didn't expect to find in such a compact machine. It cuts beautifully and makes this rank amateur look like he even knows what he is doing.

Image


Isnt that just a great little router?!?!?! I love mine and havent pulled out the full size one since i bought this one!

The camper is coming together nicely! I know the pangs of having to put construction aside while life get in the way!
---------------
--John

So be it.
User avatar
Hikerjohnd
Teardrop Advisor
 
Posts: 65
Images: 88
Joined: Wed Sep 15, 2010 9:57 pm
Location: Savannah, GA
Top

Postby myoung » Wed Jan 19, 2011 6:11 pm

Well, I thought it would be an easy task to get some epoxy resin and filler to glue the sides to each other and to the floor. Wrong.

I looked everywhere -- HD, Lowes, Ace, paint stores, and woodworking supply and lumber yards. No one carried anything except those little 8 oz two-part dispensers that are fine for small home repairs but inadequate for building a TTT.

So, I ordered epoxy, Cab-O-Sil, 6-inch fiberglass tape (for the corners of the pop-up top), and glue brushes on-line. Haven't heard when they might arrive, but I doubt that the order will be here by the weekend when I could have been assembling the box.

Oh, well. Bad planning on my part.

I did get a bracket and mounting plate for the moveable table that I will install. These items come from GoWesty, a outfit that specializes in all things for VW campers and even campers themselves. My TTT design has elements from the VW Westfalia camper so it's only fitting that I have at least one component that comes from the VW.
Mike Young
build thread: viewtopic.php?t=40459
User avatar
myoung
500 Club
 
Posts: 644
Images: 250
Joined: Sat Aug 07, 2010 11:21 am
Location: Nipomo, CA
Top

PreviousNext

Return to Build Journals

Who is online

Users browsing this forum: No registered users and 19 guests