1955 Benroy - Rebuild (08/20/2013 - Painted! Now reassembly)

...ask your questions in the appropriate forums BUT document your build here...preferably in a single thread...dates for updates, are appreciated....

Re: 1955 Benroy - Rebuild

Postby TRP » Sun Sep 09, 2012 10:45 am

'Mornin Cliff,

That would be cool if we could connect Mike up with the other KR owner.

I re-read my previous post, it reads like I implied ours were the last one on earth. Ooops. Obviously that was not my intention. I realize that there are many more original Benroy/KR's out there. I just haven't met the owners or had the pleasure of seeing them (except for the few I've seen in photos.

All of you Benroy owners - feel free to chime in!

I'm off to the garage to do some more work on the '55 today. :)

I'll try and post some photos tonight.

T
User avatar
TRP
Silver Donating Member
 
Posts: 316
Images: 341
Joined: Wed Jun 27, 2012 2:50 pm
Location: Morgan Hill, CA

Re: 1955 Benroy - Rebuild

Postby real550A » Sun Sep 09, 2012 4:40 pm

Ted, and all... Cliff gave me a lead to Harold with the KR. I have been emailing and exchanging a few photos with him.
Harold has been very helpful, and has done a nice resto-mod on his KR, much like what Ted is planning, I think. Mike
real550A
Teardrop Builder
 
Posts: 45
Joined: Wed Jul 04, 2012 11:43 am

Re: 1955 Benroy - Rebuild

Postby TRP » Sun Sep 09, 2012 5:44 pm

Afternoon/Evening folks,

I managed to face and install the interior cabinets today. As I stated before, the interior cabinets are framed with poplar and are faced with birch ply. I just need to fill the tack/screw holes and then sand everything down. I think the next step it to figure out what the heck to do about the doors and trim for the interior. I keep leaning towards a simple cherry trim and birch ply doors scheme. I'm not sure if the cherry will be to 'harsh of a contrast for the simple birch ply. Maybe I should sand an seal the interior with the spar varnish before choosing a trim scheme? Any seasoned wood workers - I seek your advice. :)

Does anyone know if you can shoot valspar through a HVLP gun? It sure would make coating the interior super quick if I could shoot it with the HVLP. :)

Sorry, not a whole lot to take photos of. :)

Ted
User avatar
TRP
Silver Donating Member
 
Posts: 316
Images: 341
Joined: Wed Jun 27, 2012 2:50 pm
Location: Morgan Hill, CA
Top

Re: 1955 Benroy - Rebuild

Postby stevegsmith » Mon Sep 10, 2012 11:12 pm

Got the interior skin on the hatch last night. Dryfit today and all looks up to snuff, heavier than I thought I'd be though. Received the T-handle and hatch latch from vintagetrailerparts very quickly. Will post pic shortly.
Steve

Green Lantern Corpsmen
User avatar
stevegsmith
Teardrop Advisor
 
Posts: 86
Joined: Thu Jul 26, 2012 7:17 pm
Location: Berkeley, CA, USA
Top

Re: 1955 Benroy - Rebuild

Postby TRP » Tue Sep 11, 2012 8:25 am

Oh? You ordered yours from vintage trailer? Humm, I didn't think of them. I placed my order with Grant. When mine arrives I'll post a photo of it. Maybe they will be similar.

Grant didn't have a striker plate for the latch. Does anyone know where I can pick up one of those?

Thanks
Ted
User avatar
TRP
Silver Donating Member
 
Posts: 316
Images: 341
Joined: Wed Jun 27, 2012 2:50 pm
Location: Morgan Hill, CA
Top

Re: 1955 Benroy - Rebuild

Postby stevegsmith » Wed Sep 12, 2012 12:07 am

TRP wrote:Oh? You ordered yours from vintage trailer? Humm, I didn't think of them. I placed my order with Grant. When mine arrives I'll post a photo of it. Maybe they will be similar.

Grant didn't have a striker plate for the latch. Does anyone know where I can pick up one of those?

Thanks
Ted

One came with mine & you are welcome to it. It's plastic but original style.
Steve

Green Lantern Corpsmen
User avatar
stevegsmith
Teardrop Advisor
 
Posts: 86
Joined: Thu Jul 26, 2012 7:17 pm
Location: Berkeley, CA, USA
Top

Re: 1955 Benroy - Rebuild

Postby SuperShady1 » Fri Sep 14, 2012 1:24 pm

Hey you guys check out my Treasure Island Thread for a Meet & Great end of October!!
:twisted:
Dave
Its a beautiful world we live in
A sweet romantic place
Beautiful people everywhere
The way they show they care
Makes me want to say

Its a beautiful world

For you, for you, for you

Coleman Keepers 200A Gang

Green Lantern Corpsmen
User avatar
SuperShady1
500 Club
 
Posts: 660
Images: 318
Joined: Tue Jul 31, 2012 11:27 am
Top

Re: 1955 Benroy - Rebuild

Postby TRP » Sun Sep 16, 2012 10:12 pm

Spent a little time on the trailer this weekend.

Managed to get the wiring all done and tested. Everything works well. Nice and tidy. The extra spool you see lying there with the blue tape is for the tail light ground.
97967


I manged to get all but one of the cabinets mounted and secured. I'm going to go with a natural finish on the birch ply. Not sure what to do for an accent trim. I have time to figure that out.
97953

The original rear formers were laminated from bending plywood. So I started to make my own. I see a lot of guys simply cut these out of ply wood. This method leaves you with and end grain to screw into. It would seem like the screw holes would be prone to stripping out.I assume this works well as so many people do it. I thought I would give this method a shot. We will see how the first one turns out. The spool of wire you see here is the wiring for the galley dome light and the galley mounted third brake light.
97970 97968

Once I get the final rear former laminated and in place I can place the final cabinet, which you can see leaning up against the back wall of the galley. After that gets completed, I'll work on mounting the 2x2 oak spar for the hatch. I placed the doors in their openings just to make sure they were still square and true.
9797197972


It's almost like it's coming together. I have a goal to make the Treasure Island get together.One or two more solid days on it and I should be able to think about applying the aluminum sides and top.

We'll see. We will see.

:beer:
User avatar
TRP
Silver Donating Member
 
Posts: 316
Images: 341
Joined: Wed Jun 27, 2012 2:50 pm
Location: Morgan Hill, CA
Top

Re: 1955 Benroy - Rebuild

Postby TRP » Tue Sep 18, 2012 12:12 pm

Whoo hooo!

I managed to pull all the clamps off yesterday and got a good look at my laminated rear galley former thing (nice name 'eh?).

It came out pretty well. I'm pleased, but I did notice some 'spring back' when I pulled it off the side. I can see how this would cause some concern if I were to use this method on the hatch. :(

Below you can see the original compared to the new one I made. I ordered some wide aluminum trim from Grant. I really like how much better it fits compared to the original. It overhangs the edge just a tiny bit, maybe... (hopefully) .040". ;) The trim will cover that edge completely, but it sure is nice to have that extra protection on that end grain. Tonight I'll lay up the other side.

Enjoy:
98072 98071 98070 98069 98068

Ted
User avatar
TRP
Silver Donating Member
 
Posts: 316
Images: 341
Joined: Wed Jun 27, 2012 2:50 pm
Location: Morgan Hill, CA
Top

Re: 1955 Benroy - Rebuild

Postby stevegsmith » Tue Sep 18, 2012 11:04 pm

Ted,
What type glue are you using?
The poly glues are designed to flex. You might try looking for a type that has no "give"....which probably wouldn't be sold here in CA.
Steve

Green Lantern Corpsmen
User avatar
stevegsmith
Teardrop Advisor
 
Posts: 86
Joined: Thu Jul 26, 2012 7:17 pm
Location: Berkeley, CA, USA
Top

Re: 1955 Benroy - Rebuild

Postby TRP » Tue Sep 18, 2012 11:28 pm

stevegsmith wrote:Ted,
What type glue are you using?
The poly glues are designed to flex. You might try looking for a type that has no "give"....which probably wouldn't be sold here in CA.


Hey Steve,

I'm using Titebond II. It flexed/sprung back a bit when I first removed the clamps, yesterday. I put it back on the trailer last night and let it dry until this evening. When I checked it after work tonight, there was no spring back at all. It stayed exactly how I had formed it. It was great to see that once it set up it held its position and shape perfectly. With that, I went ahead and laid up the other side tonight. If I can get the second one to lay up well, I will give it a go at recreating three more for the hatch.

:)

I'll post some more photos in the morning.

Oh! Speaking of photos! Steve - could you please post some details on how the original hatch and doors were sealed up? Mine didn't come with any seals and because it was completely taken apart I have no idea how the doors or hatch stayed water tight.

Thanks!
Ted

T
User avatar
TRP
Silver Donating Member
 
Posts: 316
Images: 341
Joined: Wed Jun 27, 2012 2:50 pm
Location: Morgan Hill, CA
Top

Re: 1955 Benroy - Rebuild

Postby stevegsmith » Wed Sep 19, 2012 10:07 am

TRP wrote:.....water tight.


:lol: Ted, that's the funniest thing you've said all week.

Good question. The rubber seals on my doors and the hatch have..or what's left of them...turned into a very hard black crumbly problem. It's really hard to tell what shape they were but no doubt they were glued to the aluminum with something very strong. I've been scraping and soaking the hatch strips to get rest of the residue off. Also, I've been looking for a replacement and haven't found the right one yet.
I think the best replacement is something like a 1/4" bead with a 1/2" leg. So the profile is a "P". If I can't find that, a simple 1/4" round will probably work. I'm working on that now so I'll update with new findings.

The door seals were probably at least 1/2" wide "D" shape. That's a guess though.

Sorry.

Your BR is looking great by the way. I'm impressed you're going for glued/laminated ribs as opposed to ply cut-outs. Old school!!
Attachments
benroy_door.jpg
benroy_door.jpg (91.51 KiB) Viewed 1950 times
Steve

Green Lantern Corpsmen
User avatar
stevegsmith
Teardrop Advisor
 
Posts: 86
Joined: Thu Jul 26, 2012 7:17 pm
Location: Berkeley, CA, USA
Top

Re: 1955 Benroy - Rebuild

Postby TRP » Wed Sep 19, 2012 11:55 am

Morning,

Here are the photos from the lamination work I have done. I'm pretty excited that the right side piece, once completely dried, had no spring back (shown below). The other two photos below, show the process I used to laminate the 'bows'. I didn't get photos of each step because I wasn't sure if it would work.

One photo I didn't take was a shot of all the 'strips' laid out on the ground. I start by laying the strips out on the ground/table so I can apply glue to one side of each strip. I did not apply glue to the last strip, as it is the 'top' or 'outside edge strip', so it doesn't need glue. I then took the strips and stacked them one on top of each other. I picked up the stack of oozy glued up strips and then started to clamp them to the blocks you see nailed/screwed to the side of the trailer. Start at the bottom and make sure all the ends are nice and even. Work your way up the stack towards the other end. Clamping the stack to the side of the trailer and the little former blocks as you go up. Make sure there are no gaps between the strips. Make sure the ends stay lined up nice and even. Also make sure you maintain that consistent curve with the edge of your former. In this case, that'd be the side of the trailer.

Hopefully these photos help illustrate my madness. One set will end up glued to the sides of the trailer. However, I plan to make 2 more of each side (to form the hatch), I don't want these to stick to the trailer just yet. The blue tape is there to keep the laminated ribs from sticking to the side of the trailer.

98082 98083 98081

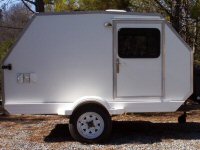
Steve - Thanks for the shot of the door. That piece makes sense. It's the hatch that confuses me. My hatch was basically completely disassembled. Where does the weather strip go on the hatch? Regarding the seal, I've seen P shaped seals for sale. Let me know if you can't find where to get it, and I can send you a link.

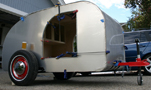
Mike - Please send shots of your hatch and how you plan to seal it up.

Thanks gang,
Ted
User avatar
TRP
Silver Donating Member
 
Posts: 316
Images: 341
Joined: Wed Jun 27, 2012 2:50 pm
Location: Morgan Hill, CA
Top

Re: 1955 Benroy - Rebuild

Postby TRP » Wed Sep 19, 2012 12:29 pm

stevegsmith wrote:
TRP wrote:.....water tight.


Your BR is looking great by the way. I'm impressed you're going for glued/laminated ribs as opposed to ply cut-outs. Old school!!


Ah, I missed this the first time through. Thanks for the kind words! I'm happy so far. Being the first one I've re-built/built, I'm just kind of making it up as I go. The scrap and 're-dos' are all part of that I suppose. Having the original wooden corners and the original aluminum skins to use as a guide, really helped.

Making the hatch and sealing up the hatch and the door hinges have me a bit skittish. I'd hate to do all this work and have it leak like a sieve. Slow and steady. We'll see how that goes I guess. :)

Thanks again,
Ted
User avatar
TRP
Silver Donating Member
 
Posts: 316
Images: 341
Joined: Wed Jun 27, 2012 2:50 pm
Location: Morgan Hill, CA
Top

Re: 1955 Benroy - Rebuild

Postby TRP » Thu Sep 20, 2012 11:15 am

Remember that mess of claps from yesterday? Here is the final result. I think this method will work well. With this, I think I will move forward and make enough of these to build a hatch.

98092

Here is the rub - I noticed that the rib from the left side is not identical in shape to the one from the right. I can easily make the one from the left, fit on the right, and vice versa, but they are not identical in shape. The difference is really in the shape of the arc. One is a bit tighter than the other. I would assume they should be identical, as I sanded the sides together to match the shape before installing the sides. Is this going to cause an issue with the hatch and it's seal? Obviously I should build the left side of the hatch with ribs formed from the left side, and the right side of the hatch will be built with ribs formed on the right edge.

I'm just wondering if I should build up the left side edge to match the right side so the two sides are more symmetrical.

I can post a photos of the two ribs side by side if that will help.

I would love advice from all of you experts! Please advise.

Thanks,
Ted
User avatar
TRP
Silver Donating Member
 
Posts: 316
Images: 341
Joined: Wed Jun 27, 2012 2:50 pm
Location: Morgan Hill, CA
Top

PreviousNext

Return to Build Journals

Who is online

Users browsing this forum: No registered users and 9 guests