New Name "TRAP SHACK" 02-09-10

...ask your questions in the appropriate forums BUT document your build here...preferably in a single thread...dates for updates, are appreciated....

New Name "TRAP SHACK" 02-09-10

Postby Moosemt » Sun Dec 27, 2009 1:32 pm

Ok --- Starting my off-road weekender-grasshopper-box inspired build the first of Feb. I have several questions so figured I would start a build journal, I have spent several hours going over numerous posts and have some really good ideas and have been able to get several of my questions answered.

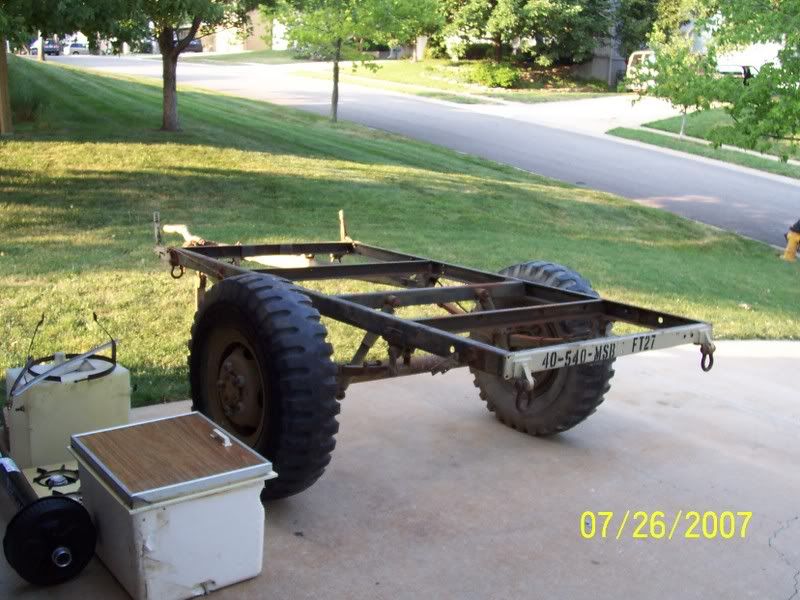
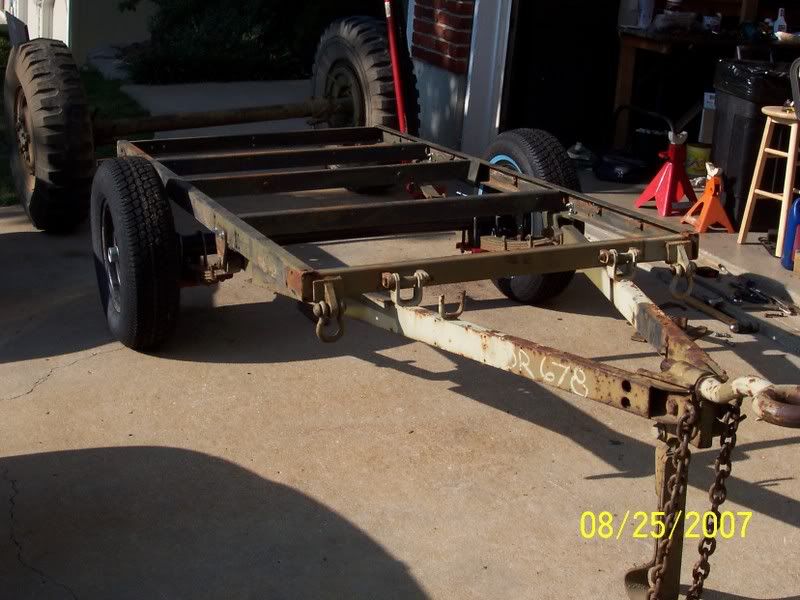
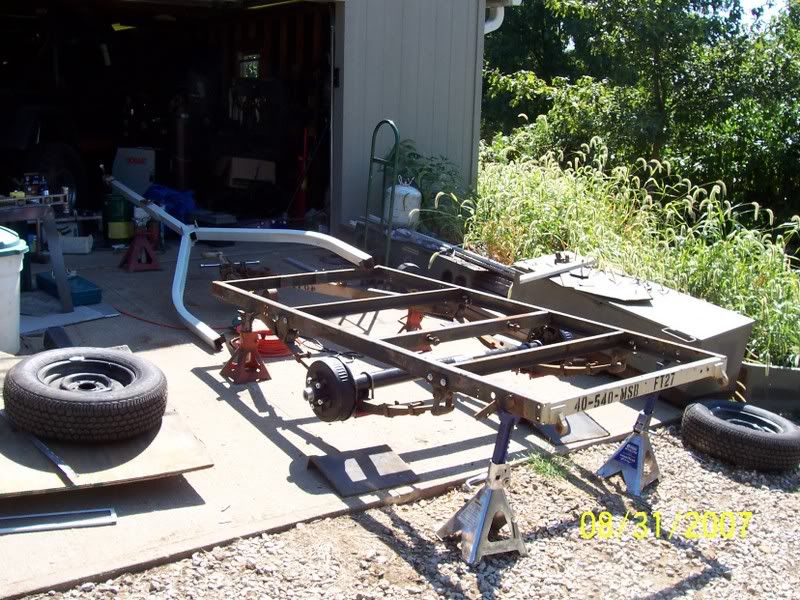
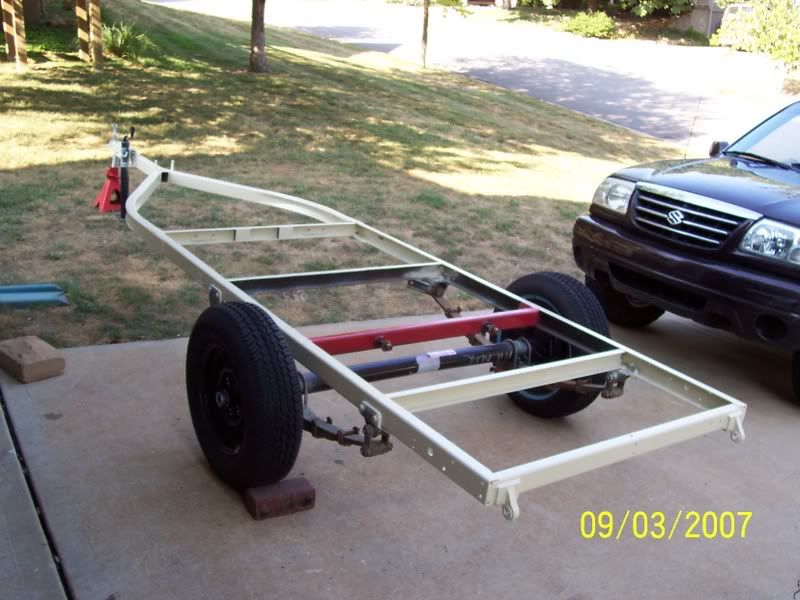
Now for the plans I am using a military trailer such as M101 if I win the bid, or an M105.

The finished trailer will be 5’ x 10’ and 4’ high. I know this is a little long for an off-road build but I need the space for stuff taking with me when I guide in hunting camps in MT. I also have no need to worry about weight as I am pulling it with an F-450.

I am planning on building it with thin wall 2â€
Last edited by Moosemt on Tue Feb 09, 2010 11:34 pm, edited 2 times in total.
User avatar
Moosemt
Donating Member
 
Posts: 33
Images: 4
Joined: Fri Dec 18, 2009 2:49 pm
Location: Roundup, MT

Postby BC Dave » Mon Dec 28, 2009 1:47 am

Interesting build; I thought of doing something similar; what I'm working on currently is not really for rough trails. I used a prebuilt 6X10 cargo Trailer that is a slow work in progress 1300 lbs, now 1600lbs. Also notice the off road section; lots of good info there; post questions there but keep your main build post going here.

For off road trailers I have noticed the Ozzies seem to have this figured out. One of the best commercial trailers i'v seen built are these Track trailers; they have incorporated lots of good ideas; look at how the rear and front linkages are set up for clearence and articution.

http://www.tracktrailer.com.au

Ply - 1/8; too thin; Id use 1/2 in on the outsiude and min 3/8 on the inside. I used 1/4 " and it has showen signs of warping on the inside ... went to 3/8 -4 ply & 1/2 5 ply on the inside; no problems.

Insulation - I used R 14 (or was it 20?) batten squished into the walls; and 1" blue foamboard in the roof (cuse thats all that would fit; 1.5 or 2 would have been better) and 1.5 glued directly on the bottom outside. It takes 10 munutes to heat up with a propane marine stove and 30 min with a work lamp.

Cheers BC Dave
User avatar
BC Dave
Teardrop Master
 
Posts: 247
Images: 13
Joined: Sat Oct 31, 2009 12:32 am
Location: BC, Canada

Postby Moosemt » Mon Dec 28, 2009 6:12 pm

User avatar
Moosemt
Donating Member
 
Posts: 33
Images: 4
Joined: Fri Dec 18, 2009 2:49 pm
Location: Roundup, MT
Top

Postby Carter » Mon Dec 28, 2009 8:30 pm

Sorry, BC Dave, I don't agree. If you are using 2" tube for the side frames, I would use cheap, water resistant luan at about 3/16" for the outside and no more than 1/4 for the inside. If the sides are open between a perimeter of 2"tubing I would use some 3/4 pine ripped to 2" for stringers to strengthen the ply. The frame will handle any load and the ply is just to contain the insulation and provide a pretty surface for the interior. I'ts pretty much how I built mine but I had a glue-lam side perimeter instead of the tubing. After 5 years it has gone nowhere. In fact I would reduce the side framing if I started again. I would reduce the perimeter to 1x2 14 or 16 gauge steel. You really don't need that much.

As always, My humble opinion.

Jim
I need a new Avatar. I'd put my dog up there but she doesn't look much like me. She's the skinny one.
User avatar
Carter
Gold Donating Member
 
Posts: 319
Images: 32
Joined: Sun Aug 10, 2008 6:45 am
Location: Rochester Hills, MI
Top

Postby Moosemt » Mon Dec 28, 2009 11:35 pm

Thanks Carter and BC Dave, I have a lot of thin wall 2" tube laying around in 5 foot lengths so kind of going with the cheaper the better. I plan on using Herculiner or Durabak on the top and half way down the sides I have a buddy covering the trailer half way up with Line-x professional liner. Thinking of going over the seams with Fiberglass and then sanding smooth and then covering the wood with a sealer before applying the finish.
User avatar
Moosemt
Donating Member
 
Posts: 33
Images: 4
Joined: Fri Dec 18, 2009 2:49 pm
Location: Roundup, MT
Top

Postby jagular7 » Fri Jan 01, 2010 1:44 pm

I would seriously rethink the use of the military M105 frame. With your tow vehicle, that would be rather large. The M101 may work better for you. Biggest thing to pulling weight offroad will be the pitching of the weight based on gravity and the terrain. The lighter and lower you have the weight, the better the control.
The M101 frame will be nearly 3/16" thick and be welded all around. I had a trailer frame based on the M101. I removed the stock military tongue and integrated a boxed boat trailer tongue to it to give me a longer frame overall. I also drilled the suspension brackets in increments of 5" to help locate the axle for the weight distribution. I removed the heavy military axle and added a 3500# Dexter with electric and parking brakes though I never got them working. The military tires and wheels were swapped for 14" rims and tires. And the Dexter axle was mounted on top of the leafs rather than underneath. I kept the stock military leafs but removed the last 2.
The M105 trailer is much heavier than the M101 trailer. Figure the trailer itself is 2750#s for the M105, and 1275# for the M101. The tires/wheels of the M105 are 20" wheel and 36" tall tires, M101 16" rim and 33" tall tire.

The frames in your pics are M101A3 frames where the axle has the same bolt pattern as the 8-lug 1-ton standard truck (not metric) and have the surge brake system on the tongue. Your F450 (depending if SuperDuty or not) will have the metric bolt pattern so your wheels/tires won't fit the trailer.

You would be much better off with a boxed frame from a boat or large pwc, or build your own, adding in suspension and other crossmembers for rigidity. I would use .120 box wall tubing rather than the thicker 'C' channel of the military frames. And to the weight as low as possible. With an offroad environment, there is a comprimize to determine that.

Image
Image
Image
Image

BTW, I got my M101 frame for $90 at gov't liq. auction. Do note, the military axle has right and left hand lug nuts and the nuts are 1.25" (IIRC) so you'll need a large socket to remove them. Not sure of the M101A3 axle. They also should be 2 pc wheels with a slip ring to secure them. These wheels can be deadly when not proper cared for and understood with pressures. The ones in your pics are the beadlock style and are a little different. Just make sure all air pressure is released from the tire before breaking them down. There is a big o-ring between the 2 pcs and they are readily available. Without it, the tires will loose air. Your wheels are designed to be tubeless.
Mike
Jagular
Lenexa, KS
jagular7
The 300 Club
 
Posts: 409
Joined: Tue Mar 21, 2006 5:10 pm
Top

Postby Moosemt » Fri Jan 01, 2010 11:43 pm

Thanks for the info on the M105 looked at one the other day and you are correct going with the M101 or M116 essentially the same trailer frame. I like what you built however I would like to keep the ground clearance you have lost by going with the different axle. I need the clearance for some of the road I need to take the camper up. The truck should be able to carry the weight no problem it is a super duty, has a tow gvw of north of 22,000 lbs.

If I can get a liquadition trailer for low cost around 150 or so it will be cheaper than purchasing the metal, axle, tires, all of that stuff might be a little overkill but need to really stay under the budget of the head accountant (wife and paymaster)
User avatar
Moosemt
Donating Member
 
Posts: 33
Images: 4
Joined: Fri Dec 18, 2009 2:49 pm
Location: Roundup, MT
Top

Postby Moosemt » Sun Jan 10, 2010 2:20 am

Got my liquidation trailer on auction today have to go pick it up later this next week but it is a start. I will try and post the image but not having much luck maybe someone can tell me what I am doing wrong.

[img]http://www.tnttt.com/gallery/image.php?image_id=59988[/img]

I give up evidently I can not follow directions
User avatar
Moosemt
Donating Member
 
Posts: 33
Images: 4
Joined: Fri Dec 18, 2009 2:49 pm
Location: Roundup, MT
Top

Postby Juneaudave » Sun Jan 10, 2010 9:34 am

Looks like you got it right to me...but here ya go...

Image
User avatar
Juneaudave
Super Duper Lifetime Member
 
Posts: 3237
Images: 380
Joined: Sun Jul 03, 2005 12:11 pm
Location: Juneau, Alaska
Top

Postby Miriam C. » Sun Jan 10, 2010 10:39 am

Juneaudave wrote:Looks like you got it right to me...but here ya go...

Image


:? Well I tried to fix your url and it just won't post a picture. Don't know why. Looks right!
“Forgiveness means giving up all hope for a better past.â€
User avatar
Miriam C.
our Aunti M
 
Posts: 19675
Images: 148
Joined: Wed Feb 15, 2006 3:14 pm
Location: Southwest MO
Top

Postby Moosemt » Sun Jan 10, 2010 11:38 am

Thanks for the help on the pictures I appreciate it. not sure why I can not post pictures have tried several times now, not sure what everyone did different but will try and get the admin. to look into it.
User avatar
Moosemt
Donating Member
 
Posts: 33
Images: 4
Joined: Fri Dec 18, 2009 2:49 pm
Location: Roundup, MT
Top

Postby jagular7 » Sun Jan 10, 2010 9:27 pm

It looks fine to me now.

But what did you get? Its an ammunition trailer which carries lots more weight. Not sure what you are going to do with that. The frame is a lot heavier as well as skinnier and not as long as compared to that of a M101 or M105. The suspension is really not there.

The gov't liq has auctions all the time. Best look for another.
Mike
Jagular
Lenexa, KS
jagular7
The 300 Club
 
Posts: 409
Joined: Tue Mar 21, 2006 5:10 pm
Top

Postby Moosemt » Thu Jan 21, 2010 2:01 am

Well little update, got tired of waiting on the gov liqidation people to process my bid (they still say I can be out 90 days) so bought the steel yesterday and stole an axle off of on of my buddies trailers to cut down and I am starting tommorrow.

I am going to sadwich the walls together and use 1 1/2" insulation in the walls, 1/2"ply on the outside and in, (what is laying around the shop) and the supports will be out of 1 1/2" light guage steel for the frame. My Question is can I use large headed pop rivits to secure the wood to the frame work with no ill effects? I have looked around on the site and have not found anything exactly fitting the subject probably missed it somewhere. I will be going over the entire vehicle with Rhino-line type product and filling in the rivits, so no worries for leaks, will start posting progress pictures soon.
User avatar
Moosemt
Donating Member
 
Posts: 33
Images: 4
Joined: Fri Dec 18, 2009 2:49 pm
Location: Roundup, MT
Top

Postby Moosemt » Fri Jan 22, 2010 5:20 pm

Hello, is their anyone out there???? wondering if anyone still had any experience with pop riviting the plywood skin on their tear. Or should I use self tapping metal screws?? or ?????
User avatar
Moosemt
Donating Member
 
Posts: 33
Images: 4
Joined: Fri Dec 18, 2009 2:49 pm
Location: Roundup, MT
Top

Postby Ageless » Fri Jan 22, 2010 5:30 pm

Yep, pop rivets will work; just stay with soft aluminum. Did a lot of this panelling the mess decks while in he Navy
Strangers on this road we are on; we are not two, we are one - Raymond Douglas Davies
User avatar
Ageless
Platinum Donating Member
 
Posts: 1603
Images: 8
Joined: Tue Aug 04, 2009 8:34 am
Location: Pt. Orchard, WA
Top

Next

Return to Build Journals

Who is online

Users browsing this forum: No registered users and 17 guests