
Cliff, I just read your build from end to end and you and I need to be called the Redo Twins. I have done so many things over too, and I know I'm not finished yet. My counter, my galley shelf, my fiberglass roof skin, sanding and re-epoxying too many times. I'm right there with you and I feel your money-sucking, time-eating, nerve-plucking pain. I truly do. But your teardrop looks great. Your cabinetry is beautiful, I love the color, and the rest will come. I hope we meet up at a gathering sometime so we can set up chairs in front of our finally finished teardrops and share build stories.
But when you consider how close we are, how much we've already completed, we know we're going to make it, and soon.
Teardrops n Tiny Travel Trailersor t n ttt for short (tnttt.com) |
"Red Woof Inn" 10-16 update Hubcaps!
Re: "The Black Hole" build 7-26 update
![]() by Oldragbaggers » Fri Jul 27, 2012 1:39 pm
by Oldragbaggers » Fri Jul 27, 2012 1:39 pm
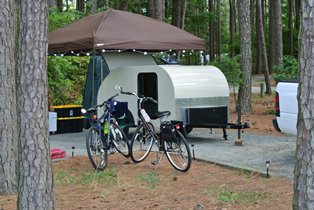
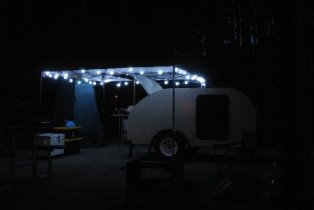
Life is sooooo good.........
Sail...camp....bike...repeat
Becky
Build Journal http://www.tnttt.com/viewtopic.php?f=50&t=45917
Visit our blog at http://www.oldragbaggers.com
Sail...camp....bike...repeat
Becky
Build Journal http://www.tnttt.com/viewtopic.php?f=50&t=45917
Visit our blog at http://www.oldragbaggers.com
-

Oldragbaggers - Gold Donating Member
- Posts: 1842
- Images: 331
- Joined: Mon Aug 01, 2011 9:22 pm
- Location: Essex, MD
Re: "The Black Hole" build 7-26 update
![]() by KCStudly » Fri Jul 27, 2012 2:22 pm
by KCStudly » Fri Jul 27, 2012 2:22 pm
CliffinGA wrote:10 ft looks great
It looks good from here, too. The red and black go together like a deck of cards; classic!
Way to persevere.

KC
My Build: The Poet Creek Express Hybrid Foamie
Poet Creek Or Bust
Engineering the TLAR way - "That Looks About Right"
TnTTT ORIGINAL 200A LANTERN CLUB = "The 200A Gang"
Green Lantern Corpsmen
My Build: The Poet Creek Express Hybrid Foamie
Poet Creek Or Bust
Engineering the TLAR way - "That Looks About Right"
TnTTT ORIGINAL 200A LANTERN CLUB = "The 200A Gang"
Green Lantern Corpsmen
-

KCStudly - Donating Member
- Posts: 9613
- Images: 8169
- Joined: Mon Feb 06, 2012 10:18 pm
- Location: Southeastern CT, USA


 . So I then pushed the bottom section down and started glueing from inside of the hatch and started one side with the skin straight and tightstarted screwing from the stop point to the bottom hatch full cross piece thus taking any slack out and smoothing it as I went. I guess you could say I wetted the skin from the sweat tha was pouring out
  but thats working in a garage when its 96 degrees and your dumb enough to forgrt to turn the fan on! Needless to say by doing it this way it ended up stretched ting and layed flatter. Only thing I will need to do to finish the hatch is to glue strips across 3 sections of skin at the seam where there was no cross pieces and you can see thru the seam. Hopefully I can do that tomorrow evening as I will be out of area working rest of the week. If so Friday night will be filling holes with putty and the epoxy and taping this weekend! Doors are on hold until I can figure the gap needed for Vintek Tech T mold and seal and door jambs. Thanks for reading guys and the encouragement maybe can have ready for a gathering in September!
 . Sometimes just to fix some of my earlier fixing! The hatch has come away with the skin glued good but I need to add extra support so I can reglue the seam.
 . The wife says as long as she is cool and she doesn't get wet while sleeping then she's good

