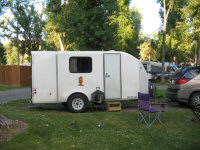
Handyman in NC - Tim B.

...ask your questions in the appropriate forums BUT document your build here...preferably in a single thread...dates for updates, are appreciated....

Handyman in NC - Tim B.

Postby treebeau » Thu Aug 16, 2012 7:28 pm

Here I go.
My first build. Been wanting to do it for years.
I don't have experience welding (maybe some day) so I took a photo of a Northern Tools trailer, sketched and wrote some details and had a local company build it. Came out nice, and usable, but if there is another build in my future there will be some modifications.

Hoping the pictures show.

Starting the floor this weekend.
Tim B.

The sketch:
Image

The trailer as fabricated:
Image
User avatar
treebeau
Teardrop Builder
 
Posts: 26
Joined: Thu Mar 29, 2012 11:39 am

Re: Handyman in NC - Tim B.

Postby treebeau » Sat Aug 18, 2012 3:07 pm

Building the floor.

Laying out and fitting the 2x4 framework.
Image


These parts all rest on welded cross members, so pocket holes are more than enough.
Image

And finally I am starting to layout a storage compartment (front) and a place to bolt on a spare tire underneath the galley (back). Still not sure how I will mount them so those pieces are all just wedged in for now.
Image
User avatar
treebeau
Teardrop Builder
 
Posts: 26
Joined: Thu Mar 29, 2012 11:39 am

Re: Handyman in NC - Tim B.

Postby Junkboy999 » Sun Aug 19, 2012 2:43 am

Looking Good

Keep pluging away at it.


Terry
Junkboy999
User avatar
Junkboy999
1000 Club
1000 Club
 
Posts: 1259
Images: 52
Joined: Fri Jul 06, 2012 9:18 pm
Location: Wichita, KS
Top

Re: Handyman in NC - Tim B.

Postby jbyrd » Sun Aug 19, 2012 5:52 am

Looking good, was just curious as to what profile you are going with?
Til later, See ya
Jeremy

My build journal #1 "SOLD" : viewtopic.php?t=45945
my build journal #2 "SOLD": viewtopic.php?f=50&t=59216
User avatar
jbyrd
Teardrop Master
 
Posts: 146
Images: 172
Joined: Sun Aug 28, 2011 8:24 pm
Location: marianna, Florida
Top

Re: Handyman in NC - Tim B.

Postby treebeau » Sun Aug 19, 2012 7:03 am

Thanks!!

I am putting 2 inspiration pictures here. I am probably going to go with a Benroy style or one very close with a few small changes. Haven't really nailed that down yet. But definitely going to do a Woody (I love woodworking and it's a must for me). I am well aware that the prettier of these 2 TDs has the doors opening toward the back, and I won't be doing that.

Image

Image
User avatar
treebeau
Teardrop Builder
 
Posts: 26
Joined: Thu Mar 29, 2012 11:39 am
Top

Re: Handyman in NC - Tim B.

Postby treebeau » Mon Sep 03, 2012 3:51 pm

Yes, I am slow, but that's me.
Got a new girlfriend (she asked "Where...the girlfriend store?" OK, I now HAVE a WONDERFUL new girlfriend) and have been enjoying THAT aspect of my life.

Here is the continuation of the floor.

Two sheets of 1/2 inch plywood.
Image

They were cut to 4ft by 5ft, and are butted together to form the 5ft by 8ft floor.
Image

The cut off pieces are used to form a storage well in the floor. Not sure what to store here, but so many of you make these and I know that NOW is the time. I don't want to regret NOT having done it.
Image
Last edited by treebeau on Wed Sep 05, 2012 5:17 pm, edited 1 time in total.
User avatar
treebeau
Teardrop Builder
 
Posts: 26
Joined: Thu Mar 29, 2012 11:39 am
Top

Re: Handyman in NC - Tim B.

Postby treebeau » Wed Sep 05, 2012 5:15 pm

To stiffen the corners, I cut and glued in 3/4 by 3/4 strips. Then glued on 4 strips at the bottom edges to support the box bottom.
Image

A board was cut for length and width and notched for the corners. It will be glued down, then caulked inside and out. Then sealed with goo on the underside later.
Image

And a random sampling of the "types" of things that can be stored. I think there should probably be a jack, tire plugs, air pressure gauge, jumper cables and other maintenance things instead.
Image
User avatar
treebeau
Teardrop Builder
 
Posts: 26
Joined: Thu Mar 29, 2012 11:39 am
Top

Re: Handyman in NC - Tim B.

Postby pete42 » Fri Sep 07, 2012 6:02 am

congrats' on trailer looks like you will end up with one fine looking trailer.

pete
User avatar
pete42
Super Lifetime Member
 
Posts: 2203
Images: 13
Joined: Sat Nov 07, 2009 11:52 am
Location: SouthWest Ohio
Top

Re: Handyman in NC - Tim B.

Postby toypusher » Fri Sep 07, 2012 6:11 am

Looking good. But you might want to consider mounting your spare under the front of the tear vs under the galley. They galley will already add extra weight behind the wheels. Maybe plan that you could have a mounting point either under the galley or under the front and then see how the tongue weight works out before actually installing any mounts for it.

Just my opinion here! :)
User avatar
toypusher
Site Admin
 
Posts: 43040
Images: 324
Joined: Fri Jan 28, 2005 12:21 pm
Location: York, PA Area
Top

Re: Handyman in NC - Tim B.

Postby bc toys » Fri Sep 07, 2012 8:53 am

remember you don't want the floor box any lower then you axel or you might lose the bottom on a big hump
bc toys
2000 Club
2000 Club
 
Posts: 2217
Images: 42
Joined: Sun Jun 28, 2009 2:45 pm
Location: LAS VEGAS NV
Top

Re: Handyman in NC - Tim B.

Postby treebeau » Sun Sep 09, 2012 12:16 pm

Thanks for the suggestions! I think mounting the spare on the tongue would be easier, so if that is the way to go then I don't have to worry about extra blocking. But nevertheless, I did mount the 2x4s under the galley if I decide to go that way.

As for storage box depth, yikes! I did want it fairly deep and only considered that it would be higher than your typical speed bump. Before the bottom is glued in place I will give a lot more consideration to the depth. Thanks!!


So now a continuation.
Since I have my 2x4 framing lying flat, I have a broader surface for butting plywood edges. SO I decided to attach the floor in a few smaller sections, Of course the whole underside will be treated later.

Here is the front panel. It is glued and screwed in place.
Image

And here is the back one. These floor panels hang ever so slightly over the edges and will be trimmed exact with a router.
Image

And here is the fill in.
Image

Still needing to cut the storage compartment cover, drill for bolts, flip, seal for roadworthiness, flip, and bolt down.
User avatar
treebeau
Teardrop Builder
 
Posts: 26
Joined: Thu Mar 29, 2012 11:39 am
Top

Re: Handyman in NC - Tim B.

Postby ecna » Sun Sep 09, 2012 5:07 pm

I really like the storage compartment. Too late for me though, I'm not cutting it in now.
ecna
Teardrop Builder
 
Posts: 26
Joined: Tue Aug 07, 2012 1:27 pm
Top

Re: Handyman in NC - Tim B.

Postby treebeau » Sun Sep 16, 2012 9:14 pm

Still chipping away at the floor.

Made a hatch cover using available plywood. It was a little short, so I cut thin strips to make up the gap. One is pointed to with the red arrow. The holes are just so I can lift it out for now. When I do the finish floor there will be some recessed rings to lift.
Image

And voila, it is snug, but not too snug.
Image


Using a router and bearing bit I trimmed the plywood flush with the outer edge of the 2x4 frame. The only difficulty here was I had to prop the long edges up over the wheels to do some of that trimming. Easy now since it isn't bolted down.
Image


It was suggested that the bottom of the storage box not be lower than the bottom of the axle. So I marked it, then made and clamped on a guide for cutting with the circular saw.
Image


Cut all 4 sides and now I just lose some depth. It's ok, because I wasn't all that sure I needed a storage bin anyway.
Image


I have since cut and glued on new strips to secure the box bottom and have started prepping for waterproofing the floor.
User avatar
treebeau
Teardrop Builder
 
Posts: 26
Joined: Thu Mar 29, 2012 11:39 am
Top

Re: Handyman in NC - Tim B.

Postby TRP » Mon Sep 17, 2012 2:12 pm

Looks like a great start.

Keep going on it, before you know it you'll be putting up walls.

T
User avatar
TRP
Silver Donating Member
 
Posts: 316
Images: 341
Joined: Wed Jun 27, 2012 2:50 pm
Location: Morgan Hill, CA
Top

Re: Handyman in NC - Tim B.

Postby jbyrd » Thu Sep 20, 2012 7:17 am

Coming along very nicely, I like the drop box and my next one will have one. :thumbsup:
Til later, See ya
Jeremy

My build journal #1 "SOLD" : viewtopic.php?t=45945
my build journal #2 "SOLD": viewtopic.php?f=50&t=59216
User avatar
jbyrd
Teardrop Master
 
Posts: 146
Images: 172
Joined: Sun Aug 28, 2011 8:24 pm
Location: marianna, Florida
Top

Next

Return to Build Journals

Who is online

Users browsing this forum: No registered users and 5 guests