Noah5 Ack! Build Log

...ask your questions in the appropriate forums BUT document your build here...preferably in a single thread...dates for updates, are appreciated....

Noah5 Ack! Build Log

Postby apaka » Mon Nov 26, 2012 1:08 am

Thought I'd throw up a thread here since I've consumed so much knowledge through this forum and maybe someone can learn from my experiences, either positive or negative.

We decided to create a blog on an external site (Wordpress.com) for ease of sharing and keeping everything organized, tell people you're building a camper and there's only one way to really explain what you're talking about, pictures!

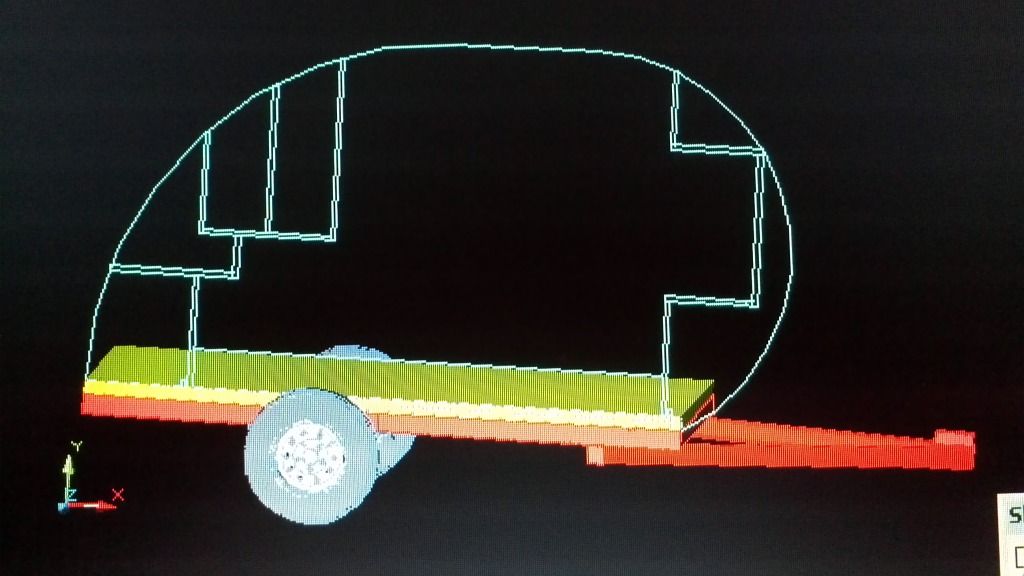
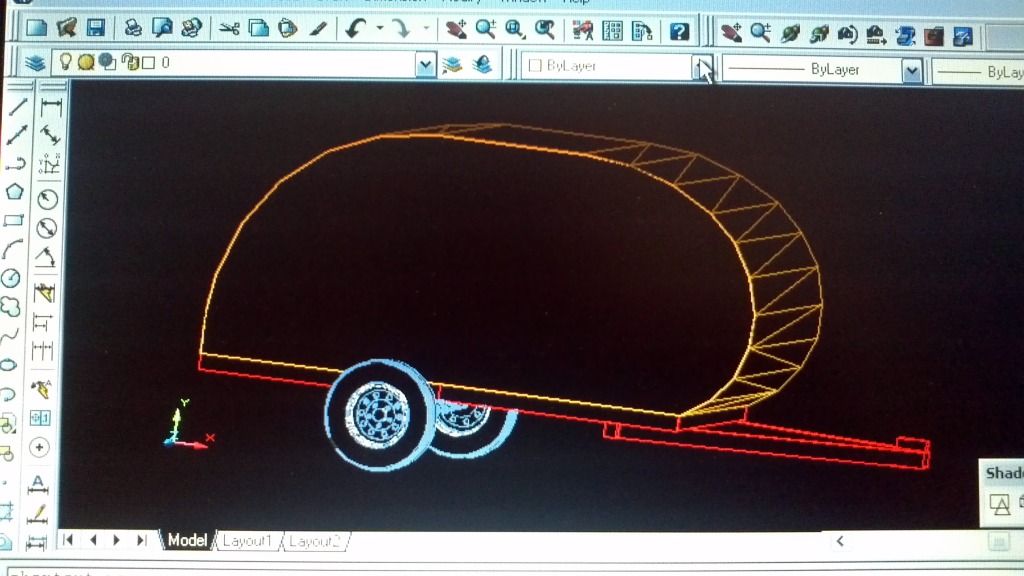
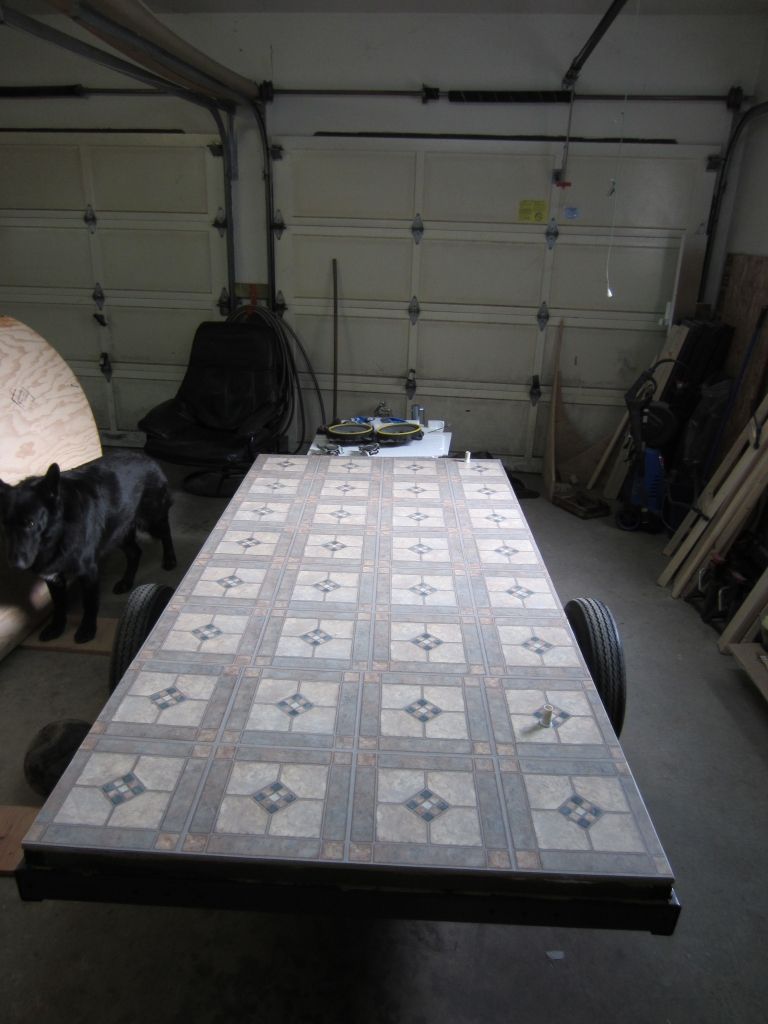
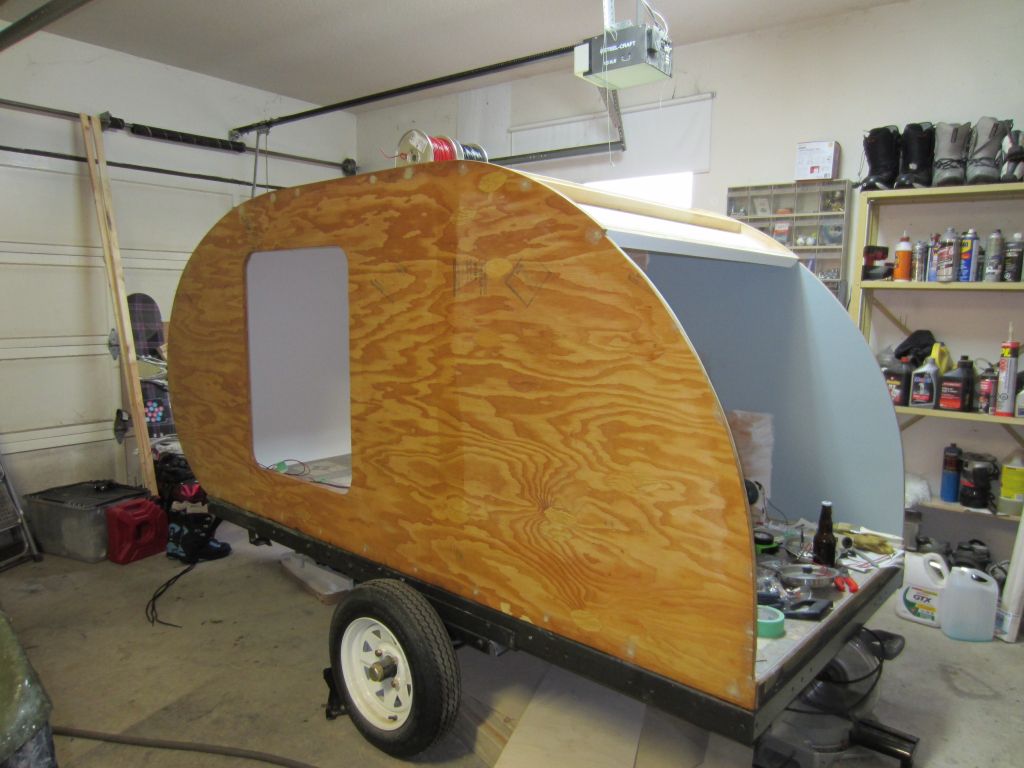
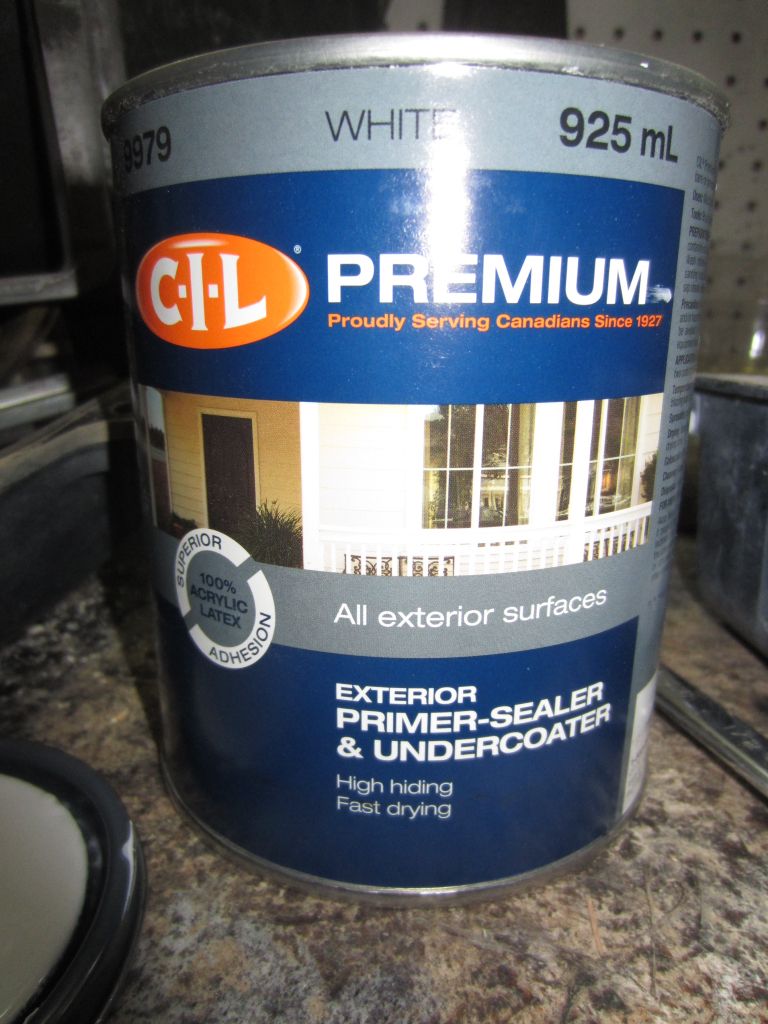
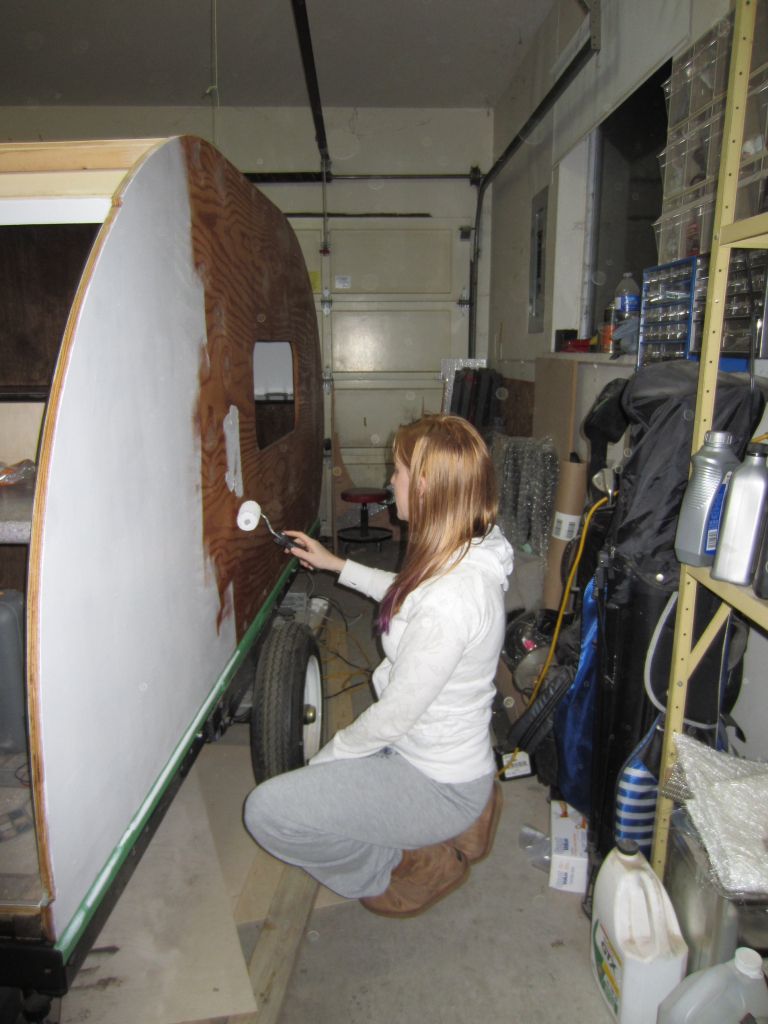
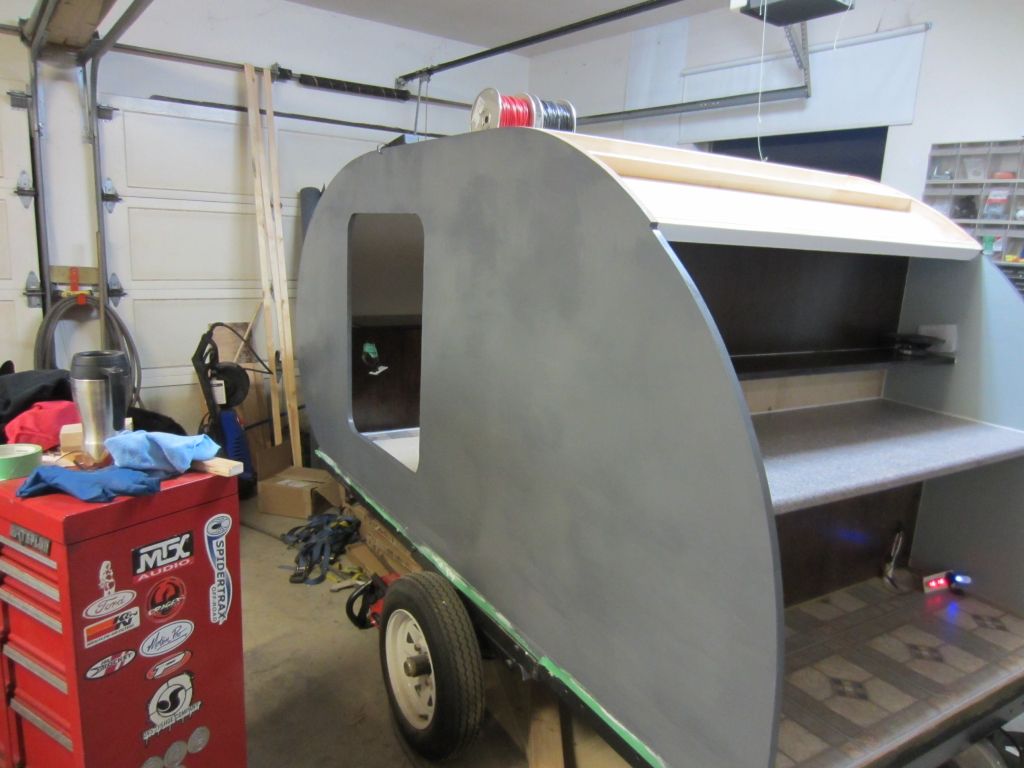
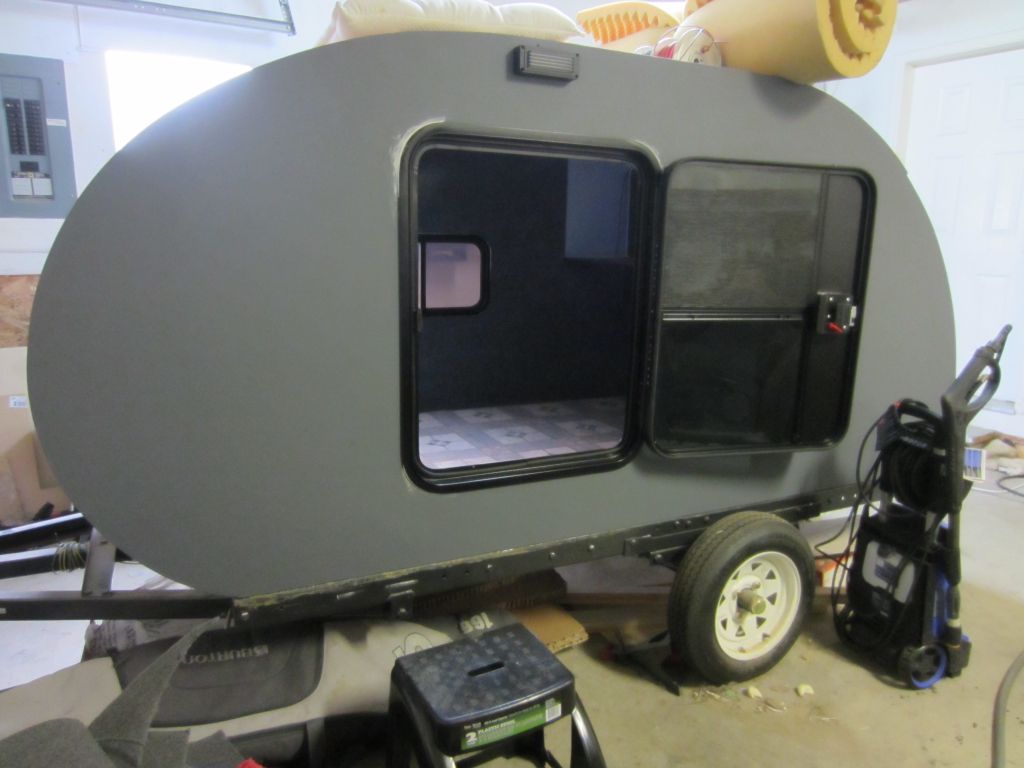
Started out with a harbor freight 4x8 1200lb folding trailer. I took the center braces, cut them, drilled what seemed like a billion holes and bolted the trailer together as a non folder. I then bought a 7' long 2x2x1/8 square tubing and extended the tongue, which also gave me the opportunity to bolt all the cross members together. I recommend this process even if you don't want to extend the tongue, the added rigidity is impressive. The trailer wires were run through the tubing for a cleaner look, 1/2" wire loom was used to protect the wires inside the tube. I then primed then painted the trailer with rustoleum hammered paint, rolled on. Painting isn't easy in BC right now with the current temperatures, space heater ftw!

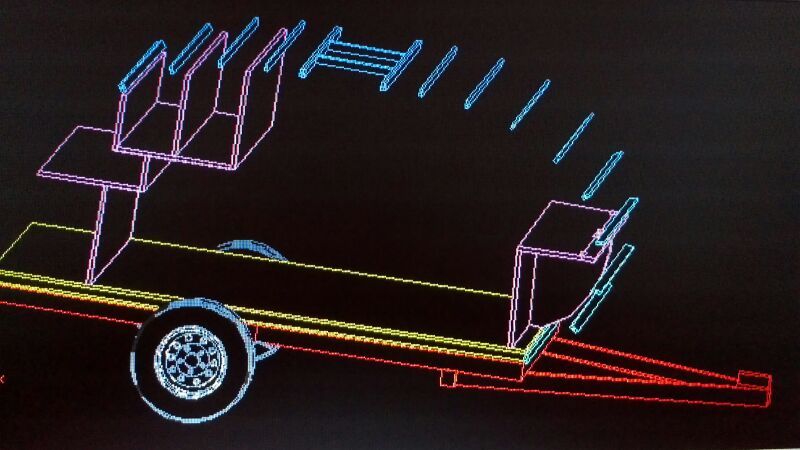
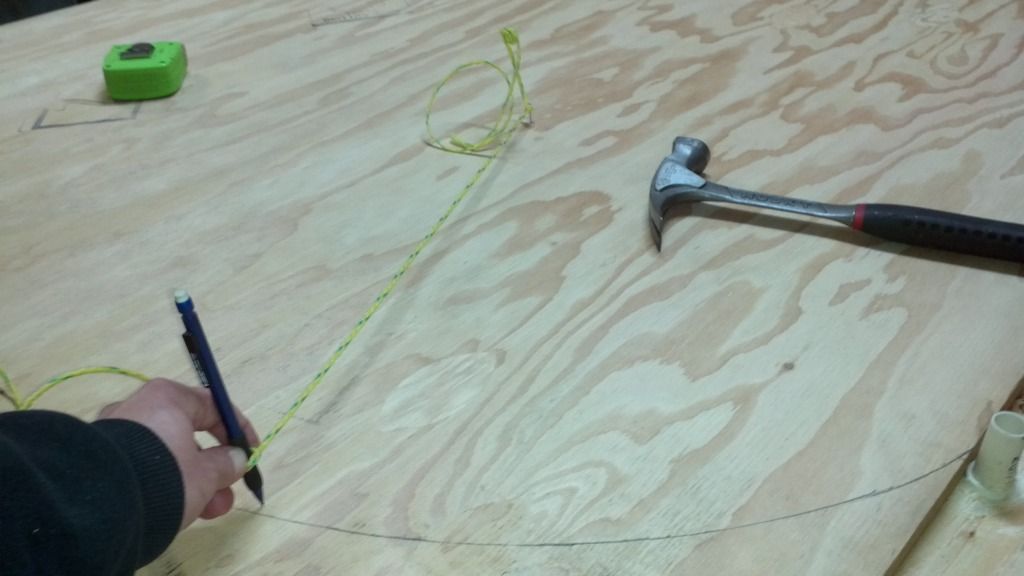
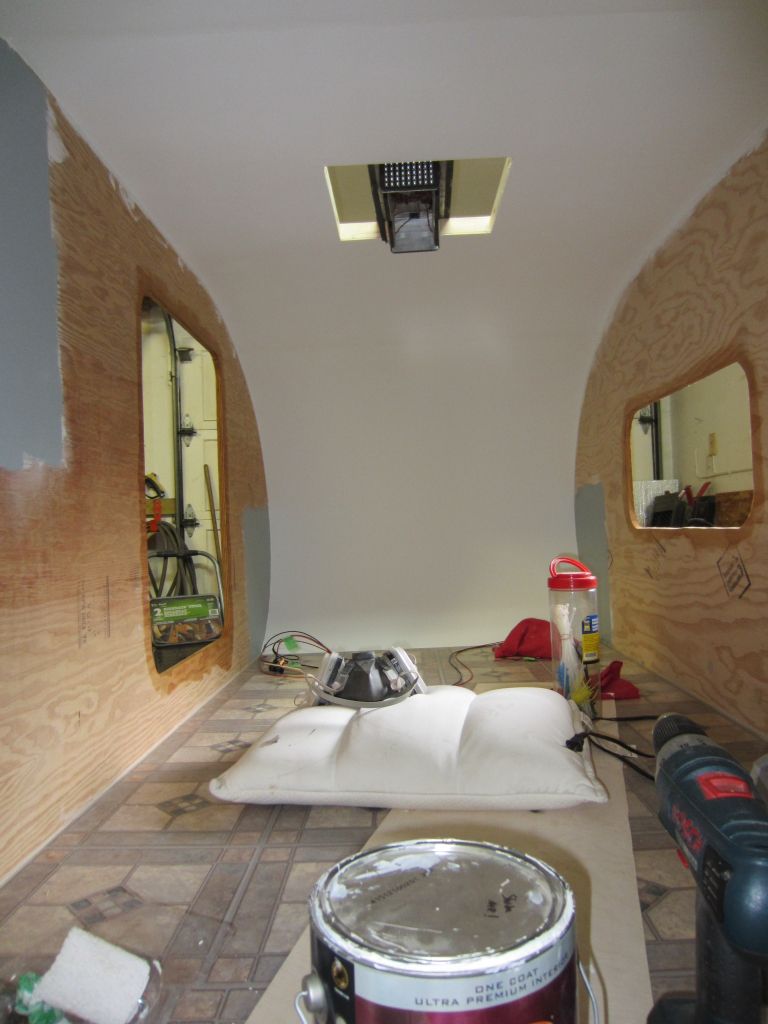
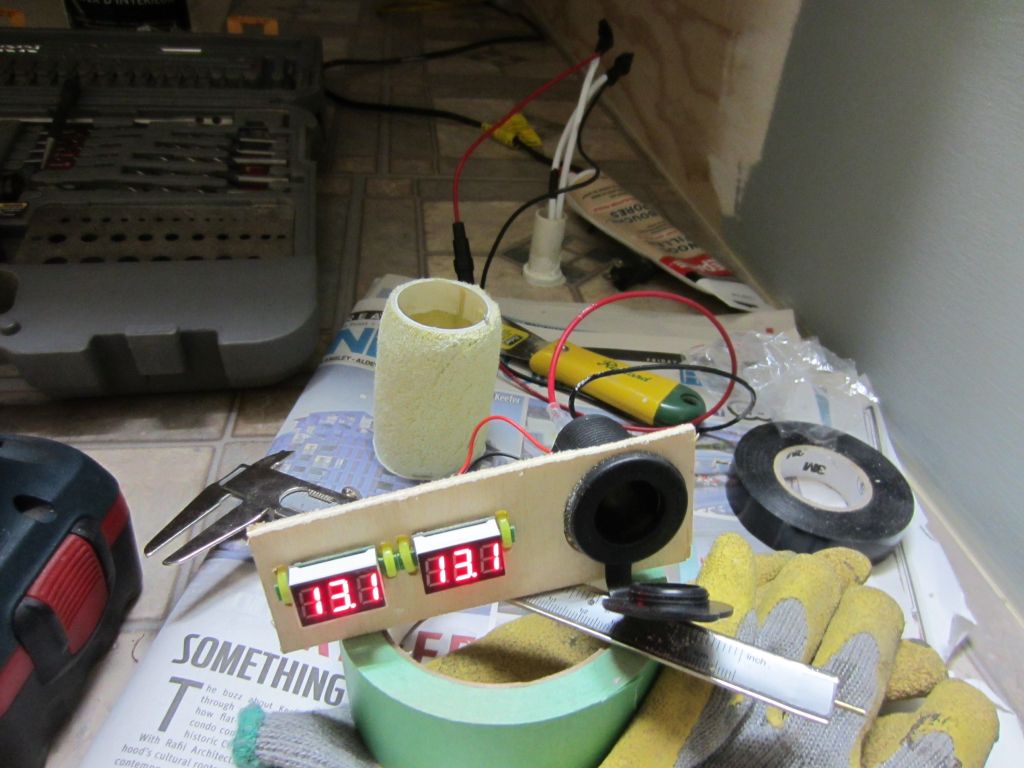
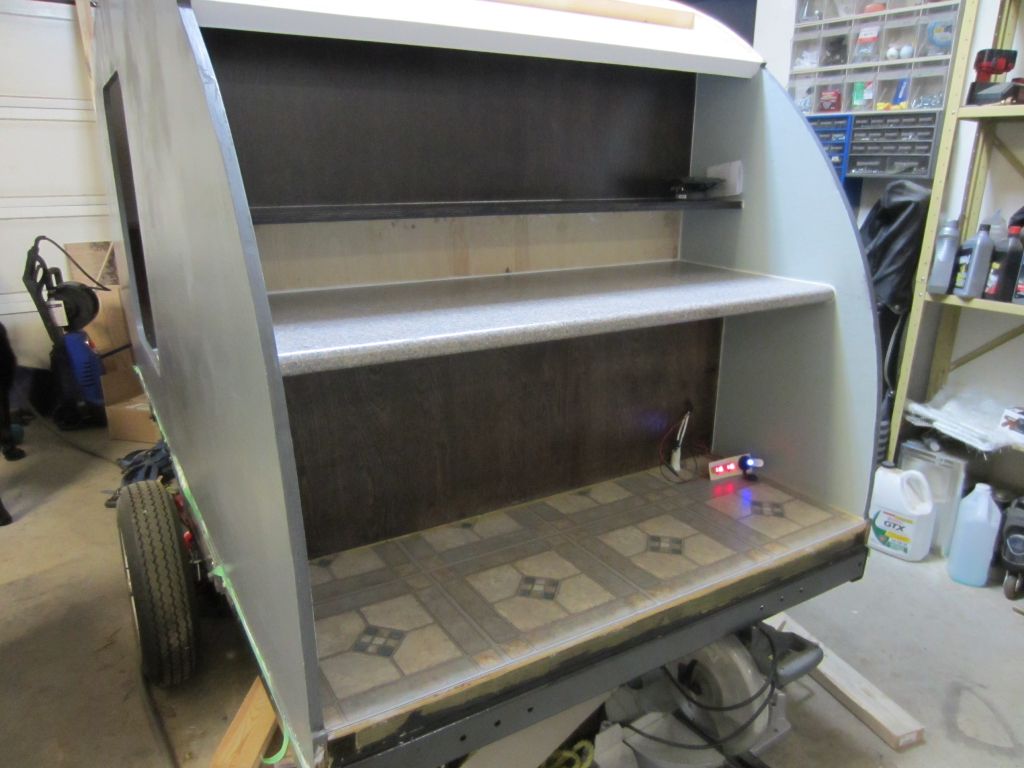
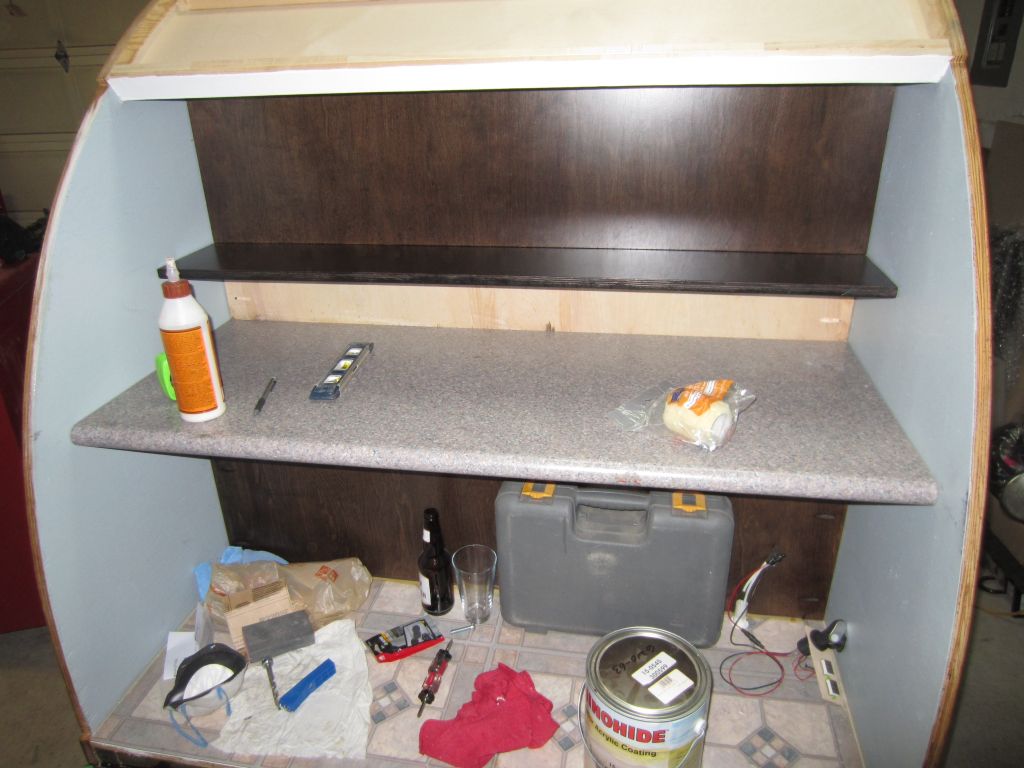
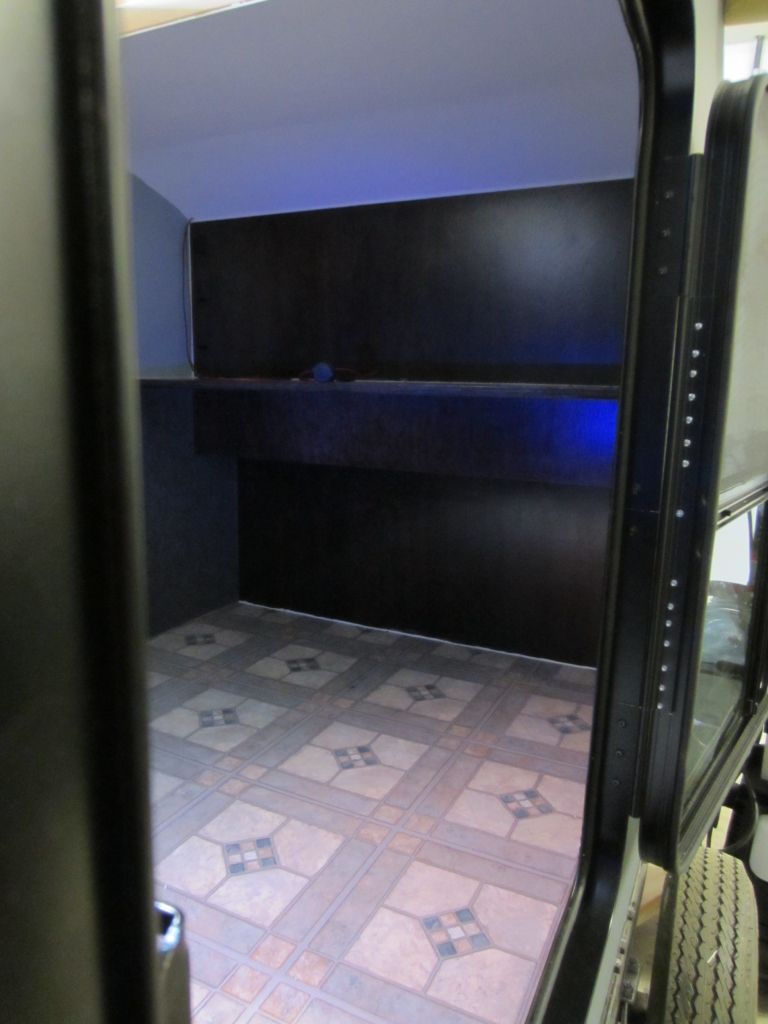
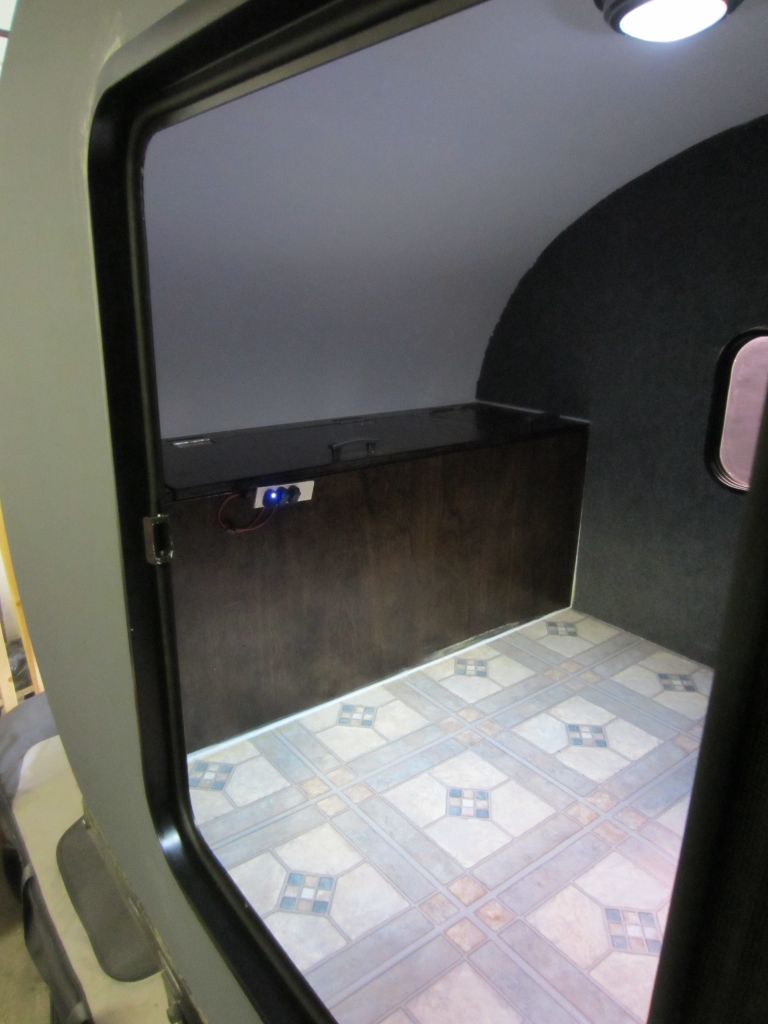
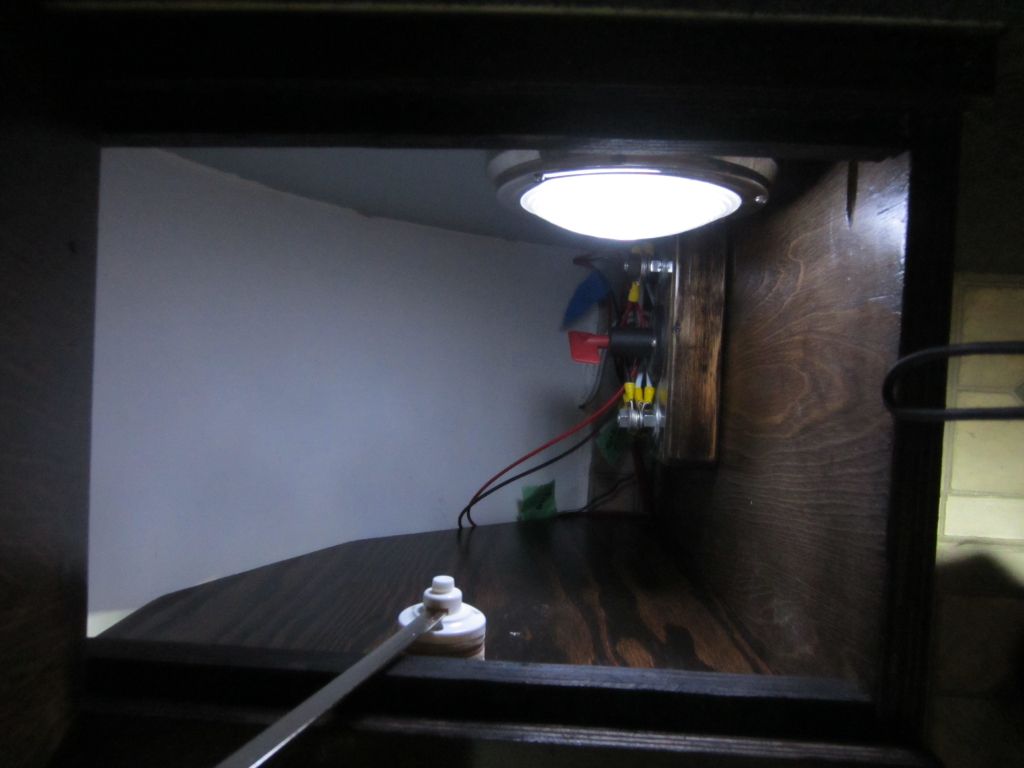
The floor is a sandwich of 3/8" plywood, 2x2s and 2x3s for the frame and 1/2" plywood top. A pvc pipe was run from the front to where the front of the rear cabinet will be so i can run wires from the front electrical cabinet to the rear galley. I used solid insulation which has a r-rating of 5.6 at the 1.5" thickness used. PL400 glue was used and spray foam was used to fill any areas around the PVC tubing as well as where the tubing comes through the floor.

Next steps will be:
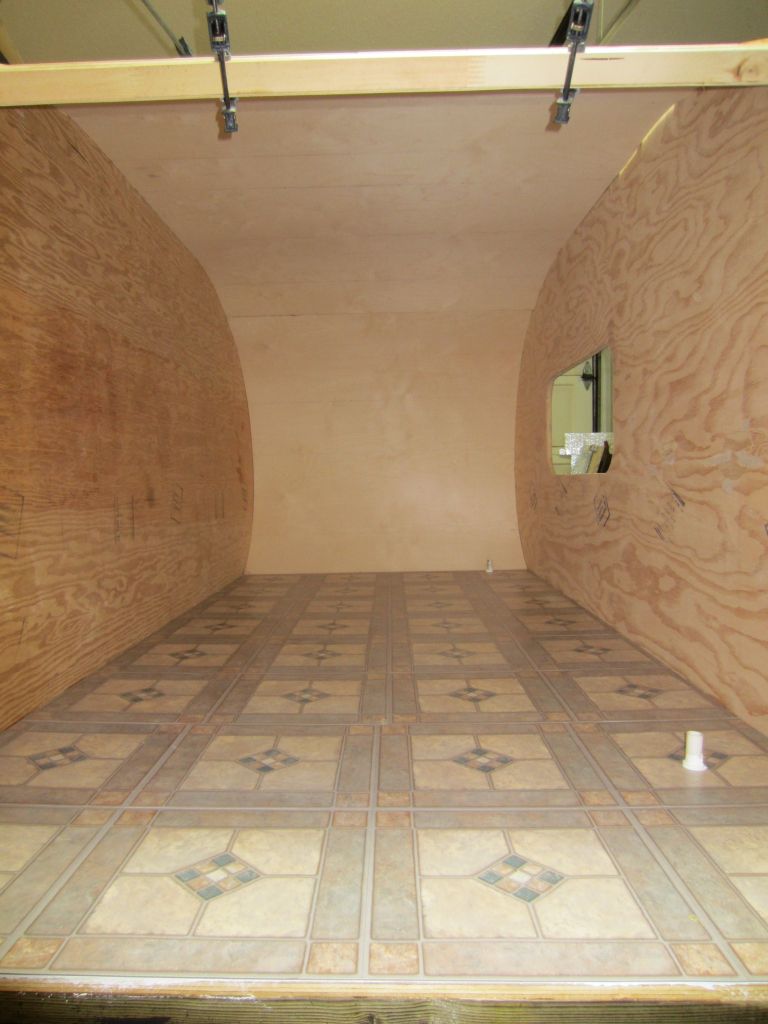
Linoleum cover for the floor
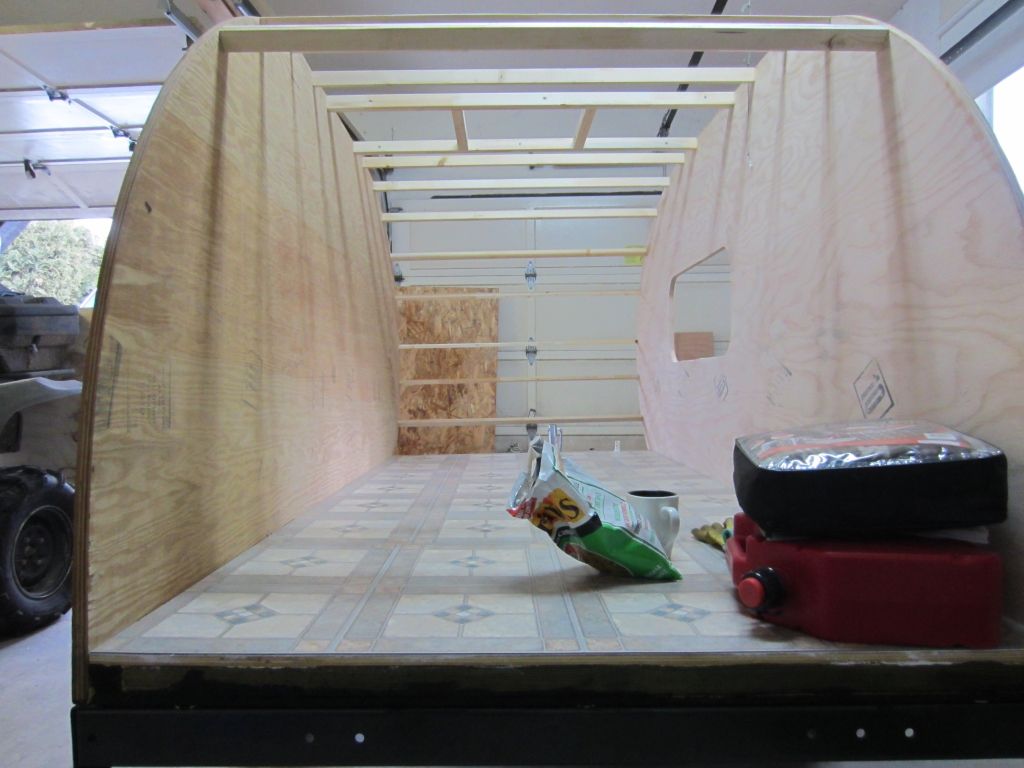
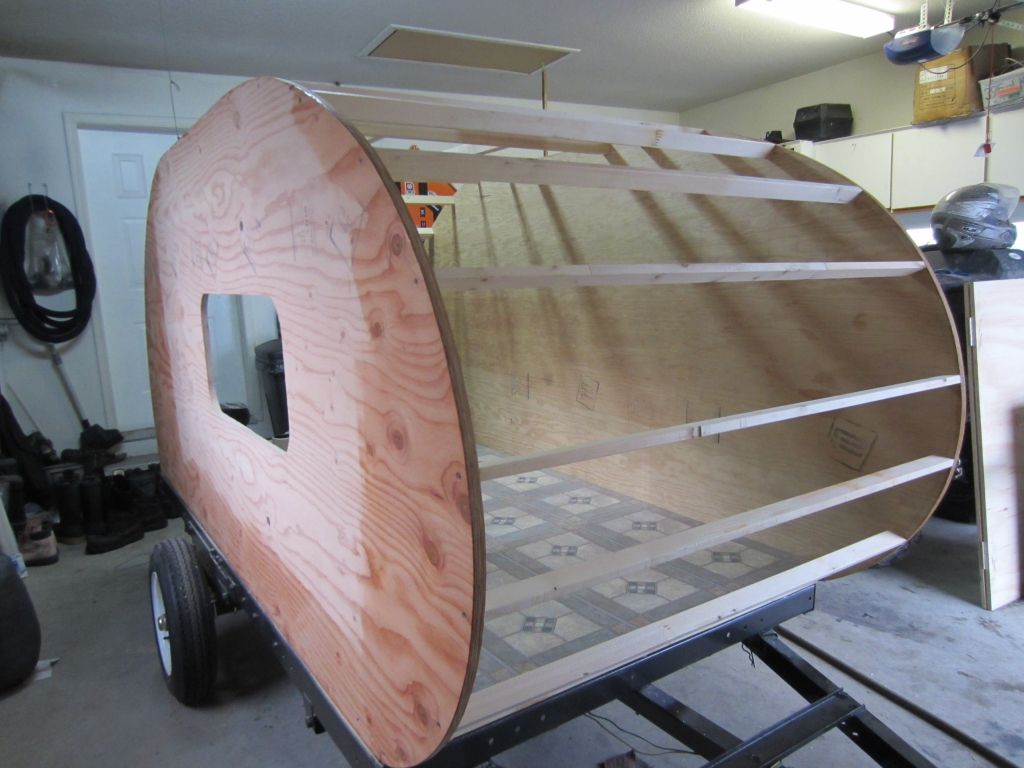
3/4" walls

Enough talk, check out the pictures!! :twisted:

http://www.noah5ack.wordpress.com
Last edited by apaka on Mon Dec 17, 2012 3:06 pm, edited 1 time in total.
apaka
Teardrop Inspector
 
Posts: 12
Joined: Thu Oct 11, 2012 1:46 pm
Location: canada

Re: Noah5 Ack! *floor finished*

Postby Irmo Atomics » Wed Nov 28, 2012 5:57 am

I like the tongue extension, that's a good upgrade. What's the profile going to look like?
Bob
User avatar
Irmo Atomics
Teardrop Master
 
Posts: 195
Images: 64
Joined: Tue Jul 10, 2012 4:58 am
Location: South Carolina

Re: Noah5 Ack! *floor finished*

Postby Junkboy999 » Wed Nov 28, 2012 10:48 pm

I second that, work on the tongue. My used teardrop need that done to it.

Keep up the good work.
User avatar
Junkboy999
1000 Club
1000 Club
 
Posts: 1259
Images: 52
Joined: Fri Jul 06, 2012 9:18 pm
Location: Wichita, KS
Top

Re: Noah5 Ack! *floor finished*

Postby apaka » Sun Dec 02, 2012 3:35 am

For the $35 + hardware cost, the tongue ext is a very cost effectiveupgrade for these trailers IMHO.

Here's a shot of where I'm at for the shape and basic cabinet layout
Image
apaka
Teardrop Inspector
 
Posts: 12
Joined: Thu Oct 11, 2012 1:46 pm
Location: canada
Top

hey a wall!

Postby apaka » Mon Dec 17, 2012 1:41 am

Image
Finalised the layout and shape of everything, you can see I've framed for the fantastic fan we plan to use

Image
view of the trailer with the skin on

Image
a shot of my high accuracy layout tool as I was laying out my wall design on the 4x10 plywood.

Image
last but not least a shot of the first cut wall proper up! Pretty cool to see it take shape!!

Image
I even got to test out my new kreg drill jig making a stand for the wall, works great!
apaka
Teardrop Inspector
 
Posts: 12
Joined: Thu Oct 11, 2012 1:46 pm
Location: canada
Top

Re: Noah5 Ack! *floor finished*

Postby droid_ca » Mon Dec 17, 2012 2:37 pm

Welcome apaka to the forum Where in BC are you from We have a new TearJerkers club started ask Brian for more details I'm sure when he sees this build he will send you the info...I like hoe you decided to build your profile sting and a pen looks like it works good I might have to try that for some of my ideas Good Tip ...an't wait to see more of this build...And welcome to the forum
There is a world, just beyond now,
where reality runs a razor thin seam between fact and possibility;

Anywhere I roam where I lay my head is home....
Image
“Fide Canem”
Please check out my build thread
viewtopic.php?f=5&t=52816
User avatar
droid_ca
Donating Member
 
Posts: 1981
Images: 176
Joined: Thu Sep 30, 2010 5:08 am
Location: Prince George BC Canada
Top

Re: Noah5 Ack! *floor finished*

Postby apaka » Mon Dec 17, 2012 3:45 pm

droid_ca wrote:Welcome apaka to the forum Where in BC are you from We have a new TearJerkers club started ask Brian for more details I'm sure when he sees this build he will send you the info...I like hoe you decided to build your profile sting and a pen looks like it works good I might have to try that for some of my ideas Good Tip ...an't wait to see more of this build...And welcome to the forum


Thanks for the welcome :)

I was wondering if there is any local teardrop clubs actually, I live out in langley
apaka
Teardrop Inspector
 
Posts: 12
Joined: Thu Oct 11, 2012 1:46 pm
Location: canada
Top

Re: Noah5 Ack! Build Log

Postby apaka » Tue Dec 18, 2012 1:25 am

Definitely fell in live with my new belt sander tonight, this just wouldn't have been possible without it.

Image
I stenciled the sanded wall onto the other piece of plywood

Image
I cut out the shape with the other finished piece aside then clamped them back together to sand

Image
Wall shapes complete!
apaka
Teardrop Inspector
 
Posts: 12
Joined: Thu Oct 11, 2012 1:46 pm
Location: canada
Top

Re: Noah5 Ack! Build Log

Postby apaka » Sun May 05, 2013 11:22 am

Been a long time since I've updated this unfortunately but I can assure you my progress hasn't ceased. The interior is finished and it felt great to actually finish a section of the trailer completely. Here's some pics over a couple posts to organize it a bit better.
Image
We used self adhesive tiles from home depot to cover the floor. They are incredibly durable, I have dripped all sorts of paint, glue and solder on the floor and it seems nothing really adheres to it, well, pl400 seems to but that stuff sticks anything together! $1.13 / sq ft

Image
Image
I got incredibly motivated one evening and put the walls up, by myself...what a feat that was!!

Image
Image
The ceiling went in a lot easier than I expected. I had my gf on the other side applying pl400 between the joists and the ceiling and checking that I was tight between the surfaces. My new staple gun was absolutely essential here and filling the staple holes wasn't to difficult, filling between the segments on the other hand....brutal! So much sanding and it's still not perfect. I'm a bit of a perfectionist and I still reached the point of "good enough"

Image
Two coats of primer and two coats of ceiling paint and she's done! The ceiling paint is always fun to use cause it looks like you're painting your ceiling pink!!

Image
Really taking shape at this point. During this painting time I also sketched the locations of the cabinets inside and primed and painted the walls a nice blue that I had laying around the garage.
apaka
Teardrop Inspector
 
Posts: 12
Joined: Thu Oct 11, 2012 1:46 pm
Location: canada
Top

Re: Noah5 Ack! Build Log

Postby apaka » Sun May 05, 2013 5:08 pm

Image
Image
I started the wiring including running the low gauge wire through the floor to the rear of the trailer. In these pictures you can see the master power shutoff and power distribution block as well as the test panel I made to test my new voltage gauges and one of my 12v outlets.

Image
This is stain I decided to use. Two coats on all of the cabinets and I've used 3 cans up to this point.

Image
This is one of the cut cabinet pieces. For the cabinets I bought a sheet of 3/4" cabinet grade plywood. It was only $30 and it has some cool grain patterns on it, I just had to be very careful cutting it because it chips very easily with the saw since its just a veneer.

Image
Image
Image
Image
Couple in progress then the final result pictures of the front cabinets. The smaller cabinet is the electrical cabinet and the bigger cabinet is a linen closet of sorts. The hinges are all recessed into the surface which proved to be difficult with plywood but I managed. All said and done including finishing touches I easily have 60 hours into this cabinet :frightened:

Image
Image
Rear hatch area finished. I'm not worried about the drawers and what not currently. I'm more concerned with getting the trailer campable then I can concern myself with the smaller details such as those.

Image
The countertop I found on craigslist for $25. I had to cut it to size obviously as it was an oval shape prior but it worked out great and I couldn't be happier with the color.

Image
Image
Image
Image
Here you can see the sides painted. It's an acrylic enamel and is quite resistant to abrasion, which I've tested numerous of times, accidentally, and can happily say it holds up well. The walls have 2 coats of cpes, two coats of exterior undercoat primer and two coats of the rhinohide.
apaka
Teardrop Inspector
 
Posts: 12
Joined: Thu Oct 11, 2012 1:46 pm
Location: canada
Top

Re: Noah5 Ack! Build Log

Postby apaka » Sun May 05, 2013 5:31 pm

So I finally worked up to something I was really dreading. I decided to carpet the walls for a couple reasons, insulation and reduction of condensation...plus I figured it would give it a nice homey feel.

Image
I used this glue, it was $7 and it worked amazingly, bought at home depot. I used both glue and staples for installation so I could stretch the carpet as I went. The carpet, which is just indoor/outdoor carpet I bought on sale at home depot, was cut down the the basic rectangular shape then all the the curved sections I had to cut actually in the trailer.

Image
Image
Door ordered from Http://www.teardroptrailerparts.com . Great selection and excellent shipping costs. He has a lot of things I couldn't find elsewhere for very reasonable prices. Site was a great find, thanks to tnttt for the suggestion!

The silicon around the door is because I cut my radii too large so I sprayfoamed, shaved the foam down then covered any porous surface with silicon. The rest of the door has good seal surface to the walls and the silicon is paintable so I'll just touch up the paint once I've finished caulking

Image
Rear shelving

Image
Headboard and front cabinet

Image
Linen cabinet

Image
Electrical cabinet. I've mounted a 12v ceramic heater and one of my voltage gauges in here too, I'll have to take a pic one day

Image
The three bottoms layers I had from making a bed in the back of my Tacoma, so I just cut them down...and the thicker upper layer my roommate got for me for free!!

Image
Ah

I still need to complete the roof, the hatch itself and the trailer wiring. The only thing that holding me back is the debate if the hurricane hinge is really worth the extra $40 from a piano hinge with a rubber gasket :thinking:
apaka
Teardrop Inspector
 
Posts: 12
Joined: Thu Oct 11, 2012 1:46 pm
Location: canada
Top

Re: Noah5 Ack! Build Log

Postby apaka » Fri May 10, 2013 7:04 pm

So I had planned on using a fantastic fan 8000 series but I was browsing Craigslist yesterday and stumbled on a killer deal for a brand new in box rv fan, for $60! I looked into the model number for this fan and I was surprised to see that it is a top of the line model!! Being that its half the price of the fan I was planning on getting this means I can now reasonably purchase a hurricane hinge for the hatch! Pretty pumped about this find honestly. Ill be picking it up in an hour, hope everything goes ok. :D

Image
apaka
Teardrop Inspector
 
Posts: 12
Joined: Thu Oct 11, 2012 1:46 pm
Location: canada
Top

Re: Noah5 Ack! Build Log

Postby Oldragbaggers » Fri May 10, 2013 8:00 pm

Very nice!! I like it, and it looks like you did it without breaking the bank.
Life is sooooo good.........
Sail...camp....bike...repeat
Becky

Build Journal http://www.tnttt.com/viewtopic.php?f=50&t=45917
Visit our blog at http://www.oldragbaggers.com
Image Image
User avatar
Oldragbaggers
Gold Donating Member
 
Posts: 1842
Images: 331
Joined: Mon Aug 01, 2011 9:22 pm
Location: Essex, MD
Top

Re: Noah5 Ack! Build Log

Postby apaka » Thu Jun 06, 2013 9:32 am

Ugh, this roof insulation is proving to be quite the challenge. I've cut all the pieces and I've kerfed the backs of the pieces that need to bend but I'm having difficulty figuring a way to hold them in the curved shape while the adhesive dries. I tried using duct tape but it just doesn't hold it down well enough. Any suggestions? Its 1.5" pink hardboard insulation.

I guess my other issue holding me back would be motivation. My winter project has now pushed into summer and its almost discouraging. On a positive note I ordered the hatch hinge and seal as well as the aluminum edge trim. Got all of those from lil bear for a very respectable price.
apaka
Teardrop Inspector
 
Posts: 12
Joined: Thu Oct 11, 2012 1:46 pm
Location: canada
Top

Re: Noah5 Ack! Build Log

Postby Oldragbaggers » Thu Jun 06, 2013 5:51 pm

Apaka, I totally get what you are feeling right now. My project that I started in the fall of 2011, and figured to be camping in by summer of 2012, was just completed last weekend. I can't even tell you how often I wallowed in that "this is NEVER going to be done" feeling. But if you just keep taking things one at a time and doing them....it will be done eventually and you can't let it hinder your resolve just because it won't be as quick as you thought it would be.

There is at least 1 build on this forum that took 3 years, and several others I have seen that took 2 years (including mine). I know there are people out there who can knock these things out in a couple of months, but I have to think that they either:

1.) have no intentions toward or expectation of a real high quality build, but just want to knock something together that will keep their head dry, or

2.) they have very good skills and lots of experience so that they plan things very well, have the right tools, know the fastest and most effective techniques and make few mistakes.

If you don't fit easily into one of those groups I think you can expect it to take a little (or a lot) longer. It's obvious you are going for a high quality build, and doing a great job of it, and really you've gotten a lot of very good work done in a short period of time, so cut yourself some slack, loosen up your deadline and just enjoy the process.

For all the frustration along the way, the two years spent building when I could have been camping (or boating, or traveling, or biking) and the hindsight that I could have easily bought a nice tear (and probably even a small travel trailer) for less than I spent, now that it is over I am still happy I did it because I have a very well built, attractive, custom teardrop that will last my lifetime and gives me a great sense of accomplishment and pride. Will I ever do it again? Highly unlikely!!

:lol: :lol: :lol: :lol:

Oh... and I used the 1-1/2" hard pink foam in the roof everyplace except around the hardest front curve. There I used two layers of 3/4" styrofoam with the foil backing. It is very flexible.
Life is sooooo good.........
Sail...camp....bike...repeat
Becky

Build Journal http://www.tnttt.com/viewtopic.php?f=50&t=45917
Visit our blog at http://www.oldragbaggers.com
Image Image
User avatar
Oldragbaggers
Gold Donating Member
 
Posts: 1842
Images: 331
Joined: Mon Aug 01, 2011 9:22 pm
Location: Essex, MD
Top

Next

Return to Build Journals

Who is online

Users browsing this forum: No registered users and 7 guests

cron