Here's my van from Scratch!Aussie Style.

...ask your questions in the appropriate forums BUT document your build here...preferably in a single thread...dates for updates, are appreciated....

Here's my van from Scratch!Aussie Style.

Postby lukeyslide » Fri Jan 04, 2013 9:32 am

Hello Everybody,

Well this has been along time coming. I have been a member for awhile in the back ground obsorbing all the information I can from the wonderful members on this site regarding building teardrops and tiny travel trailers. I wanted a van that was 10feet long or 3 metres which slid out each end to a 18 footer. Hence user name lukeyslide. Sleeps 4 , has A/C, slide out kitchen eating inside,independent ALKO brake axle and is most of all light to tow. Over 18months of research and seeing how vans in Australia are made anyone with some idea could easily do it. Well close to it. So I decided have a go and do it ,abit the design has changed over these 18 months went to a fold out and now is a full size van 4.1 metres, sorry if its too big but you guys are really the only site out there that do this:). To make the van Light and quick to assemble Iam going to use MONOPAN for the walls floor and roof. 4.5kg per square metre not sure what that is in pounds but its very light and strong.

I have had many people tell me that why am I bothering and that it or I can't do it but I going to give it ago and hopefully come out on top with a van that is strong, light and best of all I built from scratch.

Here goes
Image
Not cad but after down loading the ones on here it was easier to use something from high school, grapics. Size has since changed by 300mm or 12inches

Image
Steel for chassis

Image
Mock placing

Image
Tacks
Image
Started to weld

Image
check square

Image
level( on jack stands don't know how I pulled that off)

Image
Some of my welds
Image
Image
Image
Image
I'l call that square.
Image
Out riggers for wall supports.
Sorry for the photo bomb!
lukeyslide
Teardrop Builder
 
Posts: 29
Joined: Wed May 11, 2011 5:35 am
Location: Brisbane, Australia

Re: Here's my van from Scratch!Aussie Style.

Postby Woodbutcher » Fri Jan 04, 2013 9:47 am

WOW, nice job. I guess this was not your first welding job! Welcome , and it will be fun to follow along with your trailer build.
User avatar
Woodbutcher
Platinum Donating Member
 
Posts: 4191
Images: 45
Joined: Fri Mar 10, 2006 10:01 pm
Location: Chicago Suburbs

Re: Here's my van from Scratch!Aussie Style.

Postby lukeyslide » Fri Jan 04, 2013 9:56 am

Thanks so much. I did welding at High school in tec studies 12 years ago but my current boss says I can't weld. So I did after hours catch up class over 5 nights to get back into it and if the teacher thought I was capable of doing it then I'l buy a welder and practice, practice, practice. So I did and it seems to have worked out. Building the chassis from scratch was the daughting part I have never done this before.Just needed to confidence to do so thanks to my wife. Looking forward to giving updates.
lukeyslide
Teardrop Builder
 
Posts: 29
Joined: Wed May 11, 2011 5:35 am
Location: Brisbane, Australia
Top

Re: Here's my van from Scratch!Aussie Style.

Postby lukeyslide » Fri Jan 04, 2013 5:30 pm

Thanks. Iam still pinching myself, all this planning and Iam finally putting it into motion. I'l try and put as many photos as I can. Last night Photobucket kept dropping out which is quite frustrating.

Cya Lukey
lukeyslide
Teardrop Builder
 
Posts: 29
Joined: Wed May 11, 2011 5:35 am
Location: Brisbane, Australia
Top

Re: Here's my van from Scratch!Aussie Style.

Postby Shadow Catcher » Fri Jan 04, 2013 5:56 pm

As a long time weld inspector on everything from the space shuttle to logging equipment, I gotta say ya done a good job, I have seen pro's whose welds did not look as good.
User avatar
Shadow Catcher
Donating Member
 
Posts: 6008
Images: 234
Joined: Sat Apr 11, 2009 8:26 pm
Location: Metamora, OH
Top

Re: Here's my van from Scratch!Aussie Style.

Postby Heifer Boy » Fri Jan 04, 2013 7:08 pm

Hey Lukey. Nice to see another Aussie on this site and looking forward to following your build. Do you have any sketches of your final design? A slide-out camper sounds really cool and I'm interested in how you are planning to join the monopan panels together. I've had a breif look at it but being a wood and epoxy guy I can't get my head around it. I'm sure you will be showing how it all comes together so keep up the photos and stories. Good luck :thumbsup:

HB
Heifer Boy
Teardrop Builder
 
Posts: 38
Joined: Mon Feb 28, 2011 1:51 am
Location: Woolamia, NSW
Top

Re: Here's my van from Scratch!Aussie Style.

Postby KCStudly » Fri Jan 04, 2013 7:56 pm

I have to agree with Shadow Catcher, you welds look really good. I'm a little surprised that you did not grind or flap wheel sand the paint off first. Paint and other coatings make for very nasty fumes while welding and can cause contamination (tho it did not appear to do the later for you).

Nice work! :thumbsup: Keep up that enthusiasm, the best way I have found to do that is to put in lots of hours and post lots of pic's. We love da' pics! :thumbsup:
KC
My Build: The Poet Creek Express Hybrid Foamie

Poet Creek Or Bust
Engineering the TLAR way - "That Looks About Right"
TnTTT ORIGINAL 200A LANTERN CLUB = "The 200A Gang"
Green Lantern Corpsmen
User avatar
KCStudly
Donating Member
 
Posts: 9640
Images: 8169
Joined: Mon Feb 06, 2012 10:18 pm
Location: Southeastern CT, USA
Top

Re: Here's my van from Scratch!Aussie Style.

Postby lukeyslide » Sat Jan 05, 2013 8:51 am

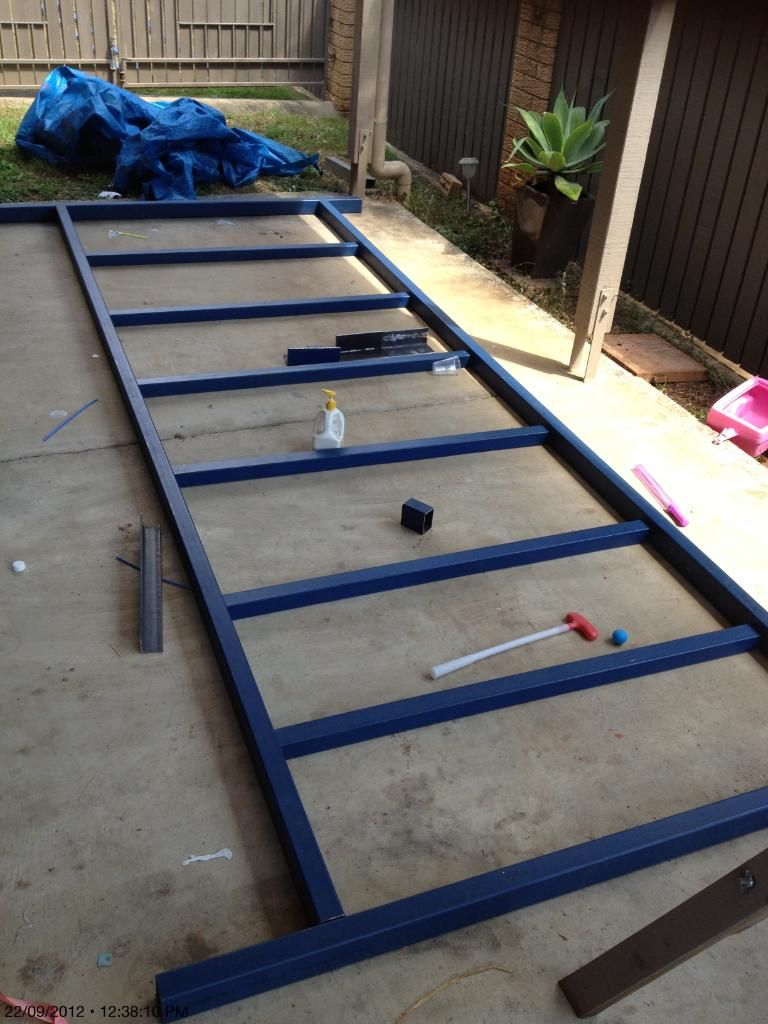
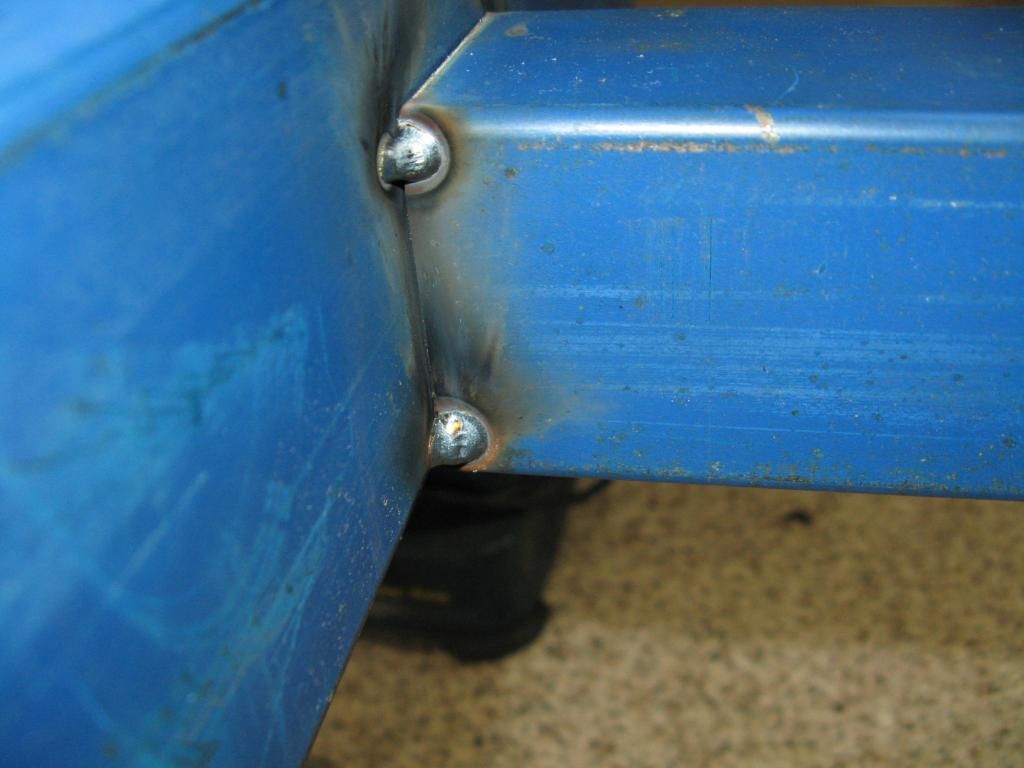
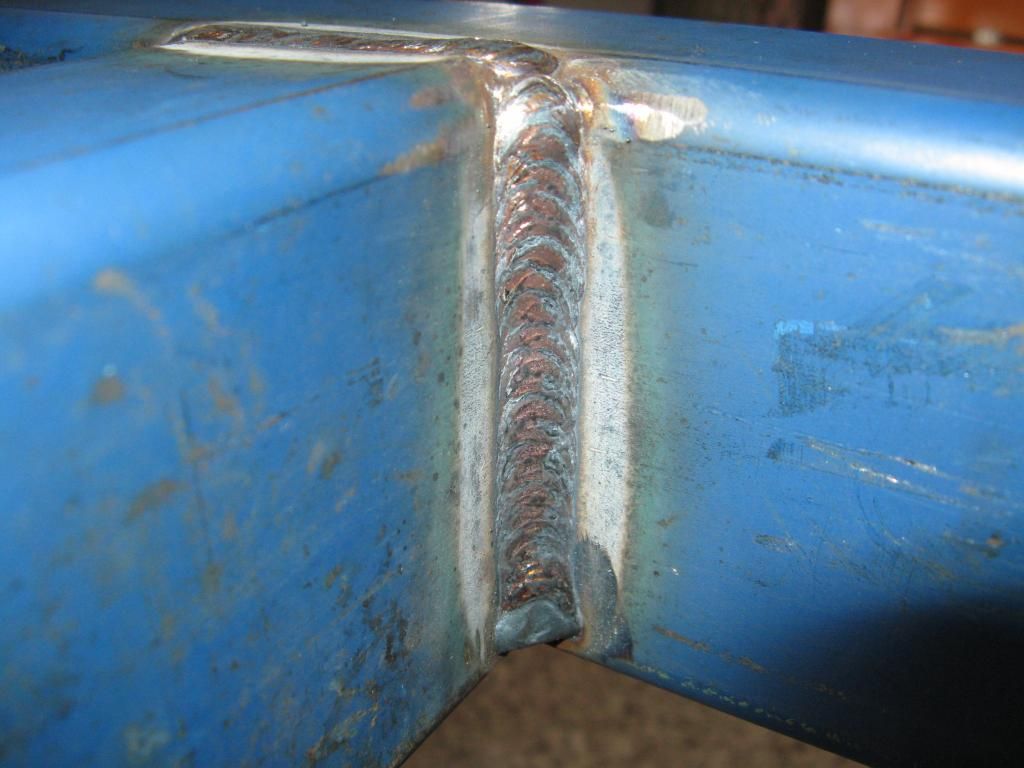
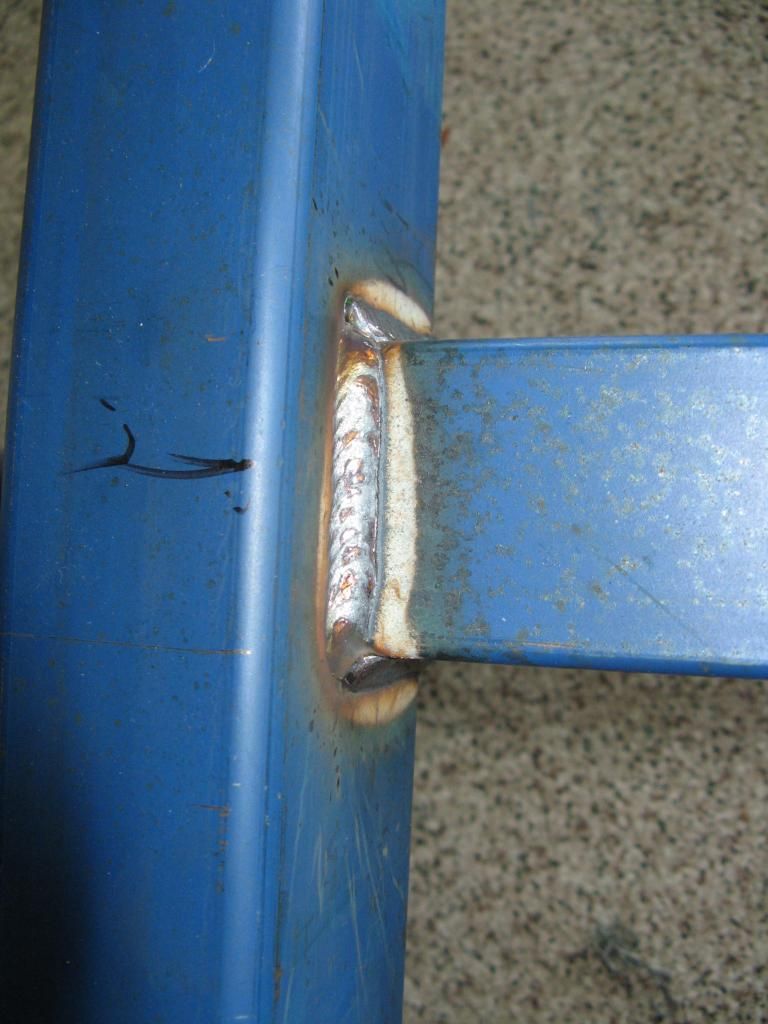
Shadow Catcher wrote:As a long time weld inspector on everything from the space shuttle to logging equipment, I gotta say ya done a good job, I have seen pro's whose welds did not look as good.


Well I was not expecting that reply, that means so much thankyou Shadow Catcher.I might look at changing jobs on that response. :D
Heifer Boy wrote:Hey Lukey. Nice to see another Aussie on this site and looking forward to following your build. Do you have any sketches of your final design? A slide-out camper sounds really cool and I'm interested in how you are planning to join the monopan panels together. I've had a breif look at it but being a wood and epoxy guy I can't get my head around it. I'm sure you will be showing how it all comes together so keep up the photos and stories. Good luck :thumbsup:

HB


Thanks Heifer Boy :) 
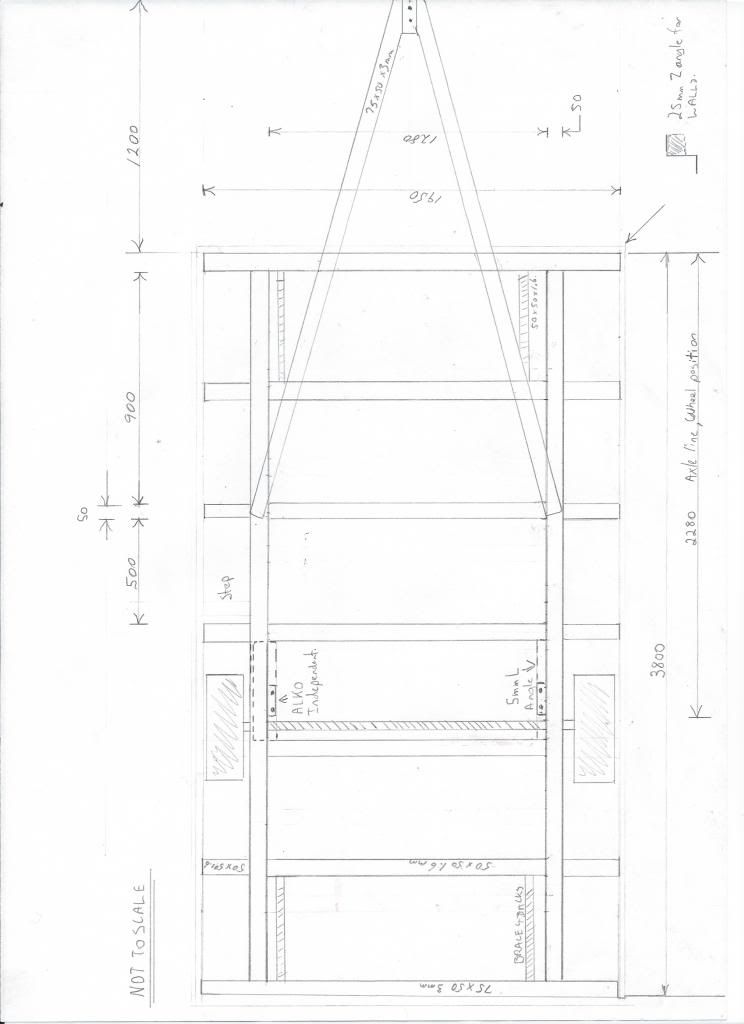
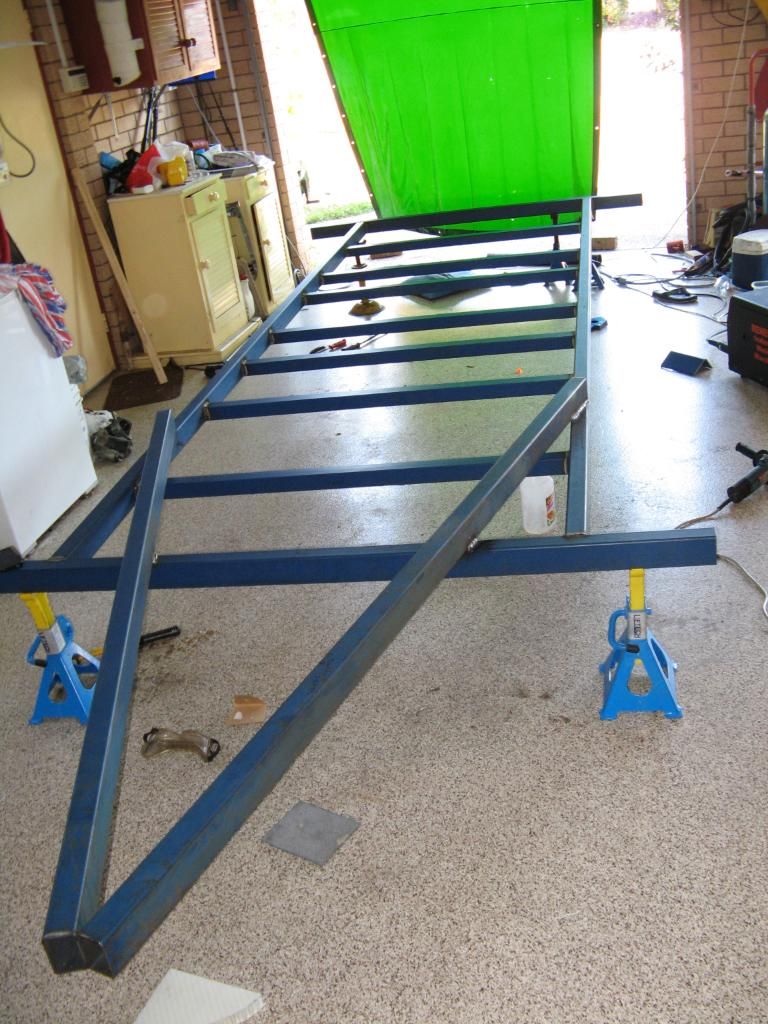
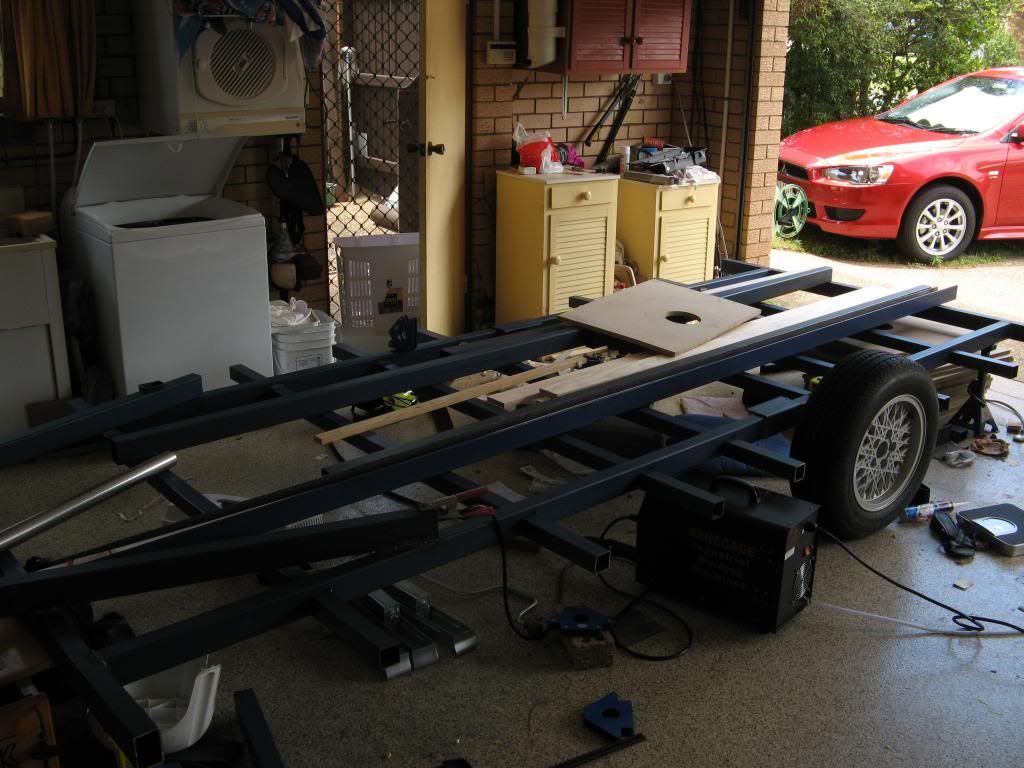
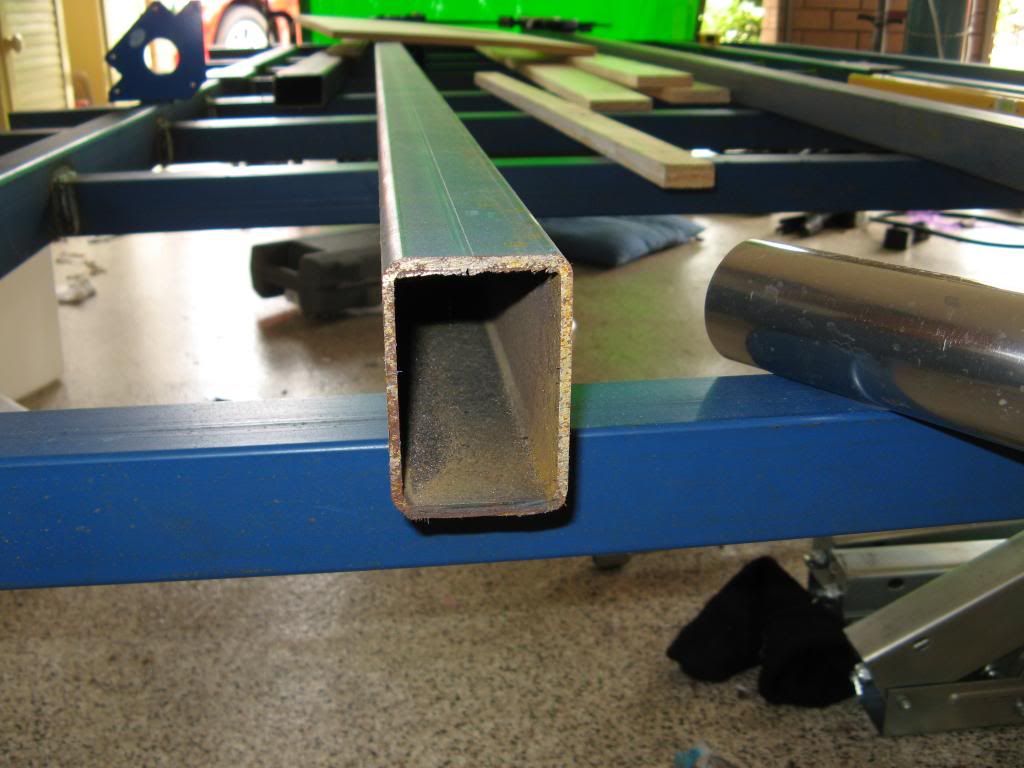
There are a few of us popping up. I have a few rough drawings but I keep changing my mind. Go with the simple shape or a bit more complex. It can bent and shaped into many ways.Being the first one I don't want to stuff up the profiles and experiment with the monopan as it could be expensive. I may not have explained myself fully. I have designs/ides for slide out/fold out but its a bit too much considering this is my first build. The kitchen on the other hand will slide out from under the bed.Joining methods well there are many wayshttp://www.monopan.ca/about/ I'l be using there special glue,aluminum angle and rivets they supply. The rivets can hold some amazing weight the best ones 1400n pull out. I have some friends who have been there done that on another site and it seemed to work well. Its not a common product so it has been hard to get info. I was considering http://www.Vanglass.com.au but Monopan seems easier to use.I did look at the tried and true method of wood but weight, time and life span has lead me to the later.I must keep remembering to take photos. Once the mask is on its head down bum up.

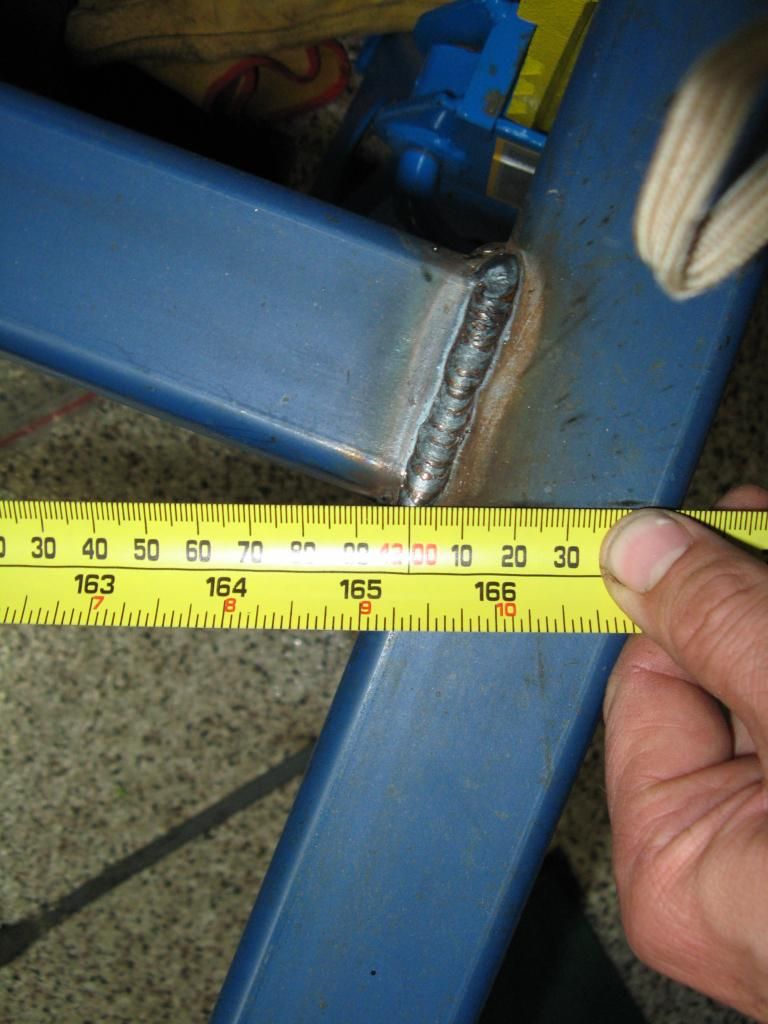
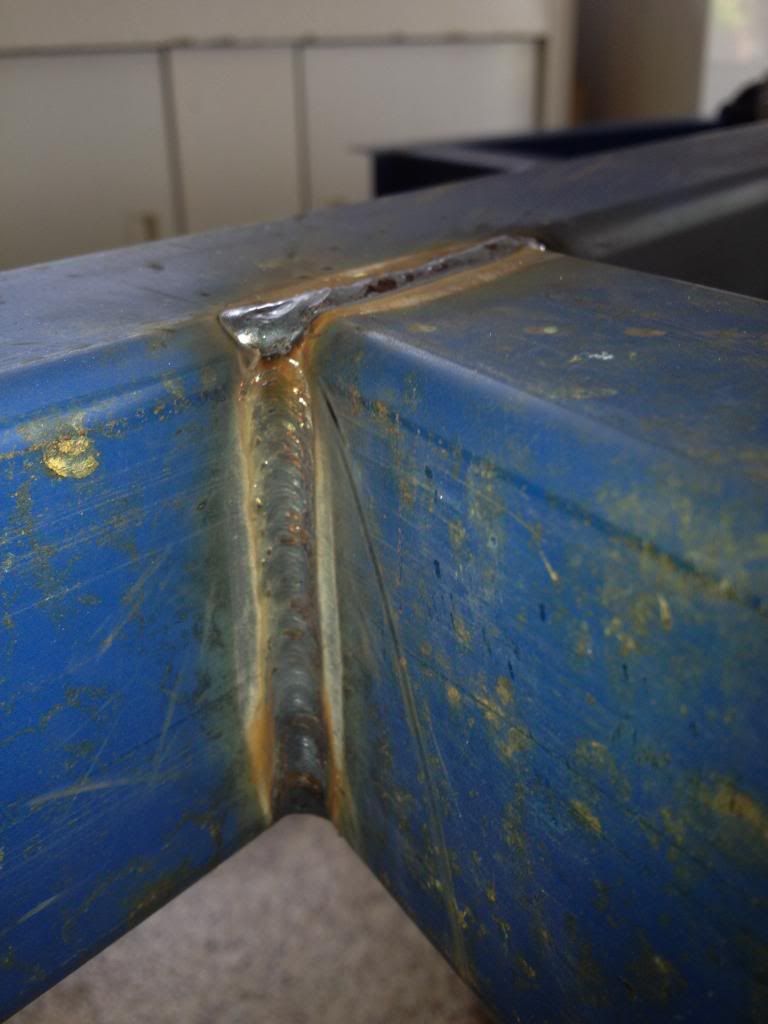
KCStudly wrote:I have to agree with Shadow Catcher, you welds look really good. I'm a little surprised that you did not grind or flap wheel sand the paint off first. Paint and other coatings make for very nasty fumes while welding and can cause contamination (tho it did not appear to do the later for you).

Nice work! :thumbsup: Keep up that enthusiasm, the best way I have found to do that is to put in lots of hours and post lots of pic's. We love da' pics! :thumbsup:


Thanks KCStudly my head is not going to fit through the door anymore. ;) 
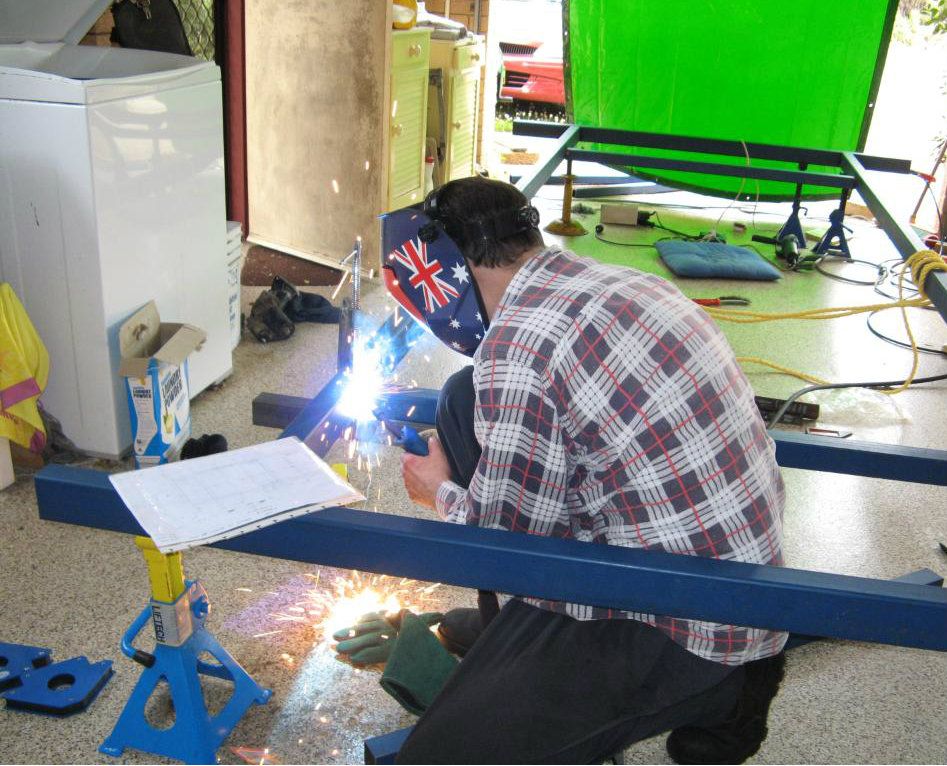
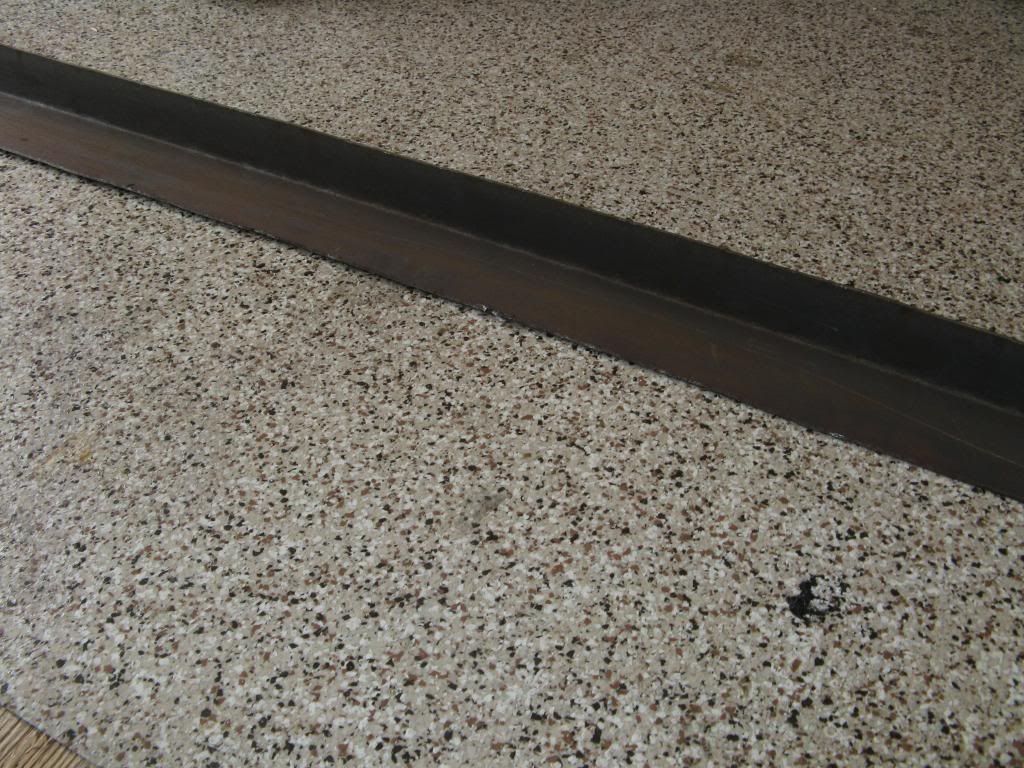
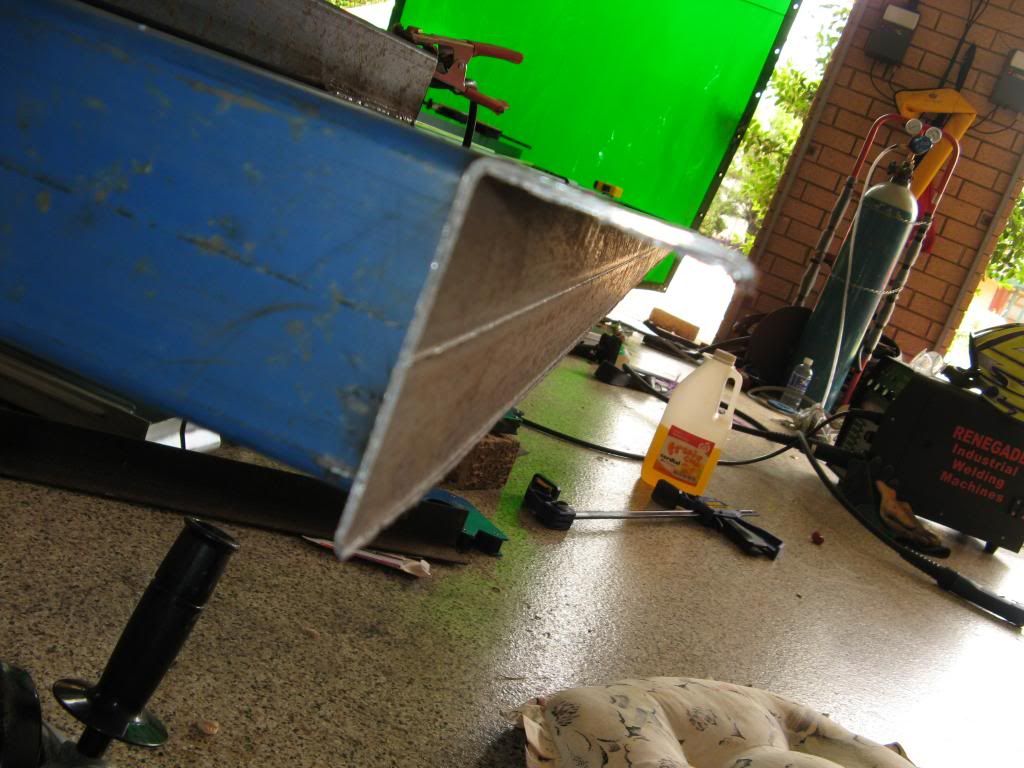
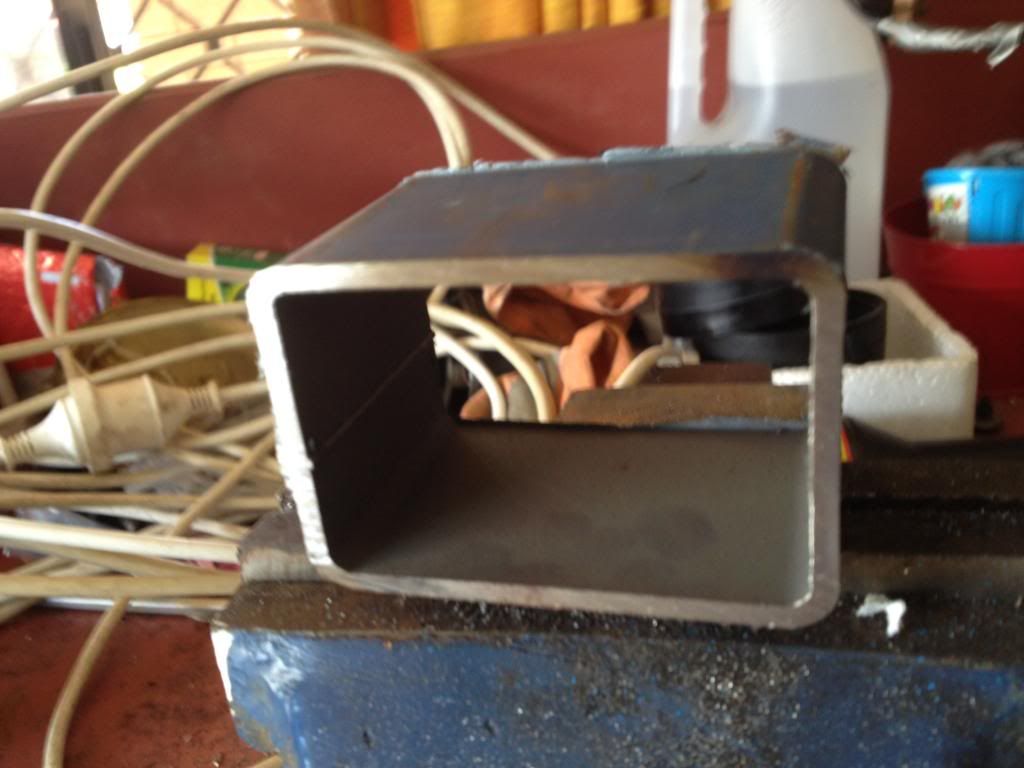
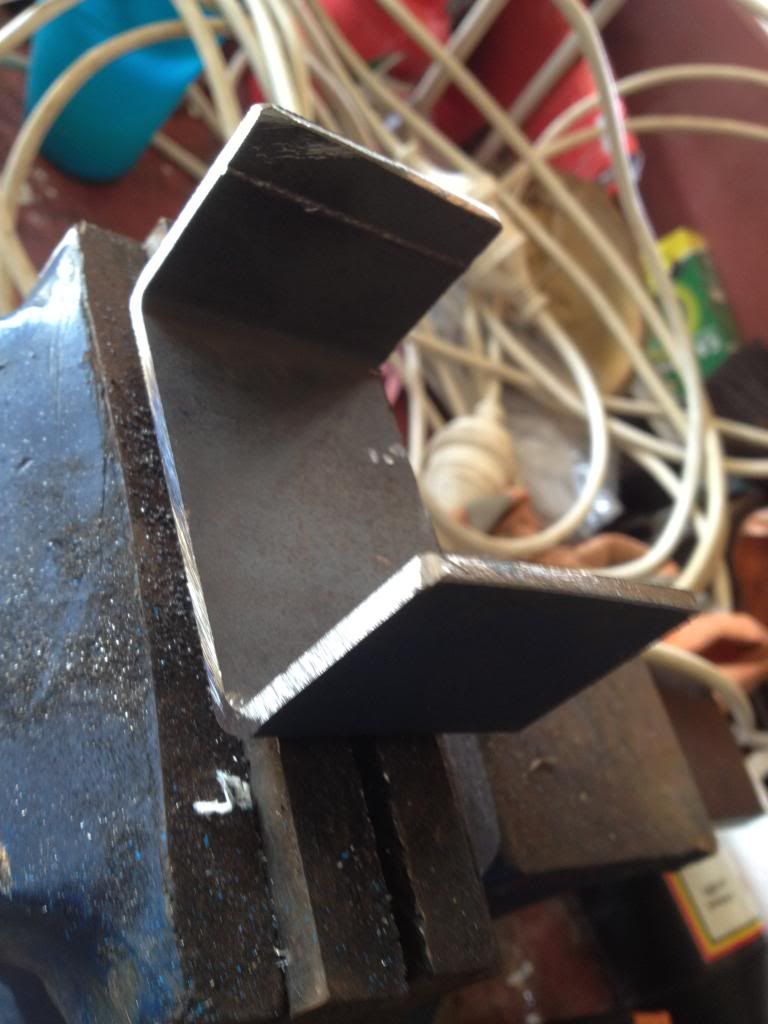
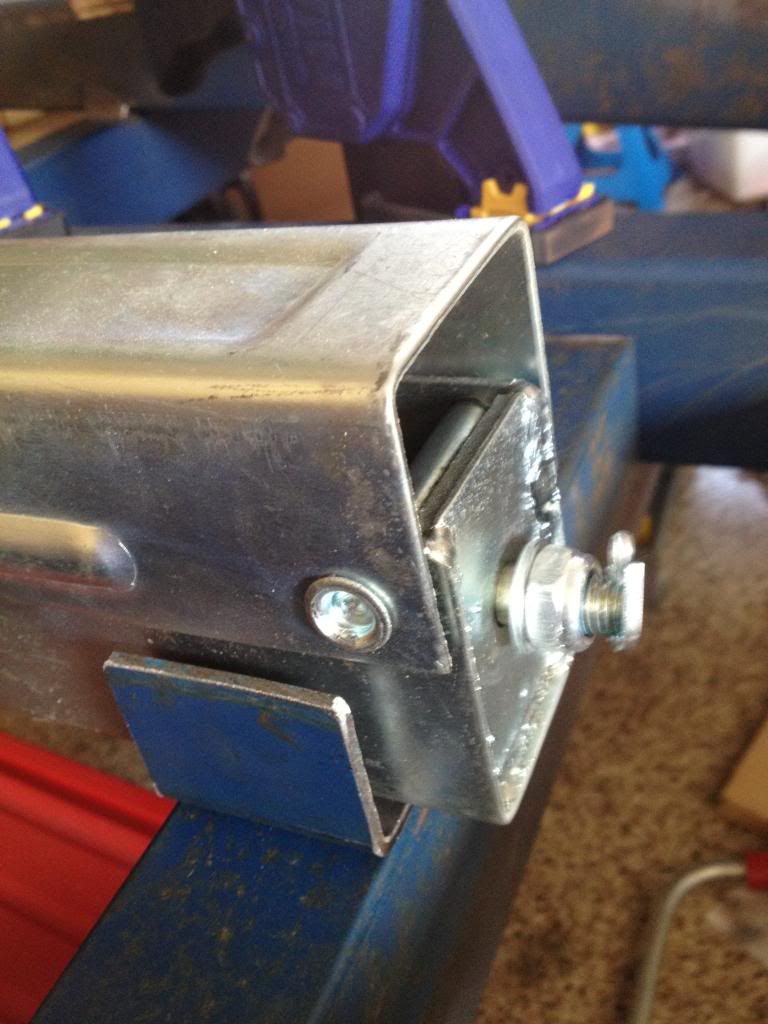
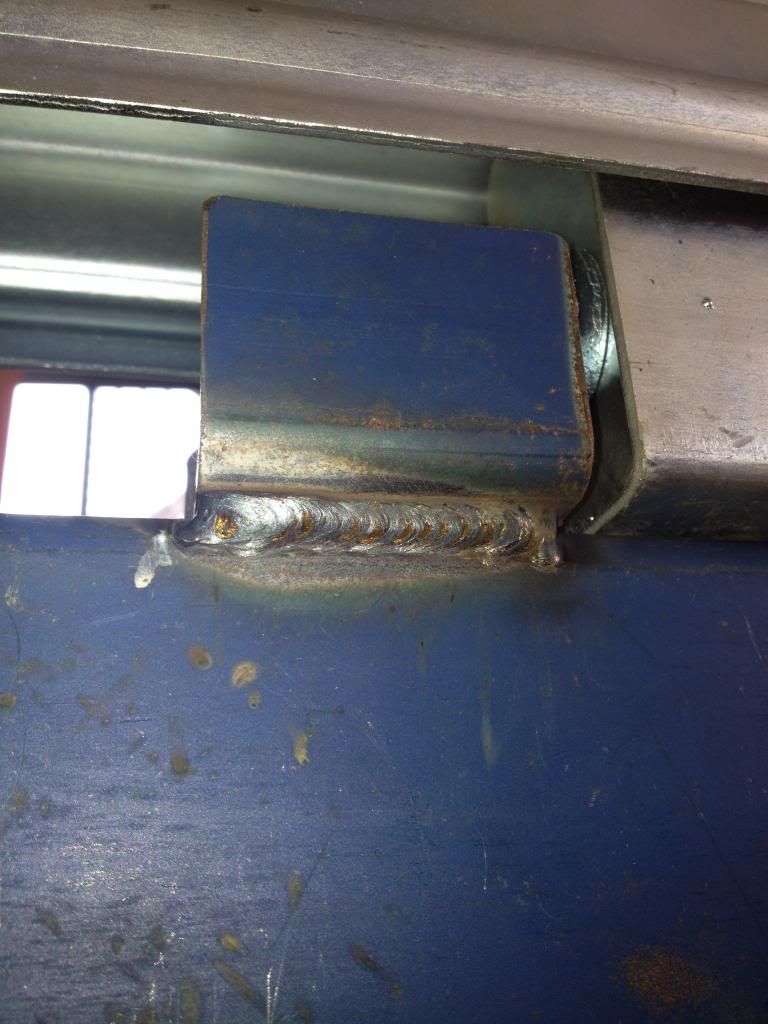
The grinding I see your point. I did a bit of looking around and the paint is special, made for welding and grinding is not needed. That is what the supplier said anyway. I did ask a fabricator on what to do which was like getting blood out of a stone. Anyway he said takes too long and if a dirty flap or grinder is used it can contaimentate the weld. I also found with practice blue painted verse bare was easier to weld as I could see the heat line better so I knew to slow it down or speed it up to get better penetration into the metal. This is evident with the white lines either side of the weld.Hours, I would love to put in more hours and photos.I'l try my best.There are more photos to come just take so long to upload. I have spent about 7-8 days so far from start to now over the last couple of months.Just have not had the time to start this thread. November and December have been so busy. But family first, toys later. Though once built it will be more family time in the van.

Cya Lukey
Last edited by lukeyslide on Wed Jan 16, 2013 1:48 am, edited 1 time in total.
lukeyslide
Teardrop Builder
 
Posts: 29
Joined: Wed May 11, 2011 5:35 am
Location: Brisbane, Australia
Top

Re: Here's my van from Scratch!Aussie Style.

Postby lukeyslide » Sat Jan 12, 2013 6:50 pm

Here's some more progress. Iam going to mount the walls off to the side of the van not on top of the floor. I want to hide the RHS and seal it at the same time. It is dear to buy 75mm X 30mm angle so to fix that I used my demo saw, one of the most useful tools I have and cut a 75 x 50 x 2 RHS to form two 90 degree angles. I did however cut the wrong side of the rectangle so instead of a 75mm coverage on one side its more like 73, due to the curve of the RHS.But once welded when the chassis is flipped it won't be noticed and also hidden behind the walls. Once I cut the RHS it did twist so using 4 of those quik grips, tape measure and level it all came back into shape

Image
Start with this.

Image

Image
end up with this

Image

Image
My Alko axle and wheels
lukeyslide
Teardrop Builder
 
Posts: 29
Joined: Wed May 11, 2011 5:35 am
Location: Brisbane, Australia
Top

Re: Here's my van from Scratch!Aussie Style.

Postby lukeyslide » Tue Jan 22, 2013 5:50 am

Hello again, Here's a little more progress. Corner steadies are normally welded to the chassis but it makes life hard especially if they need maintenance. So to fix I have dececided to bolt them to some brackets like this
Image
Started like this
Image
75mm x50 mm
Image
Cut and file like this
Image
End up like this.
Now to weld into place and then drill the holes for the corner steadies and bolt it up. It may need a couple of washers either to compensate for the gap.

Cya Lukey
lukeyslide
Teardrop Builder
 
Posts: 29
Joined: Wed May 11, 2011 5:35 am
Location: Brisbane, Australia
Top

Re: Here's my van from Scratch!Aussie Style.

Postby pappaw » Tue Jan 22, 2013 12:18 pm

Oh Babby!, that's Sweet!. Nice garage too. :thumbsup:

Cheers :beer:
Image Cheers from Granny, Pappaw, and Cocoa (the Dachshund) Image
pappaw
Teardrop Master
 
Posts: 240
Images: 14
Joined: Mon Nov 22, 2010 12:15 pm
Location: S.W.Ohio
Top

Re: Here's my van from Scratch!Aussie Style.

Postby Junkboy999 » Tue Jan 22, 2013 5:45 pm

Really nice work so far, definitely a build to follow closely.

Only question I have to ask is, …

Does the little misses know you are using her good patio furniture cushions while you are wielding? :R


lukeyslide wrote:Here's some more progress.....

Image
User avatar
Junkboy999
1000 Club
1000 Club
 
Posts: 1259
Images: 52
Joined: Fri Jul 06, 2012 9:18 pm
Location: Wichita, KS
Top

Re: Here's my van from Scratch!Aussie Style.

Postby lukeyslide » Thu Jan 31, 2013 7:44 am

pappaw wrote:Oh Babby!, that's Sweet!. Nice garage too. :thumbsup:

Cheers :beer:


Thanks pappaw. Glad you like it. The Garage well may not be a shed but does me just fine. Its a bit of a mess at the moment sorry for that. :(

Junkboy999 wrote:Really nice work so far, definitely a build to follow closely.

Only question I have to ask is, …

Does the little misses know you are using her good patio furniture cushions while you are wielding? :R


lukeyslide wrote:Here's some more progress.....


Image


Thanks Junkboy999 I'l try and keep the photos and updates coming. Truth be known they are from the bar stools and my wife had told me to throw them out as they we looking too old fashion but I could not help my self and keep a couple for my knees when welding. ;)
lukeyslide
Teardrop Builder
 
Posts: 29
Joined: Wed May 11, 2011 5:35 am
Location: Brisbane, Australia
Top

Re: Here's my van from Scratch!Aussie Style.

Postby lukeyslide » Thu Mar 07, 2013 8:29 am

I have not had much time of late to work on the chassis but here is some progress. I was going to mount the corner steadies on 50x 50 Rhs welded at 90 degrees to the chassis rails and wall support and then the above U brackets welded to them and the corner steadies bolted to the U brackets but after cutting all the 8 pieces I realised it was more then was needed i.e welding and metal. My inital reasoning for it was to have the corner steadies as high as possible under the chassis as the van is low. But it was hard to locate the nut with the crank handle and was not worth all the mucking around for an extra 25mm. So I dececided to weld them to the rails. This brings a problem of upside down welding (well almost upside down welding) so I did a bit of practice and I think it turned out ok.Apart from a weld ( grind and redo) thanks to the hot splatter landing on my arm,bloody hurts its also a mission to upload these photos with photobucket dropping out and sooo slow.
I have also welded the A frame brace in as well.

Image
welded U brackets

Image
A frame cros brace cut pretty close to spot on.

Image
welded in place
lukeyslide
Teardrop Builder
 
Posts: 29
Joined: Wed May 11, 2011 5:35 am
Location: Brisbane, Australia
Top

Re: Here's my van from Scratch!Aussie Style.

Postby Shadow Catcher » Thu Mar 07, 2013 10:15 am

I use weld through paint when I am working on the Saab Sonett restoration and generally unless you are welding galvanized it is no more dangerous than breathing the fumes from the weld rod or wire. Galvanized is dangerous. I only once have seen a welder suing a true respirator with proper filters in all my years of weld inspection and I know from what I used to hauk up after just being around welding it is not good for you. Sucking rubber (respirator) is not fun but seeing what gets caught in the filter made me a believer.
User avatar
Shadow Catcher
Donating Member
 
Posts: 6008
Images: 234
Joined: Sat Apr 11, 2009 8:26 pm
Location: Metamora, OH
Top

Next

Return to Build Journals

Who is online

Users browsing this forum: No registered users and 12 guests