K.I.S.S Teardrop Build (Trying...)

...ask your questions in the appropriate forums BUT document your build here...preferably in a single thread...dates for updates, are appreciated....

K.I.S.S Teardrop Build (Trying...)

Postby IslandStorm62 » Sun May 26, 2013 3:23 pm

Time to start the my TD build, almost. Since this is my first "TD Build" and it is also my first major DIY project (with my brothers help). I am going to attempt to stay within the "Keep It Simple Silly" mind frame.

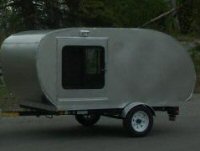
This will be a Benroy design wit ha woody exterior; I'm guessing the term "woody", with respect to TD Trailers, just means no aluminum, FRP or other synthetic exterior is used

I intend on following a lot of the Benroy Generic Plan posted in this forum. Having said that, I must confess that I am already veering left of the plan, since I am going with a HF 4X8 Trailer and also planning on full insulation because I will be using this during the wet, cold winters.

I did have a couple questions on the Benroy Generic Plans:

1 - What is protecting the insulation under the floor (see page 15)?

2 - Is there not enough room between the frame and the tire, so the wall can extend down and conceal the frame (see page 9)? Is it absolutely necessary to shorten the cross members?

Now before continuing I want to thank Woodbutcher for providing that link for the HF Coupon, that provided a big savings. Thank you :beer:

I picked up the trailer and paid $308.00, tax included. Later that afternoon, I went with documentation in hand and had it registered (utility trailer)...too easy.

I then proceeded to inventory the trailer components. I wanted to make sure everything was in order before taking it down to California for the build. It turns out,I was missing major items. Two washers for the hub bearings and the cotter pins for the castle nut to hold the bearings in. Easy enough to buy these items if you knew exactly what they looked like. Personally I could not figure out what a "20 Flat Washer" was or a "4mm Cotter pin"; neither could the HF personnel.

What we wound up doing was removing these items from their floor model; problem solved. Inventory is 100% complete and trailer is repacked and ready for transport to the build site.

I tried to load pictures of the inventory layout, but the files were too large. I will have to figure out how to take pictures that do not have such high resolution. 8)
IslandStorm62
Teardrop Advisor
 
Posts: 90
Images: 13
Joined: Mon May 20, 2013 6:57 pm

Re: K.I.S.S Teardrop Build (Trying...)

Postby Gregdickinson » Tue May 28, 2013 8:22 am

Hello, and welcome. I just started my build also and the name in the build journal is Gypsy Traveler. You can download Photoscape for free and downsize the pics before you load them.
Good luck with your build,
Greg Dickinson
Gregdickinson
Teardrop Inspector
 
Posts: 6
Images: 7
Joined: Mon Apr 15, 2013 6:01 pm
Location: Vineland, NJ

Re: K.I.S.S Teardrop Build (Trying...)

Postby IslandStorm62 » Tue May 28, 2013 11:09 am

Thankyou, I'm not too much into working with Information Technology. More of a lack of interest, as opposed to lack of ability.

However, I found something similar on my Chromebook, that should work. Now let's give 'er a shot: Well, it still did not work. I was able to put them in the gallery. If you click on the image I put a not in the description. When I get to California, I will take a photo of the other items from box 2 and post them.
IslandStorm62
Teardrop Advisor
 
Posts: 90
Images: 13
Joined: Mon May 20, 2013 6:57 pm
Top

Re: K.I.S.S Teardrop Build (Trying...)

Postby Gregdickinson » Tue May 28, 2013 12:13 pm

I know nothing about chrome, but if you download photoscape I would be glad to walk you through it by text! :D
Gregdickinson
Teardrop Inspector
 
Posts: 6
Images: 7
Joined: Mon Apr 15, 2013 6:01 pm
Location: Vineland, NJ
Top

Re: K.I.S.S Teardrop Build (Trying...)

Postby KCStudly » Tue May 28, 2013 3:53 pm

Go here http://www.tnttt.com/viewtopic.php?p=911290#p911290 for help with photos.

It's under "Forum Problems" tab in the blue header up ^^^^ there.
KC
My Build: The Poet Creek Express Hybrid Foamie

Poet Creek Or Bust
Engineering the TLAR way - "That Looks About Right"
TnTTT ORIGINAL 200A LANTERN CLUB = "The 200A Gang"
Green Lantern Corpsmen
User avatar
KCStudly
Donating Member
 
Posts: 9640
Images: 8169
Joined: Mon Feb 06, 2012 10:18 pm
Location: Southeastern CT, USA
Top

Re: K.I.S.S Teardrop Build (Trying...)

Postby IslandStorm62 » Tue Jun 04, 2013 10:40 am

We started assembling the trailer yesterday and made it about 95%. I had to go buy a couple tools; we did not have all the tools we needed Wrenches over 19mm and a 17mm Deep Socket. Not having tools can be a real bummer.

Here's the skinny on the HF Trailers.

1 - Be aware that if you are missing parts or find a damaged part when you start assembling the trailer. Harbor Freights policy is that you are supposed to "Bring the Entire Trailer Package, back to the store..." for them to give you another package.

If you are lucky, the store manager will pull the part from one of there "in store" trailers and swap with you. In either case, they will tell you initially, that you are supposed to bring the entire trailer back for a one for one swap. I was lucky twice 8)

2 - Clean and inspect the hub and bearings. Remove all the factory grease and really inspect the bearings (to include the inside bearings). I did not remove the inside bearing but after cleaning off the grease I was able to see that "one" did not look like the other. This is the only way you will know if the bearings are in good shape.
(See the Pics in my gallery - IslandStorm62)

:? Technically challenged, not able to load picture with post, also was not able to get the url to the picture. Look at "Inside Bearing - Good" and "Inside Bearing - Damaged"

No other damage or missing items noted (BTW the missing washers and 3mm cotter pins were stuffed in the hub under the hub cover).

3 - Low cost and easy to assemble.
Now to finish assembling the trailer.
IslandStorm62
Teardrop Advisor
 
Posts: 90
Images: 13
Joined: Mon May 20, 2013 6:57 pm
Top

Re: K.I.S.S Teardrop Build (Trying...)

Postby Corwin C » Tue Jun 04, 2013 9:51 pm

Image
Inside Bearing - Damaged

Image
Inside Bearing - Good

BTW - Neither one of these bearings look very good to me ... however, metal can be difficult to photograph.
Corwin
Image Image Image
If I am unwilling to stand up straight before the world and admit what I have accomplished during the day, without excuses, in complete and honest detail, then I can do better ...
and no one should be expected to accept anything less.
-- myself
User avatar
Corwin C
500 Club
 
Posts: 916
Images: 78
Joined: Mon Oct 19, 2009 10:27 am
Location: Junction, Piute County, UT
Top

Re: K.I.S.S Teardrop Build (Trying...)

Postby KCStudly » Tue Jun 04, 2013 11:33 pm

I see some residual grease that may be playing into things, and I have to agree that these are not high grade bearings, but, other than that, I don't see a serious problem. What am I missing, and do you have any more information?
KC
My Build: The Poet Creek Express Hybrid Foamie

Poet Creek Or Bust
Engineering the TLAR way - "That Looks About Right"
TnTTT ORIGINAL 200A LANTERN CLUB = "The 200A Gang"
Green Lantern Corpsmen
User avatar
KCStudly
Donating Member
 
Posts: 9640
Images: 8169
Joined: Mon Feb 06, 2012 10:18 pm
Location: Southeastern CT, USA
Top

Re: K.I.S.S Teardrop Build (Trying...)

Postby IslandStorm62 » Wed Jun 05, 2013 8:48 am

If you are referring to your bearings, only you can tell. If you are referring to the pictures of my bearings, the you can see the actual bearing "rollers" in the inside ring of the damaged bearing pic. On the good bearing pic, you cannot see them. What that picture does not capture is how the bearing casing is flared up and out, exposing the actual bearings or "rollers" within the berings.
IslandStorm62
Teardrop Advisor
 
Posts: 90
Images: 13
Joined: Mon May 20, 2013 6:57 pm
Top

Re: K.I.S.S Teardrop Build (Trying...)

Postby IslandStorm62 » Mon Jun 10, 2013 9:46 am

Progress....sort of. We got the exterior walls up with temporary spars. I am/was following the Generic Benroy plans, but due to my/our limited woodworking knowledge/skills everything is not a smooth as I had hoped. But we are getting there, :thinking: one piece at a time.
Attachments
Temp Walls.jpg
Temp Walls.jpg (135.96 KiB) Viewed 1083 times
IslandStorm62
Teardrop Advisor
 
Posts: 90
Images: 13
Joined: Mon May 20, 2013 6:57 pm
Top

Re: K.I.S.S Teardrop Build (Trying...)

Postby IslandStorm62 » Mon Jun 10, 2013 9:50 am

Again, since we are not following the Generic Benroy plans precisely, we are now going figure out where the doors, lights and cabinets should be placed. Here a profile shot.
Attachments
Profile.jpg
Profile.jpg (104.06 KiB) Viewed 1085 times
IslandStorm62
Teardrop Advisor
 
Posts: 90
Images: 13
Joined: Mon May 20, 2013 6:57 pm
Top

Re: K.I.S.S Teardrop Build (Trying...)

Postby IslandStorm62 » Thu Jun 20, 2013 7:52 pm

Finally got the walls setup; unfortunately, we don't know this problem came up. There was a gap between the floor and the wall, right about the center of walls/floor. WE did not notice this when we did the temporary wall setup. The picture shows a clamp pulling the wall to the floor on both sides. Not sure what caused this. Hopefully this will fix the problem.

Anyone else ever had this issue?

In any case, I have to put the project on the side for a couple months...

Thanks to all of you for your comments and asssistance.
Attachments
Closing A Gap.jpg
Closing A Gap.jpg (154.92 KiB) Viewed 967 times
IslandStorm62
Teardrop Advisor
 
Posts: 90
Images: 13
Joined: Mon May 20, 2013 6:57 pm
Top

Re: K.I.S.S Teardrop Build (Trying...)

Postby KCStudly » Thu Jun 20, 2013 11:11 pm

Very common issue.

The bolt together trailers can sag and aren't especially true and welded frames will warp due to the heat of welding.

Your solution is as good as any. Just sink enough screws or bolts along the frame so that the loads are well distributed and the cabin will hold everything straight.

Because the trailer frames are relatively flat they have no triangulation in the vertical axis, whereas the cabin is deep in this direction and can stiffen the frame up true.
Last edited by KCStudly on Sun Jun 23, 2013 7:16 pm, edited 1 time in total.
KC
My Build: The Poet Creek Express Hybrid Foamie

Poet Creek Or Bust
Engineering the TLAR way - "That Looks About Right"
TnTTT ORIGINAL 200A LANTERN CLUB = "The 200A Gang"
Green Lantern Corpsmen
User avatar
KCStudly
Donating Member
 
Posts: 9640
Images: 8169
Joined: Mon Feb 06, 2012 10:18 pm
Location: Southeastern CT, USA
Top

Re: K.I.S.S Teardrop Build (Trying...)

Postby IslandStorm62 » Sun Jun 23, 2013 10:35 am

Well,
Here we are...project on hold for a few months. It was a long, trying and yet very quick 3 weeks. 108426

I put the blue tape to hopefully keep my brothers children of the jungle gym :?

I am in Lacey, WA and my build is in Anaheim, CA.
IslandStorm62
Teardrop Advisor
 
Posts: 90
Images: 13
Joined: Mon May 20, 2013 6:57 pm
Top

Re: K.I.S.S Teardrop Build (Trying...)

Postby IslandStorm62 » Mon Jan 13, 2014 3:10 pm

Hey all, I am preparing to get back to my build. Before leaving my build, I had attempted to install the headliner one sheet of 1/8" Baltic birch. This attempt resulted in the sheet of birch just splitting and breaking; mostly due to my lack of patience. Does anyone have solid advice on how to best install this headliner? Is it reasonable for me to expect this sheet of birch to bend, assuming I develop patience? Or am i going to have to cut it into smaller pieces and just putty the seams?
IslandStorm62
Teardrop Advisor
 
Posts: 90
Images: 13
Joined: Mon May 20, 2013 6:57 pm
Top


Return to Build Journals

Who is online

Users browsing this forum: Bing [Bot] and 11 guests