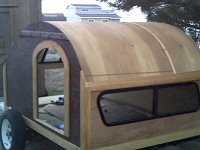
The Sentimental Journey Build

...ask your questions in the appropriate forums BUT document your build here...preferably in a single thread...dates for updates, are appreciated....

The Sentimental Journey Build

Postby wesrmartin » Mon Nov 11, 2013 3:12 pm

Sorry to start documenting in middle of build, but that is the way it had to be this time... :oops: I'll get this stuff figured out eventually...114216
wesrmartin
Teardrop Inspector
 
Posts: 22
Images: 18
Joined: Wed Jun 06, 2012 2:27 pm
Location: Lees Summit, MO

Re: The Sentimental Journey Build

Postby Shadow Catcher » Mon Nov 11, 2013 3:21 pm

Better late than never, is it a stripper?
User avatar
Shadow Catcher
Donating Member
 
Posts: 6008
Images: 234
Joined: Sat Apr 11, 2009 8:26 pm
Location: Metamora, OH

Re: The Sentimental Journey Build

Postby wesrmartin » Mon Nov 11, 2013 3:43 pm

it is
wesrmartin
Teardrop Inspector
 
Posts: 22
Images: 18
Joined: Wed Jun 06, 2012 2:27 pm
Location: Lees Summit, MO
Top

Re: The Sentimental Journey Build

Postby KCStudly » Mon Nov 11, 2013 3:44 pm

Wow! That's a slot of slats! (I said to myself in my best Sylvester the cat impersonation). :lol: :thumbsup: :applause:
KC
My Build: The Poet Creek Express Hybrid Foamie

Poet Creek Or Bust
Engineering the TLAR way - "That Looks About Right"
TnTTT ORIGINAL 200A LANTERN CLUB = "The 200A Gang"
Green Lantern Corpsmen
User avatar
KCStudly
Donating Member
 
Posts: 9640
Images: 8169
Joined: Mon Feb 06, 2012 10:18 pm
Location: Southeastern CT, USA
Top

Re: The Sentimental Journey Build

Postby wesrmartin » Mon Nov 11, 2013 8:20 pm

you ainta kiddin....!
wesrmartin
Teardrop Inspector
 
Posts: 22
Images: 18
Joined: Wed Jun 06, 2012 2:27 pm
Location: Lees Summit, MO
Top

Re: The Sentimental Journey Build

Postby wesrmartin » Wed Nov 13, 2013 1:06 pm

hope this works...found a couple pics wife had taken when the stripping started....ahem. the teardrop's stripping.
114266
114267

used steve Frederick's idea about hatches....think it is brilliant, and hope I did it okay!
wesrmartin
Teardrop Inspector
 
Posts: 22
Images: 18
Joined: Wed Jun 06, 2012 2:27 pm
Location: Lees Summit, MO
Top

Re: The Sentimental Journey Build

Postby wesrmartin » Wed Nov 13, 2013 1:42 pm

front angle view....stripping almost done here....this was about three weeks ago I believe
Image
wesrmartin
Teardrop Inspector
 
Posts: 22
Images: 18
Joined: Wed Jun 06, 2012 2:27 pm
Location: Lees Summit, MO
Top

Re: The Sentimental Journey Build

Postby RAYVILLIAN » Wed Nov 13, 2013 4:44 pm

Wow Wes that's going to be one beautiful TD. How big is it?

Gary
Where ever we raise the hatch is home.
Darn blank states keep getting further away and we keep traveling slower ain't never gona get this map full.
111961Image
User avatar
RAYVILLIAN
Lifetime member
 
Posts: 1434
Images: 109
Joined: Thu Aug 05, 2004 9:33 pm
Location: Rayville MO
Top

Re: The Sentimental Journey Build

Postby wesrmartin » Wed Nov 13, 2013 8:09 pm

Thanks Gary! I just hope its a pretty as I've been dreaming about since I found tnttt! its an old pop-up frame, so 75" wide outside, and I extended it two feet over the frame (lengthwise) to bring it to 12'. (6 need to fit! :shock: ) the hatch circles out another foot, bringing the actual SJ to 13'.
wesrmartin
Teardrop Inspector
 
Posts: 22
Images: 18
Joined: Wed Jun 06, 2012 2:27 pm
Location: Lees Summit, MO
Top

Re: The Sentimental Journey Build

Postby wesrmartin » Wed Nov 13, 2013 9:14 pm

a look at how the inside is shaping up...
the "couch" back hinges down for sitting, and up for second half of bunk
Image

cabinet layout, the slot is for the table top (hinged for storage), bench seats also hinged. old pop frame, had to deal with the wheel wells, figured why not make a bench seat for a table? storage under bench seats just enough for coloring books, paper (remember: 4 munchkins need rainy weather crafts!)
Image

table in slot, legs not attached yet, but just above table slot is a hinged door for crayons and markers, and also conveniently hides electrical shtuff.
Image
wesrmartin
Teardrop Inspector
 
Posts: 22
Images: 18
Joined: Wed Jun 06, 2012 2:27 pm
Location: Lees Summit, MO
Top

Re: The Sentimental Journey Build

Postby wesrmartin » Wed Nov 13, 2013 9:17 pm

and a look at our skylight and fart fan. I mean, fantastic fan.
Image
wesrmartin
Teardrop Inspector
 
Posts: 22
Images: 18
Joined: Wed Jun 06, 2012 2:27 pm
Location: Lees Summit, MO
Top

Re: The Sentimental Journey Build

Postby AlgoDan » Thu Nov 14, 2013 5:25 am

Looking good, also like the skylight...well done.
Here now but Camping later.............Dan

Build Journal
http://www.tnttt.com/viewtopic.php?f=50&t=54681
102535 103199 105576
From .................Paper...........................To.......................... Pavement............................
User avatar
AlgoDan
The 300 Club
 
Posts: 449
Images: 238
Joined: Mon Feb 25, 2013 4:08 am
Location: Ontario, Canada
Top

Re: The Sentimental Journey Build

Postby wesrmartin » Fri Nov 15, 2013 10:03 am

thanks, dan! the skylight is a necessity for us! the kids still get geeked out that they will be able to look at the stars even on the coldest of nights now...or, at least, when its done they will...
wesrmartin
Teardrop Inspector
 
Posts: 22
Images: 18
Joined: Wed Jun 06, 2012 2:27 pm
Location: Lees Summit, MO
Top

Re: The Sentimental Journey Build

Postby wesrmartin » Fri Nov 22, 2013 3:38 pm

hmmmm.....the tongue is coming in at 240 lbs....have NO idea what the trailer is coming in at, but perhaps need to rethink even having a battery....it was going to be up front with converter....i'm not sure about being restricted to electric campsites only. anyone have any creative suggestions? I am definitely open to them! either battery placement, portable batter only for off-grid. All lights and fan are 12 volt. perhaps a genny? guess i'll have plenty of time....winter going to slow this build down, BIG TIME. :cry:
wesrmartin
Teardrop Inspector
 
Posts: 22
Images: 18
Joined: Wed Jun 06, 2012 2:27 pm
Location: Lees Summit, MO
Top

Re: The Sentimental Journey Build

Postby Junkboy999 » Fri Nov 22, 2013 5:04 pm

You said Hatch? So it is going to be a rear kitchen right. Keeping a battery and an AC in the back would help the tongue weight. You will have about 60 - 80 pounds of camping stuff, Food, water, pots, stove in back as well. Without seeing picture of the back and maybe a side drawing it hard to suggest where to place things.

Is that space behind the wheel arch / bench spoken for?

An AC unit can be an item taken out and only used seasonally. My new camper will have a built in AC, but I leaning to having it easily removable. A simple box will replace the hole where the AC went and act asr more storage.

The battery is not an item you would want to take and remove alot. It would be better to leave in so It can charge off tow vehicle while traveling and use when needed. I have seen ( on youtube ) where people made a portable battery box and a solar setup to take when they are camping with out park shore power.
User avatar
Junkboy999
1000 Club
1000 Club
 
Posts: 1259
Images: 52
Joined: Fri Jul 06, 2012 9:18 pm
Location: Wichita, KS
Top

Next

Return to Build Journals

Who is online

Users browsing this forum: No registered users and 14 guests