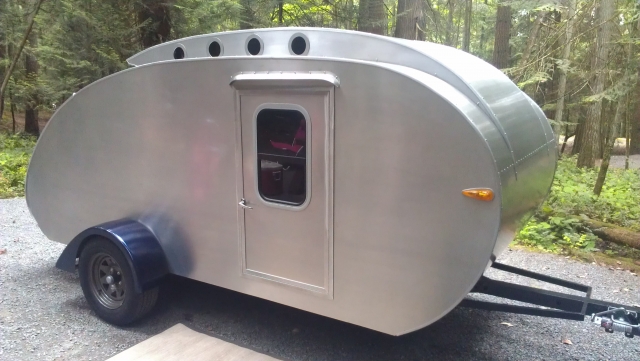
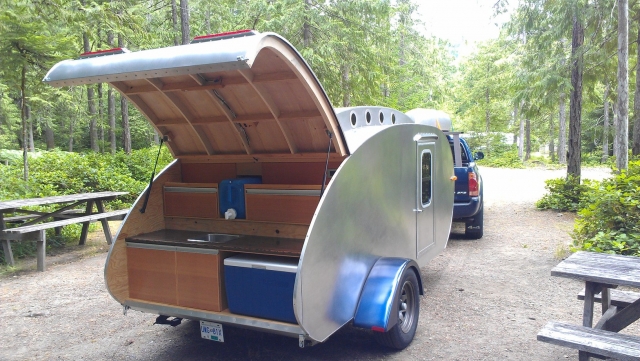
The Aluminati Build

...ask your questions in the appropriate forums BUT document your build here...preferably in a single thread...dates for updates, are appreciated....

Re: The Aluminati Build

Postby SLUG36 » Fri Jul 18, 2014 10:44 am

That is a great looking build. And your build skills are indeed great.
Making big pieces of wood into the wrong size..... for over 30 years....
User avatar
SLUG36
Teardrop Master
 
Posts: 212
Images: 137
Joined: Wed Mar 28, 2012 6:51 am
Location: Sabine/Neches river Delta

Re: The Aluminati Build

Postby jackdaw » Thu Jul 24, 2014 9:47 am

Just seen your Trolley top... and love it ! Very nice build ...nice sliding window in the back too :thumbsup:
User avatar
jackdaw
500 Club
 
Posts: 598
Images: 124
Joined: Fri Feb 22, 2008 2:31 pm
Location: Wltshire, UK

Re: The Aluminati Build

Postby SkookumAJ » Thu Jul 31, 2014 7:56 pm

jackdaw wrote:Just seen your Trolley top... and love it ! Very nice build ...nice sliding window in the back too :thumbsup:

Thanks, Jack!
I must say that, when I was first looking at this site and deciding what to build, I was drawn to your trailers in a major, major way.. The all aluminum skin and trolley top; Yup, that's for me..
As for the rear window, I'm sure that you recognize that.. well you know that imitation is the sincerest form of flattery.. hope you don't mind, but it is brilliant! :wine:
User avatar
SkookumAJ
Teardrop Inspector
 
Posts: 10
Images: 30
Joined: Tue Aug 06, 2013 5:29 pm
Location: Victoria, British Columbia, Canada
Top

Re: The Aluminati Build

Postby Johnysteam » Fri Aug 01, 2014 4:52 am

you've certainly got skills there buddy. What was the highest standing point measuring at, I think some of us could stand in there
User avatar
Johnysteam
Silver Donating Member
 
Posts: 80
Images: 40
Joined: Mon Sep 16, 2013 6:28 pm
Top

Re: The Aluminati Build

Postby SkookumAJ » Sat Aug 02, 2014 3:32 pm

Johnysteam wrote:you've certainly got skills there buddy. What was the highest standing point measuring at, I think some of us could stand in there

Thanks, eh!
It's 55" height inside.. perfect for the 'slouch-stand'..
User avatar
SkookumAJ
Teardrop Inspector
 
Posts: 10
Images: 30
Joined: Tue Aug 06, 2013 5:29 pm
Location: Victoria, British Columbia, Canada
Top

Re: The Aluminati Build

Postby Metalhead » Fri Sep 12, 2014 9:18 am

Man that thing is awesome!!!

New to the forums and getting ready to design my first build, and yours has definitely caught my eye. Is there any way you could post some pics of the bunk you mentioned as a bunk(s) is a primary goal of my build as we will be traveling with 1-2 kids.
User avatar
Metalhead
Teardrop Builder
 
Posts: 39
Images: 7
Joined: Thu Sep 11, 2014 5:01 pm
Top

Re: The Aluminati Build

Postby Atomic77 » Wed Feb 18, 2015 3:50 pm

I would like to see some interior pix. I want to see that ceiling from the inside!
Michael

"The Strength is in the Sum of the Parts..."

The Astroliner

Follow The Astroliner Blog Here!

Check out our YouTube video
User avatar
Atomic77
1000 Club
1000 Club
 
Posts: 1463
Images: 309
Joined: Tue Oct 08, 2013 5:29 pm
Location: Fort Wayne Indiana
Top

Re: The Aluminati Build

Postby Ron Dickey » Sat Jun 13, 2015 11:12 pm

Looks really nice how did you light the galley and the inside of the trailer. do the trolley windows open or just let in light. any curtains or shades for those windows?

Like the shape. welcome to the TT club( teardrop trolley club!!) :lol:

My trolley windows are not in any perfect shape so it is hard to cover. Was going to just use Plexiglass but the warped. Each hole on each side is just a little smaller then the one before on each side. I am going to make it so I can open each of those windows. I often camp near death valley and need the air.

Dose your trolley like Doug's hide the fan? :NC

Ron
121377......134179
Inside almost done--Trolly top has opening windows & roof.doors need assembling--pictured above waley windows..galley 1/3 done
Cross Bow in Build Journals....http://www.tnttt.com/viewtopic.php?f=50&t=54108
User avatar
Ron Dickey
Silver Donating Member
 
Posts: 3074
Images: 711
Joined: Tue Apr 20, 2004 5:56 pm
Location: Central Coast, CA
Top

Re: The Aluminati Build

Postby Wesley25 » Thu Sep 03, 2015 1:31 am

That is amazing. Very well done.
User avatar
Wesley25
Donating Member
 
Posts: 5
Images: 4
Joined: Tue May 19, 2015 3:59 pm
Location: Eagan, Minnesota
Top

Re: The Aluminati Build

Postby dales133 » Thu Sep 03, 2015 4:54 am

Inceridible cladding and trim work
User avatar
dales133
4000 Club
4000 Club
 
Posts: 4605
Images: 1
Joined: Mon Oct 13, 2014 5:26 pm
Top

Re: The Aluminati Build

Postby felixx » Thu Sep 03, 2015 5:11 am

beautiful
felixx
Donating Member
 
Posts: 644
Images: 22
Joined: Sun Nov 30, 2014 3:01 pm
Location: Christchurch, New Zealand
Top

Re: The Aluminati Build

Postby OP827 » Thu Sep 03, 2015 12:51 pm

You did put a lot of effort in it for sure and finished beatifully. You've got skills! :thumbsup: :applause:

I do want to see the interior pictures.. please?
User avatar
OP827
Donating Member
 
Posts: 1555
Images: 405
Joined: Fri Apr 25, 2014 7:27 pm
Location: Bruce County Ontario
Top

Re: The Aluminati Build

Postby Adirondackersouth » Thu Jan 28, 2016 7:23 pm

SkookumAJ wrote:Well I finally finished my first build; It got a bit obsessive towards the end, aiming to have her ready for use this summer.. I joined tnttt last august and lurked about for a month, researching the vast info and clarifying what I wanted to build.. and settled on a Modernistic style cabin stretched out to 12' long, to have an extra mini-bed for my 3 yr old daughter. Oh yea, and a trolleytop..
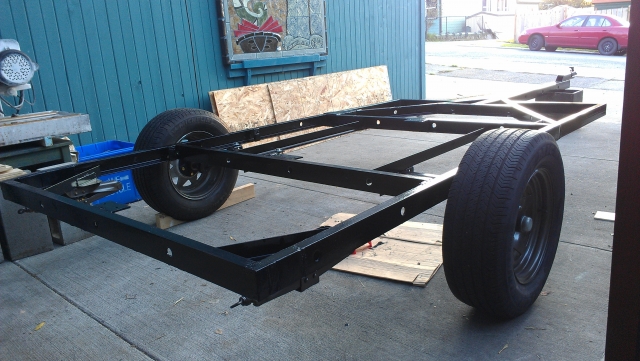
In mid september 2013 I found a trailer that was the size that I wanted. It didn't look great but the steel was good and the price was right..
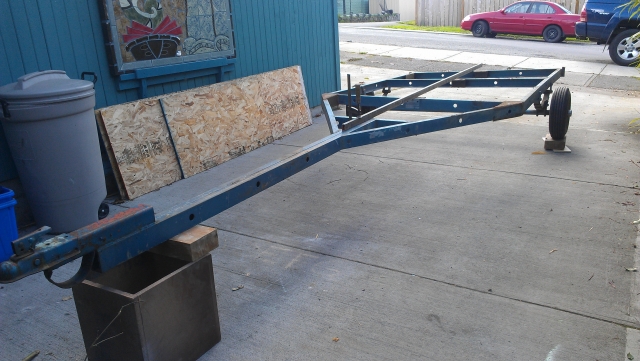
Image

I stripped all the boat stuff off, welded some corners on the front to make the deck 10'x5'.
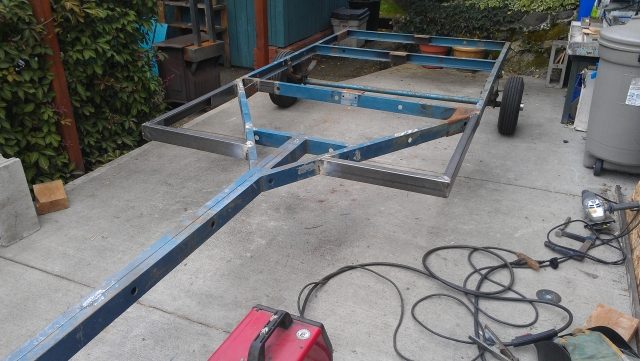
Image

Tossed the axle and crappy little wheels and installed torsion axles and put on some 15" wheels. Welded on stabilizer jacks also..
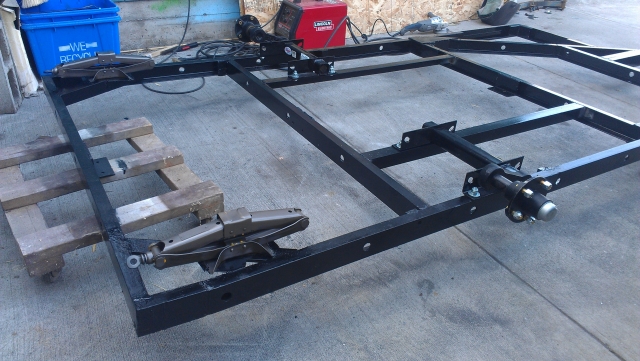
Image

And voila, we are on our way
Image

So it looks like I made some kind of frame for the deck, I think I was trying to line up the sticks to where my benches in the cabin would sit..
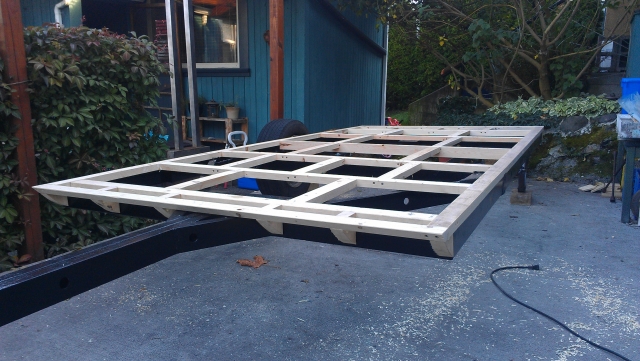
Image

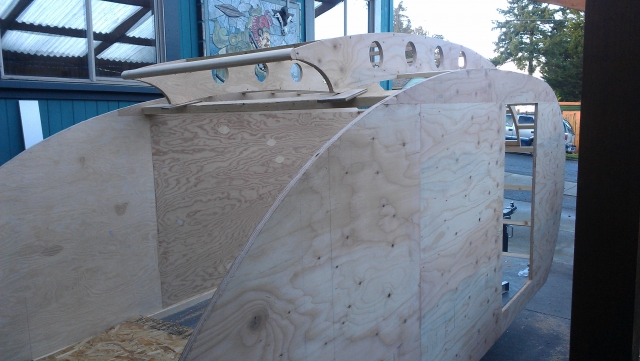
With the ply floor on, and the deck bolted to the frame.. onto walls! My profile was entirely hand drawn, no CAD, no cnc, no compass or math; just drawing on ply, step back to review, and repeat a bizillion times to dial it in...
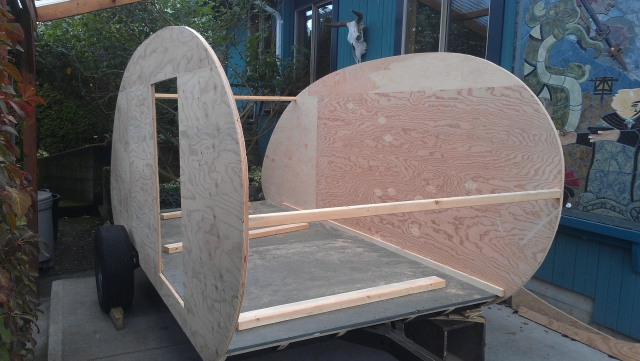
Image

With spars installed, this thing is taking shape...
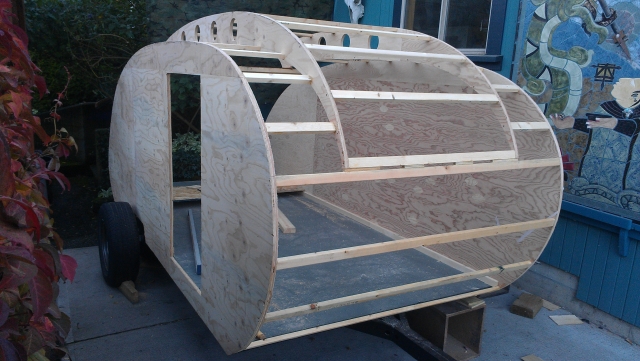
Image
Image

I skinned the inside with 1/4" fir ply, then started on forming the galley..
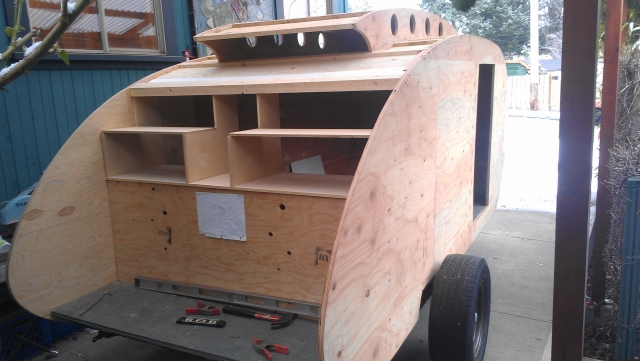
Image

It was around this point that I realized that the (former boat trailer) tongue was really long! So I lopped a couple feet off of that..
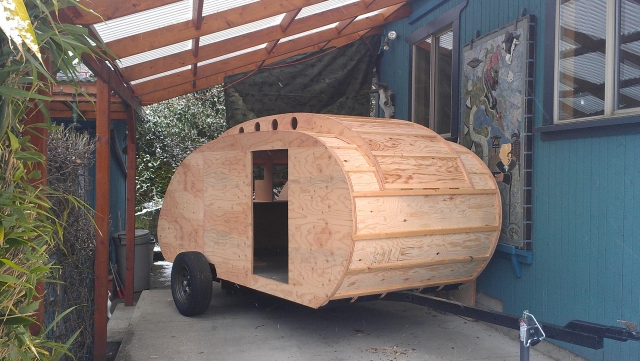
Image

I guess it's time to run wire for lights, etc.. Pulled wire up both sides of the front/top, then slapped some hard foam insulation in between the spars..
Also added some 'wings' onto the tongue, as I would probably need to mount something out front someday...
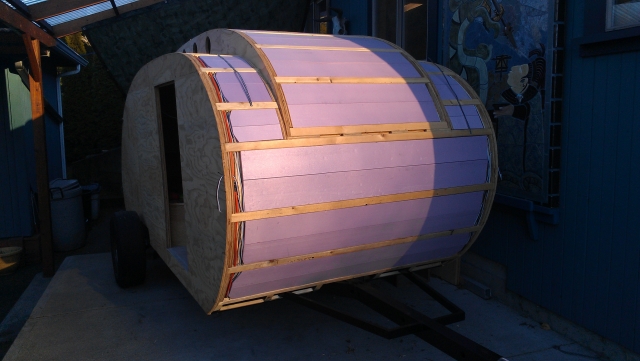
Image

I skinned the outside with 3/16" el cheapo ply, then sealed that with polyurathane. And it looks like the galley is moving along all right; My countertop is an old board of VG Fir salvaged for lord-knows-where.. Ran it through the planer, she cleaned up real nice. Stained it black and 4 coats of poly- I wonder how long it'll stand up to the wifes abuses.. heh..
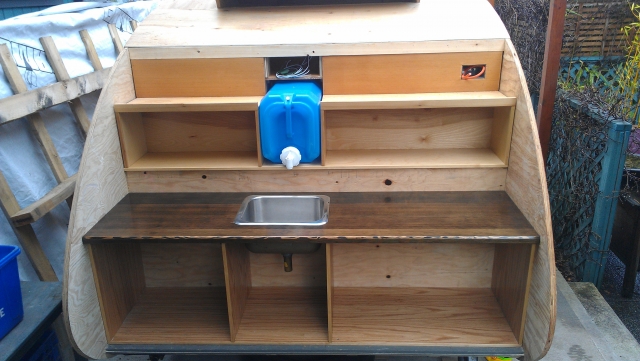
Image
As for plumbing, this being my first trailer build, I wanted to keep things simple in that department for now.. so I opted for a 5 gal jug situated above a small sink, with a catch basin below. it works all right; I can always upgrade later...

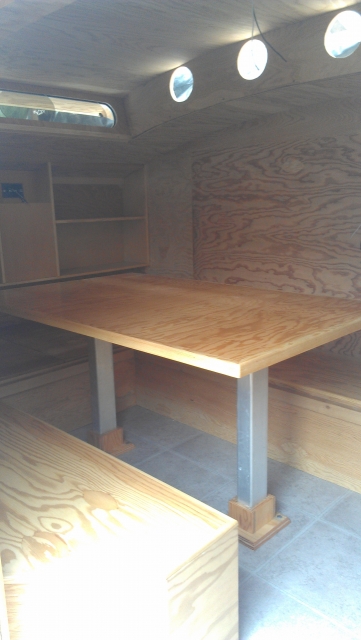
The interior is moving along too; here we have a full queen-size bed on storage benches, and the center piece can pop up to make a table and booth seating..
Image

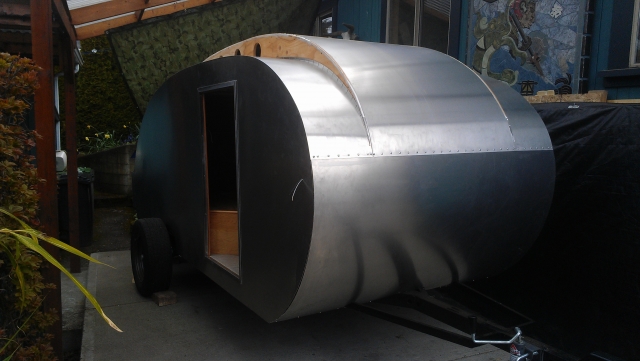
Ok, so I guess we are onto aluminum skinning! Now I know that we want to float aluminum for expansion, but since I would not be having my edge molding for another month and I gotta get skinning, I elected to glue the alum onto the cabin for the building period.. So I used the 5'x12' shipping pallet that the alum came on to clamp it to the cabin:
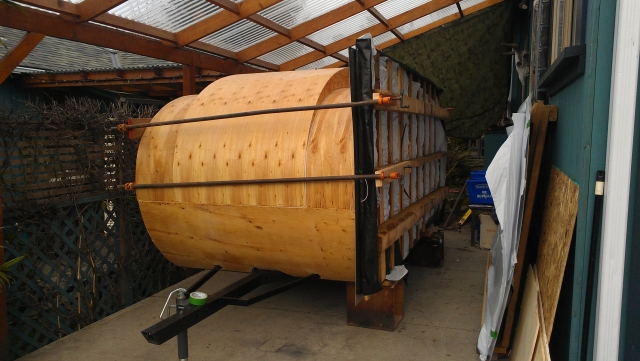
Image
I glued the full 5'x12' sheet to the side wall, then cut out the profile, which was SO FUN! Then used a flush bit on a laminate trimmer to clean that hot mess up; worked pretty not bad...

then onto the front and roof:
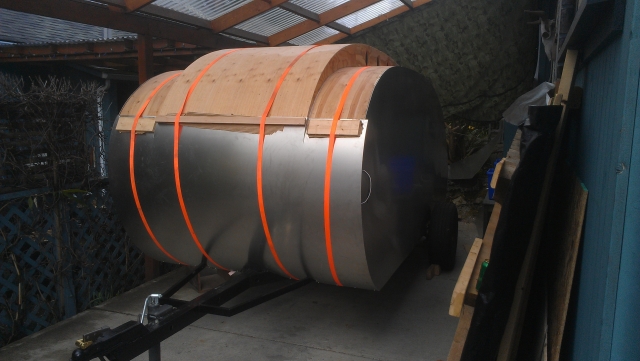
Image
Image

Here's one of the templates to do the trolleytop sides:
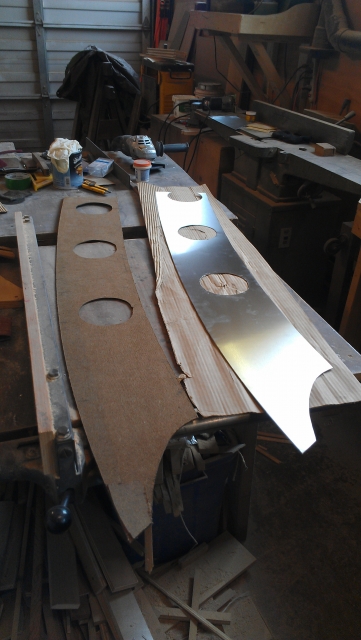
Image
If anything, this just shows how in my obsession with building a teardrop, I allowed my shop to descend into shear depraved chaos.. it's just embarrassing..
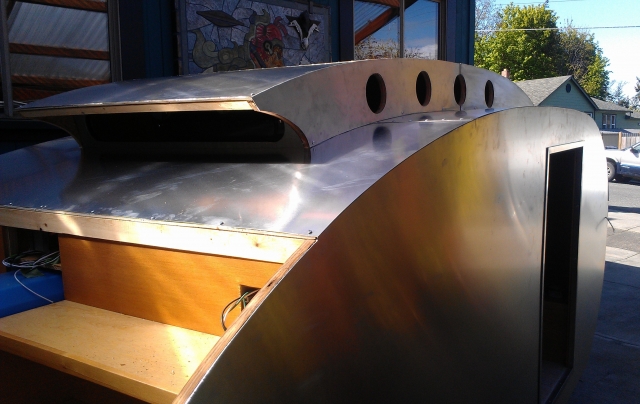
Image
But worth it I suppose..

Time to bust a move on the galley hatch..
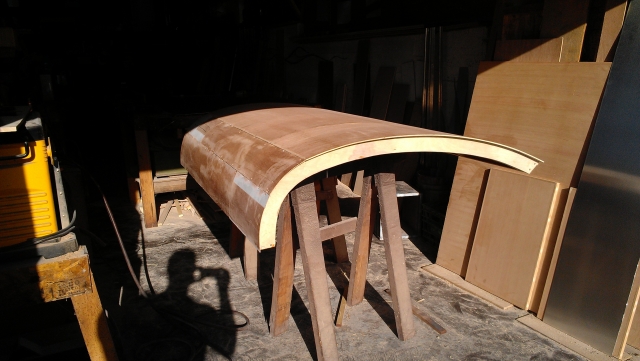
Image

And presto, bango, and galley door! You can see the floppy alum siding here. I was at the point of doing the edge molding, so I was un-adhering the glued alum so that it would be floating.. It came off pretty easy, having oil-canned a few times already
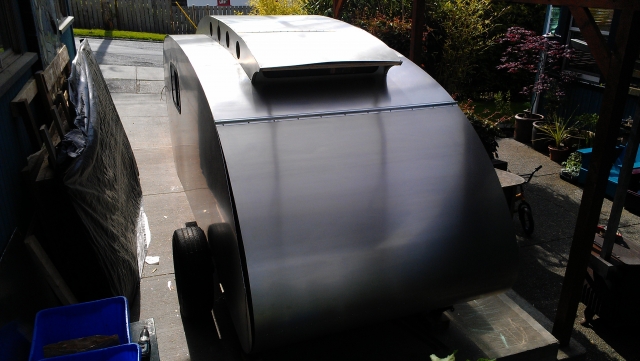
Image

My order of edge molding, windows, door handles and various specialty parts came in, very exciting, aside from the punishing postage for stuff sent from US to Canada... But now I can assemble the finishing touches!

The first road test; just a bandit cruise around the block to make sure that it didn't cartwheel sideways off the road, or simply break in two haha..
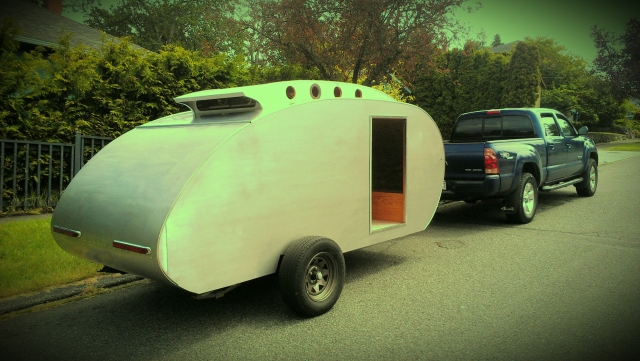
Image
All good!

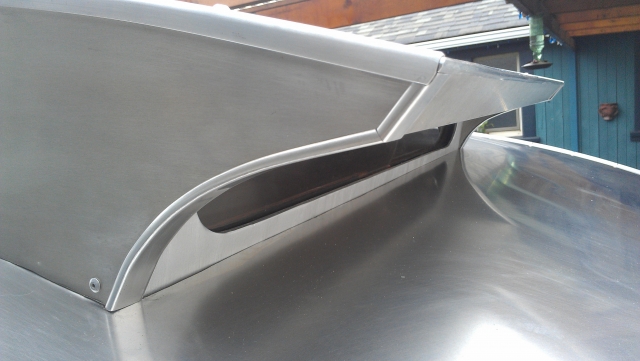
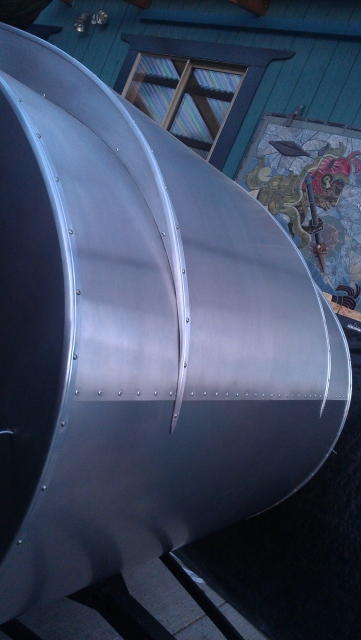
Here's how the edge molding tapered out at the front of the trolleytop:
Image

And here's how it ended at the rear:
Image
That was a load of fun getting all that to fit tight and right, tell you what..

So then there's installing and connecting the lights, apparently not photoworthy.. same goes for cabinet doors and drawers; Sorry! I'm a woodworker by trade and I guess that cabinet doors and drawers barely register on my radar these days, y'all know what I mean?

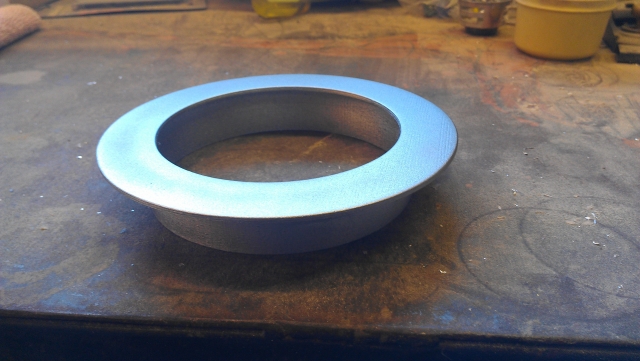
What does register is getting my porthole windows sorted out. it wasn't in my budget to order 8 @$20 plus shipping to Canada (double that $$, for real), and i didn't relish making them out of wood. Lo and behold, the universe provided and I met a fellow living one block away from me, who has a 3-D printer and was open to a little project. I drew the part on Autocad, and he printed 8 trimrings for me (for a trade, bit o woodwork for him):
Image
They came white plastic. I paint them 'stainless steel' and siliconed a tinted plexi disc in there, then silcone that into the openings in my trolleytop, and I'm very happy!

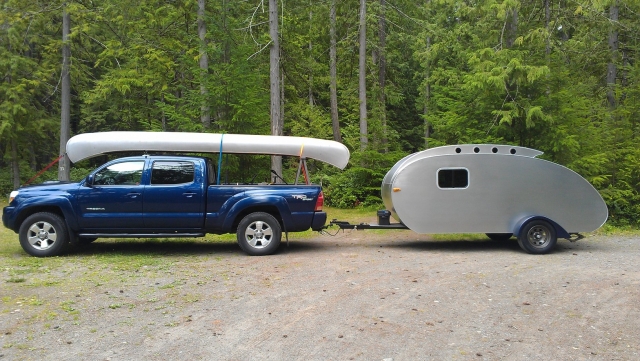
Heck we must be getting close.. fenders came in, painted them to match the truck.. Gas props dialed in after much screwing around... You know what, I'm done.. Let's go camping already!!
Image
Image
Image


Major sweet build! :beer:
David Medici
Mechanicsville, Virginia 23116
Happy Trails
User avatar
Adirondackersouth
Teardrop Master
 
Posts: 103
Images: 3
Joined: Tue Jan 19, 2016 4:25 am
Location: Hanover County, Virginia (North of Richmond)
Top

Previous

Return to Build Journals

Who is online

Users browsing this forum: No registered users and 34 guests

cron