5X10 on a 4X8 HF trailer - First build - On the Road!

...ask your questions in the appropriate forums BUT document your build here...preferably in a single thread...dates for updates, are appreciated....

Re: "Toy Hauler" 5X10 on a 4X8 HF trailer - First build

Postby noseoil » Tue Sep 30, 2014 7:09 am

What happens over time is sort of like asphalt paving on a street. At first it looks really nice, smooth & tight, good surface & no problems. Move along a few years and the sun, wind & rain begin to come into play. Any small crack or fissure becomes magnified by temperature & humidity. If any moisture gets into the wood, localized swelling will be the result. The fibers soak water, the wood expands and the surface is lifted. Any finish is now functionally destroyed in that spot and things begin to break down rapidly at this point.

The easiest solution is a good sealing job at the time of the build (prevention). That's why aluminum skins work so well to protect things. The aluminum can only leak at an edge or fastening, otherwise it just isn't possible. Epoxy & glass is also good, but a UV coating is still needed, because the sun will eat epoxy over time. Paint on canvas or some other fabric works well, as long as the paint is intact there will be no change under it. Etc. etc. etc.....
Build log: viewtopic.php?f=50&t=60248
The time you spend planning is more important than the time you spend building.........

137905
User avatar
noseoil
1000 Club
1000 Club
 
Posts: 1820
Images: 669
Joined: Sun Apr 27, 2014 8:46 am
Location: Raton, New Mexico, living the good life!

hatch and roof finished

Postby Barak » Sun Nov 09, 2014 11:34 pm

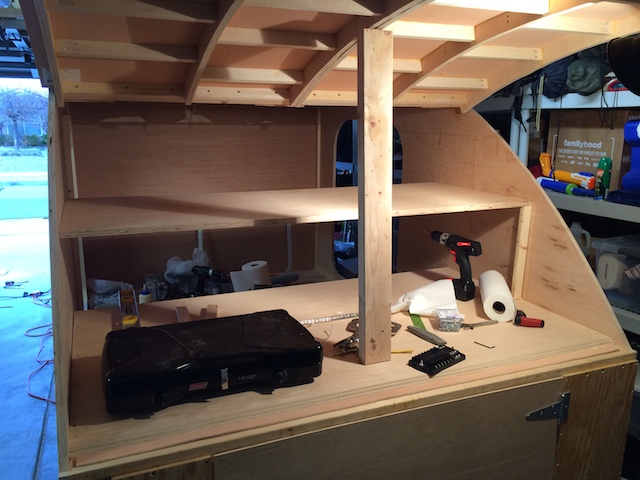
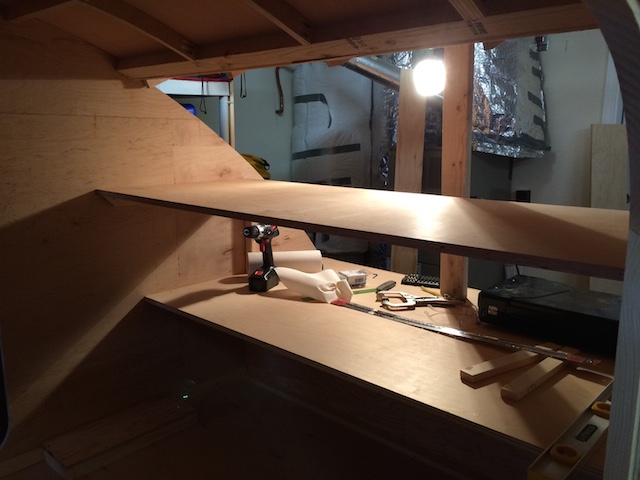
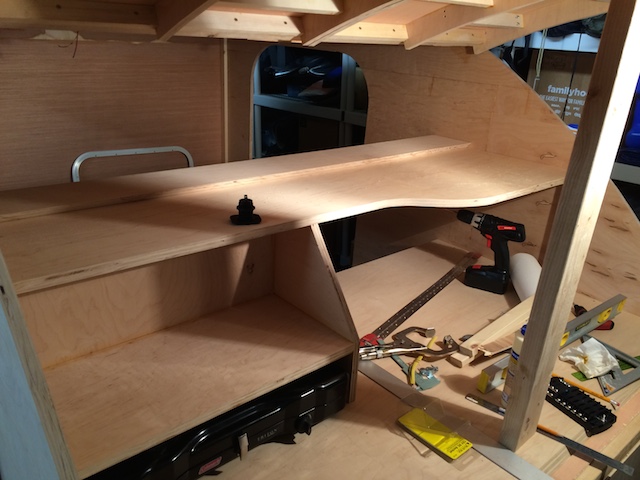
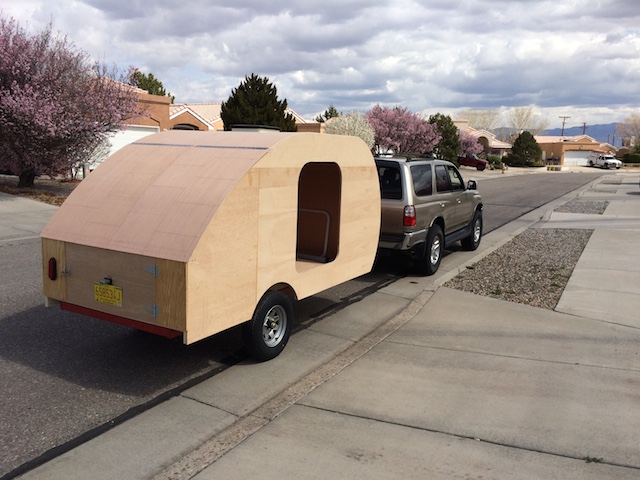
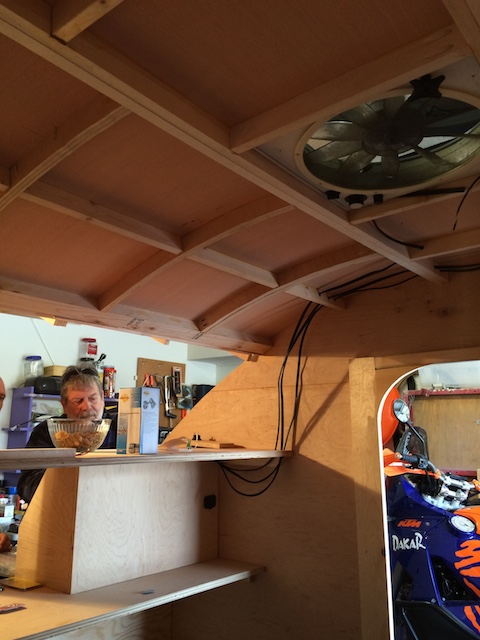
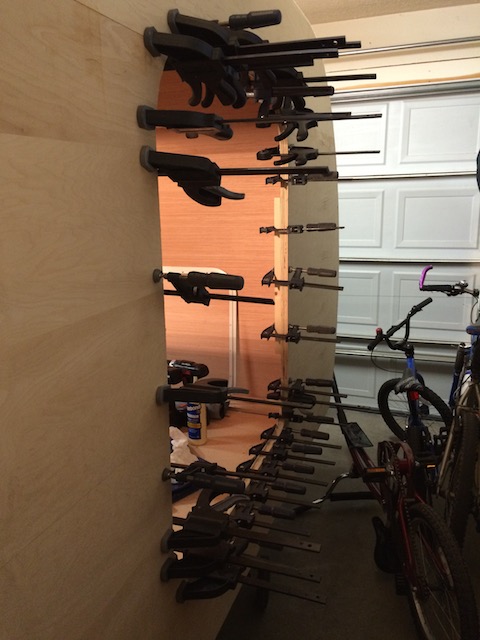
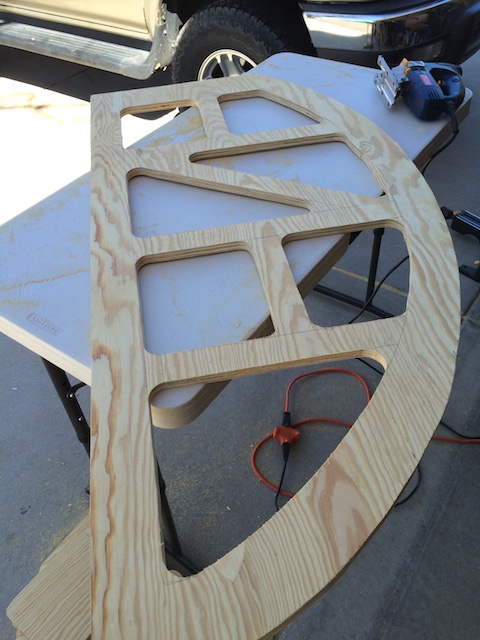
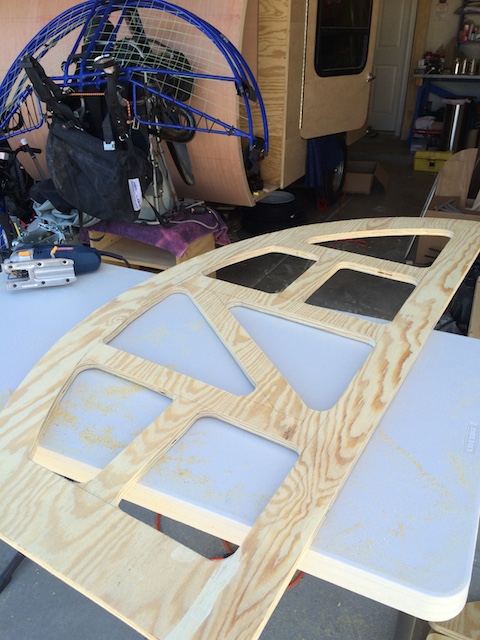
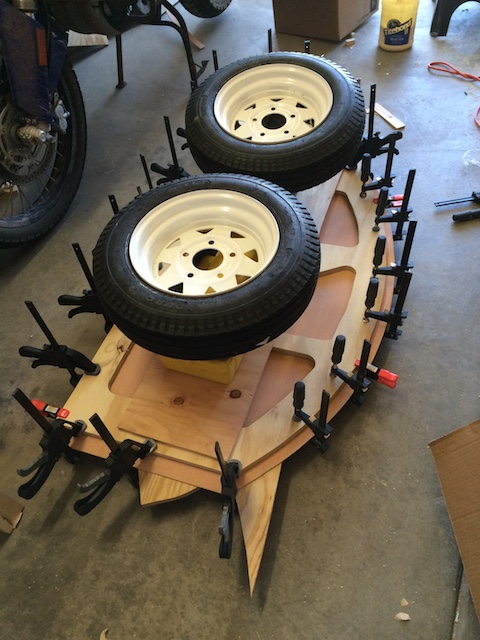
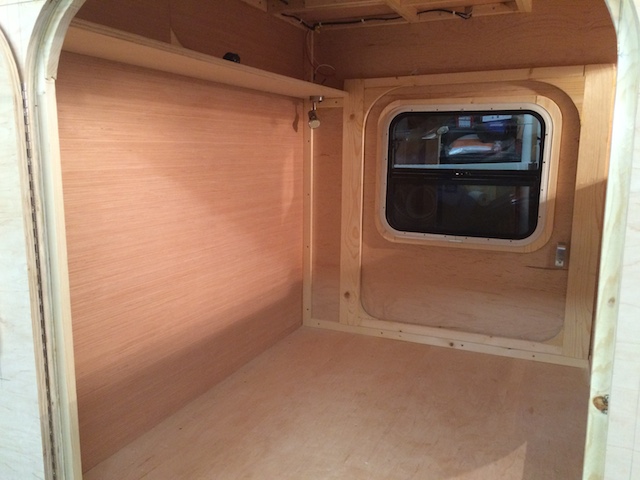
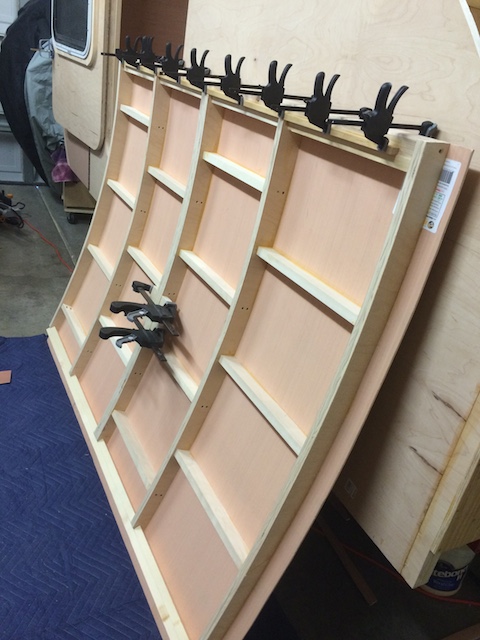
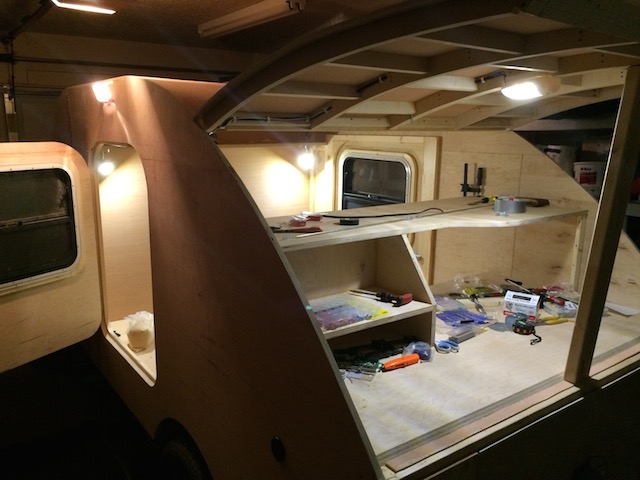
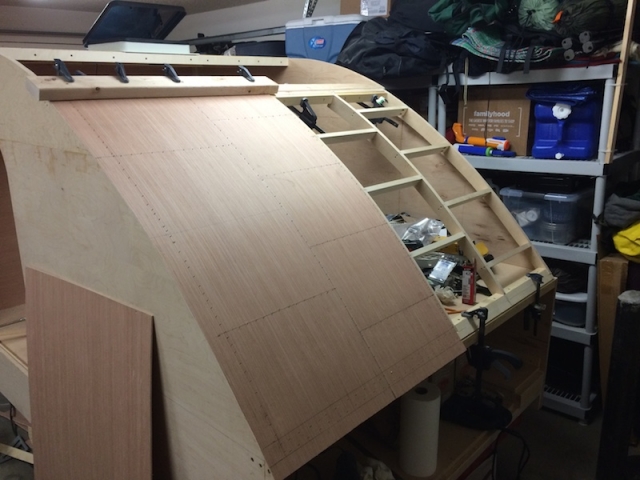
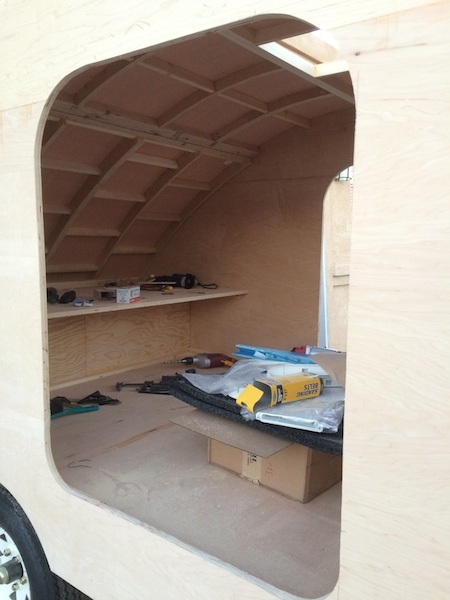
I have put some work in to the teardrop this last month. Built the hatch and finished up the roof:

Image

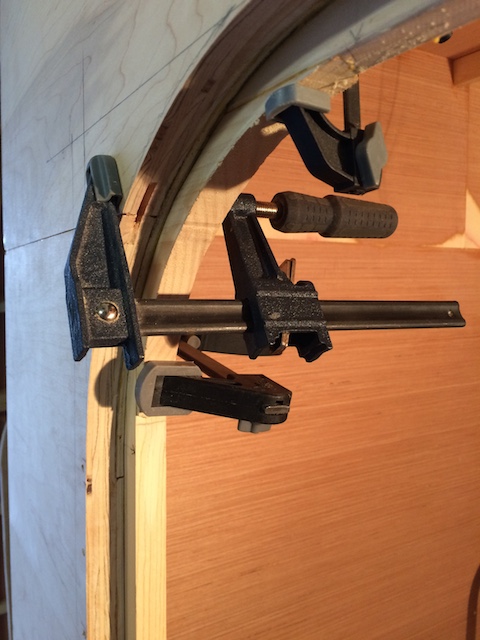
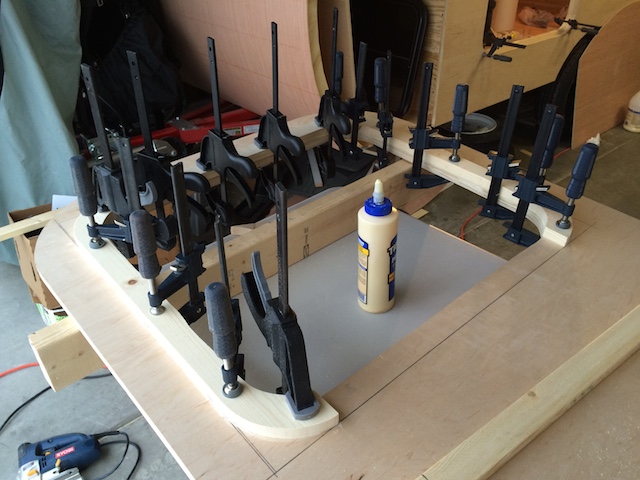
Built the hatch in to the teardrop using spacers as many have recommended doing

Image

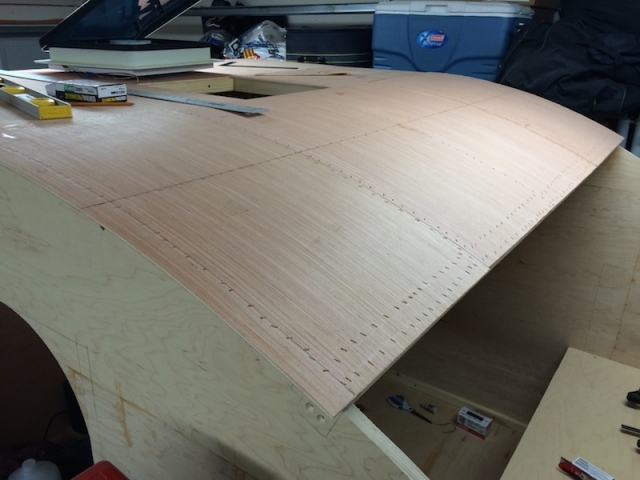
Used the same 5mm ply for the hatch, no issues with bending
Image

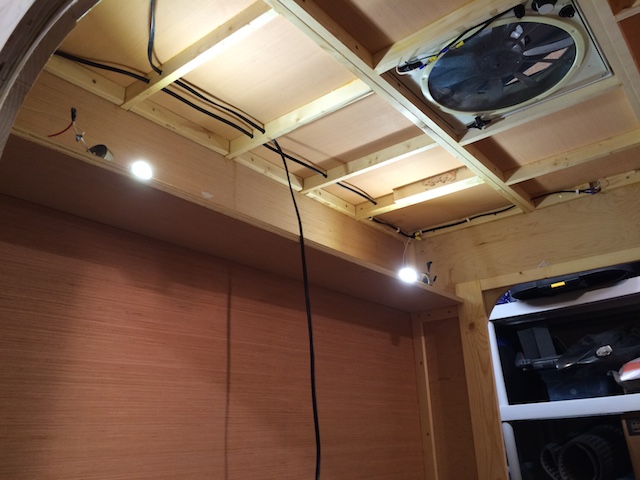
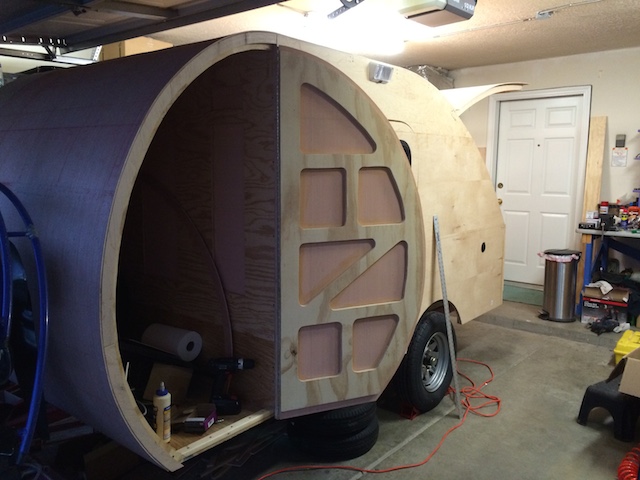
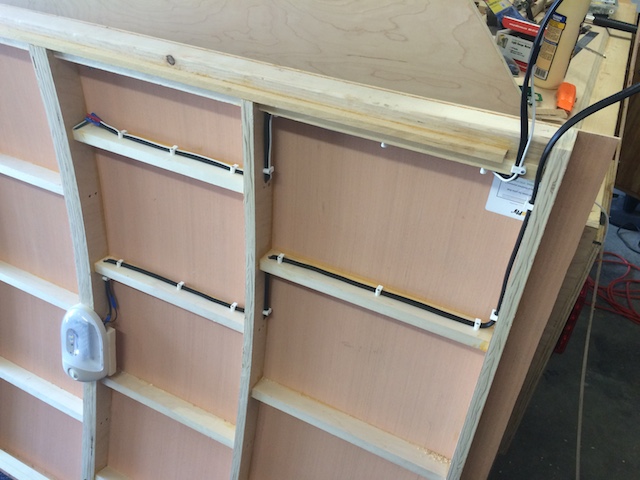
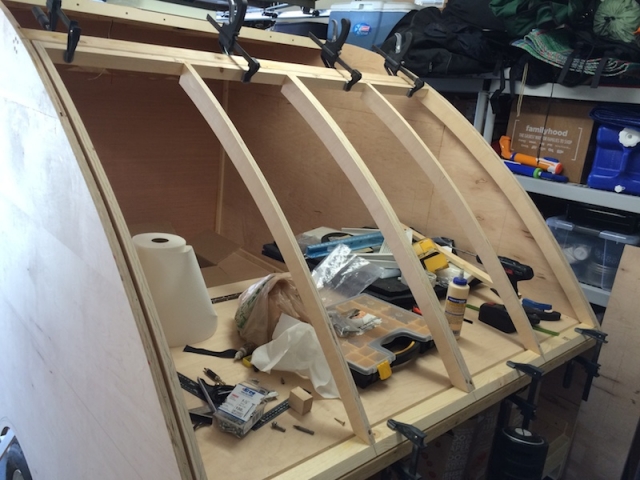
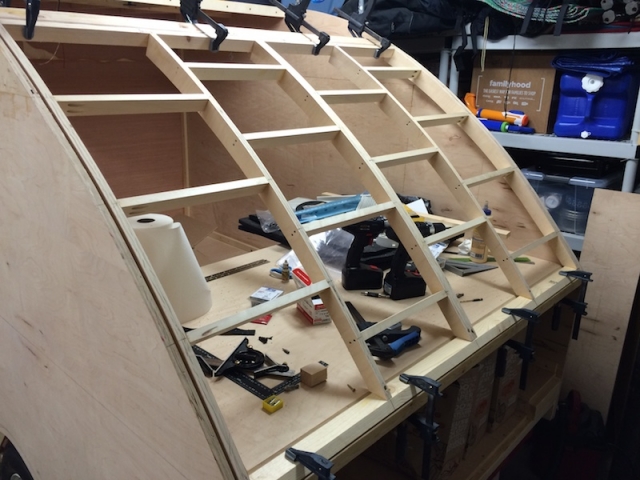
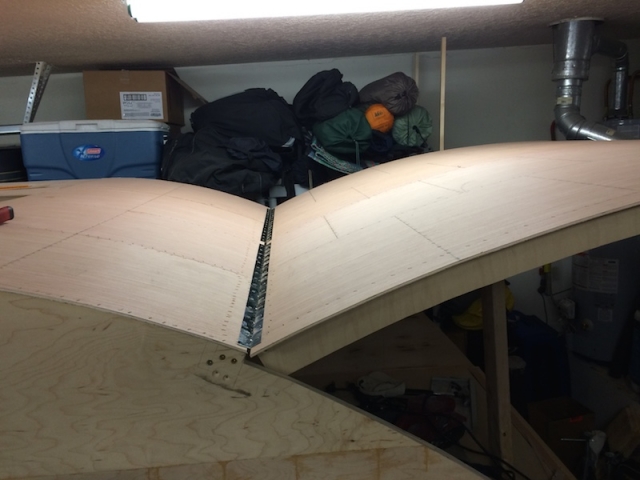
Then finished up the remaining roof section:
Image

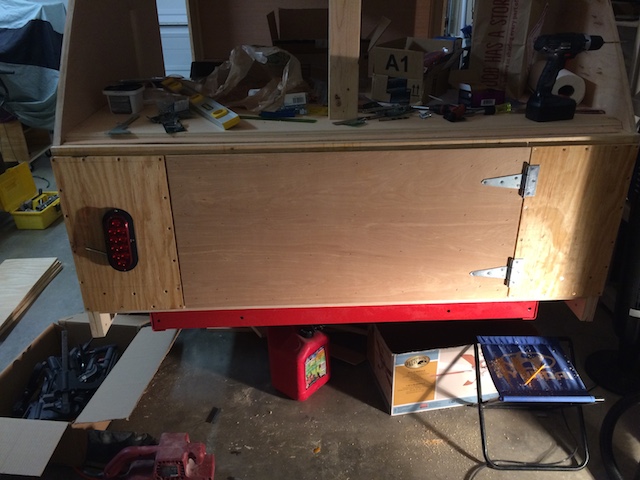
Fitted two 30" piano hinges. I will later insert a vinyl strip underneath for waterproofing and use longer screws.
Image

Image

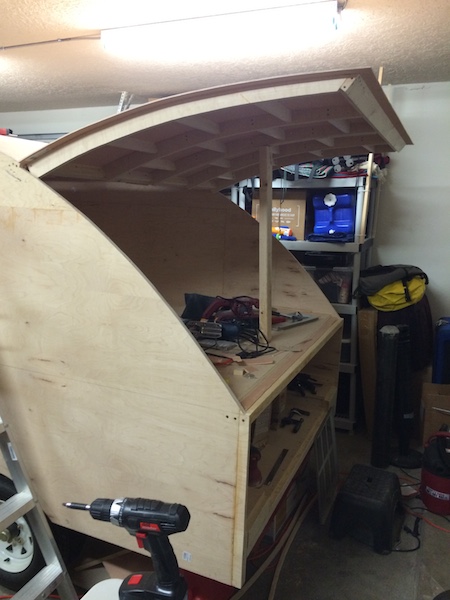
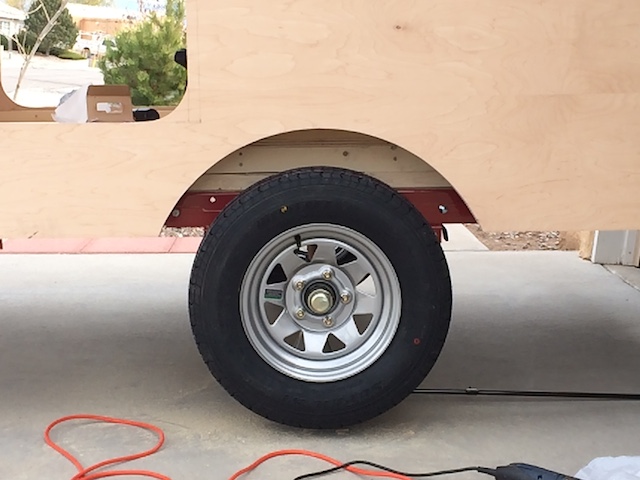
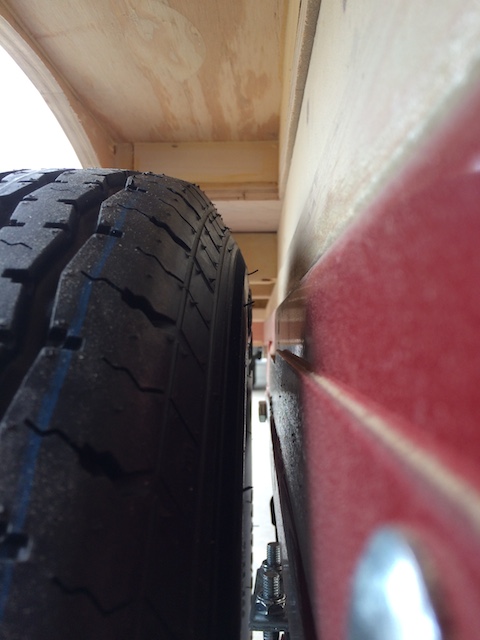
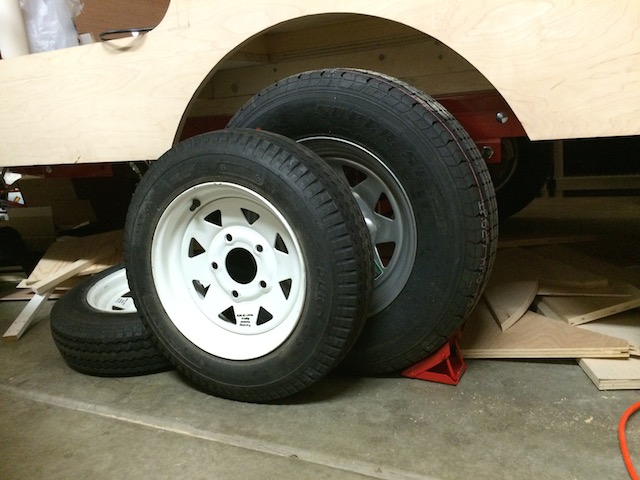
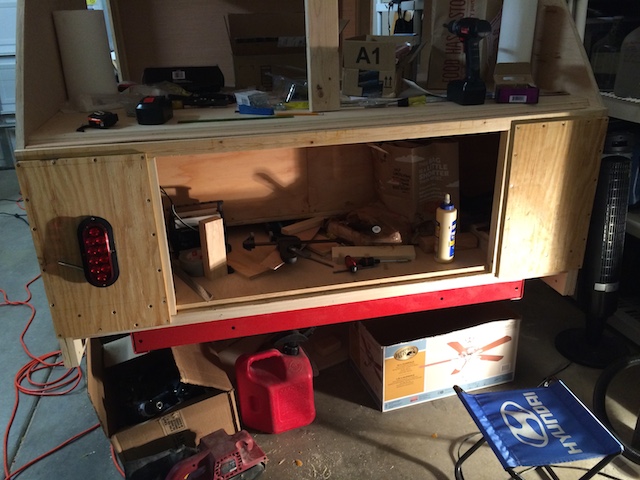
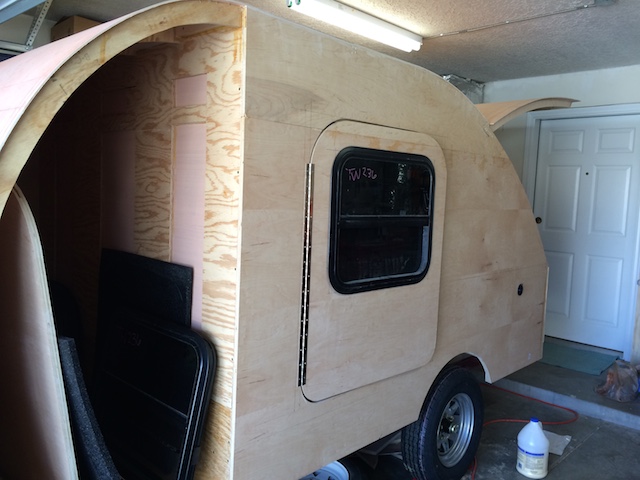
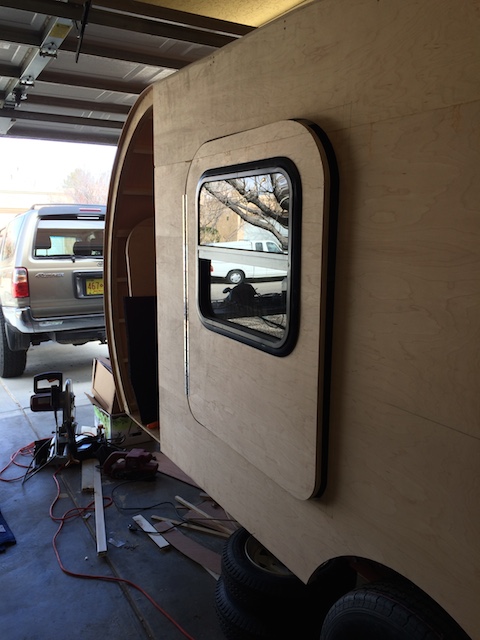
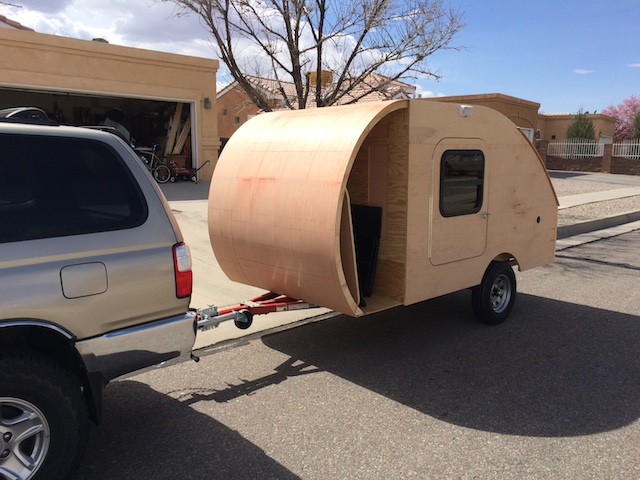
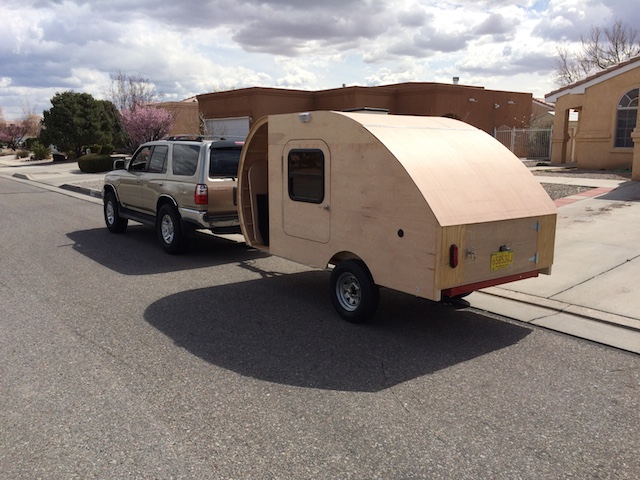
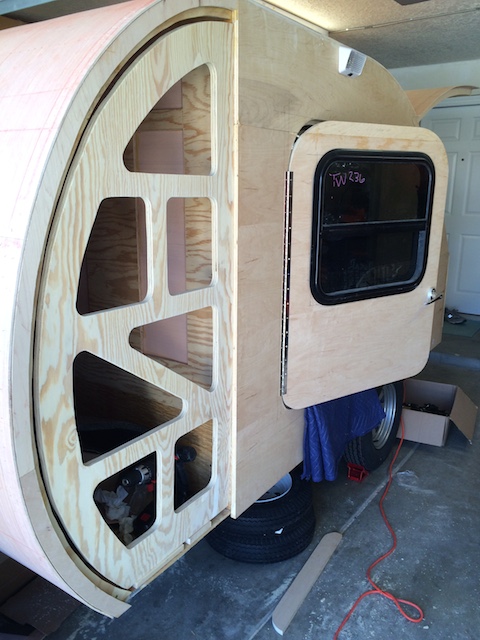
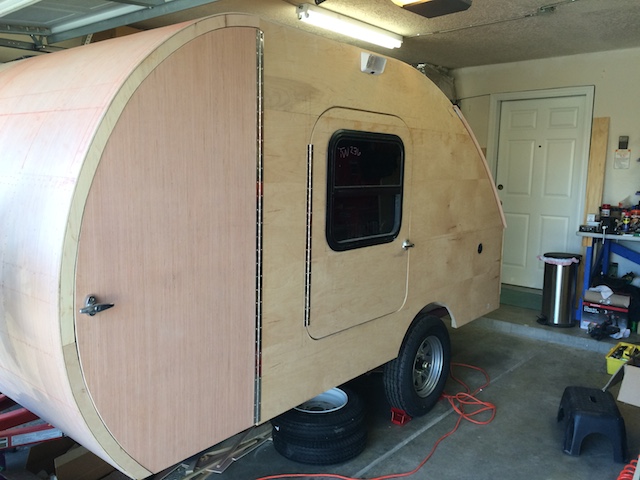
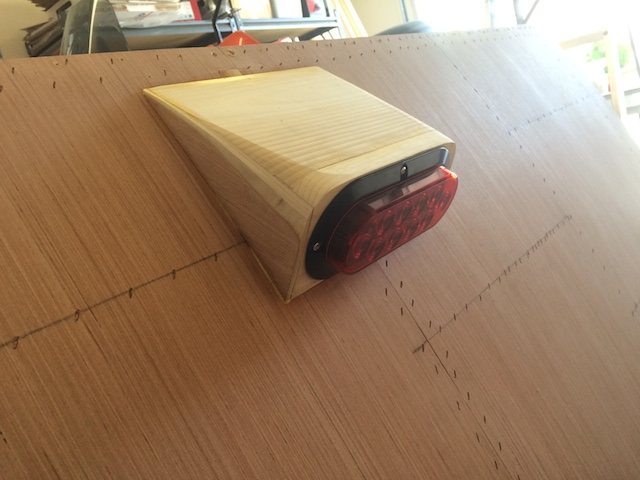
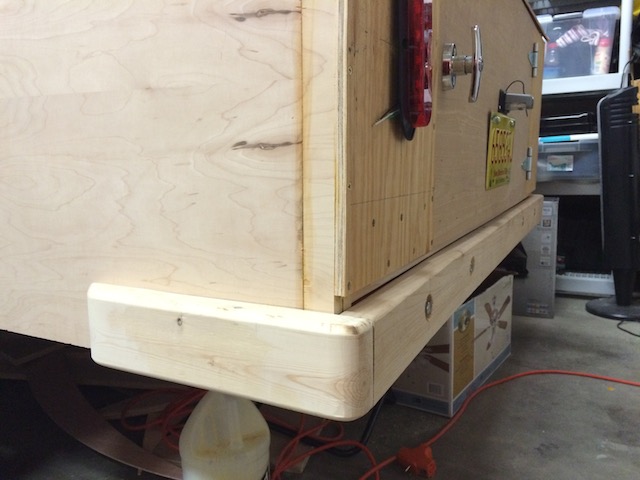
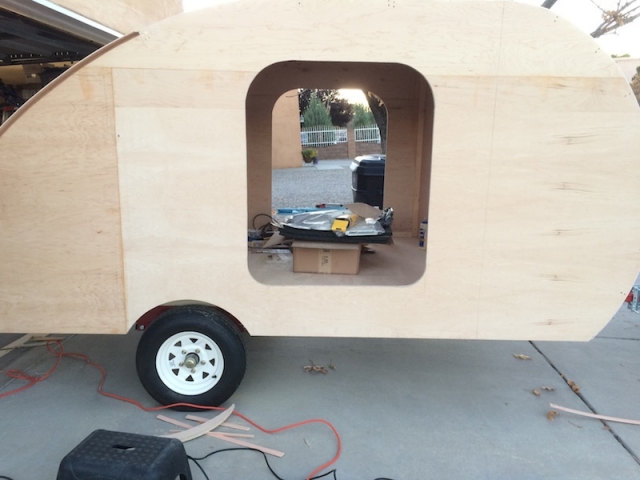
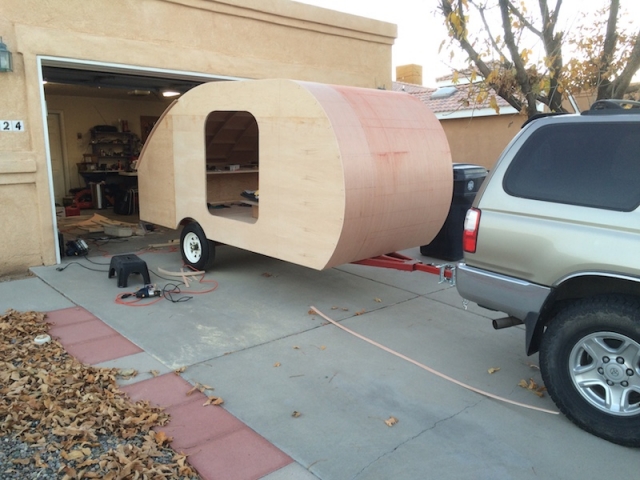
Pulled it out of the garage to cut the second door out and do some trim work. Gosh those 12" wheels look small. I'm considering going with 13" wheels and 175/80 tires and am researching if these will rub against the HF frame or not:
Image

But happy with the way things are looking overall!
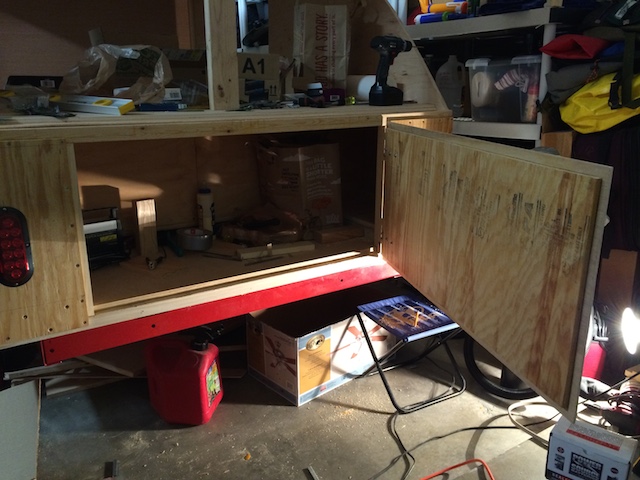
Image

Image

Next - doors!
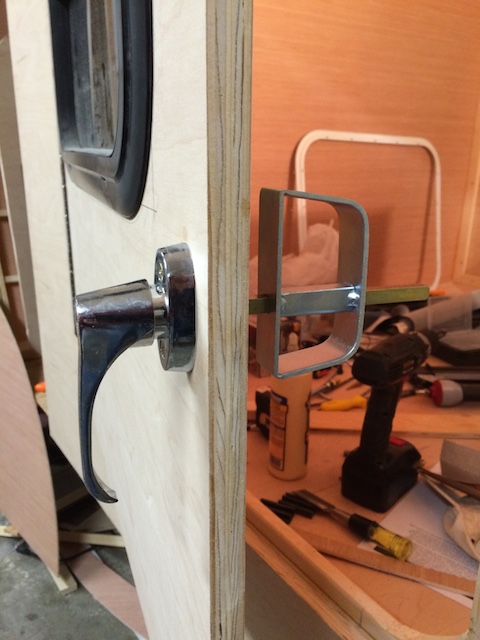
I have ordered handles for the (FIVE) doors this thing will have
Barak
Teardrop Builder
 
Posts: 26
Images: 78
Joined: Sun Jan 05, 2014 9:11 am

Re: "Toy Hauler" 5X10 on a 4X8 HF trailer - First build

Postby ChasCABQ » Wed Nov 12, 2014 11:53 am

Wow! It's looking good and coming along well
Build journal: http://www.tnttt.com/viewtopic.php?t=61303
In 2016, I received a kidney transplant, finished my teardrop, and took it on the road! In 2017 I sold it and am back to car camping.
Thanks to all forum members who provided advice about my build and posted info to help me get started.
User avatar
ChasCABQ
Donating Member
 
Posts: 95
Images: 18
Joined: Sat Sep 27, 2014 3:54 pm
Location: Albuquerque, NM
Top

All major construction finished!

Postby Barak » Mon Apr 13, 2015 9:12 am

I'm happy to say that I have been making progress in the past couple of months. The winter was a bit too cold to work in the garage (even here in sunny NM) and I ended up getting a garage space heater, but late in the season.
So the next 45 images are what I have done since December. I am going to leave the inside as is for now and put all of my efforts and time to finishing the exterior and weatherproofing it so I can get this thing on the road, hopefully within a month or two.
So here goes:
Back in December, after pulling the trailer out and having a look, I decided to install larger wheels on 13 inch rims to replace the HF originals. At first I thought I might have gap issues , but didn't need to use spacers. But did need to cut out wheel wells for the larger diameter tires. - These will not be visible from the inside as I will make cut-outs in the memory foam mattress.

The exterior cut:
Image2014-12-06 12.20.14 by bnaggan, on Flickr

The interior cut:
Image2014-12-06 11.20.52 by bnaggan, on Flickr

The NEW gap:
Image2014-12-06 12.21.58 by bnaggan, on Flickr

Old vs new tires:
Image2015-01-06 09.27.34 by bnaggan, on Flickr


ELECTRICAL SYSTEM:

My basic 120V system consists of a marine inlet for connecting shoreline power at RV parks (or for charging battery)
Image2015-01-06 09.26.17 by bnaggan, on Flickr

Started collecting all of the 12V goodies:
Image2015-01-06 09.32.22 by bnaggan, on Flickr

Placement of the battery - the "heart" of the 12V system:
Image2015-01-06 09.33.50 by bnaggan, on Flickr

And started to build the rear section of the storage area:
Image2015-01-11 18.09.22 by bnaggan, on Flickr

Rear storage door installed:
Image2015-01-12 22.33.23 by bnaggan, on Flickr

Rear door open:
Image2015-01-12 22.33.35 by bnaggan, on Flickr

SIDE DOORS:
I decided to use the cutouts from the walls as my doors. Ordered two RV windows and wanted to build an internal lip that would serve as the door stop/seal lip. I added a 5 mm spacer inside to accommodate the future seal, but it was a long task and a lot of cutting.
Image2015-01-16 16.21.41 by bnaggan, on Flickr

Internal lip:
Image2015-02-22 16.53.57 by bnaggan, on Flickr

Cut out doors and windows:
Image2015-01-16 16.21.54 by bnaggan, on Flickr

Windows: The RV windows I got were meant for a much thicker wall than my 3/4 inch ply so needed to add thickness to match:
Image2015-02-22 16.54.07 by bnaggan, on Flickr

One door installed!
Image2015-02-21 11.39.37 by bnaggan, on Flickr

Image2015-02-21 11.39.51 HDR by bnaggan, on Flickr

This is my basic keyed gate style door handles I will be using:
Image2015-02-22 21.47.23 by bnaggan, on Flickr

to be continued...
Barak
Teardrop Builder
 
Posts: 26
Images: 78
Joined: Sun Jan 05, 2014 9:11 am
Top

Galley

Postby Barak » Mon Apr 13, 2015 11:10 am

The galley, in this stage will be a simple secondary shelf, under which, on the right, my AC unit will fit (future), and on the left, have a small cub bard for the stove and a place to install my 12V electrical board.
I started with a plain shelf:
Image2015-03-07 17.44.29 by bnaggan, on Flickr

Image2015-03-07 17.44.42 by bnaggan, on Flickr

Built the stove slot:
Image2015-03-09 08.28.56 by bnaggan, on Flickr

Shaped the shelf for a more interesting look:
Image2015-03-09 08.29.03 by bnaggan, on Flickr

Installed 12V fuse box and two of the three 12V outlets:
Image2015-03-10 18.44.38 by bnaggan, on Flickr

Then took it out for a photo shoot to see how it sits with the new wheels:
Image2015-03-13 12.33.27 by bnaggan, on Flickr

Image2015-03-13 12.33.41 by bnaggan, on Flickr

Image2015-03-13 12.34.00 by bnaggan, on Flickr

next up: wiring the teardrop
Barak
Teardrop Builder
 
Posts: 26
Images: 78
Joined: Sun Jan 05, 2014 9:11 am
Top

Re: "Toy Hauler" 5X10 on a 4X8 HF trailer - First build

Postby Vedette » Mon Apr 13, 2015 2:32 pm

Wonderful Job! :thumbsup:
Hope you have as much fun using it, as you appear to be having building it? :applause:
Good Roads
Brian & Sandi
Good Roads
Brian & Sandi
Here is a link to my Build Journal
viewtopic.php?f=50&t=50912
Image109106109111109110138766
User avatar
Vedette
Silver Donating Member
 
Posts: 5141
Images: 443
Joined: Thu Dec 01, 2011 4:28 am
Location: Westbank B.C.
Top

Re: "Toy Hauler" 5X10 on a 4X8 HF trailer - First build

Postby KCStudly » Mon Apr 13, 2015 6:29 pm

Great job! I like the shape of the upper galley shelf. :thumbsup:
KC
My Build: The Poet Creek Express Hybrid Foamie

Poet Creek Or Bust
Engineering the TLAR way - "That Looks About Right"
TnTTT ORIGINAL 200A LANTERN CLUB = "The 200A Gang"
Green Lantern Corpsmen
User avatar
KCStudly
Donating Member
 
Posts: 9611
Images: 8169
Joined: Mon Feb 06, 2012 10:18 pm
Location: Southeastern CT, USA
Top

Wiring Party

Postby Barak » Mon Apr 13, 2015 6:59 pm

I have a couple of friends who happen to both be electrical engineers, and using the seduction power of beer, I lured them in to the trap. They figured out the wiring amps, volts, watts, gauges etc, while I drilled holes and pretended to be in charge.
Here is a view looking up to where all of the ceiling lights and accessories are wired through:
Image2015-03-13 15.46.25 by bnaggan, on Flickr

Professionally wired fuse box:
Image2015-03-13 17.45.33 by bnaggan, on Flickr

And then there was light:
Image2015-03-25 20.56.21 by bnaggan, on Flickr

Image2015-03-25 20.56.30 by bnaggan, on Flickr

And then it's time for the second door - can never have too many clamps:
Image2015-03-14 22.16.13 by bnaggan, on Flickr

Last door! - for front storage area - I went all fancy with my weight saving design, liked the result so took lot's of photos. Too bad it will be hidden from view most of the time :(
Image2015-03-28 14.50.59 by bnaggan, on Flickr

The front storage area was specifically designed to house my powered paraglider seen in the background of this photo (unassembled) - thus the overly wide/tall design of the teardrop
Image2015-03-28 14.51.10 by bnaggan, on Flickr

Image2015-03-28 15.02.42 by bnaggan, on Flickr

Glueing the door:
Image2015-03-28 15.42.13 by bnaggan, on Flickr

Door open:
Image2015-03-28 19.36.19 by bnaggan, on Flickr

Door closed:
Image2015-03-29 08.12.39 by bnaggan, on Flickr

Interior:
Image2015-04-04 17.42.50 by bnaggan, on Flickr

Image2015-04-04 17.43.02 by bnaggan, on Flickr
Barak
Teardrop Builder
 
Posts: 26
Images: 78
Joined: Sun Jan 05, 2014 9:11 am
Top

Re: "Toy Hauler" 5X10 on a 4X8 HF trailer - First build

Postby KCStudly » Mon Apr 13, 2015 7:07 pm

Nice. Door frame looks good! :thumbsup:
KC
My Build: The Poet Creek Express Hybrid Foamie

Poet Creek Or Bust
Engineering the TLAR way - "That Looks About Right"
TnTTT ORIGINAL 200A LANTERN CLUB = "The 200A Gang"
Green Lantern Corpsmen
User avatar
KCStudly
Donating Member
 
Posts: 9611
Images: 8169
Joined: Mon Feb 06, 2012 10:18 pm
Location: Southeastern CT, USA
Top

finishing touches

Postby Barak » Mon Apr 13, 2015 7:10 pm

Took the rear hatch off to re-sand the bottom curves of the ribs to perfection, in case I want to glue a bottom skin at some point, then wired for a galley dome light and additional rear brake light
Image2015-04-05 10.21.54 by bnaggan, on Flickr

Image2015-04-05 16.53.36 by bnaggan, on Flickr

very proud of my rounded rear light housing:
Image2015-04-05 16.53.49 by bnaggan, on Flickr

Bumper:
Image2015-04-13 18.04.05 by bnaggan, on Flickr

Lights!
Image2015-04-11 17.44.49 by bnaggan, on Flickr
Barak
Teardrop Builder
 
Posts: 26
Images: 78
Joined: Sun Jan 05, 2014 9:11 am
Top

Re: "Toy Hauler" 5X10 on a 4X8 HF trailer - First build

Postby Vedette » Mon Apr 13, 2015 9:52 pm

Soooooo much wood! :R
Brian
Good Roads
Brian & Sandi
Here is a link to my Build Journal
viewtopic.php?f=50&t=50912
Image109106109111109110138766
User avatar
Vedette
Silver Donating Member
 
Posts: 5141
Images: 443
Joined: Thu Dec 01, 2011 4:28 am
Location: Westbank B.C.
Top

Re: "Toy Hauler" 5X10 on a 4X8 HF trailer - First build

Postby ChasCABQ » Mon May 04, 2015 6:53 pm

Great looking build Barak! :thumbsup: Your progress has helped inspire me to get back to work on my teardrop this past week.
Build journal: http://www.tnttt.com/viewtopic.php?t=61303
In 2016, I received a kidney transplant, finished my teardrop, and took it on the road! In 2017 I sold it and am back to car camping.
Thanks to all forum members who provided advice about my build and posted info to help me get started.
User avatar
ChasCABQ
Donating Member
 
Posts: 95
Images: 18
Joined: Sat Sep 27, 2014 3:54 pm
Location: Albuquerque, NM
Top

The Twilight is rolling!

Postby Barak » Sat Jun 06, 2015 8:46 am

After scrambling to get the bare minimum necessary to have the teardrop road ready for last weekend's maiden camping trip I am happy to say - mission accomplished!
The past couple of months have been spent primarily sanding filling sanding filling sanding and painting, and final hardware and weatherproofing, and as many of you know, very time-consuming.
I want to thank the forum members again for the wonderful ideas and inspiration while working on the camper.
Much detailing work yet to be done, but it has passed the first trip with flying colors and I am excited about other trips to come.
So stepping back a couple of months:

Purchased a couple of gas springs for the hatch and installed:
Image

Image

Image


Varnished the Galley surfaces:
Image

Then, took off all of the hardware and the filling and sanding process began:
Image

And first of three coats of primer went on:
Image

Image

Then three coats of Behr "Twilight Gray" (I really liked the name of the paint hence the teardrop name)
Image

Image

Then out for a first look in the sun:
Image

And finally, re-installed all of the hardware, lights, installed and wired up trailer lights, weatherstripping, waterproofing, cleaned, put mattress in and after a very very long day, went out for the first test drive.
Image

Then the next day, went on a 150 mile, camping trip to the Jemez mountains, and even had some rain to test the weatherproofing. All was well.
The tow was uneventful, trailer towed perfectly, no swaying, and only lost about 15% on the fuel economy overall.
Kids didn't want to leave the perfect little play space and had a very comfortable night on the memory foam bed.
Very happy camper! :thumbsup:

Image

Image

Image
Barak
Teardrop Builder
 
Posts: 26
Images: 78
Joined: Sun Jan 05, 2014 9:11 am
Top

Re: 5X10 on a 4X8 HF trailer - First build - On the Road!

Postby KCStudly » Sat Jun 06, 2015 11:02 pm

Awesome for you!!!
I like the ground clearance that appears to match your TV, and the color. Good job!!! :thumbsup:

Thanks for sharing.
KC
My Build: The Poet Creek Express Hybrid Foamie

Poet Creek Or Bust
Engineering the TLAR way - "That Looks About Right"
TnTTT ORIGINAL 200A LANTERN CLUB = "The 200A Gang"
Green Lantern Corpsmen
User avatar
KCStudly
Donating Member
 
Posts: 9611
Images: 8169
Joined: Mon Feb 06, 2012 10:18 pm
Location: Southeastern CT, USA
Top

Re: 5X10 on a 4X8 HF trailer - First build - On the Road!

Postby tony.latham » Sun Jun 07, 2015 1:07 am

GREAT JOB! :thumbsup:

Tony
User avatar
tony.latham
Gold Donating Member
 
Posts: 6899
Images: 17
Joined: Mon Jul 08, 2013 4:03 pm
Location: Middle of Idaho on the edge of nowhere
Top

PreviousNext

Return to Build Journals

Who is online

Users browsing this forum: No registered users and 15 guests