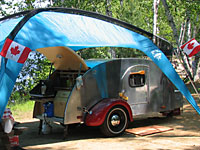
Resist the urge to over build. It is not a garden shed or a stationary home. If your son is still in doubt, direct his attention to many of the fine builds here and the builder's comments that they feel they have over built (after their sub-1000 lb goal turned out to be a 1300 to 1500 lb heavy weight). Seek out Sharon's and Angib's excellent trailer weight chart to find the average build weights for campers in your size category, then go look at those builds to see what 'schedule of construction' (sizes of materials and build methods) they used and compare it to your planned methods. There are a lot of very sturdy campers being built with less wood (= less weight).
On wiring, trailer lighting is one of the most typically unreliable systems on almost every trailer I have been involved with (that I did not wire myself). The manufacturers of cheap trailers provide cheap wiring and fixtures. They make the wires look the same as good quality wire by making the insulation extra thick, but inside there are only a very few strands of (relatively expensive) copper. They save several feet of wire per trailer by not providing a dedicated ground system, and to appeal to the masses of home assemblers that have limited patience with things electrical, they provide... wire nuts... and/or blade splice style connectors, both of which make me shudder. Another ridiculous thing they do is provide about 4 wire ties or metal clips to secure all of the wiring. That is just not enough.
Okay, full disclosure, I may have used some wire nuts and/or splice connectors on my ultra thrifty Charcoal Briquette UT resurrection,

but I cringed

doing it and at least wrapped them in tape. That was a different level of priority than my camper build.
With cheap shoddy wiring don't expect more than a season or two without having a failure, at least not if you live in wet environs where they salt the roads in winter. Without some upgrades (better wire, solder, shrink wrap, better connectors and secure mounting), and additional attention during install expect corrosion and/or damaged wires to cause failures within a year or two.
Bare minimum, I would wrap some electrical tape around the wire nuts to seal them up (better yet assemble them with dielectric grease first) and around the wires where they pass thru those bolt holes. The tape will wear away and unravel eventually, but at least it won't cut the insulation and short out in the first 10 minutes.
To ground your light fixtures, look at the back of them to find out how they are intended to ground to the chassis. Some just rely on the metal bracket grounding but they are usually painted. I've even seen where they used a grommet shaped sticker to mask around the mounting hole during paint, but then didn't bother to pull the masking off afterward. Scratch the paint off around the mounting holes for a better ground. Some fixtures will have a brass grommet connecting the ground buss from the socket to one of the mounting screw holes. If necessary take the lenses off and look at how the light socket is connected to the fixture. Some fixtures will already have a notch in the trim ring to allow a wire to get behind on a surface mount application, others require a hole thru whatever they are mounted to. To attach a dedicated ground wire you need to route it to the back of the fixture and preferably solder it to the grounding ring, negative buss, or even to the shell of the socket. Option B would be to pinch a ring terminal between the grommet and mounting screw. If you don't already have a wire hole thru the chassis, or a notch in the back of the fixture trim, you can probably file a notch in the plastic to let the wire out w/o it getting pinched.


 .... But, I didn't want to find that out after the fact.
 doing it and at least wrapped them in tape. That was a different level of priority than my camper build.
