Floor is 1/4" Plytanium top and bottom with 3.5"x1" framing that I ripped from standard 2x4. Got the 1" foam board for free from a friend. I used PL3 and #6 1" screws. I needed the wide width so I would reach the gussets I made to bolt it down. I was happily surprised how rigid and strong it is. Heavy too. The wide angle lens makes it look much narrower than it actually is. Batteries are going below in the hole. Made it big enough for 2 100A Lithium although I will initially use deep cycles.
Teardrops n Tiny Travel Trailersor t n ttt for short (tnttt.com) |
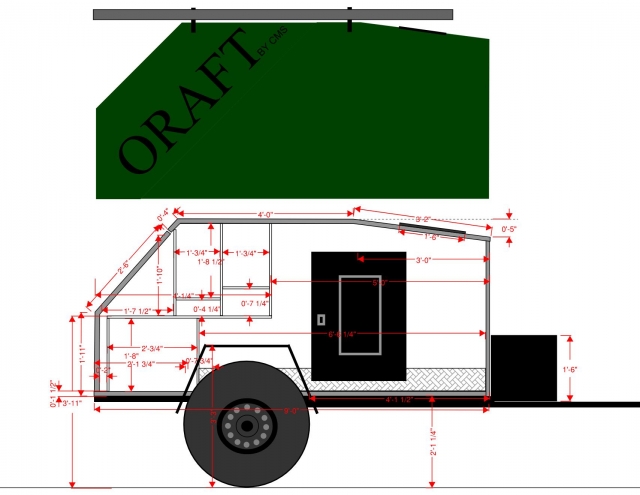
5X9 ORAFT Build
48 posts
• Page 1 of 4 • 1, 2, 3, 4
5X9 ORAFT Build
![]() by Onajourney » Mon Aug 08, 2022 3:35 pm
by Onajourney » Mon Aug 08, 2022 3:35 pm
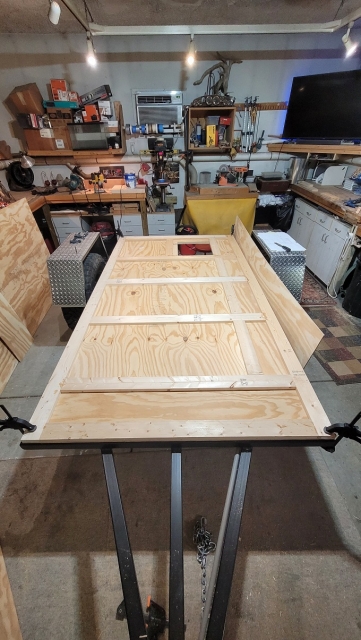
Here is the start of my build. Actually got the frame done a few months ago and then had some other projects and life delay the wood portion. It all very exciting to me. I feel I have pretty good design and build plan thanks to all the help and inspiration I have gotten on this site.
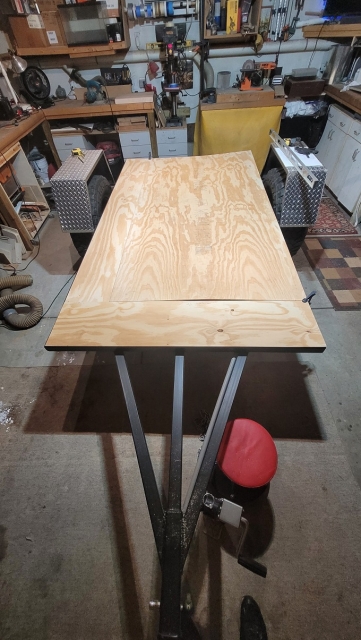
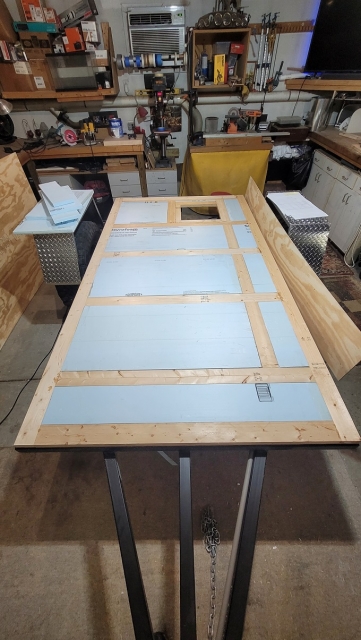
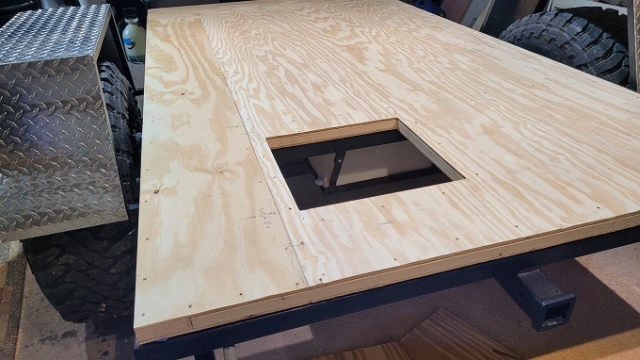
Floor is 1/4" Plytanium top and bottom with 3.5"x1" framing that I ripped from standard 2x4. Got the 1" foam board for free from a friend. I used PL3 and #6 1" screws. I needed the wide width so I would reach the gussets I made to bolt it down. I was happily surprised how rigid and strong it is. Heavy too. The wide angle lens makes it look much narrower than it actually is. Batteries are going below in the hole. Made it big enough for 2 100A Lithium although I will initially use deep cycles.
Floor is 1/4" Plytanium top and bottom with 3.5"x1" framing that I ripped from standard 2x4. Got the 1" foam board for free from a friend. I used PL3 and #6 1" screws. I needed the wide width so I would reach the gussets I made to bolt it down. I was happily surprised how rigid and strong it is. Heavy too. The wide angle lens makes it look much narrower than it actually is. Batteries are going below in the hole. Made it big enough for 2 100A Lithium although I will initially use deep cycles.
-

Onajourney - Teardrop Master
- Posts: 259
- Images: 181
- Joined: Mon Sep 06, 2021 2:16 am
- Location: Central North Carolina
Re: 5X9 ORAFT Build
![]() by mhnudi » Tue Aug 09, 2022 8:17 am
by mhnudi » Tue Aug 09, 2022 8:17 am
Looking good! I’m planning a similar style floor construction in mine. I’m curious about your water tank, as I’m still figuring out exactly what I want to do for my under trailer tanks. Are you doing one clean and one grey water tank? Or one clean water tank and disposal of the waste water.
-

mhnudi - Teardrop Builder
- Posts: 45
- Joined: Thu Aug 04, 2022 4:52 pm
- Location: Charlotte, NC