5X9 ORAFT Build

...ask your questions in the appropriate forums BUT document your build here...preferably in a single thread...dates for updates, are appreciated....

5X9 ORAFT Build

Postby Onajourney » Mon Aug 08, 2022 3:35 pm

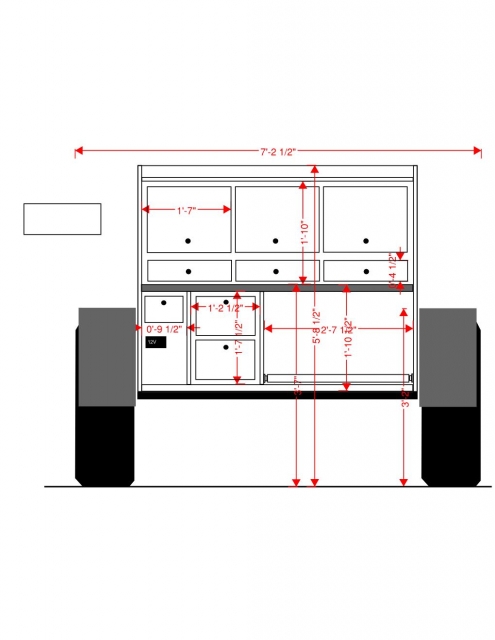
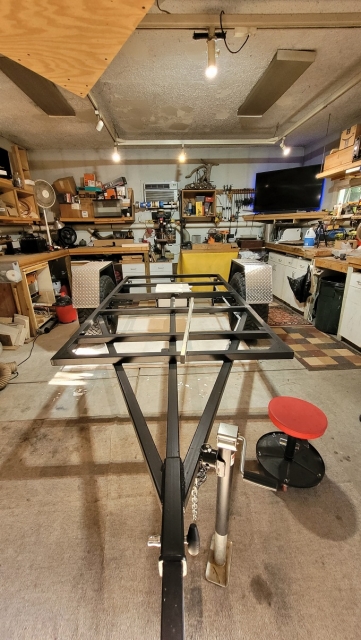
Here is the start of my build. Actually got the frame done a few months ago and then had some other projects and life delay the wood portion. It all very exciting to me. I feel I have pretty good design and build plan thanks to all the help and inspiration I have gotten on this site.
Image
Image

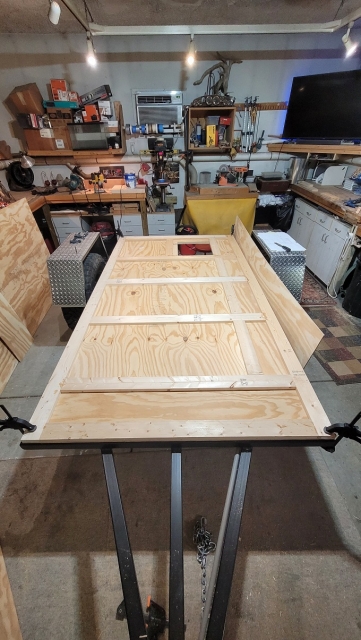
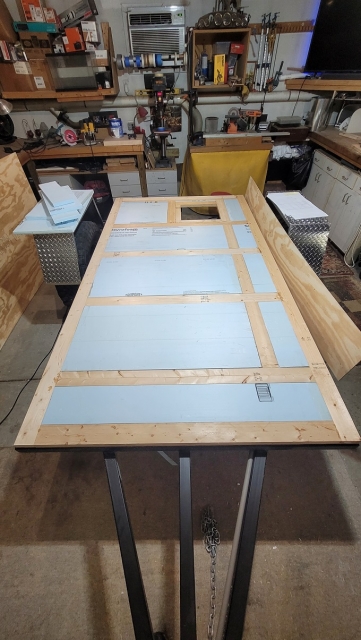
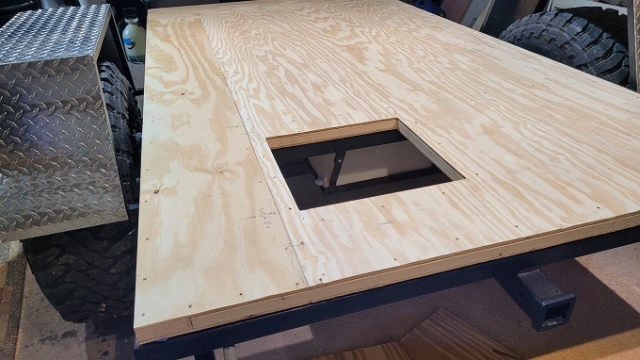
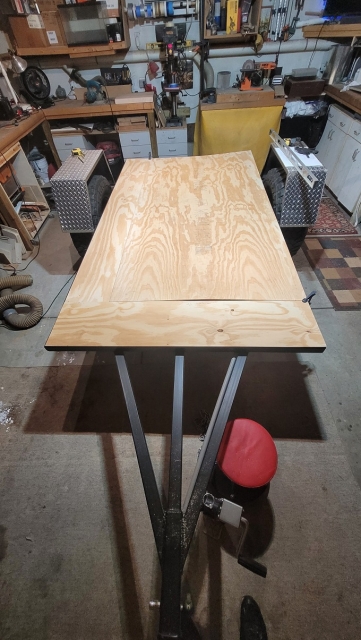
Floor is 1/4" Plytanium top and bottom with 3.5"x1" framing that I ripped from standard 2x4. Got the 1" foam board for free from a friend. I used PL3 and #6 1" screws. I needed the wide width so I would reach the gussets I made to bolt it down. I was happily surprised how rigid and strong it is. Heavy too. The wide angle lens makes it look much narrower than it actually is. Batteries are going below in the hole. Made it big enough for 2 100A Lithium although I will initially use deep cycles.
Image
Image
Image
Image
Image
User avatar
Onajourney
Teardrop Master
 
Posts: 244
Images: 181
Joined: Mon Sep 06, 2021 2:16 am
Location: Central North Carolina

Re: 5X9 ORAFT Build

Postby mhnudi » Tue Aug 09, 2022 8:17 am

Looking good! I’m planning a similar style floor construction in mine. I’m curious about your water tank, as I’m still figuring out exactly what I want to do for my under trailer tanks. Are you doing one clean and one grey water tank? Or one clean water tank and disposal of the waste water.
User avatar
mhnudi
Teardrop Builder
 
Posts: 45
Joined: Thu Aug 04, 2022 4:52 pm
Location: Charlotte, NC

Re: 5X9 ORAFT Build

Postby Onajourney » Tue Aug 09, 2022 9:50 am

That's a 7 gallon water tank underneath. No grey tank and no sink. I plan for just a quick connect water hose on the side and probably a collapsible tub for dishes. mounting the pump under floor also. There will be no plumbing above the floor. This reduces space requirements above and worry about leaks.
User avatar
Onajourney
Teardrop Master
 
Posts: 244
Images: 181
Joined: Mon Sep 06, 2021 2:16 am
Location: Central North Carolina
Top

Re: 5X9 ORAFT Build

Postby JasenC » Tue Aug 09, 2022 6:32 pm

Nice, it did look a bit narrow until I read about the wide angle lens.
The hole in the floor is for? will it have a 5 gal squat buck, never mind, I'll show myself out.
I'll be done when I'm finished, if that's not fast enough, take a number.

Build Thread https://www.tnttt.com/viewtopic.php?f=50&t=74269
User avatar
JasenC
The 300 Club
 
Posts: 420
Images: 122
Joined: Tue Oct 19, 2021 2:05 am
Location: Snohomish county Wa
Top

Re: 5X9 ORAFT Build

Postby Onajourney » Fri Aug 12, 2022 11:18 am

Finished the floor. 2 coats of epoxy and 2 coats of Henry. white. Elevator bolts worked real well.

Image

Image

Wiring from the TV to trailer will be in the conduit seperate from the camper wiring.

Image

Image

Image

Now excited to get started on the walls this weekend!

Image
User avatar
Onajourney
Teardrop Master
 
Posts: 244
Images: 181
Joined: Mon Sep 06, 2021 2:16 am
Location: Central North Carolina
Top

Re: 5X9 ORAFT Build

Postby Onajourney » Mon Aug 15, 2022 10:27 am

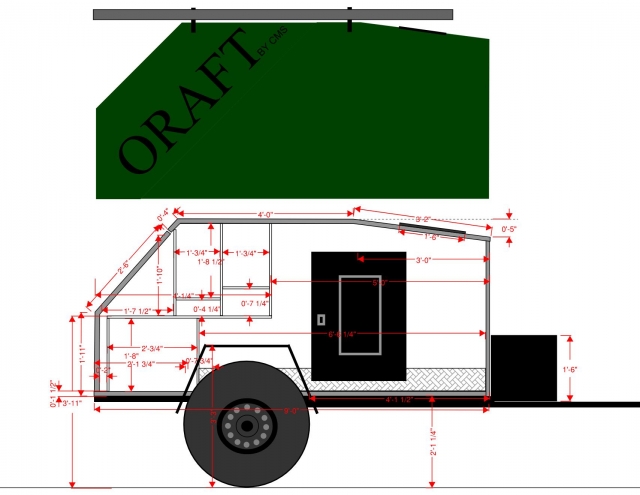
Decided to go with the framing/ plywood design below.

Image

Printed a template for the doors and cut them both at the same time.

Image

1/4" Ply seems flimsy at first but even after just a bit of framing it's starts stiffing up nicely. I am very happy with the shape. I should be, it's exactly as I drew it LOL.
Not as far along as I was hoping. I like working with the clear 5/4 pine. No more using ripped studs. They're too soft. the 5/4 is pricey. 5"x12' is $26 which I rip in half.

Image

Image

Image
User avatar
Onajourney
Teardrop Master
 
Posts: 244
Images: 181
Joined: Mon Sep 06, 2021 2:16 am
Location: Central North Carolina
Top

Re: 5X9 ORAFT Build

Postby Onajourney » Tue Aug 23, 2022 11:36 am

Continued on the walls. It's amazing how sturdy it is even without a roof yet.

Image

Image

Image

Ripping 2x4 for roof spars is no fun.

Image

I just laid them up there to get look. I need to sit down a figure out how I am going to do the stargazer window. I have been working on the design for a while I am just not 100% on the build sequence. I do not want any staples, screws, etc. in wall or ceiling faces. I was pretty proud that everything was within 1/16 of square which makes it a breeze to do the interior work.

Image

Found baltic birch for the ceiling about an hour away and picked up some of this walnut ply for the walls.

Image
User avatar
Onajourney
Teardrop Master
 
Posts: 244
Images: 181
Joined: Mon Sep 06, 2021 2:16 am
Location: Central North Carolina
Top

Re: 5X9 ORAFT Build

Postby Onajourney » Tue Sep 06, 2022 9:39 am

Framed the ceiling with 1.5". This mess is so I was able to clamp the ceiling 1/8 BB. I opted to just glue. Really did not want to see staples.

Image

I tried explaining this part to Capebuild but I don't think I did a very good job. So here I made the template for both the ceiling and roof cutout for the stargazer. The part that I scribbled blue is not glued and is just got a few screws to temporarily hold it. I will be removed them after I skin and cut the roof opening. This will leave a 1.5 " gap all around and where I will install some sort of blind and it will give me the space for the trimlok gasket.

Image

The hard part of the roof is complete. Not sure why I stressed so much about it before.

Image

The ceiling actually sits on top of the walls and the roof frame sits on top. I used these make-sift presses out of 1/2" PVC. They bent just the right amount to get in there and firmly clamp the ceiling while the PL3 cured overnight. I did use some screws where the cabinets will cover. All in all, pretty happy with the progress. Plan your work and work your plan.

Image

Image

Started the wiring. I installed bracing every where the cabinets tie into the walls so I will not need to fasten from the outside. I want to leave the walls open till I skin the sides and install all the exterior lighting and wiring. Seems like it would be a real PiA to skin with all those wires hanging out.

Image

The last thing I want to do is put a screw thru any wiring.

Image

Image

Definitely taking shape.

Image
User avatar
Onajourney
Teardrop Master
 
Posts: 244
Images: 181
Joined: Mon Sep 06, 2021 2:16 am
Location: Central North Carolina
Top

Re: 5X9 ORAFT Build

Postby JasenC » Tue Sep 06, 2022 11:53 pm

Very nice.
I think I see what you're doing for the stargazer shade.
I'll be done when I'm finished, if that's not fast enough, take a number.

Build Thread https://www.tnttt.com/viewtopic.php?f=50&t=74269
User avatar
JasenC
The 300 Club
 
Posts: 420
Images: 122
Joined: Tue Oct 19, 2021 2:05 am
Location: Snohomish county Wa
Top

Re: 5X9 ORAFT Build

Postby Onajourney » Tue Sep 13, 2022 9:45 am

One thing I never worried about tackling was the wiring. Electrician by trade. I never thought I'd run about 500' of 18 ga wire in a 9' camper. And just the 12v stuff. Got it all in now about 15' 14/2 for 120V and I can start the insulation.

Image

Image
User avatar
Onajourney
Teardrop Master
 
Posts: 244
Images: 181
Joined: Mon Sep 06, 2021 2:16 am
Location: Central North Carolina
Top

Re: 5X9 ORAFT Build

Postby western traveler » Tue Sep 13, 2022 10:10 am

Looks good, and stout.
I’m guessing I ended up making 3 wire purchases. I kept guessing what I would need and each time didn’t come close. Same with glue and urethane.
Ralph
western traveler
Donating Member
 
Posts: 396
Images: 264
Joined: Wed Dec 28, 2016 6:59 am
Location: The Front Montana
Top

Re: 5X9 ORAFT Build

Postby Onajourney » Tue Sep 13, 2022 3:33 pm

100% Ralph. I too made 3 wire orders. In the beginning I guessed (6) PL3 cartridges for the box. Boom..6 it was.
User avatar
Onajourney
Teardrop Master
 
Posts: 244
Images: 181
Joined: Mon Sep 06, 2021 2:16 am
Location: Central North Carolina
Top

Re: 5X9 ORAFT Build

Postby noseoil » Wed Sep 14, 2022 8:29 am

Looking very nice, clean & sturdy. Should be good to go for 100,000 miles! I like the simple approach you're using for the build.
Build log: viewtopic.php?f=50&t=60248
The time you spend planning is more important than the time you spend building.........

137905
User avatar
noseoil
1000 Club
1000 Club
 
Posts: 1820
Images: 669
Joined: Sun Apr 27, 2014 8:46 am
Location: Raton, New Mexico, living the good life!
Top

Re: 5X9 ORAFT Build

Postby Squigie » Thu Sep 15, 2022 11:23 am

Great progress.
Tagging to follow. :thumbsup:
User avatar
Squigie
The 300 Club
 
Posts: 403
Joined: Sun Aug 04, 2019 7:52 am
Location: Southeastern ID
Top

Re: 5X9 ORAFT Build

Postby Onajourney » Mon Sep 19, 2022 8:42 am

Finished up the 12V wiring and tested before closing up the roof.

Image

Image

Got all the electrical stuff and maintaining rule #1. Save NO receipts.

Image

Mocked up the front.

Image

Installed 1.5" insulation and closed up the roof.

Image

Image

Called a night. Next up...Sealing and skinning. I have one bend to make on the roof. I will have to load the 4x10 piece of aluminum on a trailer and take to a metal fabricator that has a brake to bend it for me that is almost an hour away. I couldn't figure a better method.

Image
'.
User avatar
Onajourney
Teardrop Master
 
Posts: 244
Images: 181
Joined: Mon Sep 06, 2021 2:16 am
Location: Central North Carolina
Top

Next

Return to Build Journals

Who is online

Users browsing this forum: No registered users and 11 guests